

MGEX work continues
Second leg was completed, it went waaay better than the first one – call it experience 😉 I tested the…

Second leg was completed, it went waaay better than the first one – call it experience 😉 I tested the…
As on a picture – it looks like a bit of challenge and ambitious play with LEDs and cables here…
I bought MGEX Strike Freedom as soon as it was available… then in May 2023 I build the frame which…
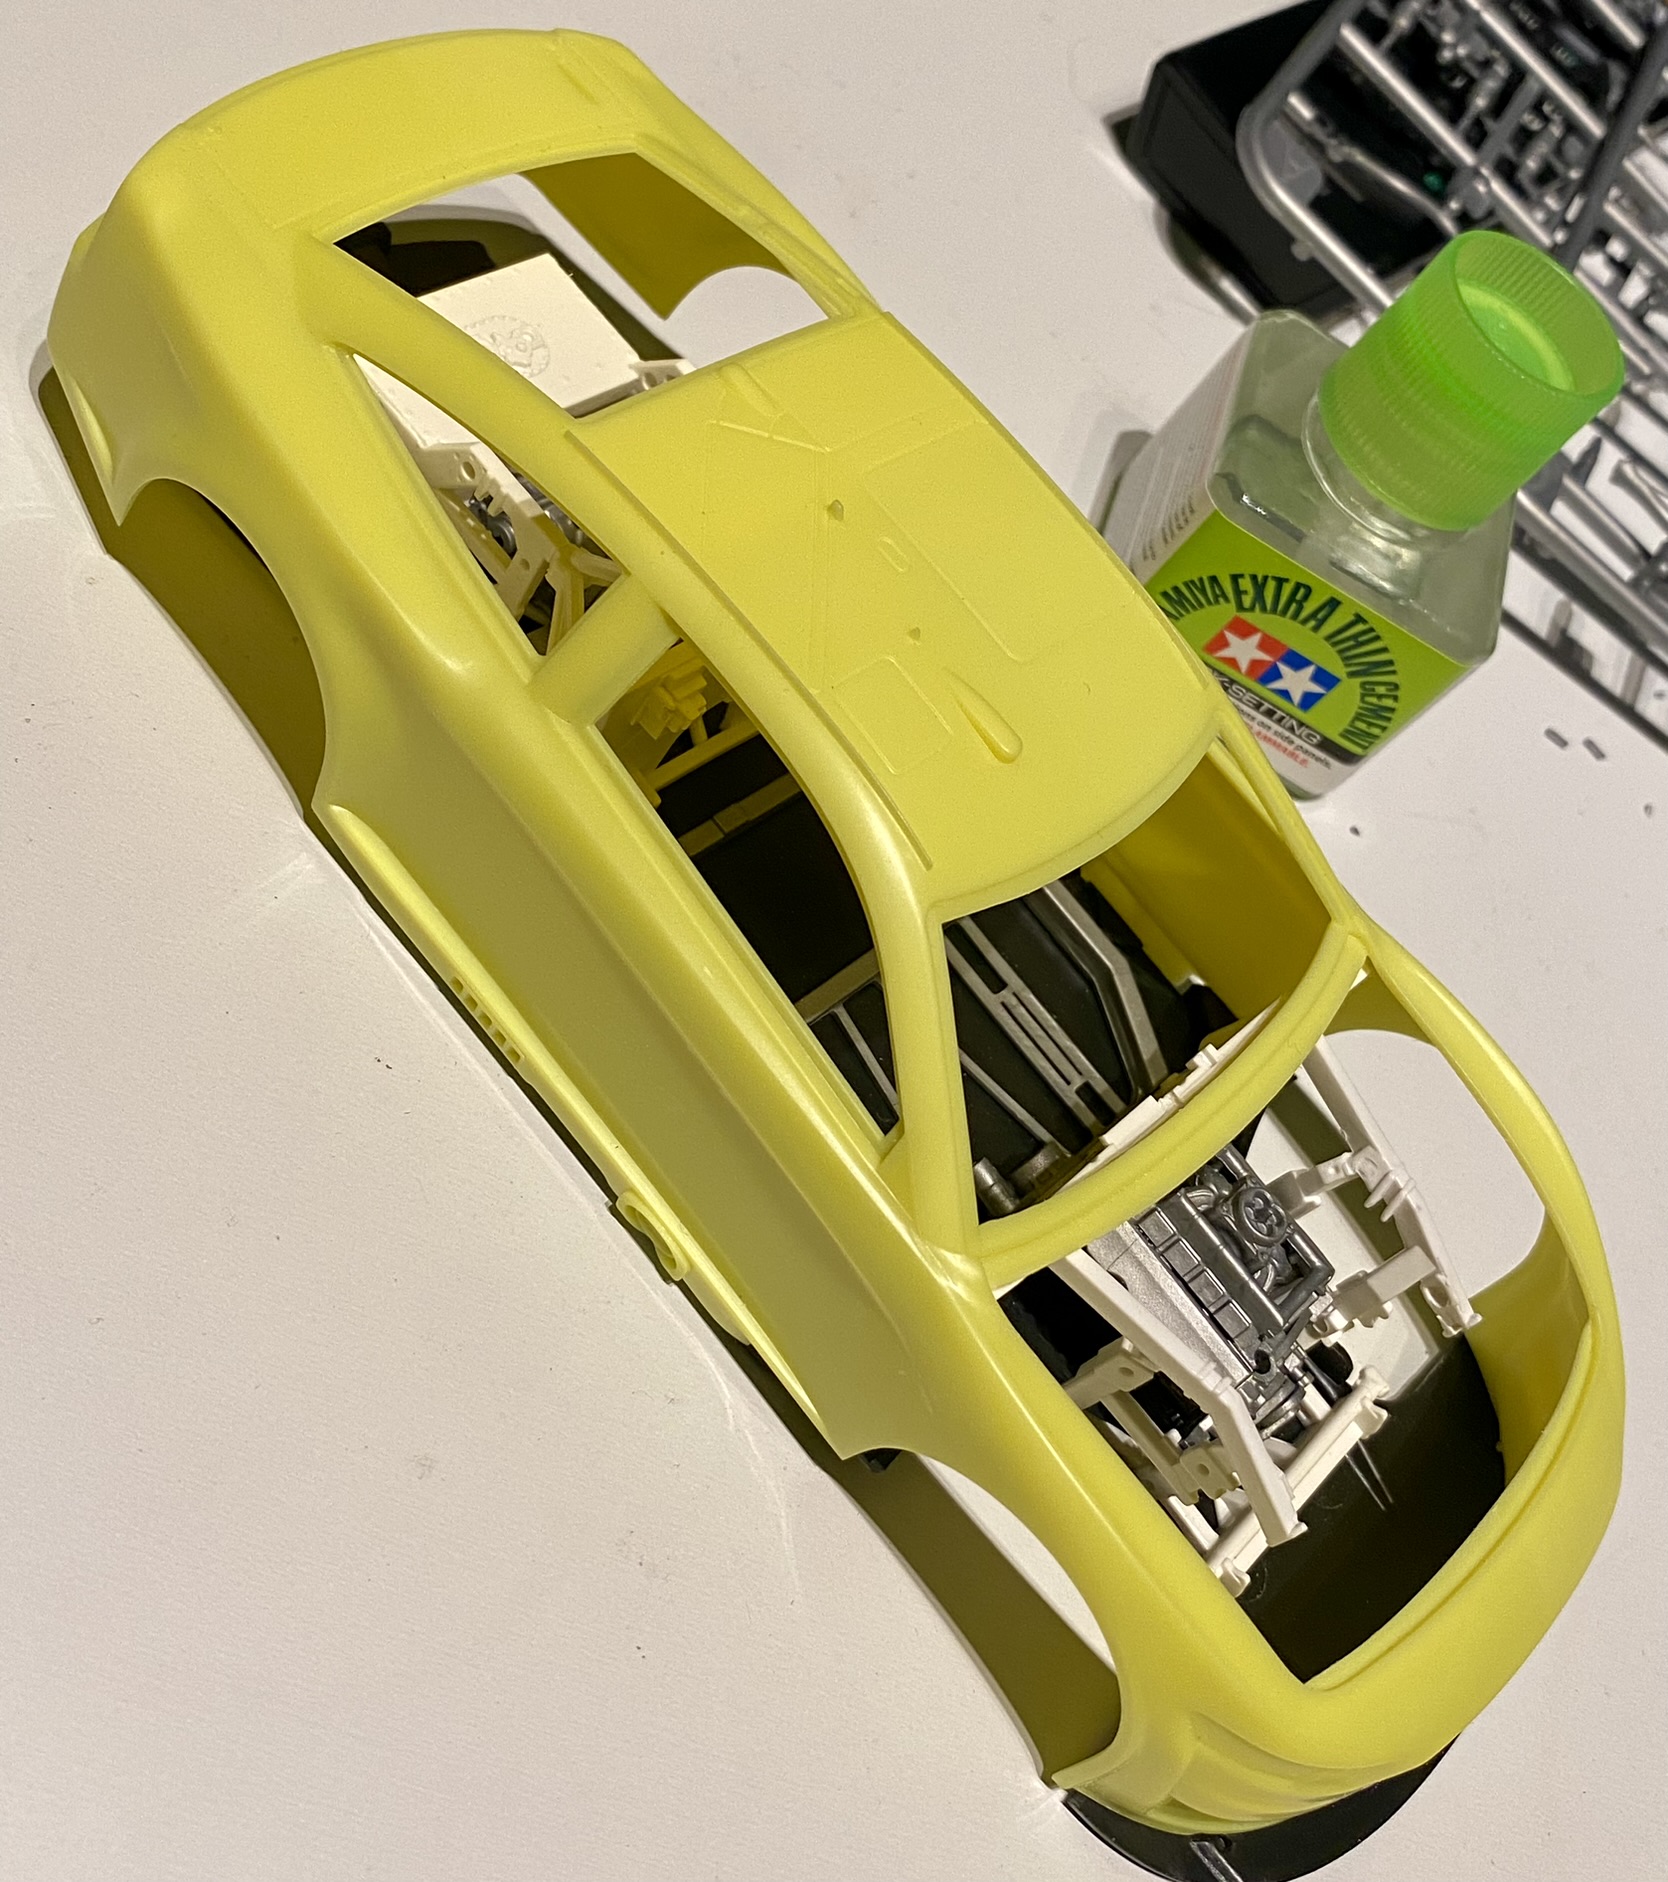
Finally I added steering wheel and was able to glue the roof and added rear spoiler.I used transparent windshield from…
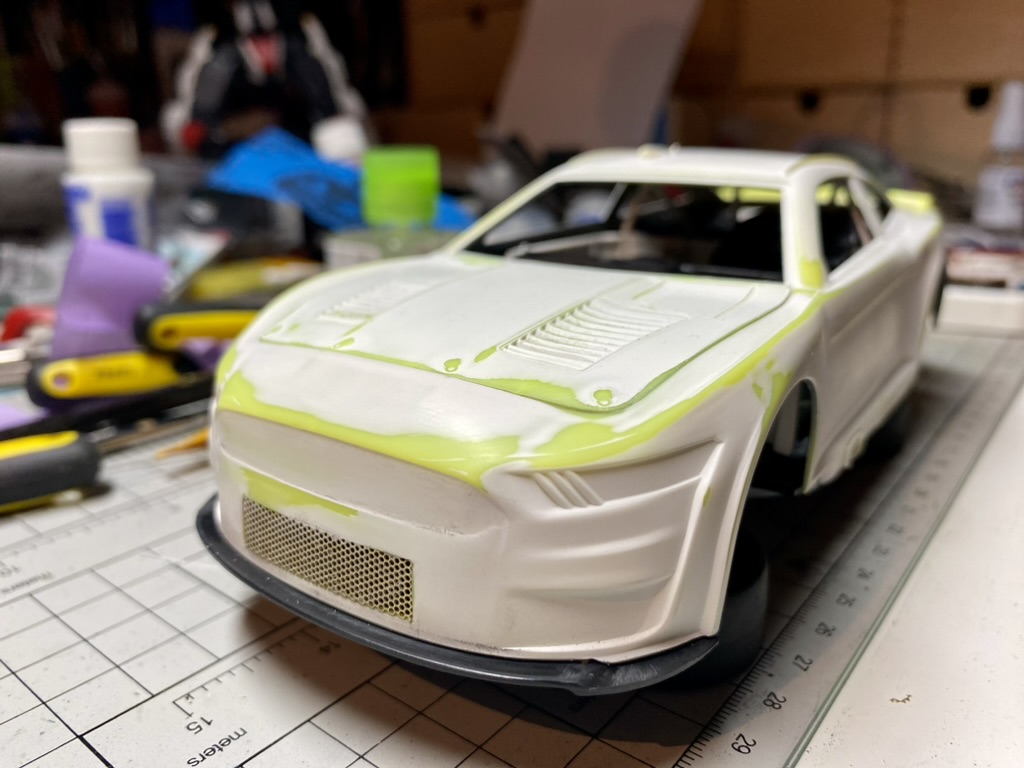
After countless hours of thinking “how to” improve the kit. I decided to replace original part for front net of…
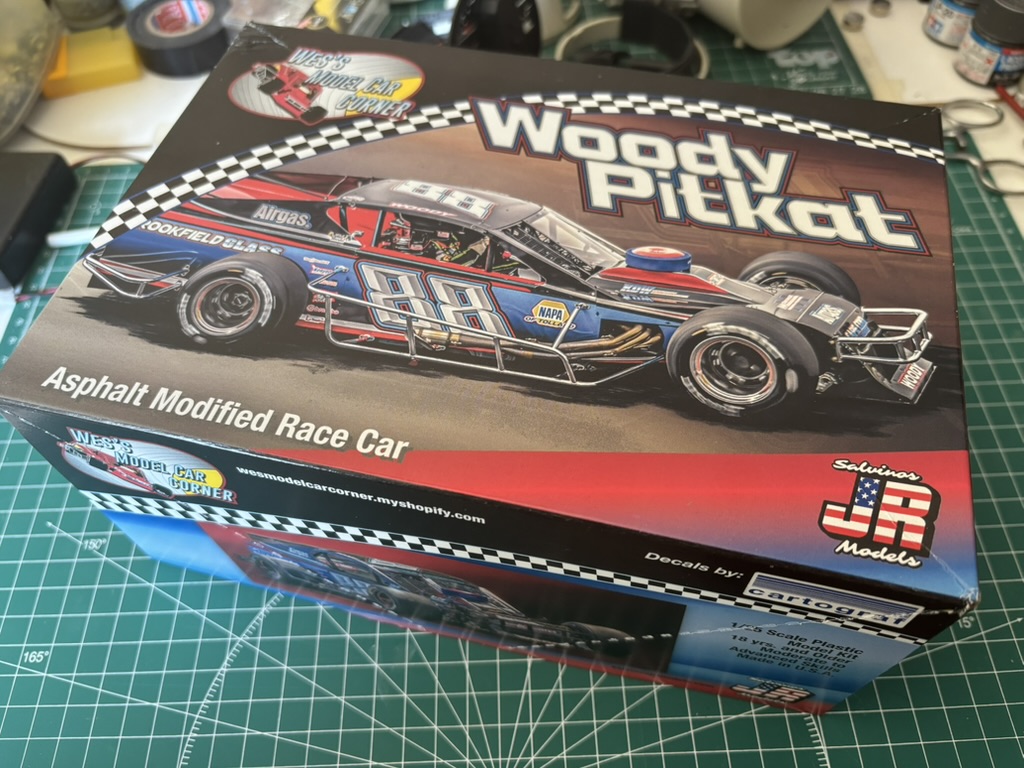
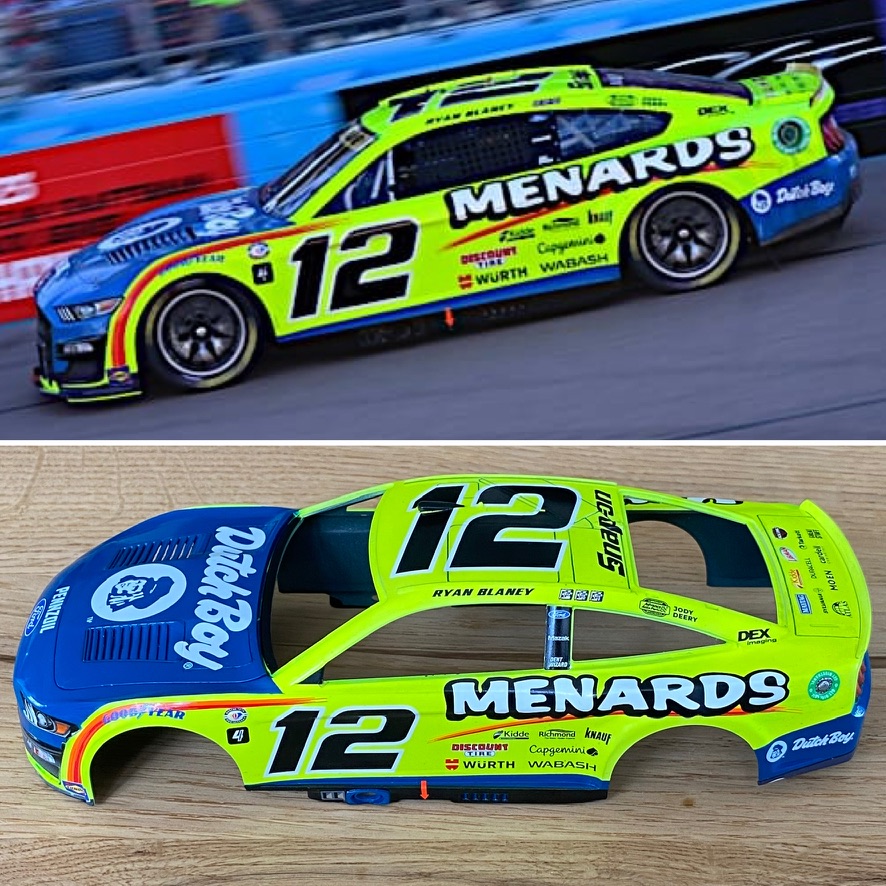
As my previous experience with Salvinos JR model – this kit is basically same – it is not the representation…
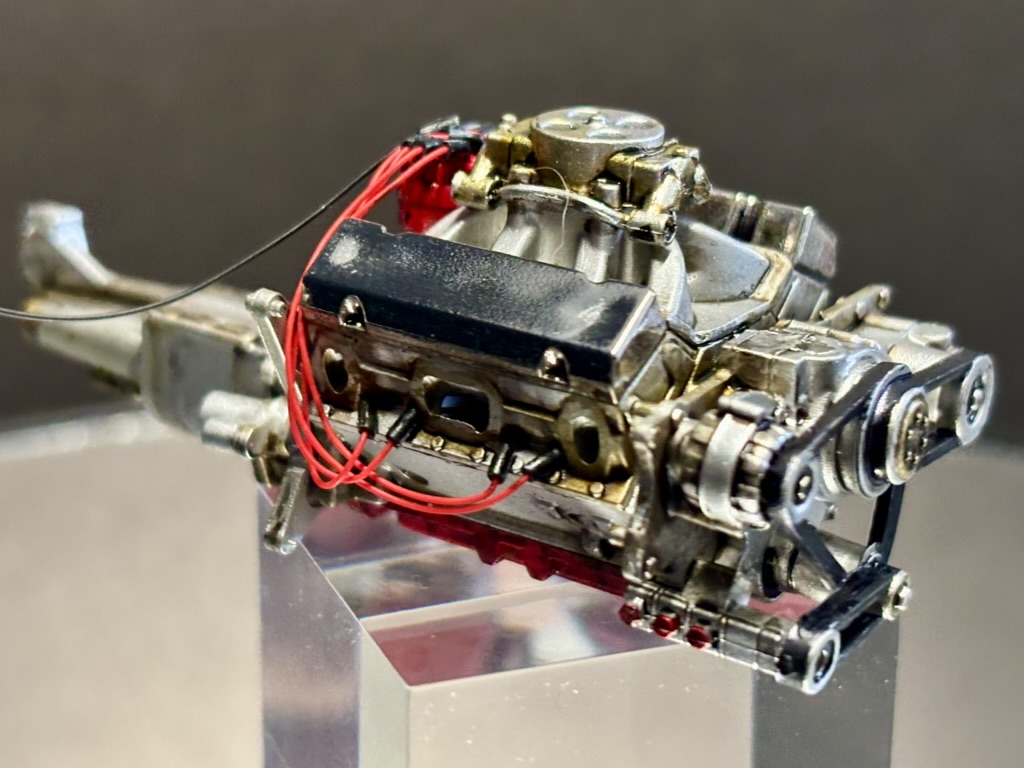
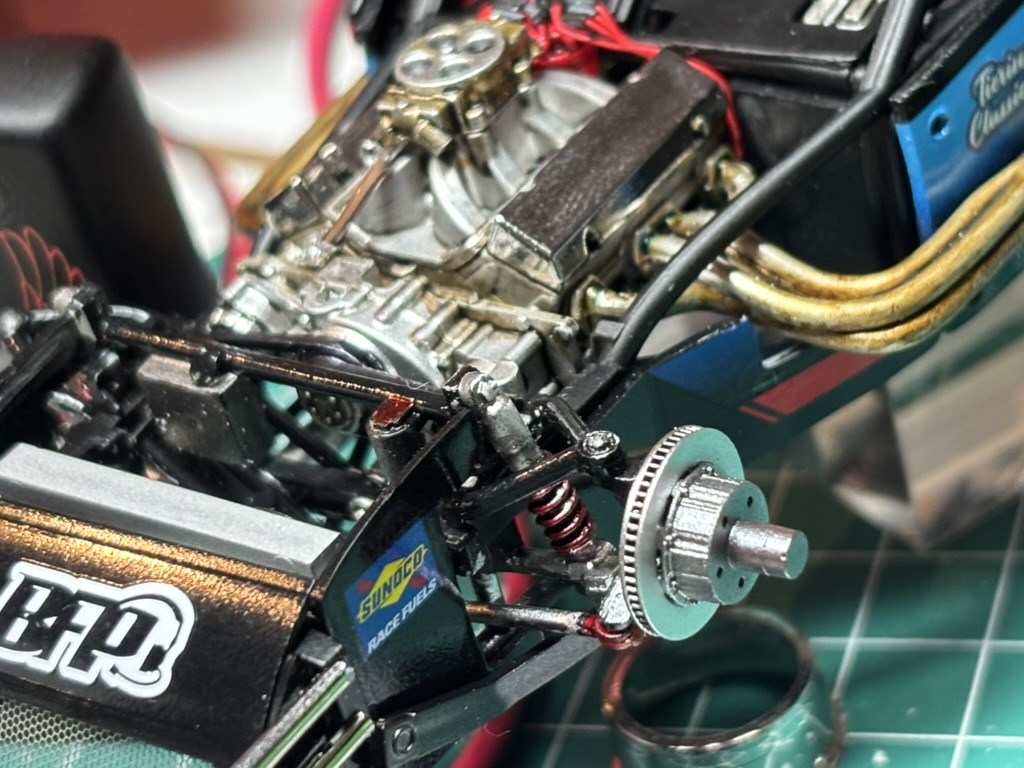
Racecar project is progressing.Initial painting, parts of the frame and engine. I used Tamiya LP range, SemiGloss Black, Italian Red,…
“Drivers – start your engines!” Lately I got opportunity to watch amateur class racing at BullRing LasVegas. Between many classes…

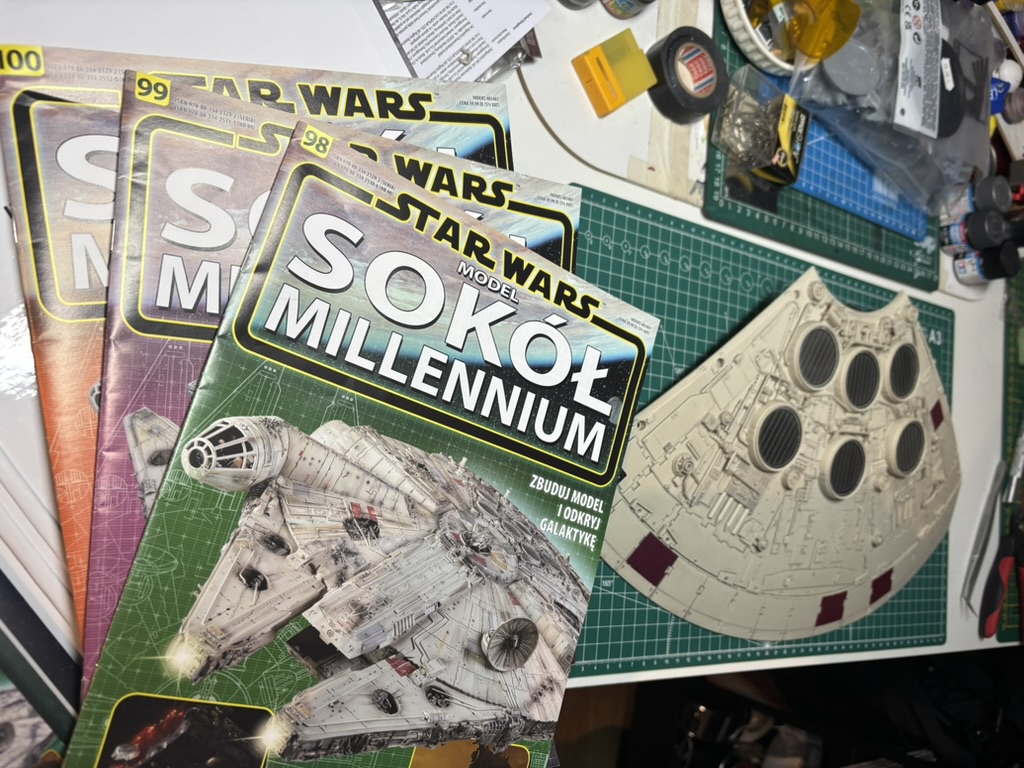
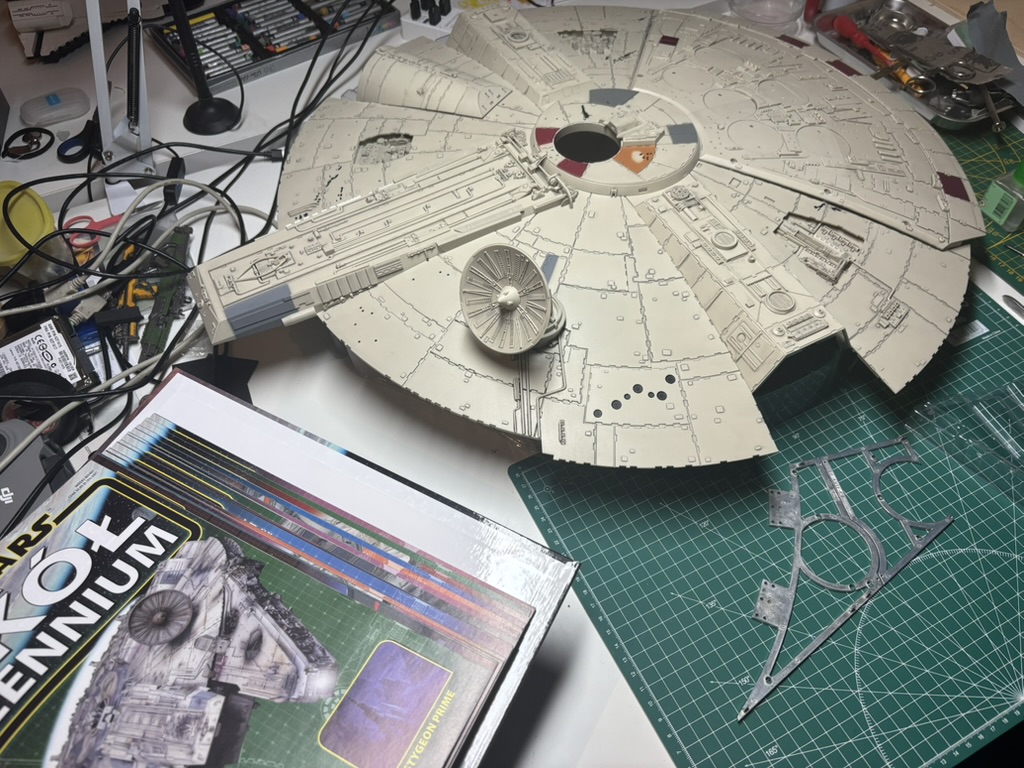
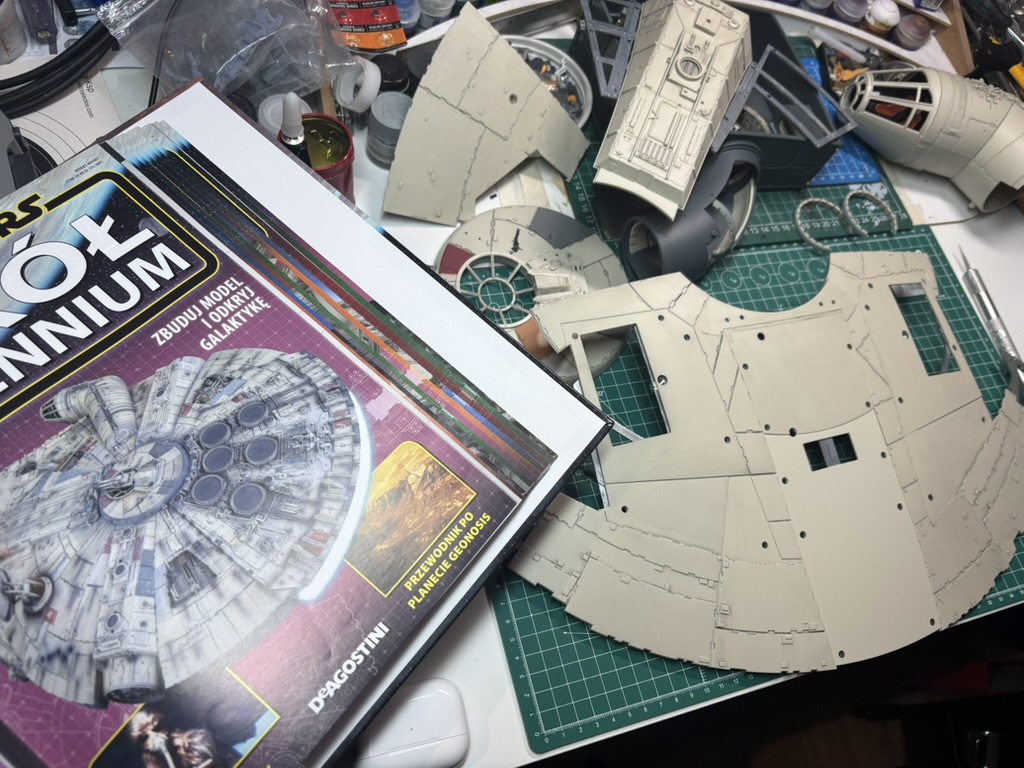
It was great OOB build – Millenium Falcon from DeAgostini looks just stunning!The last issues contains the rest of greeblies…
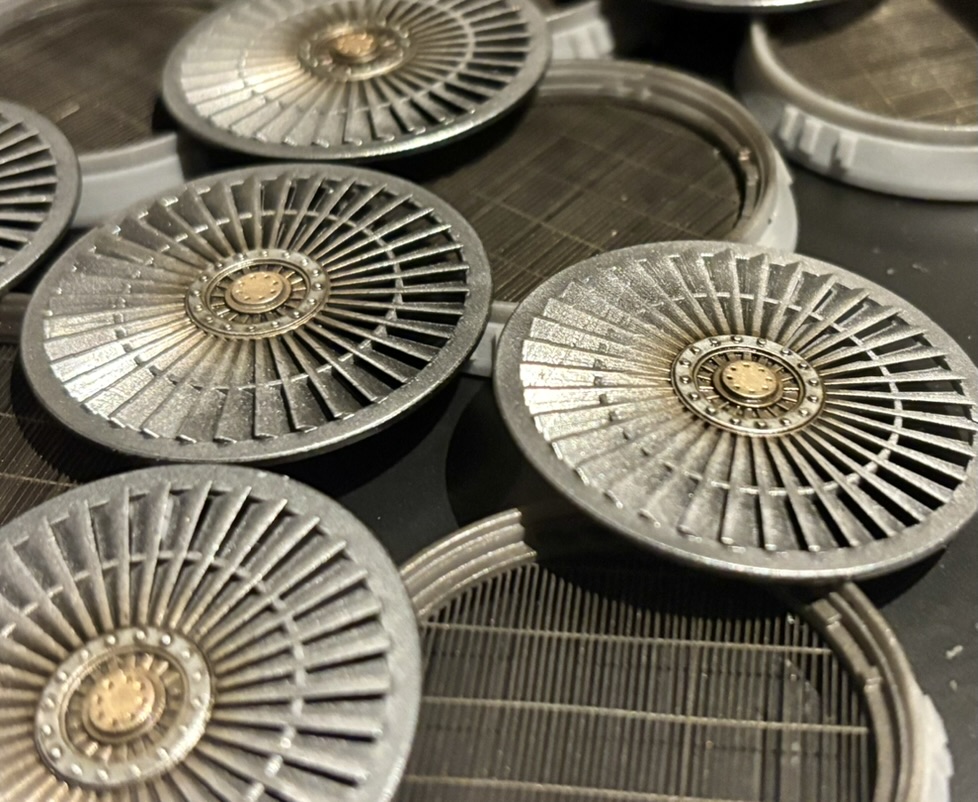
Painted fans received washes from GW range, Agrax Earthshade on internal parts and the hubs were covered with Nuln Oil…
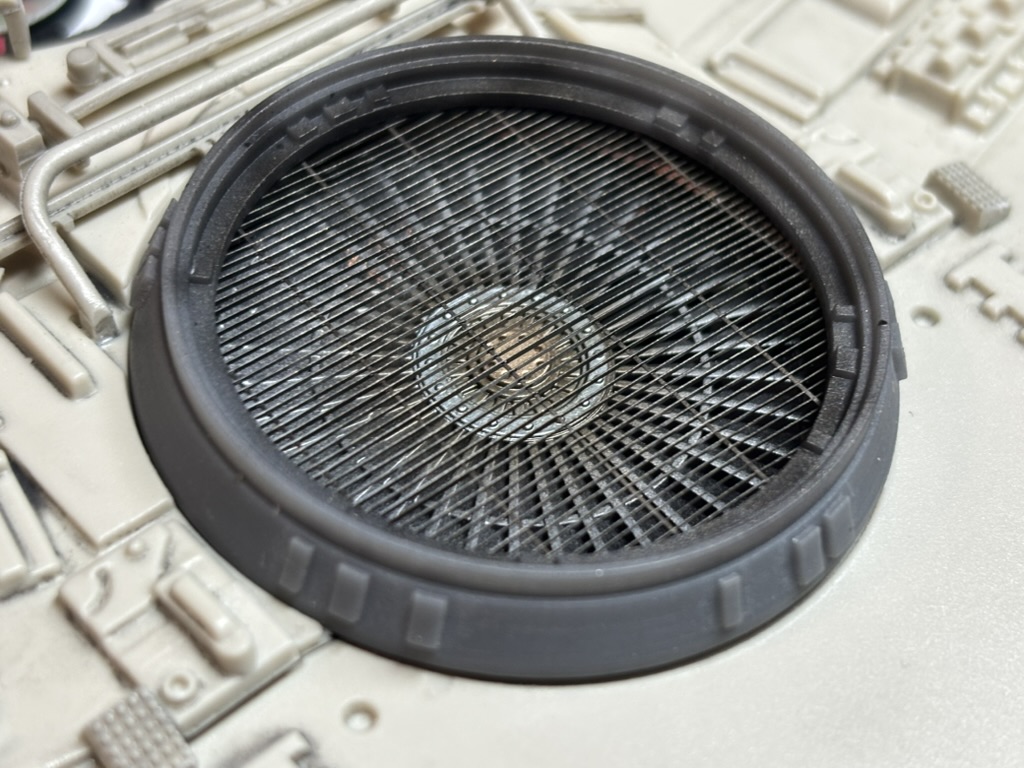
In meantime I glued all grills in – alignment wasnt easy – unfortunately some of the grill ribs were misaligned…

I was planning this design in my head for a while… Finally the time has come to put my thoughts…
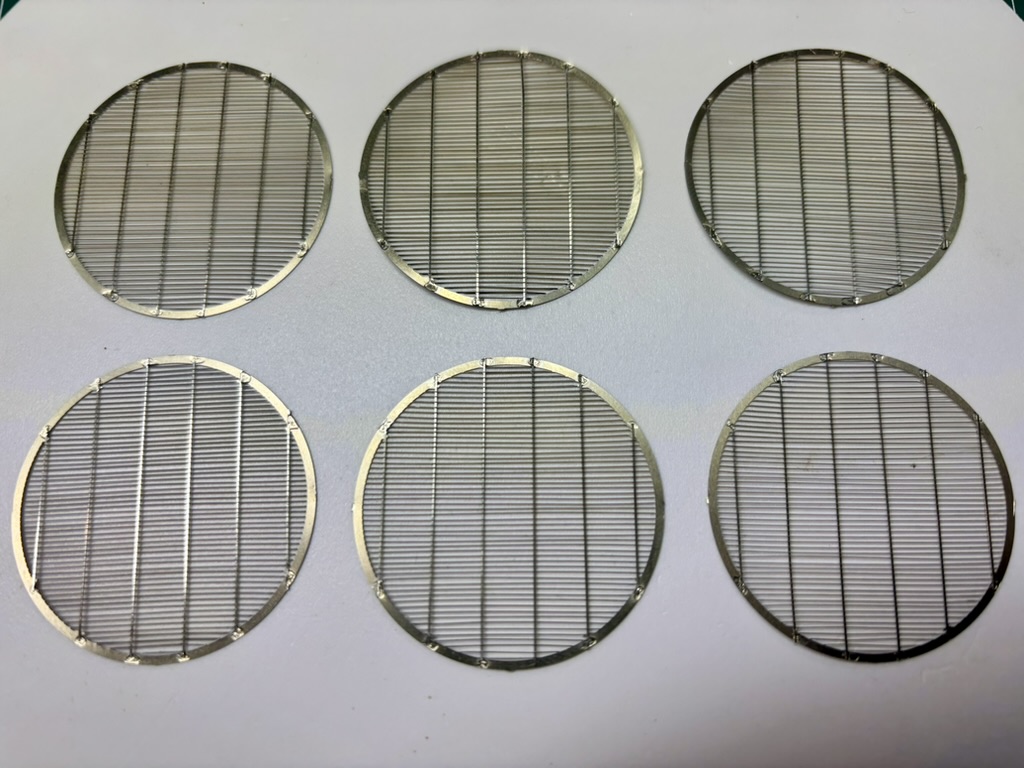
Quick update this time – all koolshades are completed. As my friend told me – if I will go one…
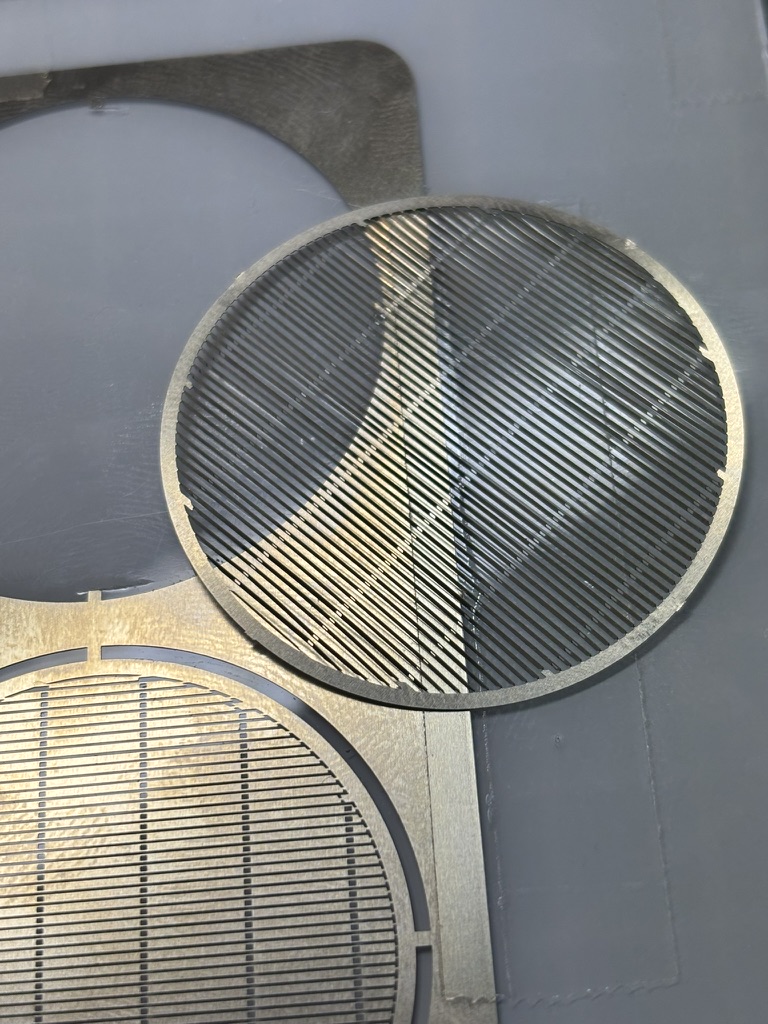
Some years ago, I bought photoetched vents set from https://scifimodels.de/ – to be honest, when I received it – I…

Some new additional parts arrived last week. A bag of electonics bought on Aliexpress. …and set of resin prints from…
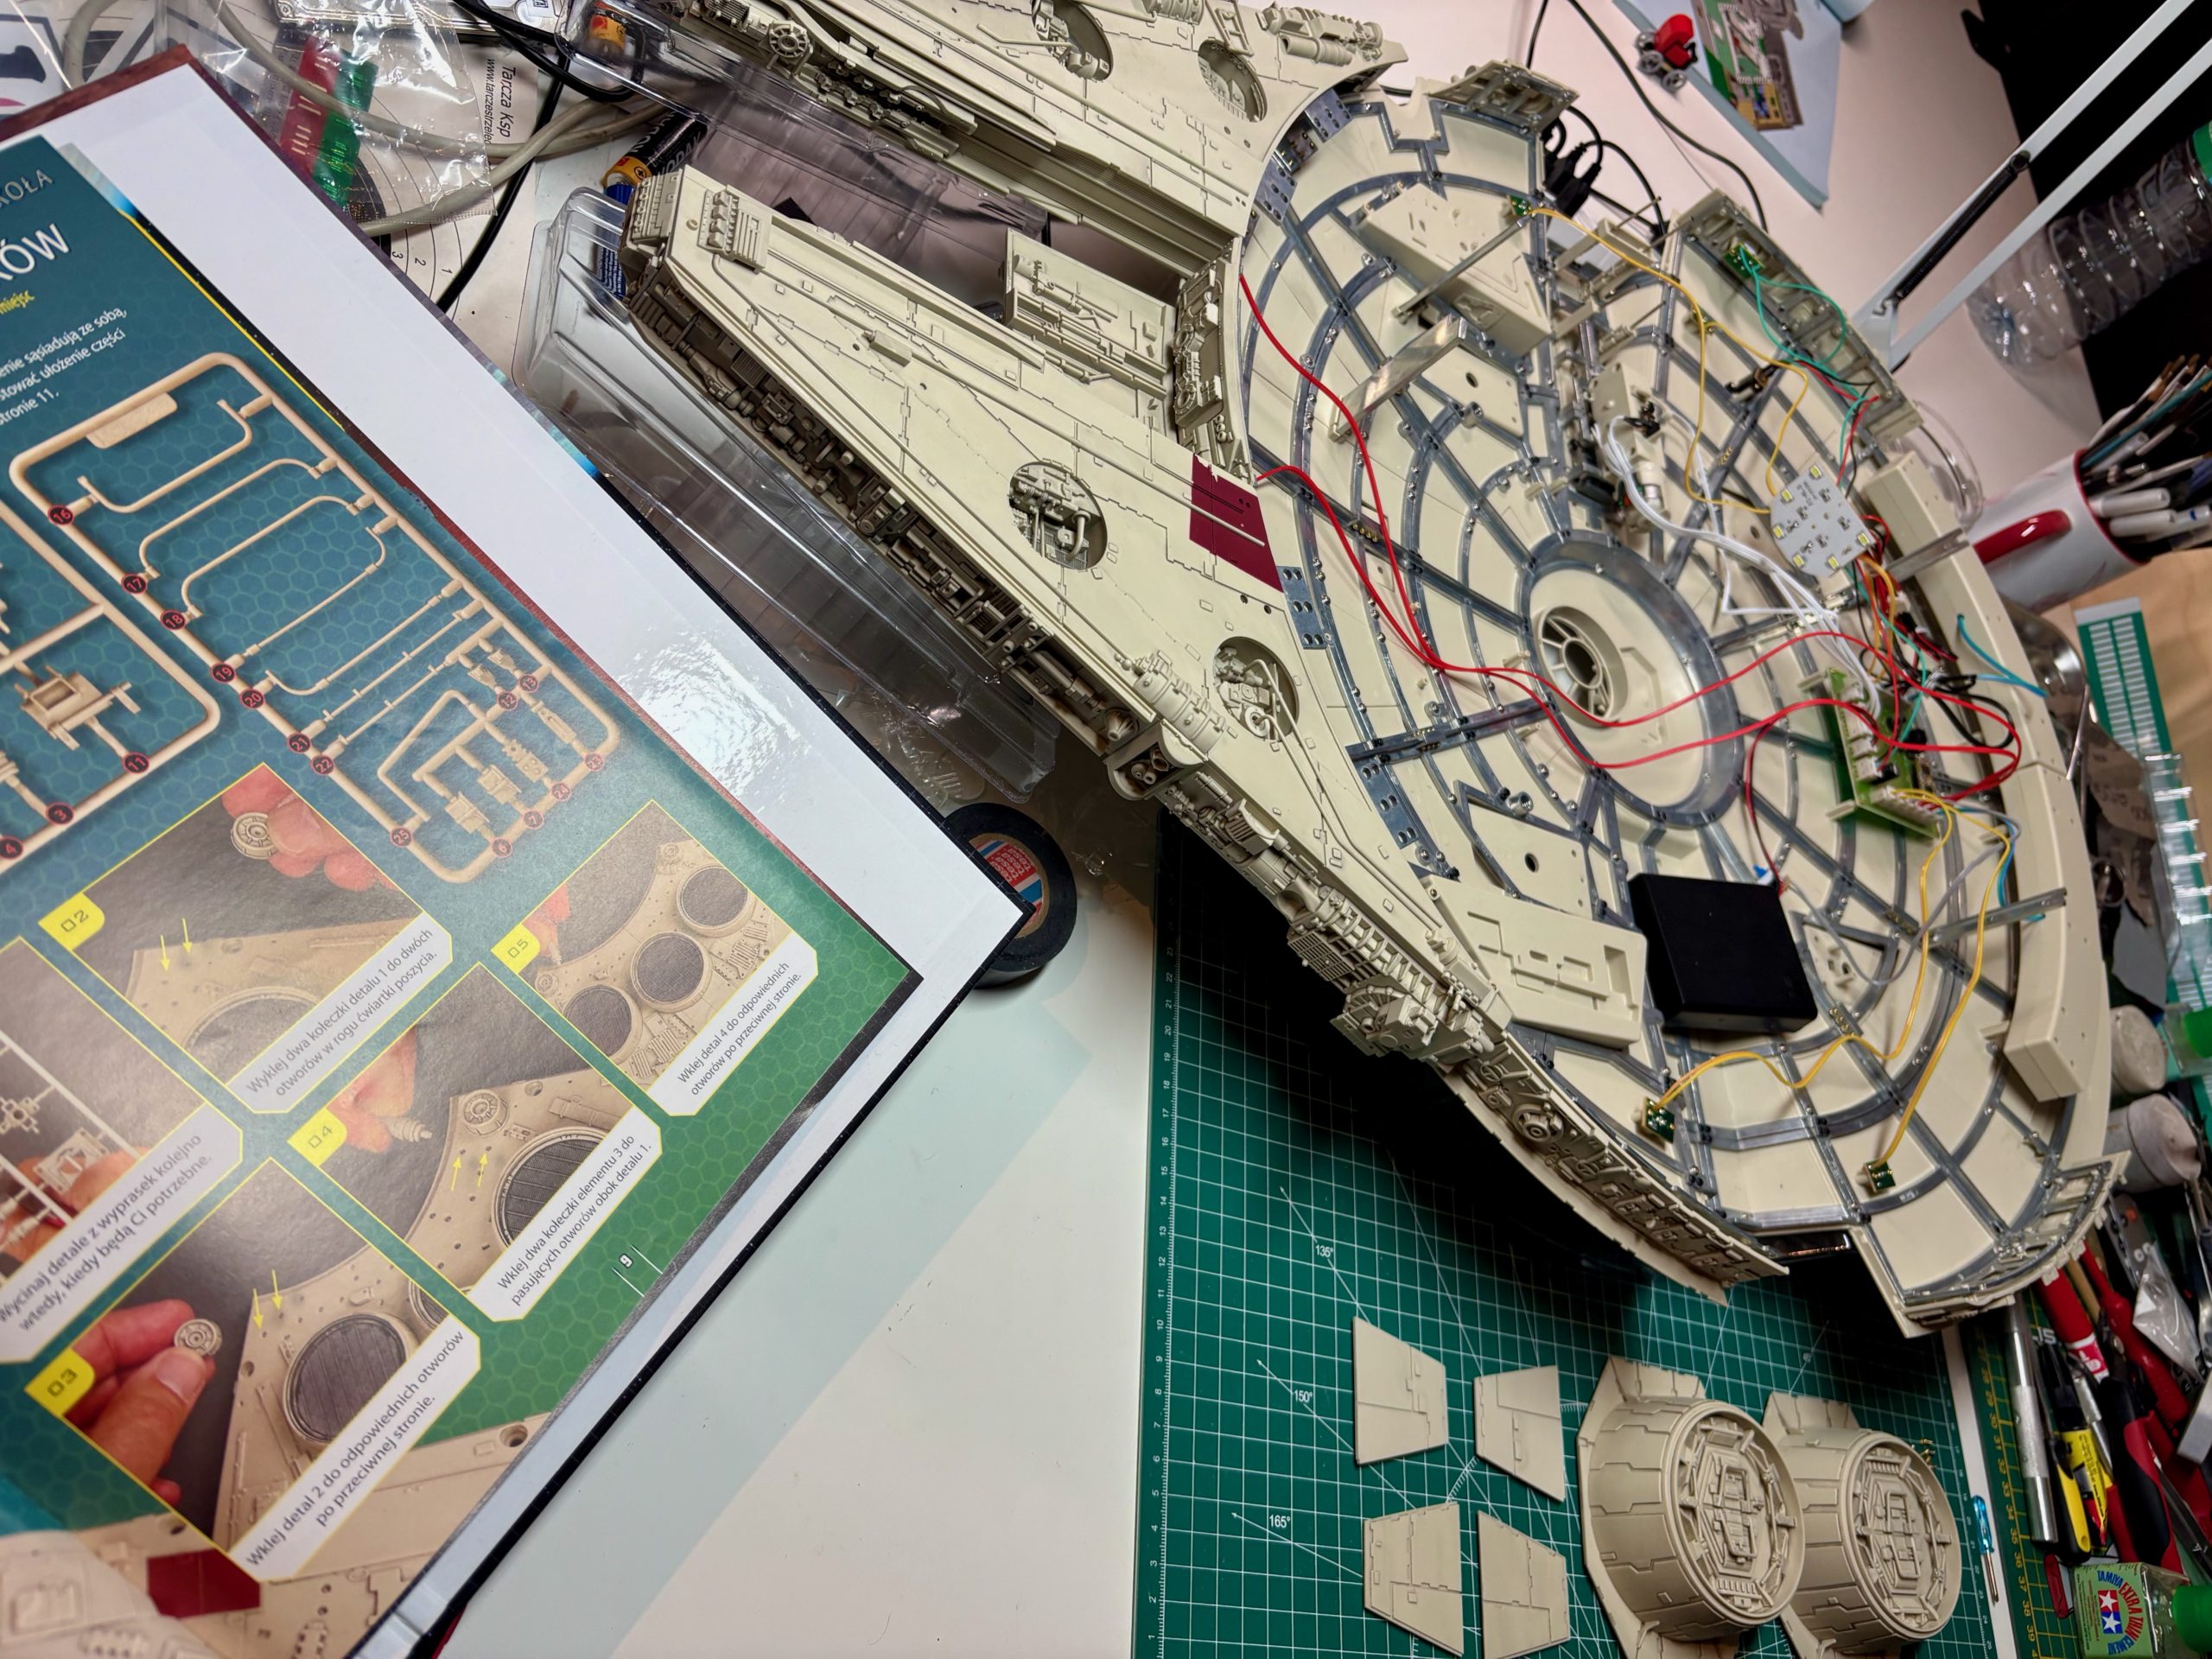
Issues 96-97 focuses on engine cover details. Many small “greeblies”, some are easily recognizable as some tank parts, suspension and…
Short update, some 2h session, 3 bags with parts added to the model.Docking bays completed. Construction was focused on side…
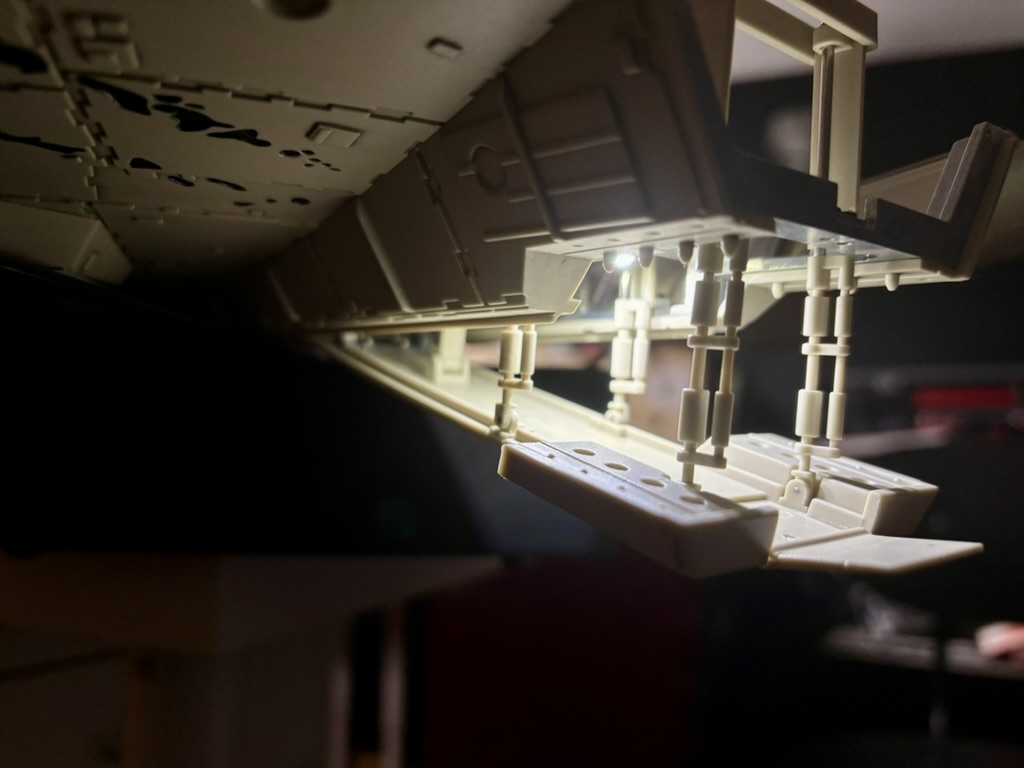
The construction continue towards fixing of the internal compartments and attachment of completed mandibles. Then I performed lighning test. I…
Construction continues around mandibles. Left mandible frame maintenance bays and external details. Bottom and top mandible sides. I must say…
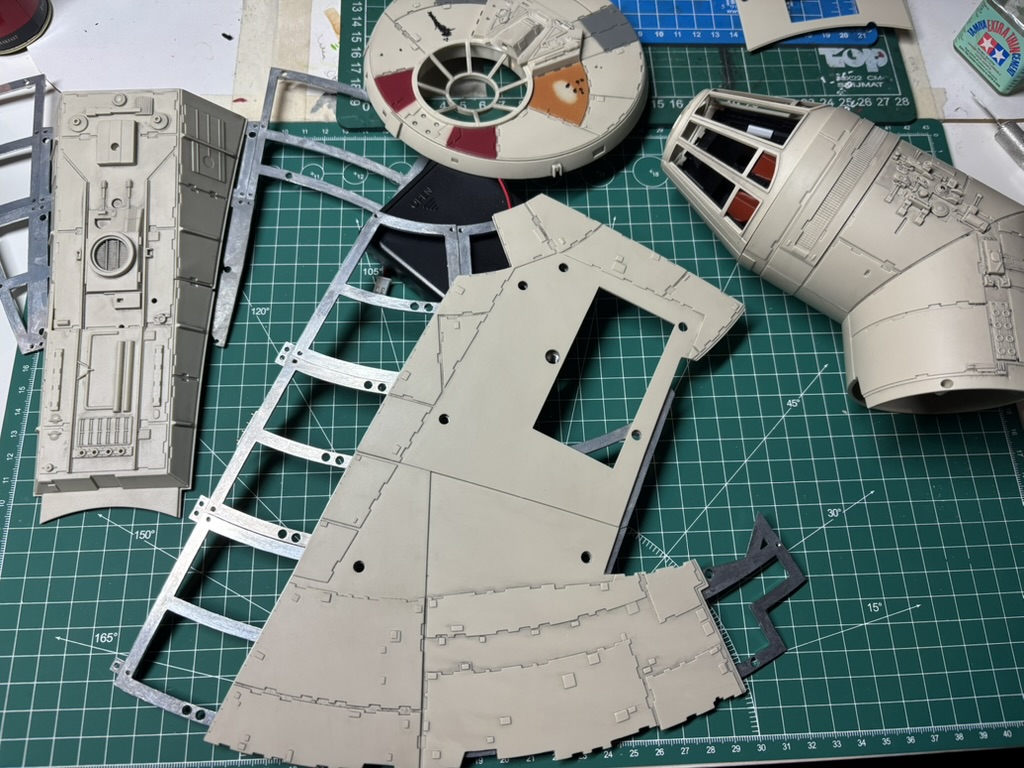
Falcon construction continues to another iconic parts of the space-ship – front mandibles!The inner frame build went straight forward –…
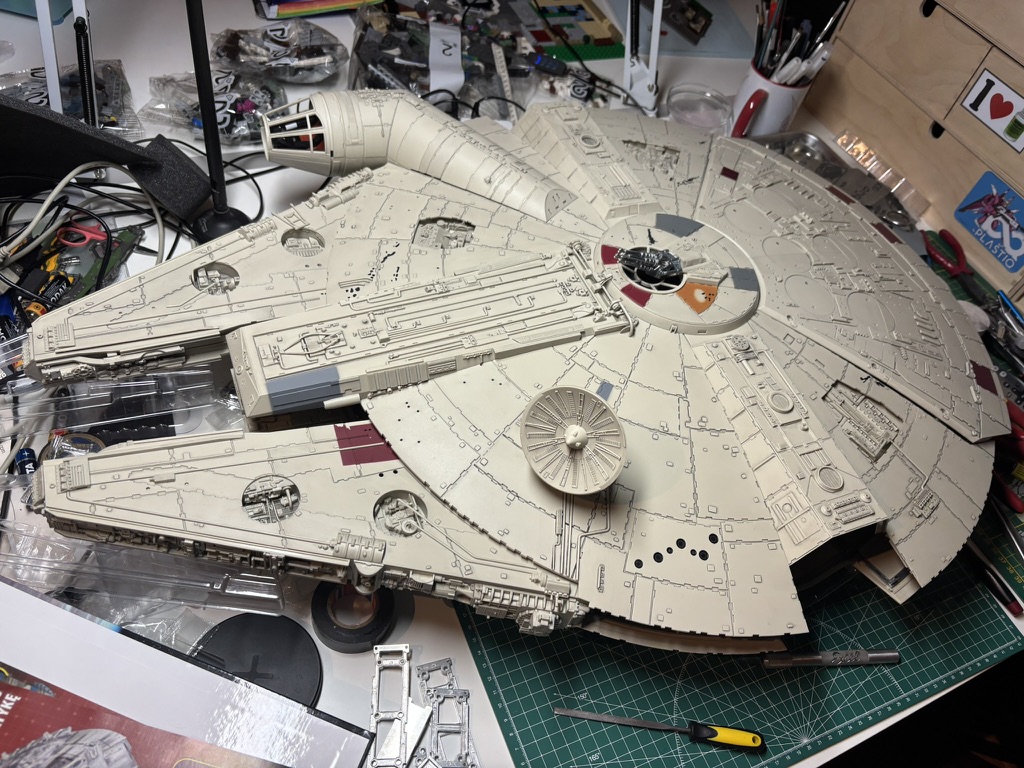
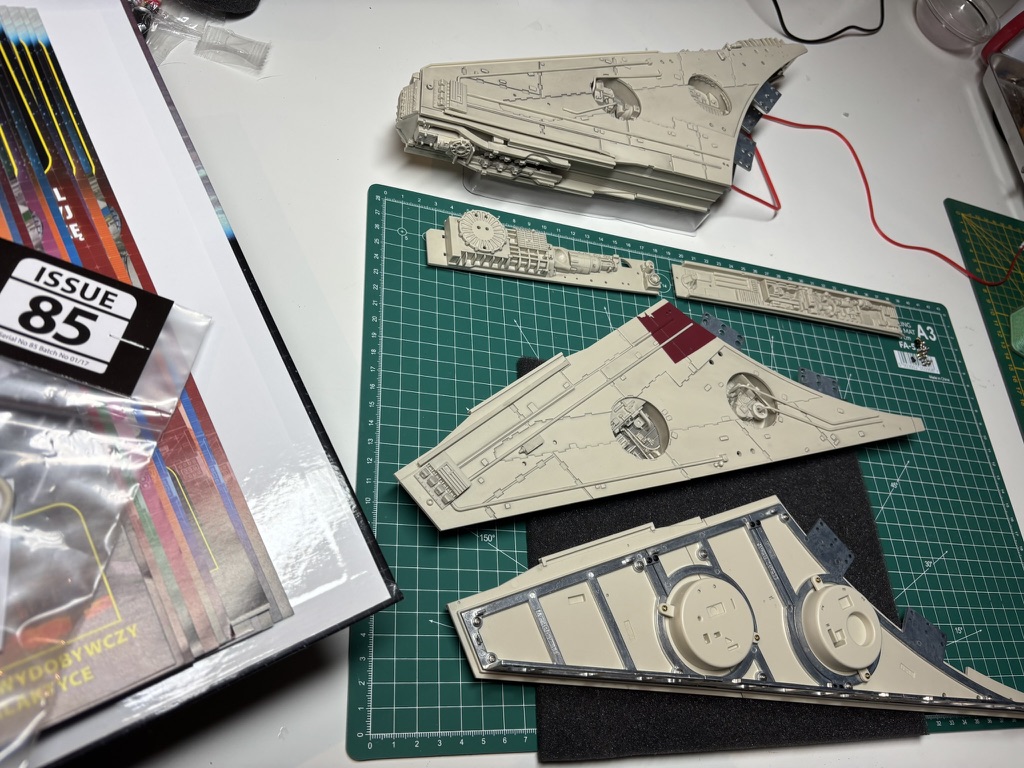
Construction continues around engines cover – it is still separated from the model, will be fixed later. Then, following the…
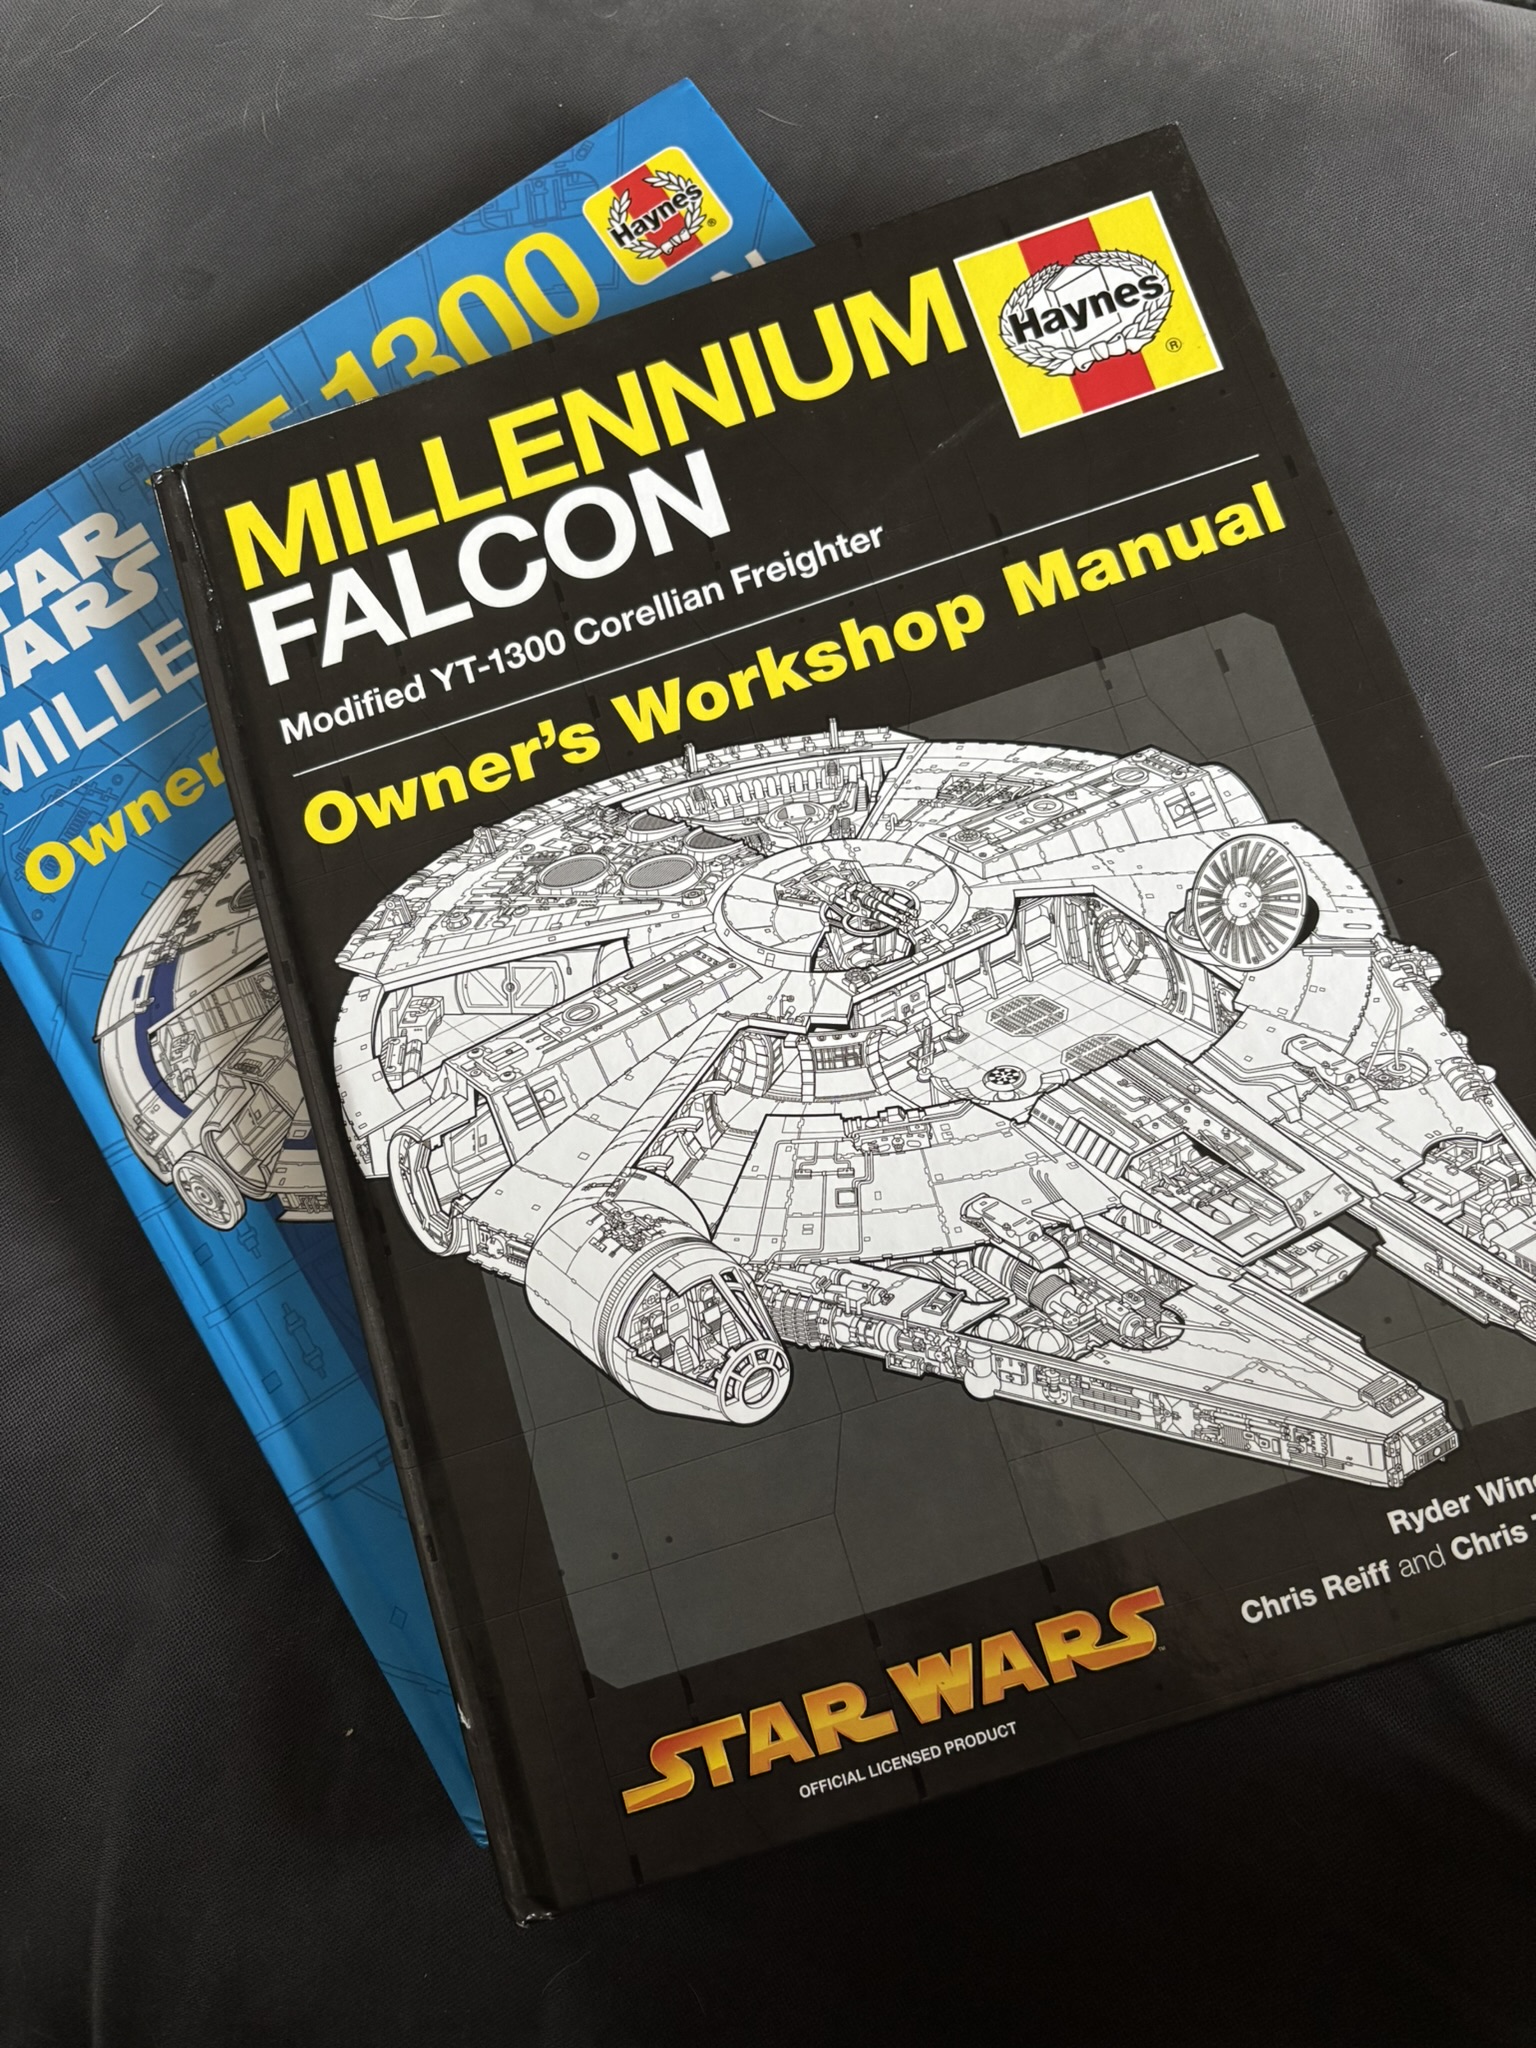
If you’re Millennium Falcon fan then you know how StarWars movie models were created. Many detail parts on a surface…
Finally, I was able to test out Millennium Falcon motorized boarding ramp. Surprisingly it went fine without any adjustments!I was…
I sit for a moment to the model just to have a look on it…. and somehow 4h passed in…
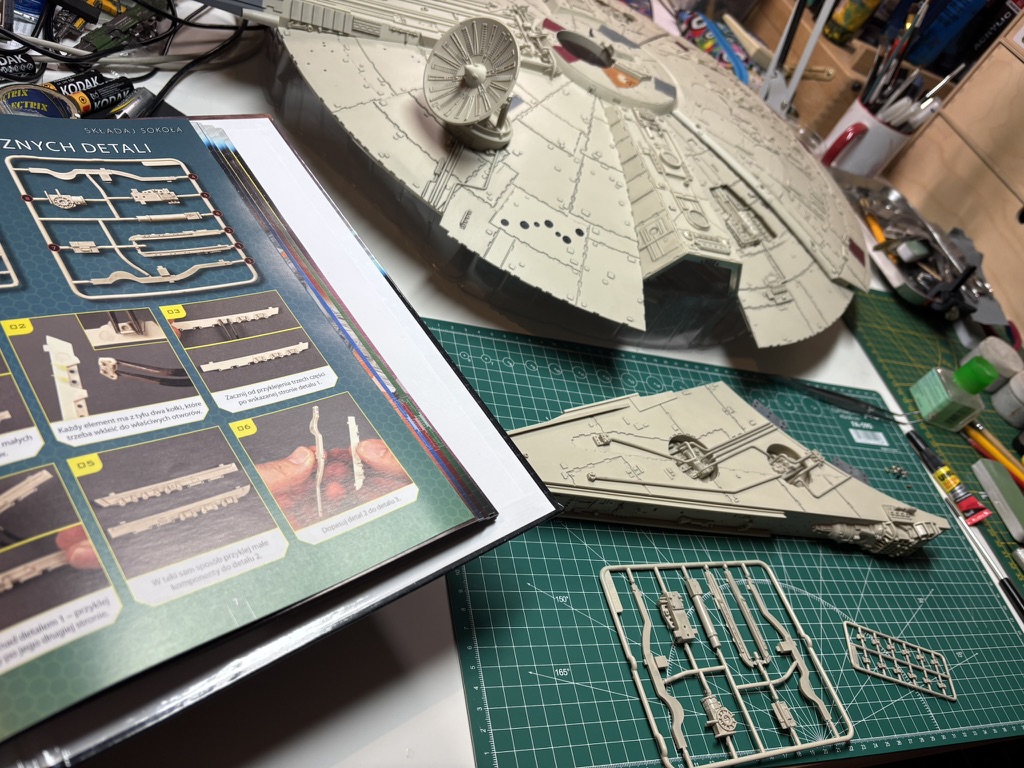
Now time has come for some detailing work. Detail parts comes as plastic sprues that we used to in “ordinary”…
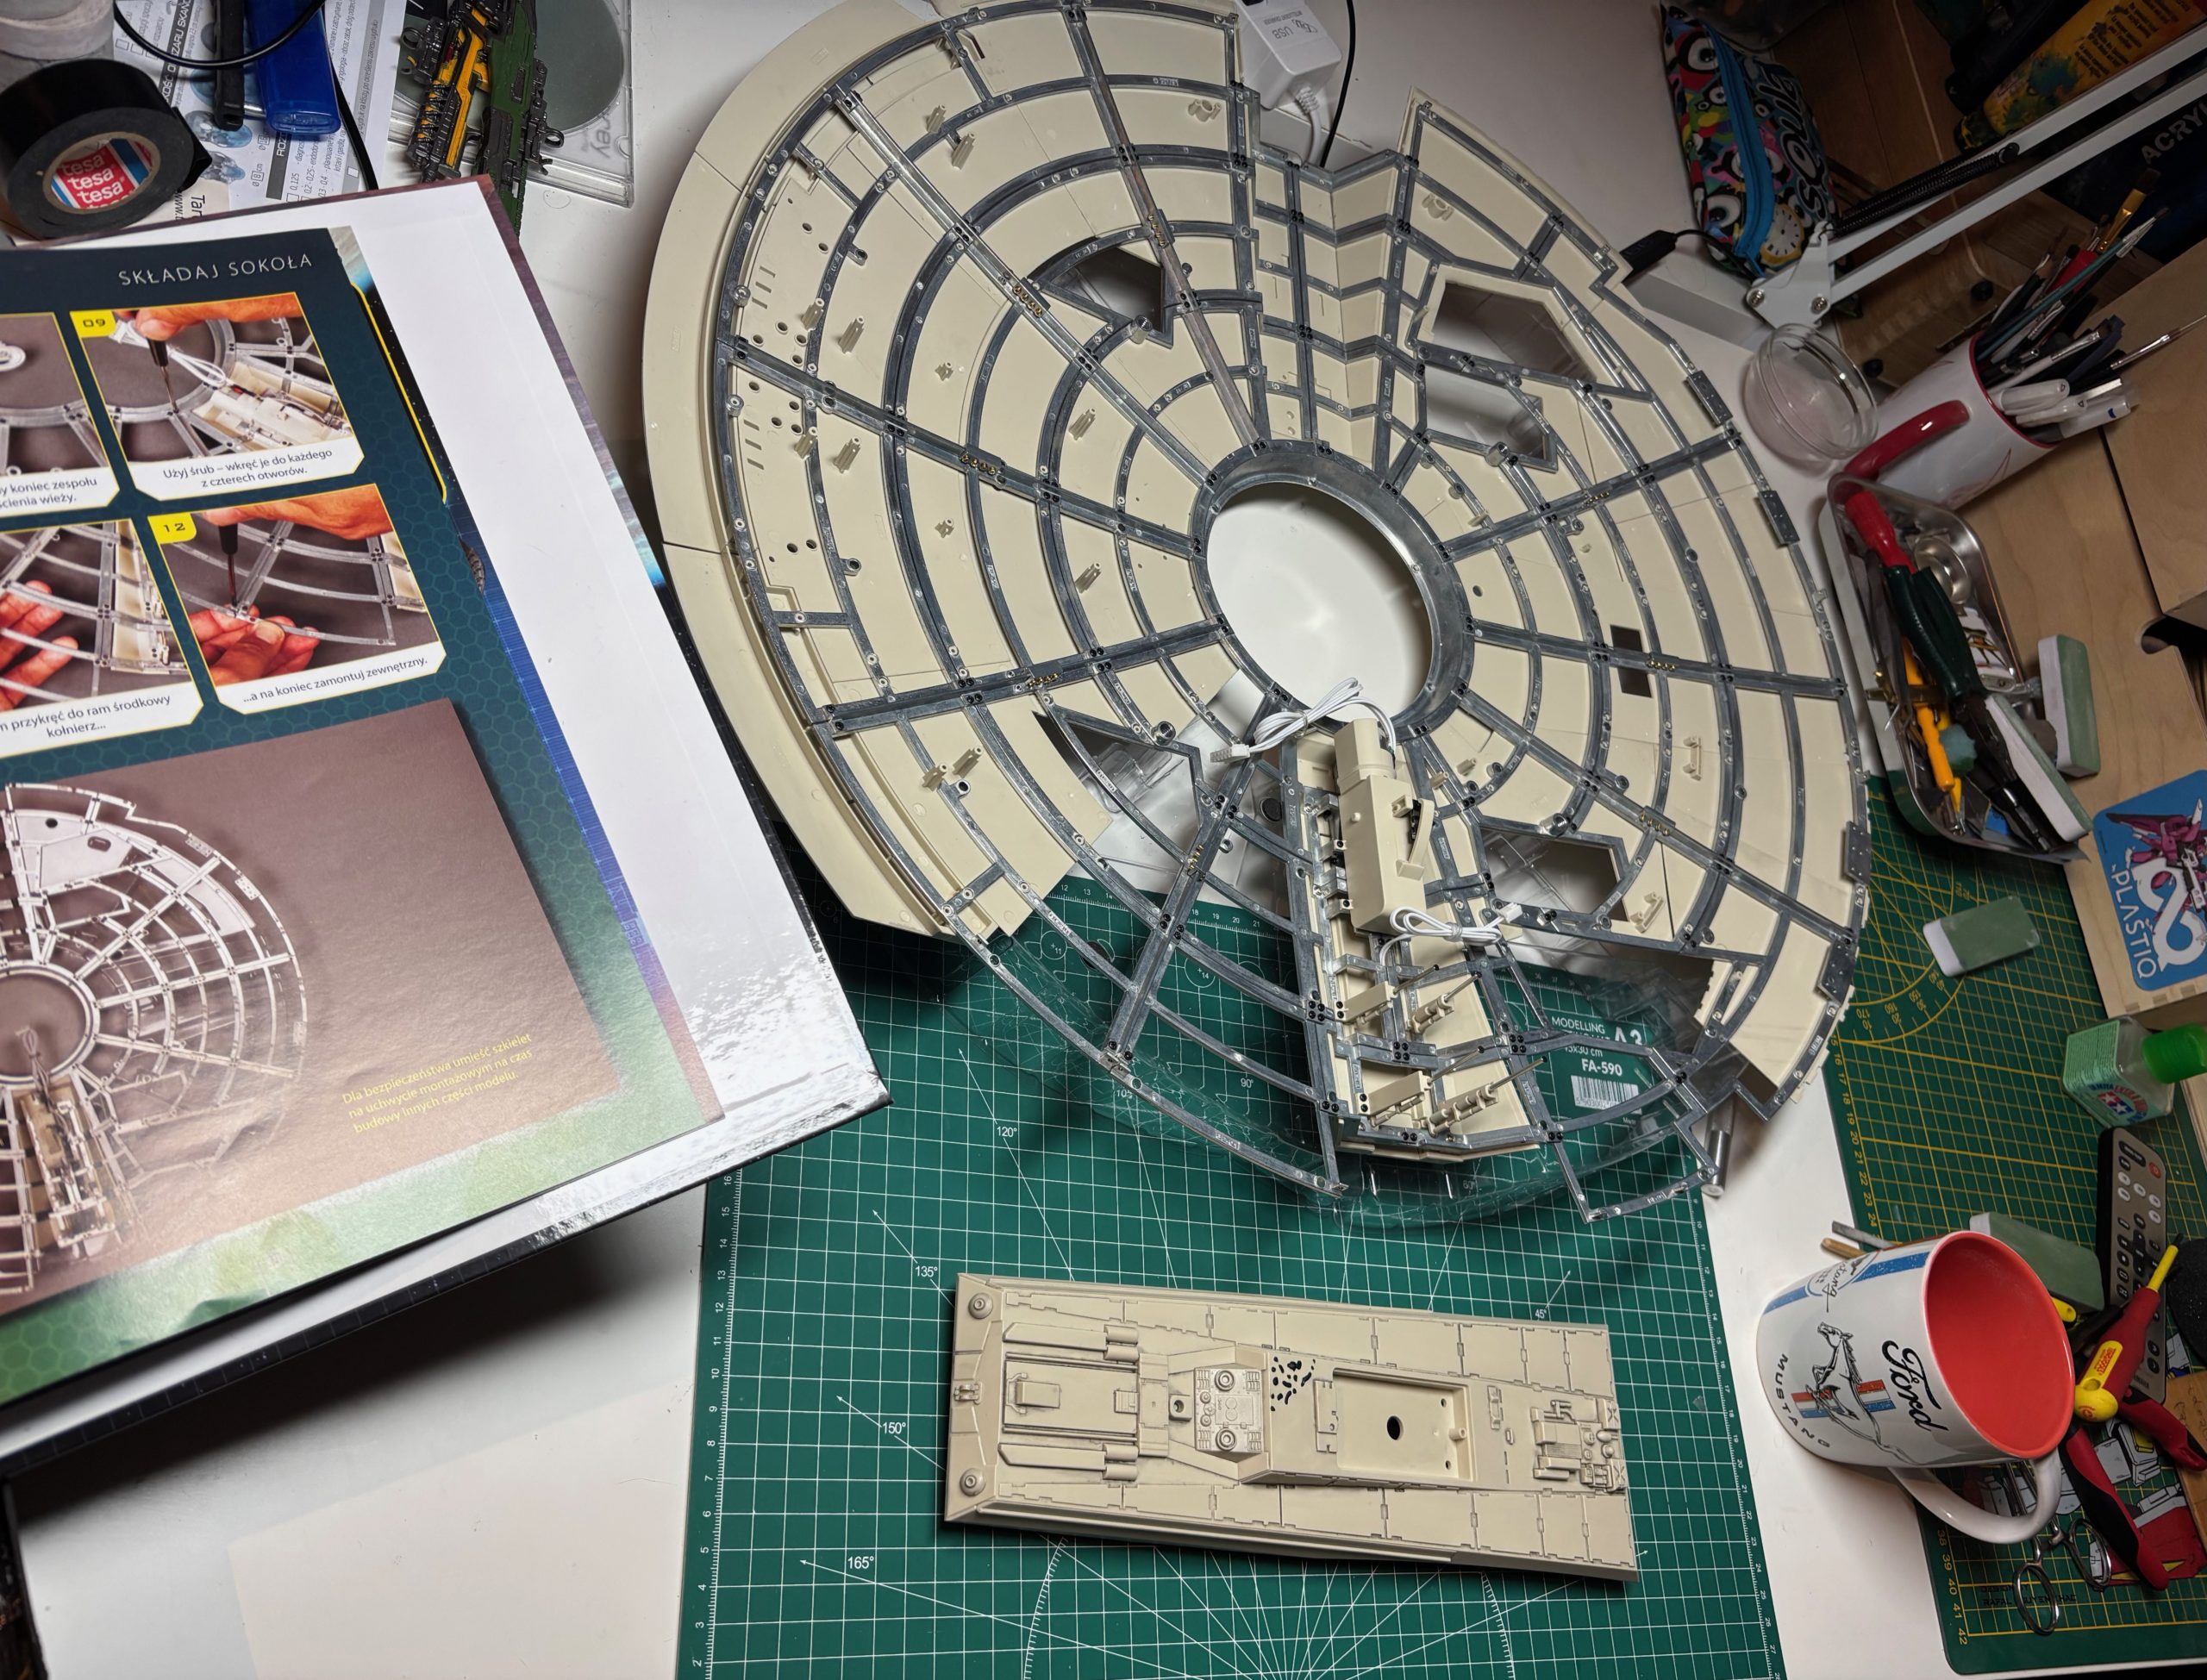
Again, DeAgostini did good job with mixing the construction between frame assembly, some exterior details and building motorized loading ramp.…
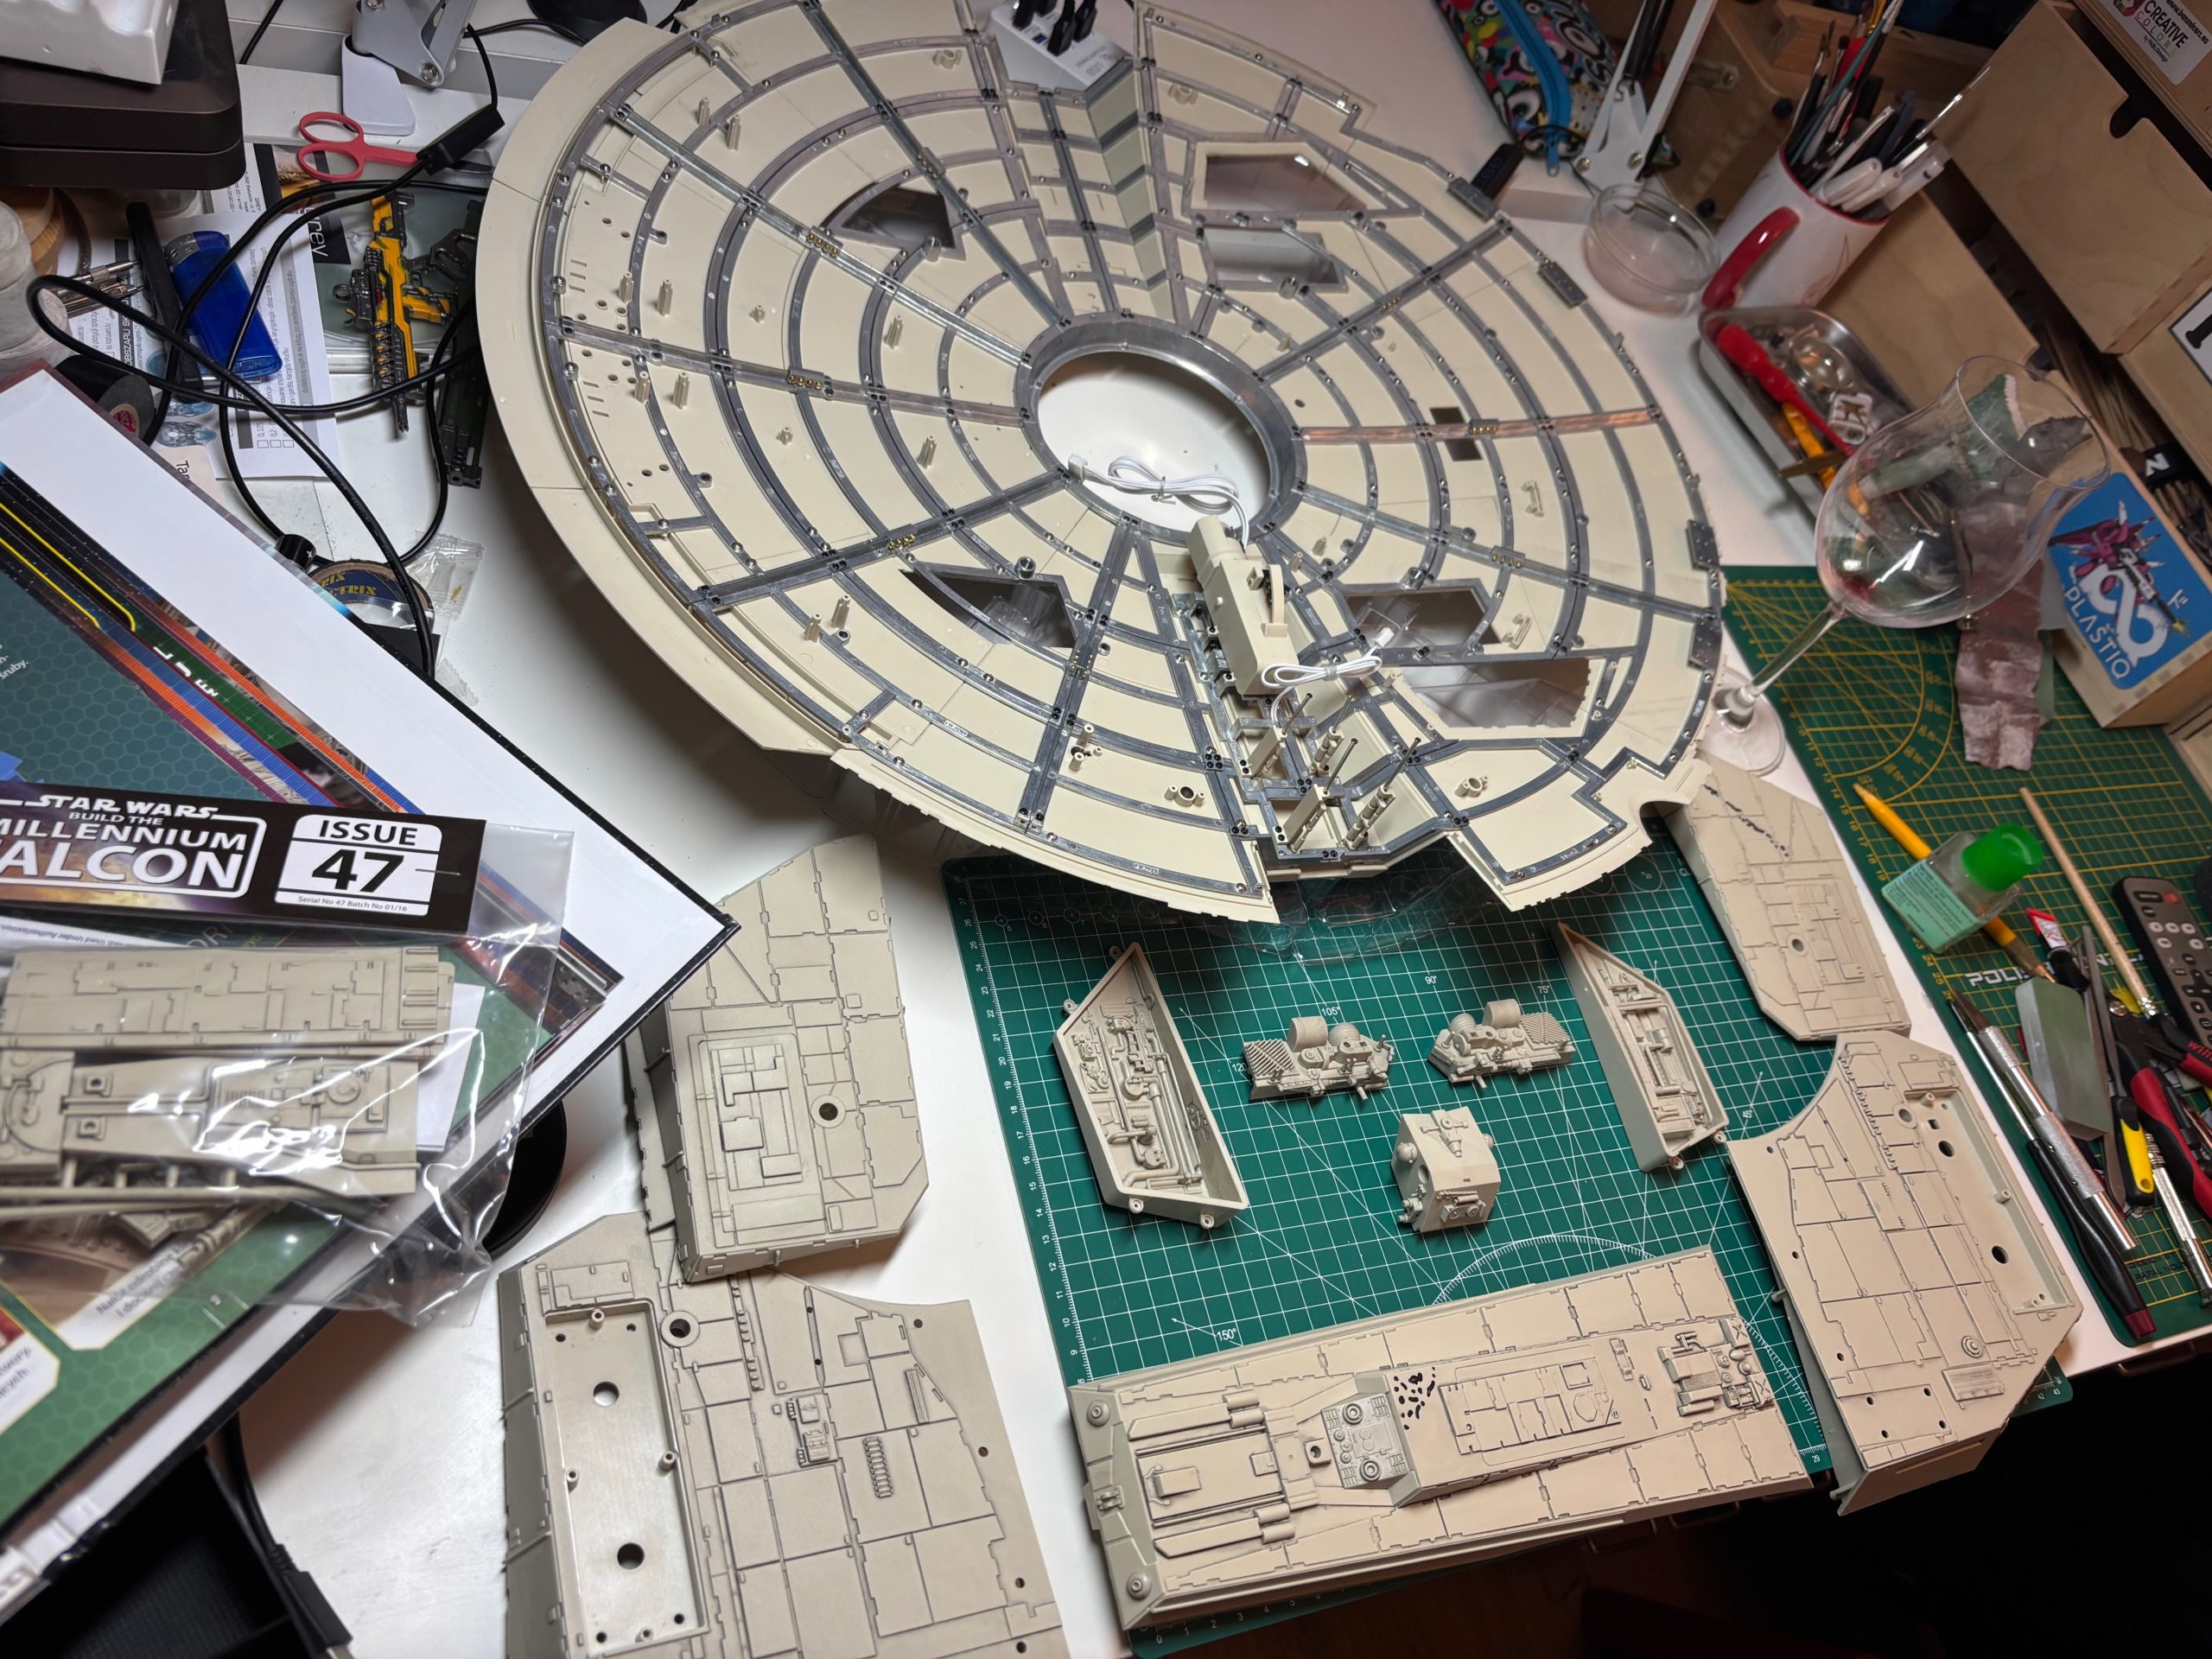
Issues from 19 to 29 completed. The construction went smooth basically focused on internal compartment and corridors. It looks like…
Stages 13 to 18 provides parts for internal compartment, corridor and bottom fuselage construction. As I am not planning (still)…
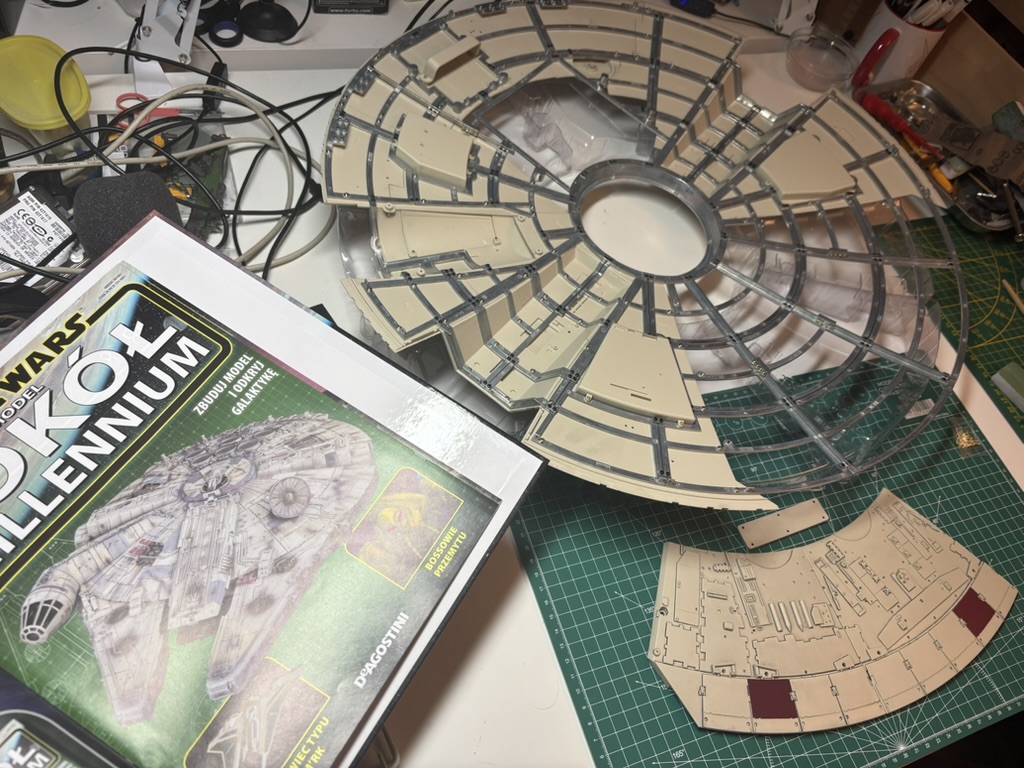
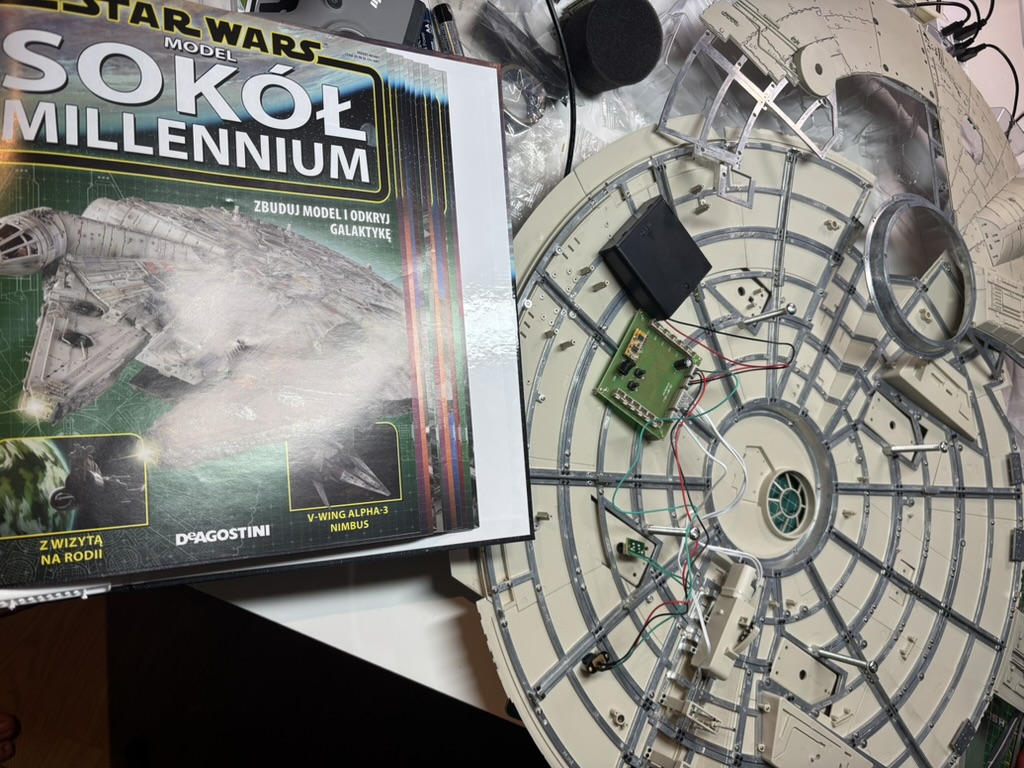
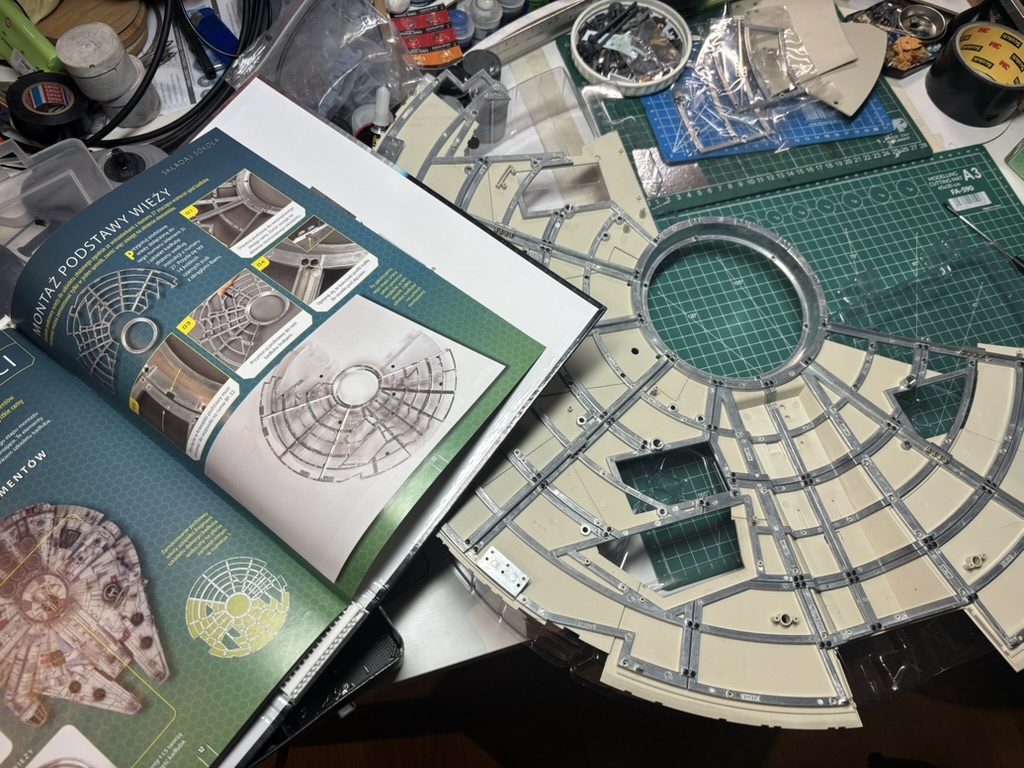
Punch it Chewie! Kit’s parts are organized in 100 construction steps (that means – a hundred of different sizes plastic…
The time has come to move-on and take to the workshop biggest model in my backlog.Deagostini Falcon Millennium in 1/43…
Whats left? – windows net and some final touches.Kit net is made of hard plastic, I was planning to do…
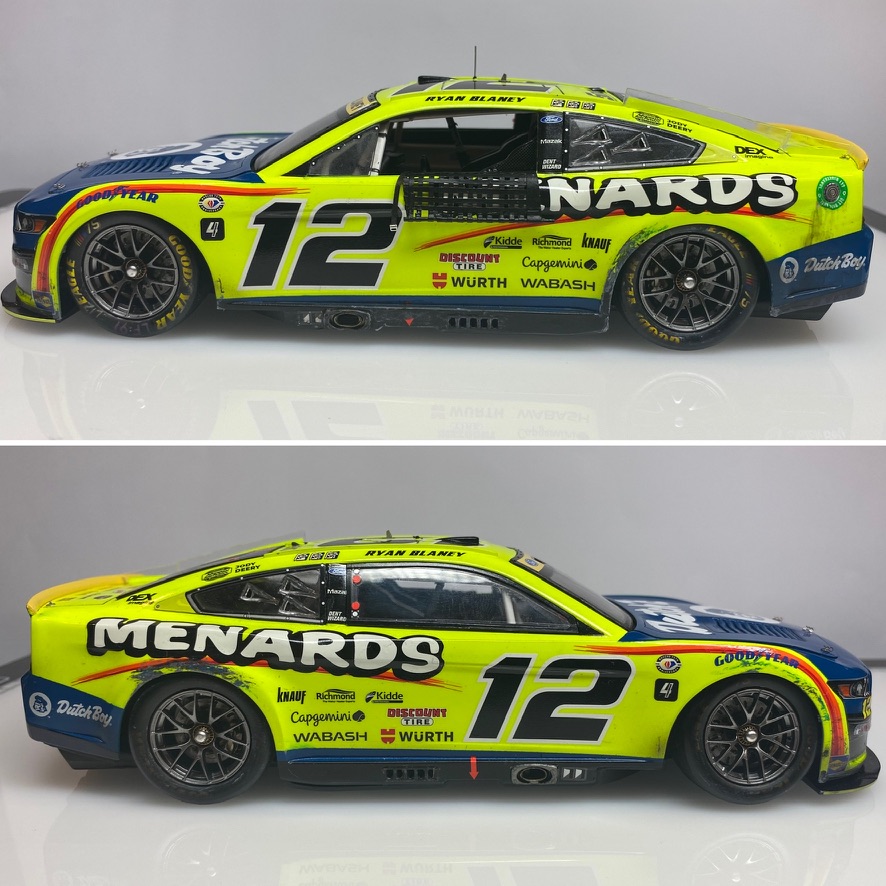
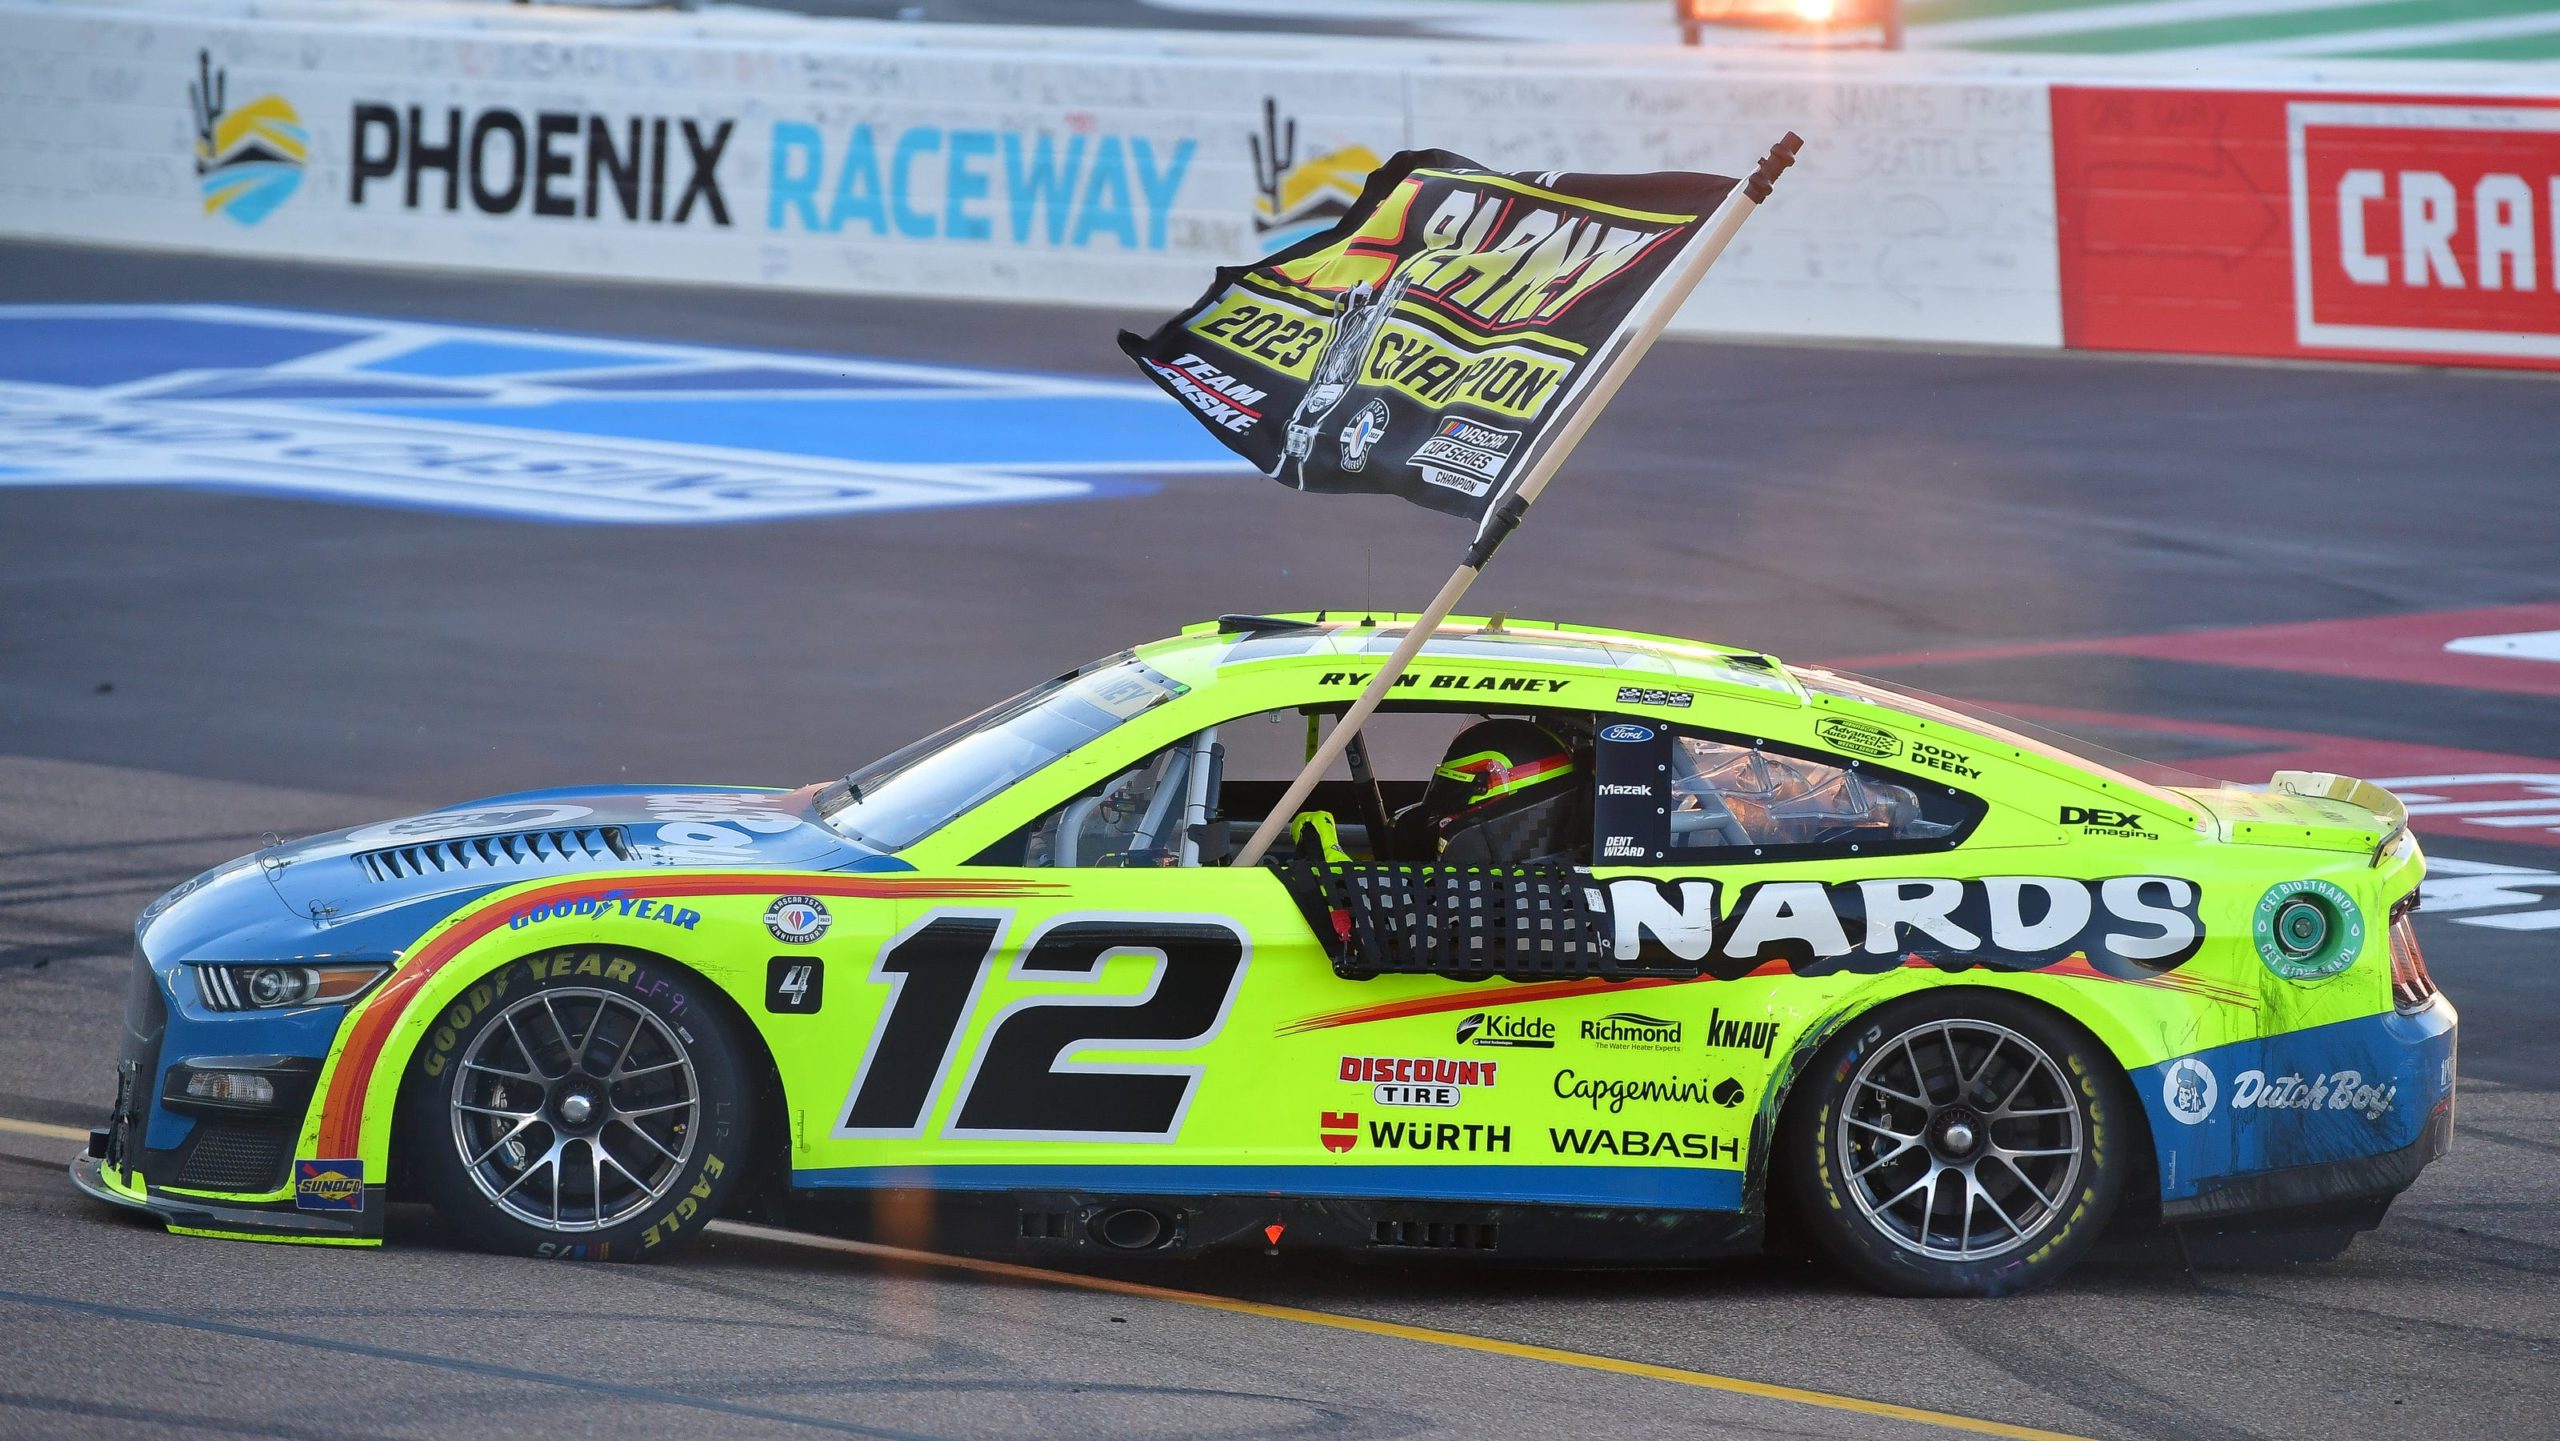
Nascar race cars in superspeedway configurations are not symetrical when it comes to wheels camber and toe. I went oob…
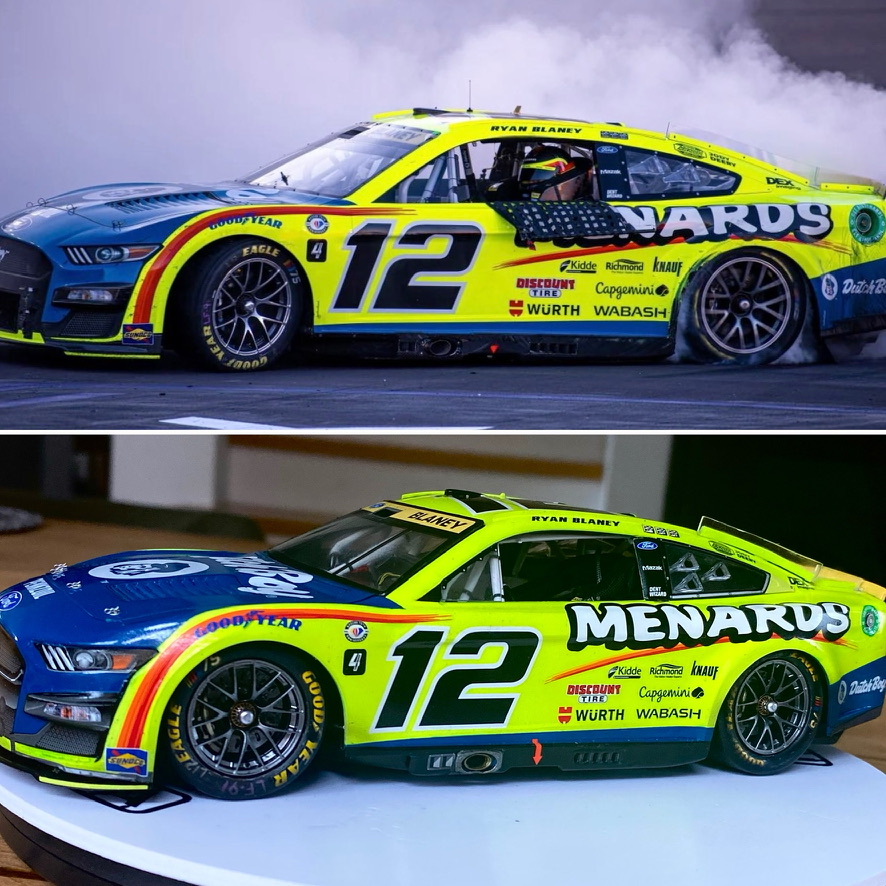
Yup, I decided for more challanging wheatered, beaten raced version of my miniature – I found it more interesting.Whetering of…
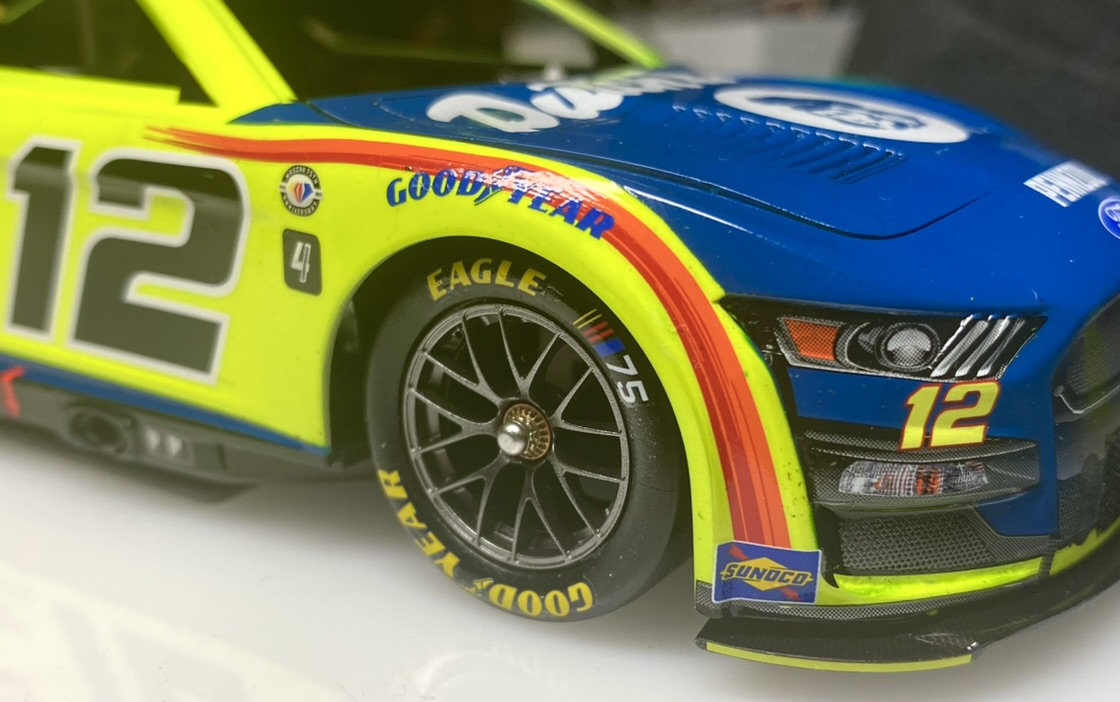
Photo documentation showed that wheel rims colors is not unified – it looks like polished metal on spokes with dark…
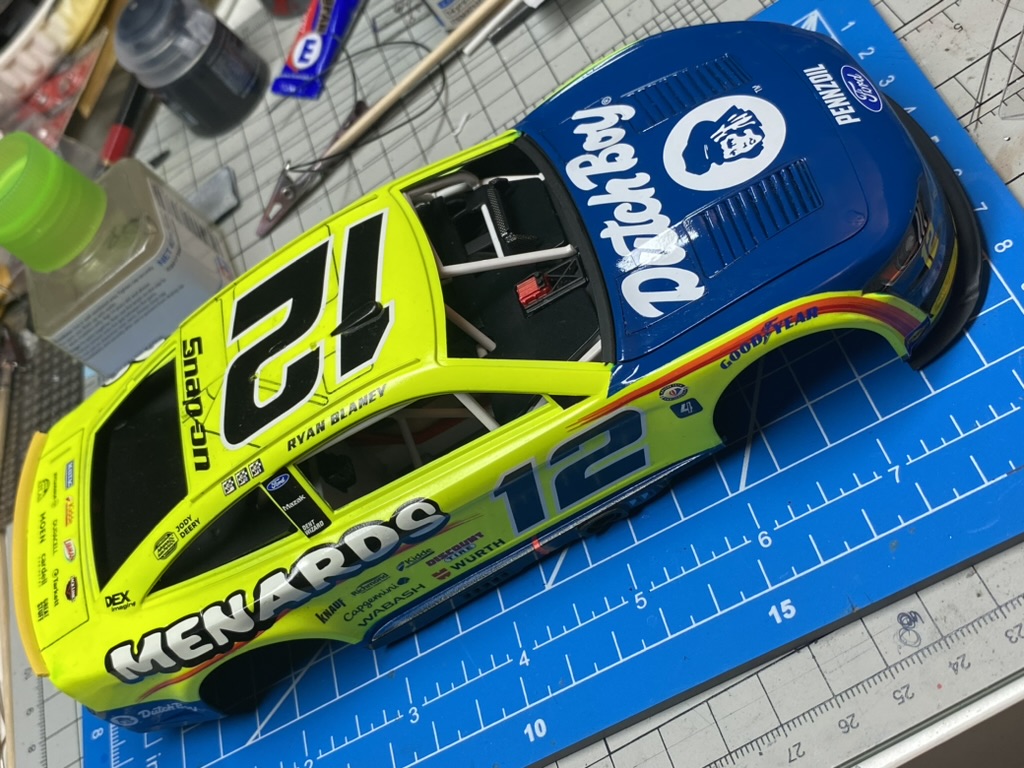
Time for a top coat.GX112 SuperClearIII UV Cut applied. After some polishing work the body looks as it should. As…
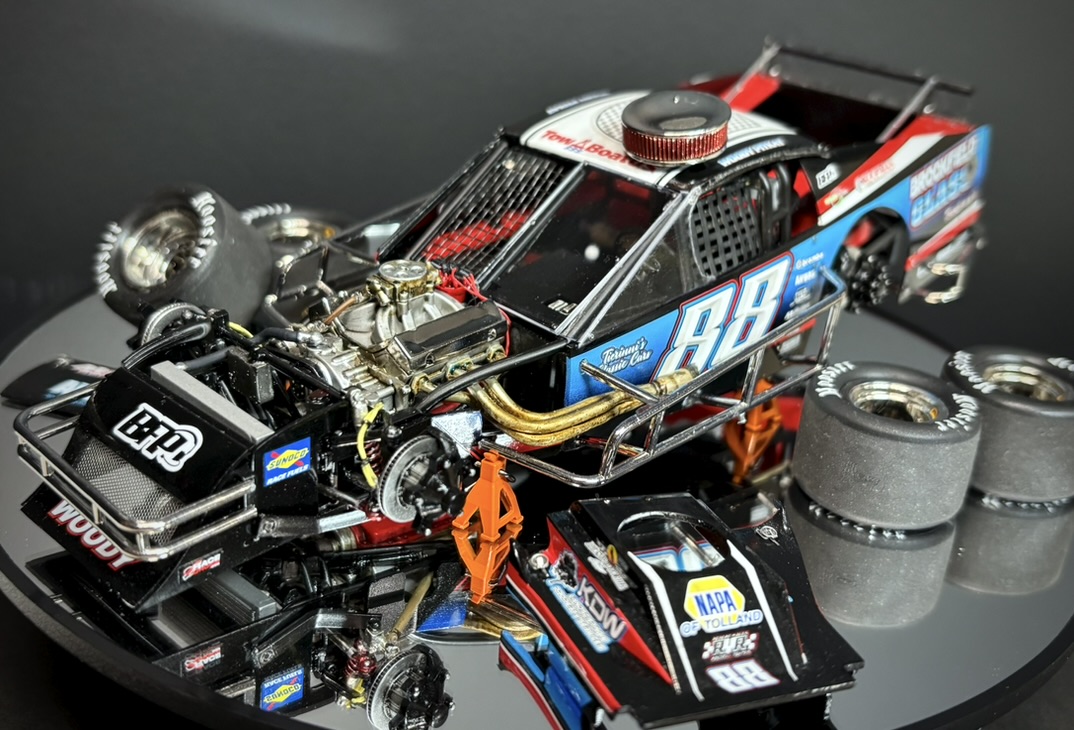
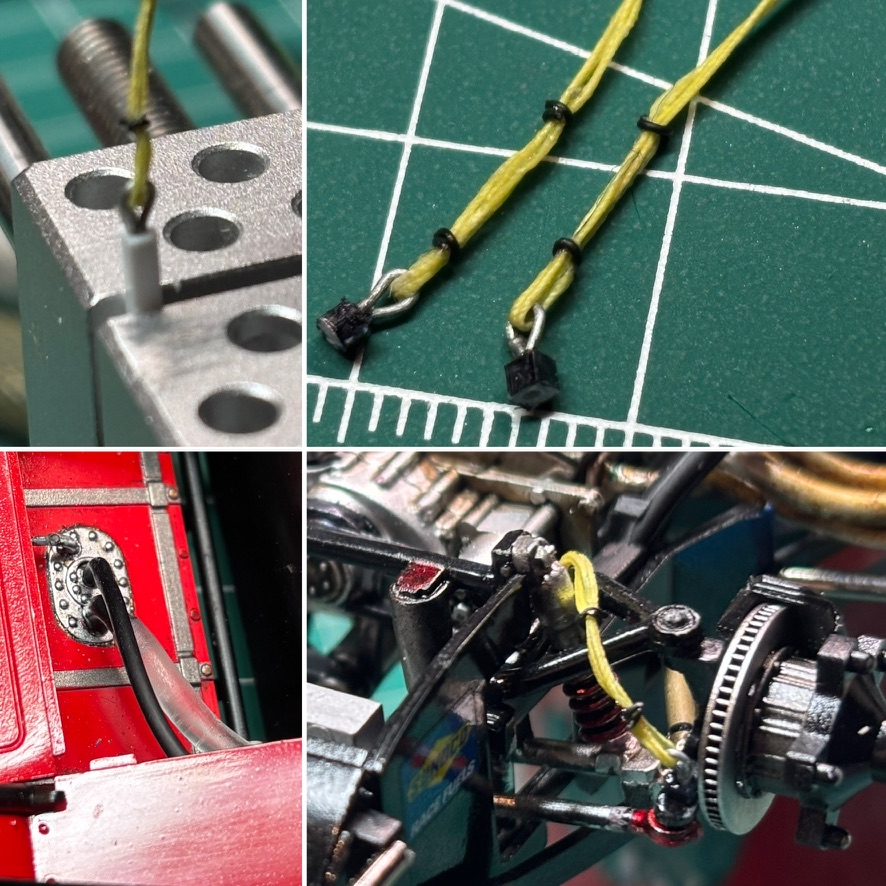
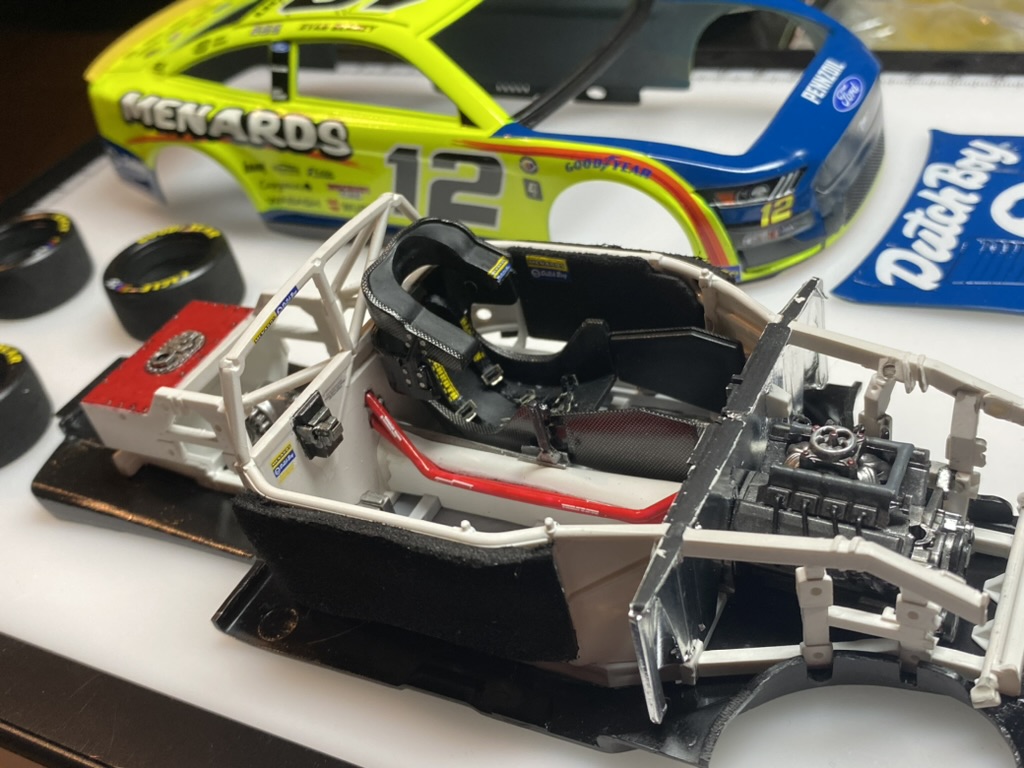
I added few internal details including visible fuel lines. It will fit quite nicely into the body. Unfortunately, there will…
In meantime I ordered aftermarket racing belt set. Its not as real-real Nascar safety belts, but I decided to go…
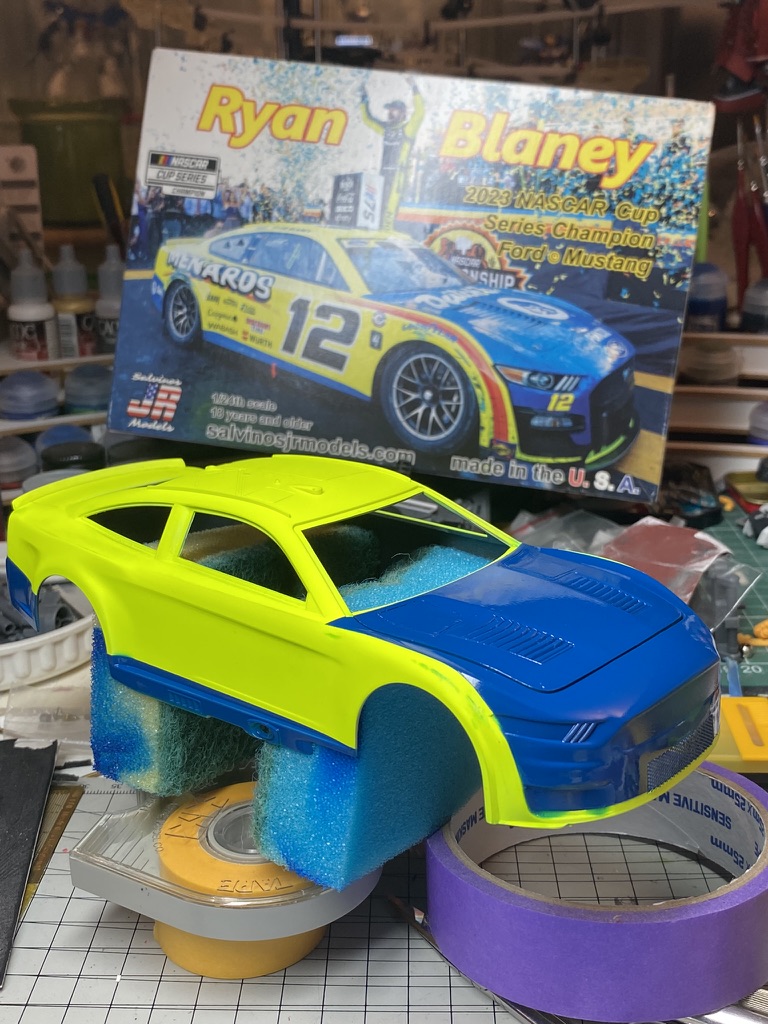
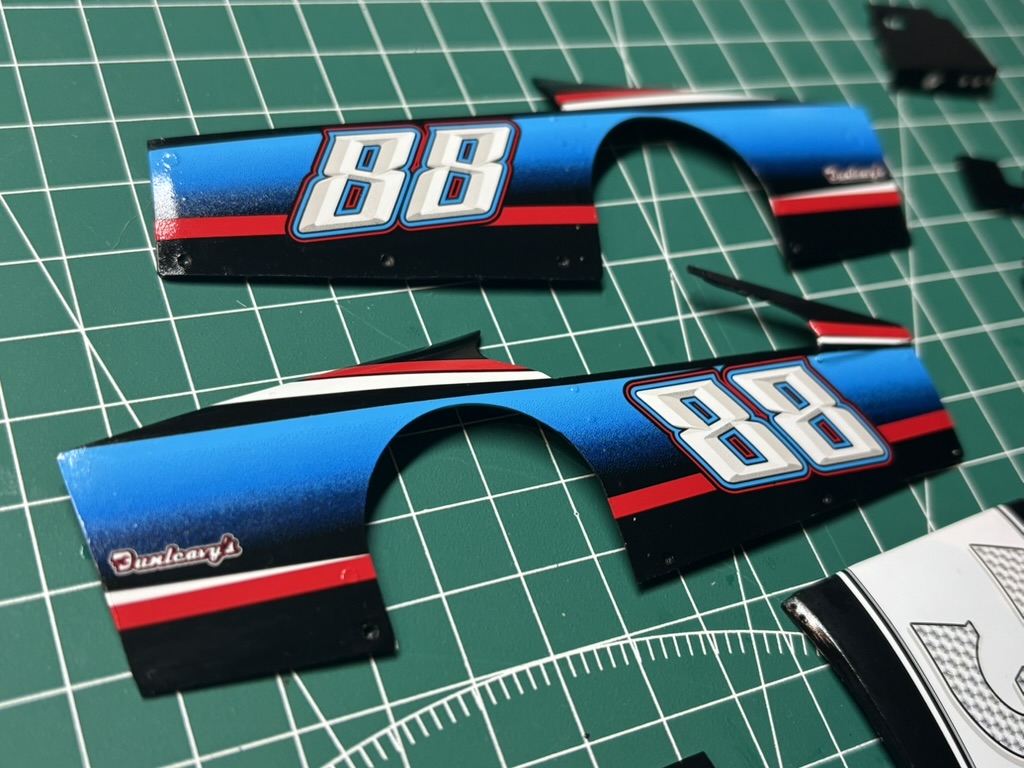
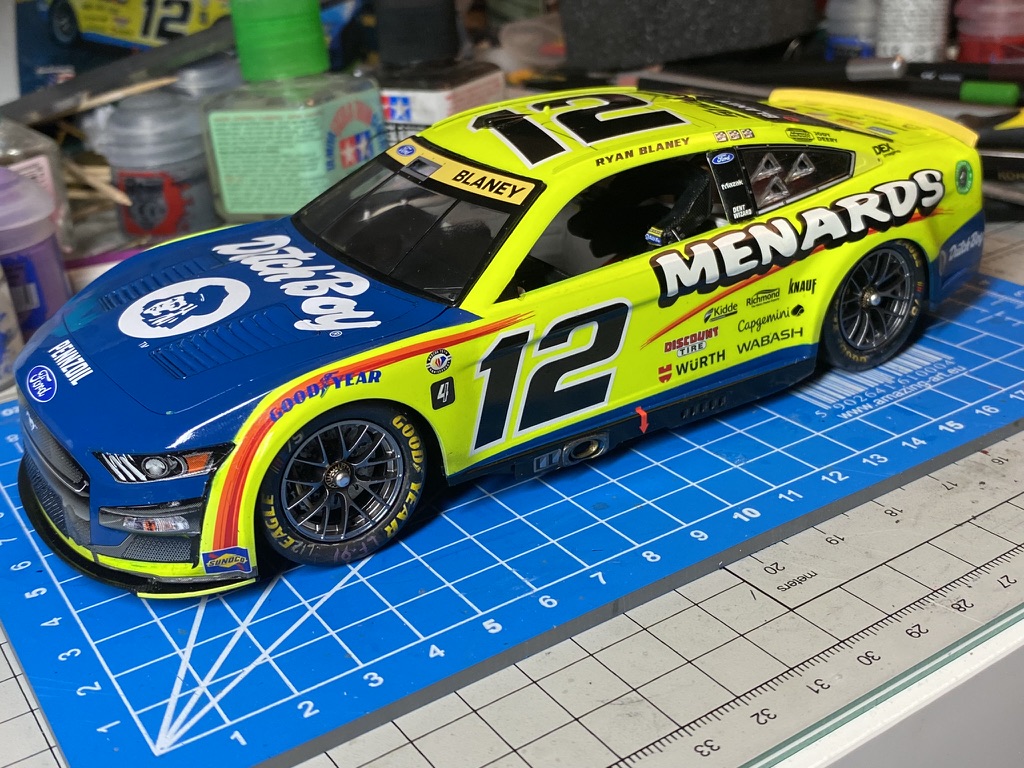
I started to work on the blue parts of Blaney’s Champion car.Masking tape was applied based on photo documentation and…
In my modeller shelf I found plain carbon fibers waterslide decals. I put them on the racing chair and other…
Nascar cars details like headlights or grilles are made of sticker in the real thing… Salvinos decals covers thats pretty…
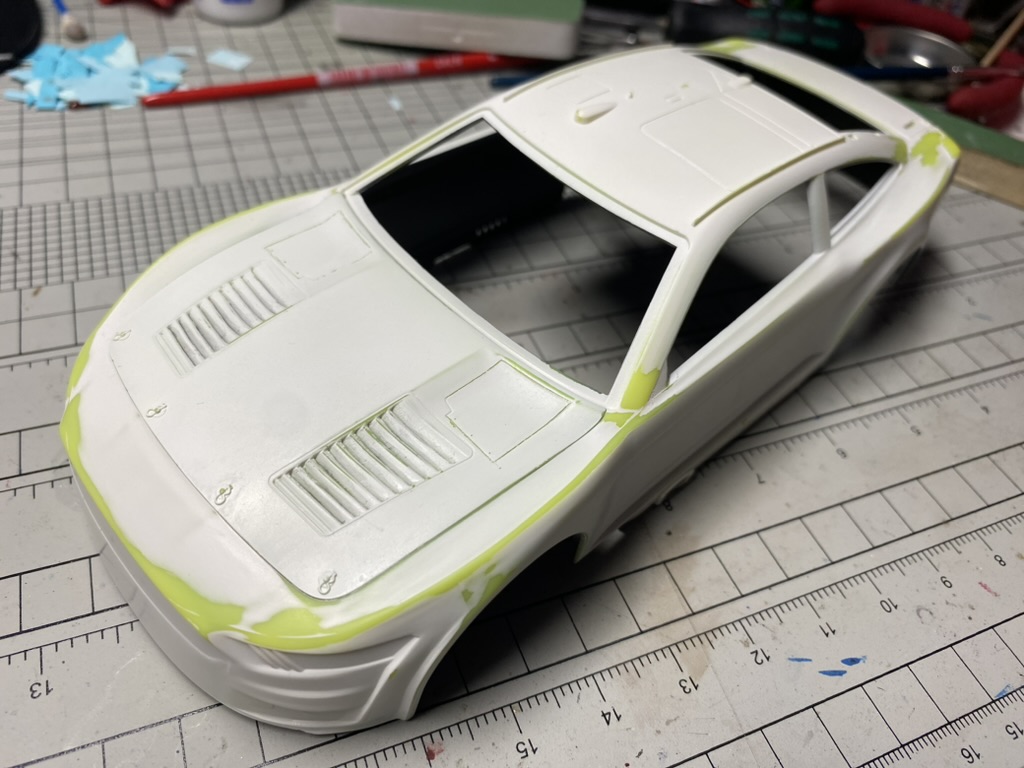
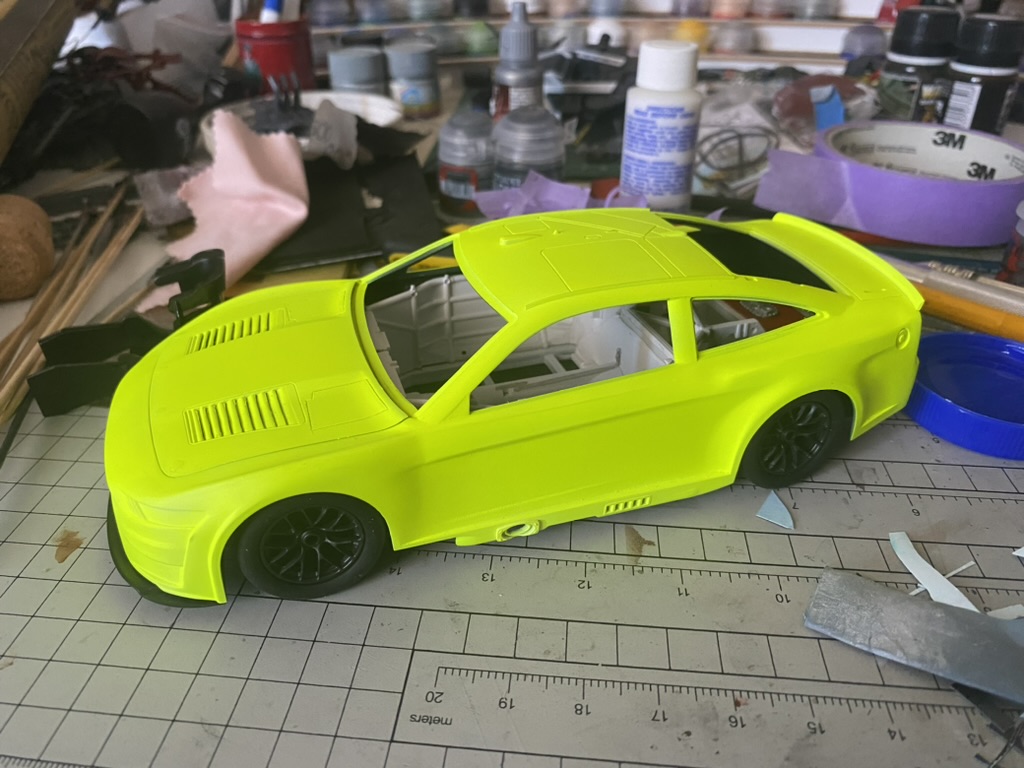
After application of white surfacer a lot of imperfections popped up… I was expeting some but not to that level…
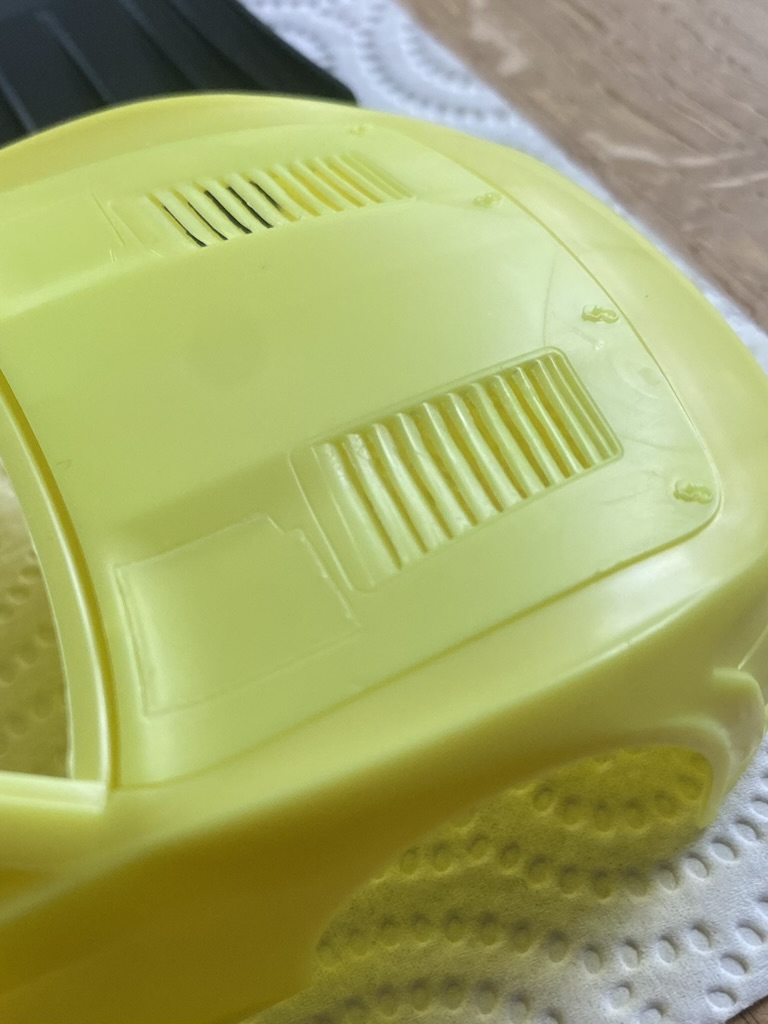
I didn’t like molded (closed) hood vents, took one of my gunpla scribing cheesels and start to dig the holes…
Time to start the build! Im just following SalvinosJR instruction.Rear frame of racecar with fuel-cell and gearbox attached – looks…
I was F1 fan for many years…. after last season I was completely bored with ‘F1 train’ and one/two same…
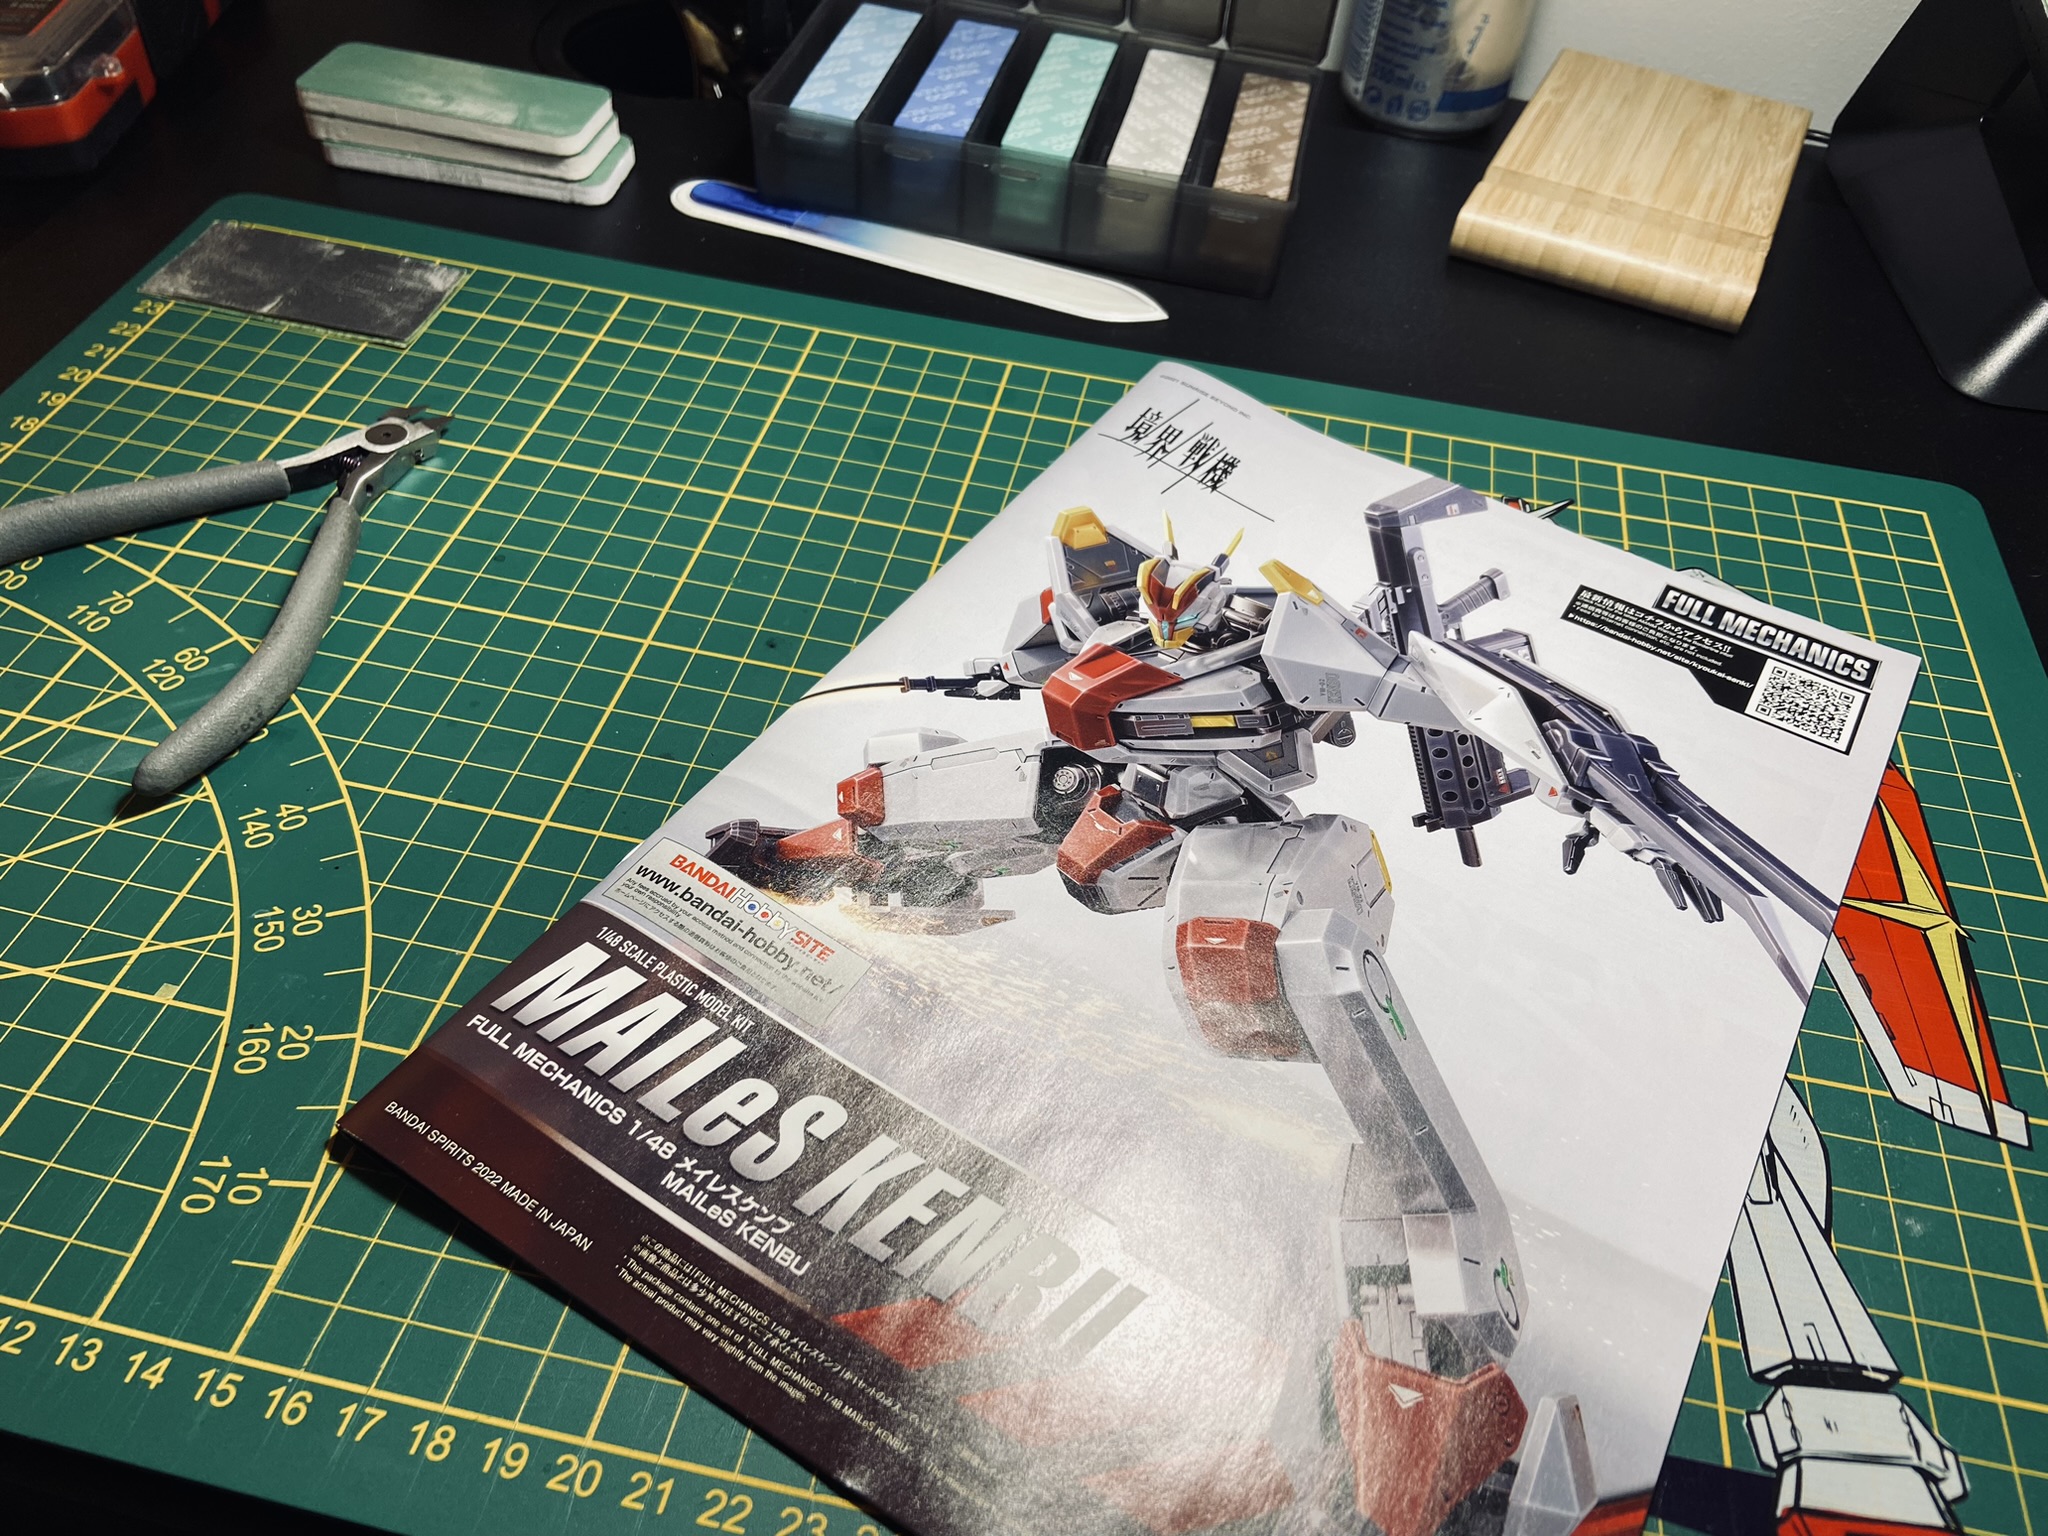
With great pleasure, I would like to inform that there is new Work In Progress available! This time, I started…
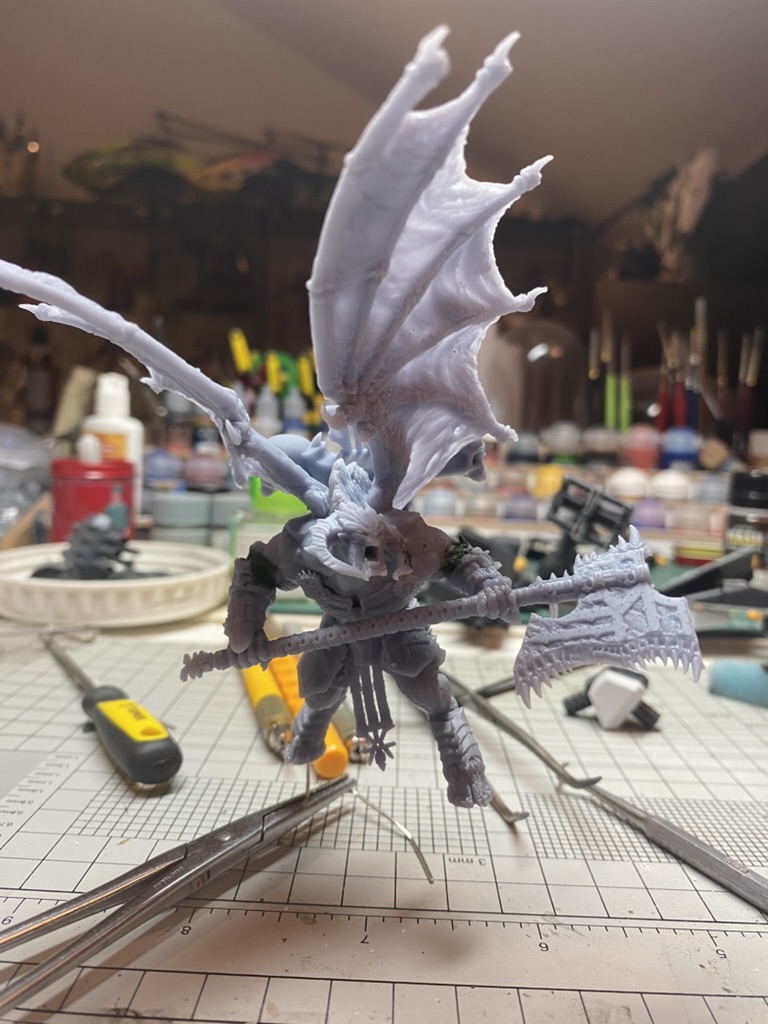
Just received great gift from friend of mine – thanks Kuba!!!Its 3D printout of some devil-looks like demon with huge…
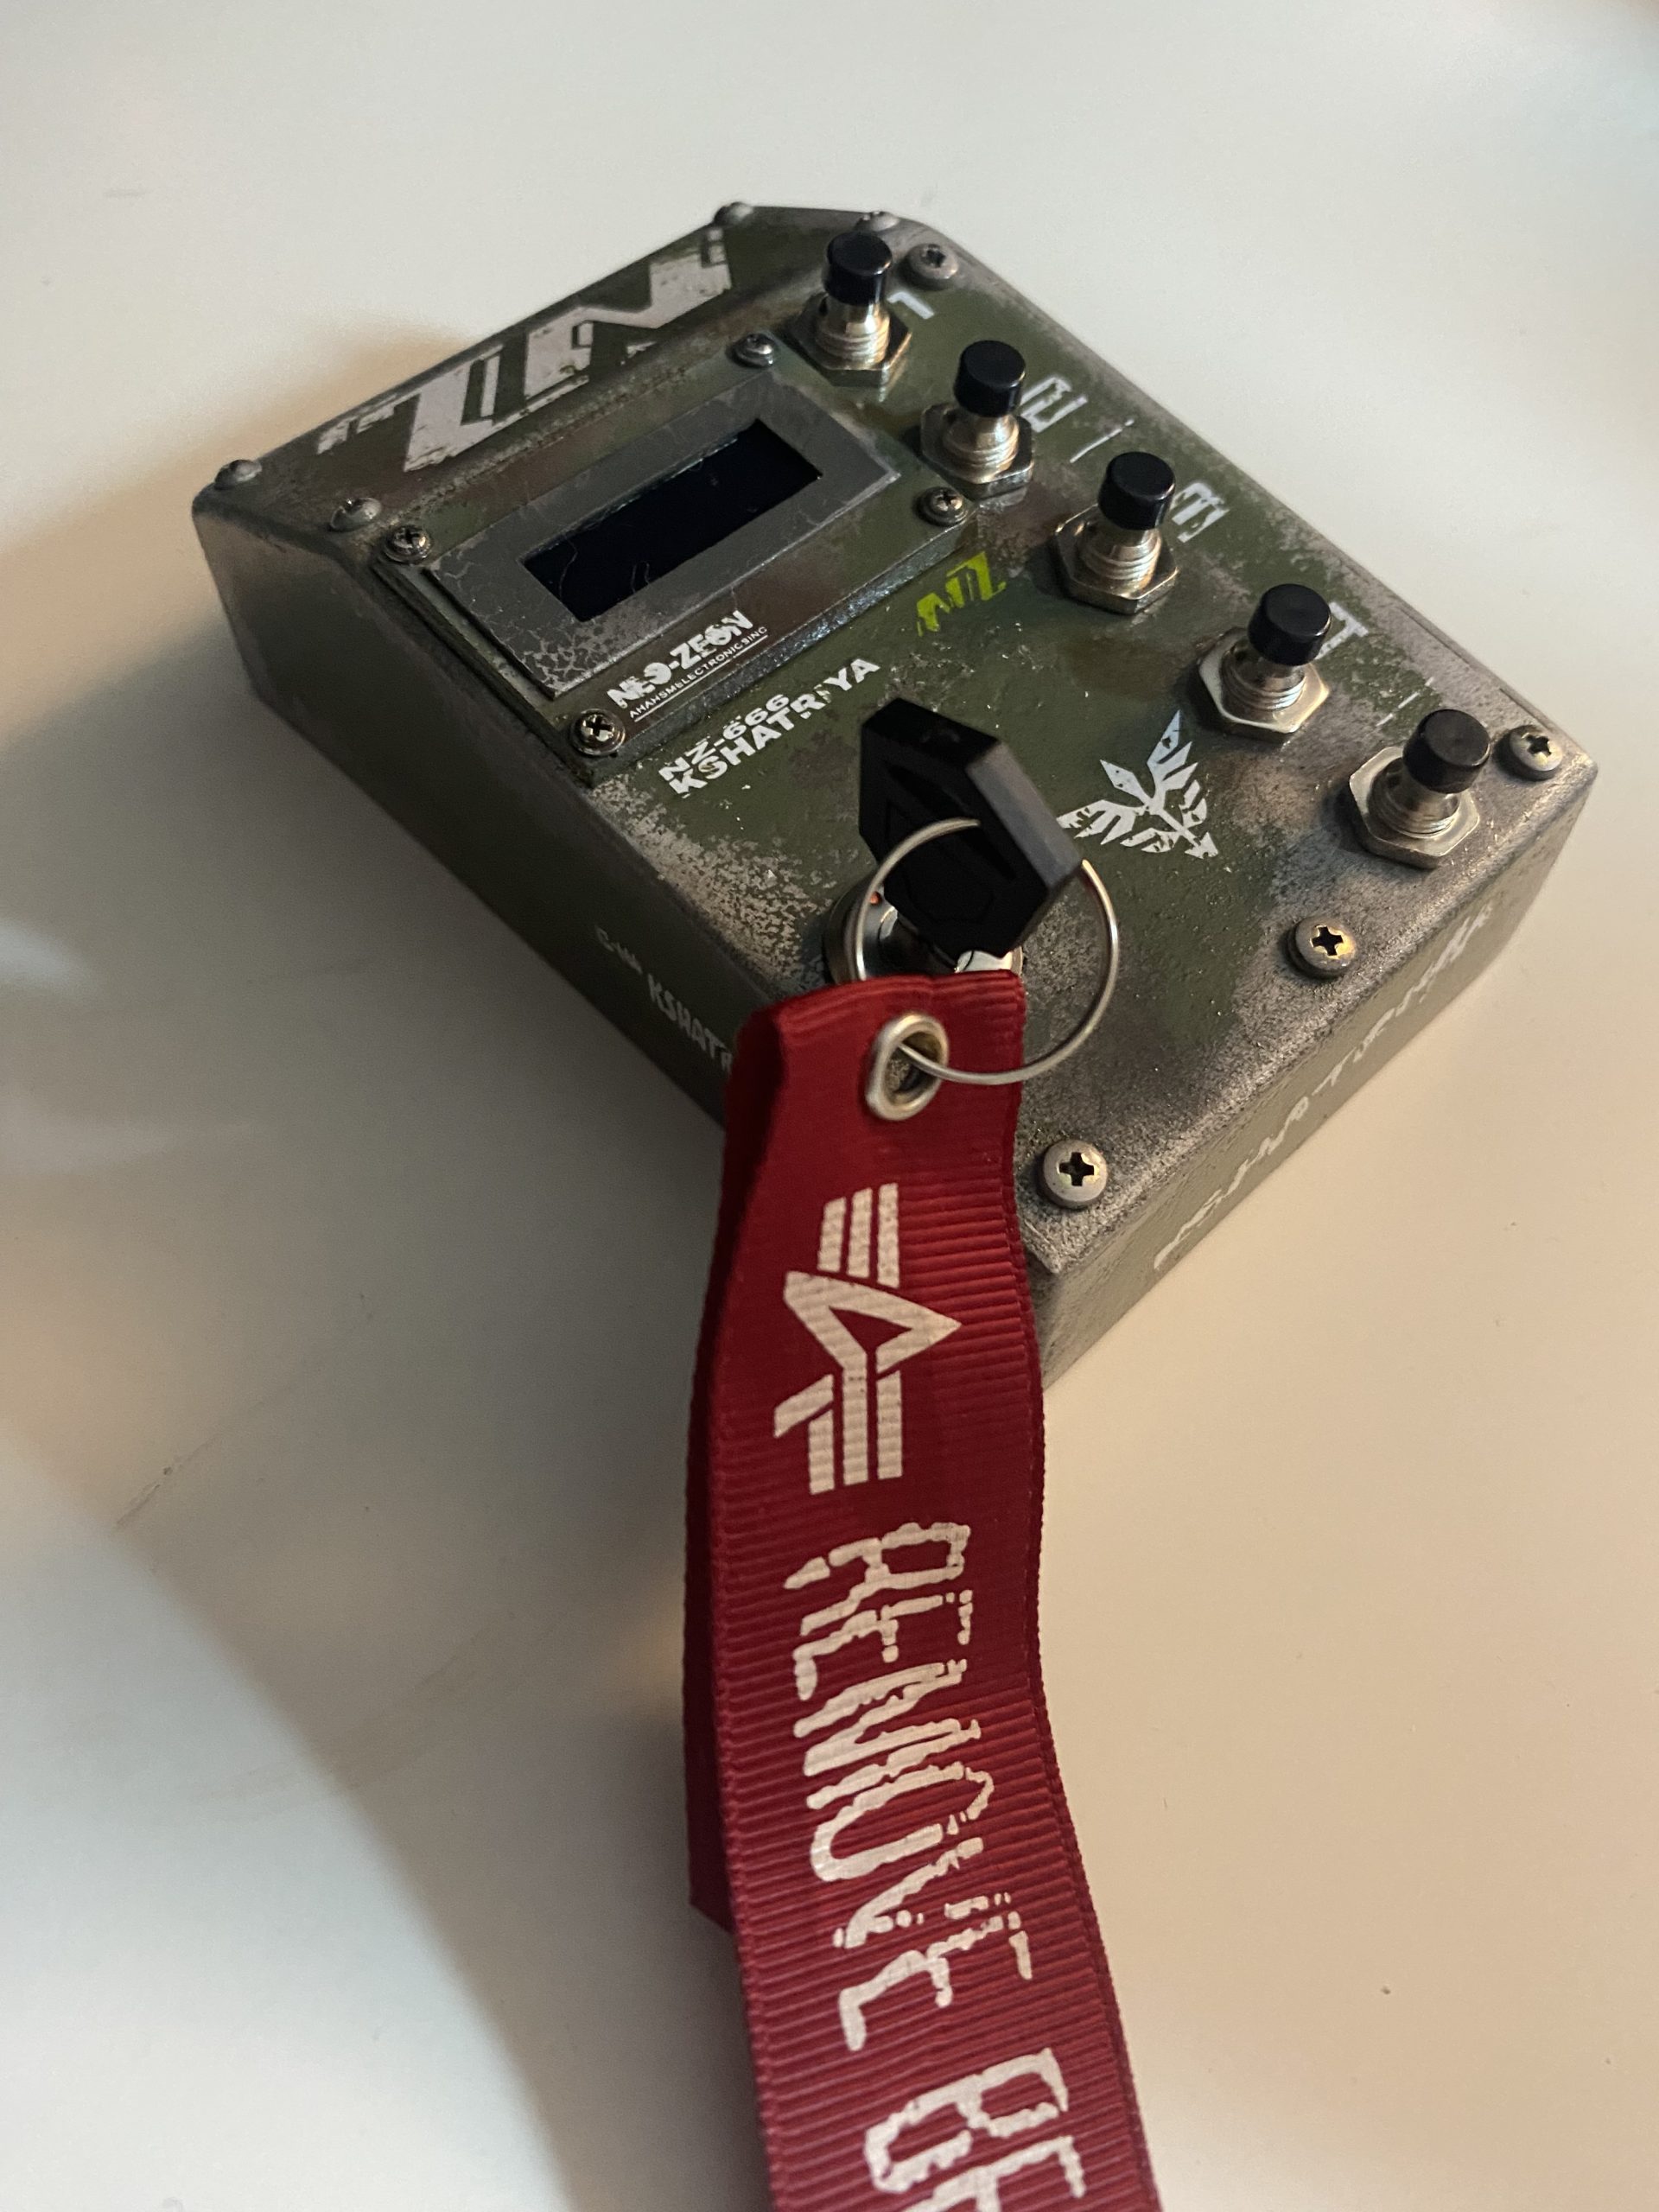
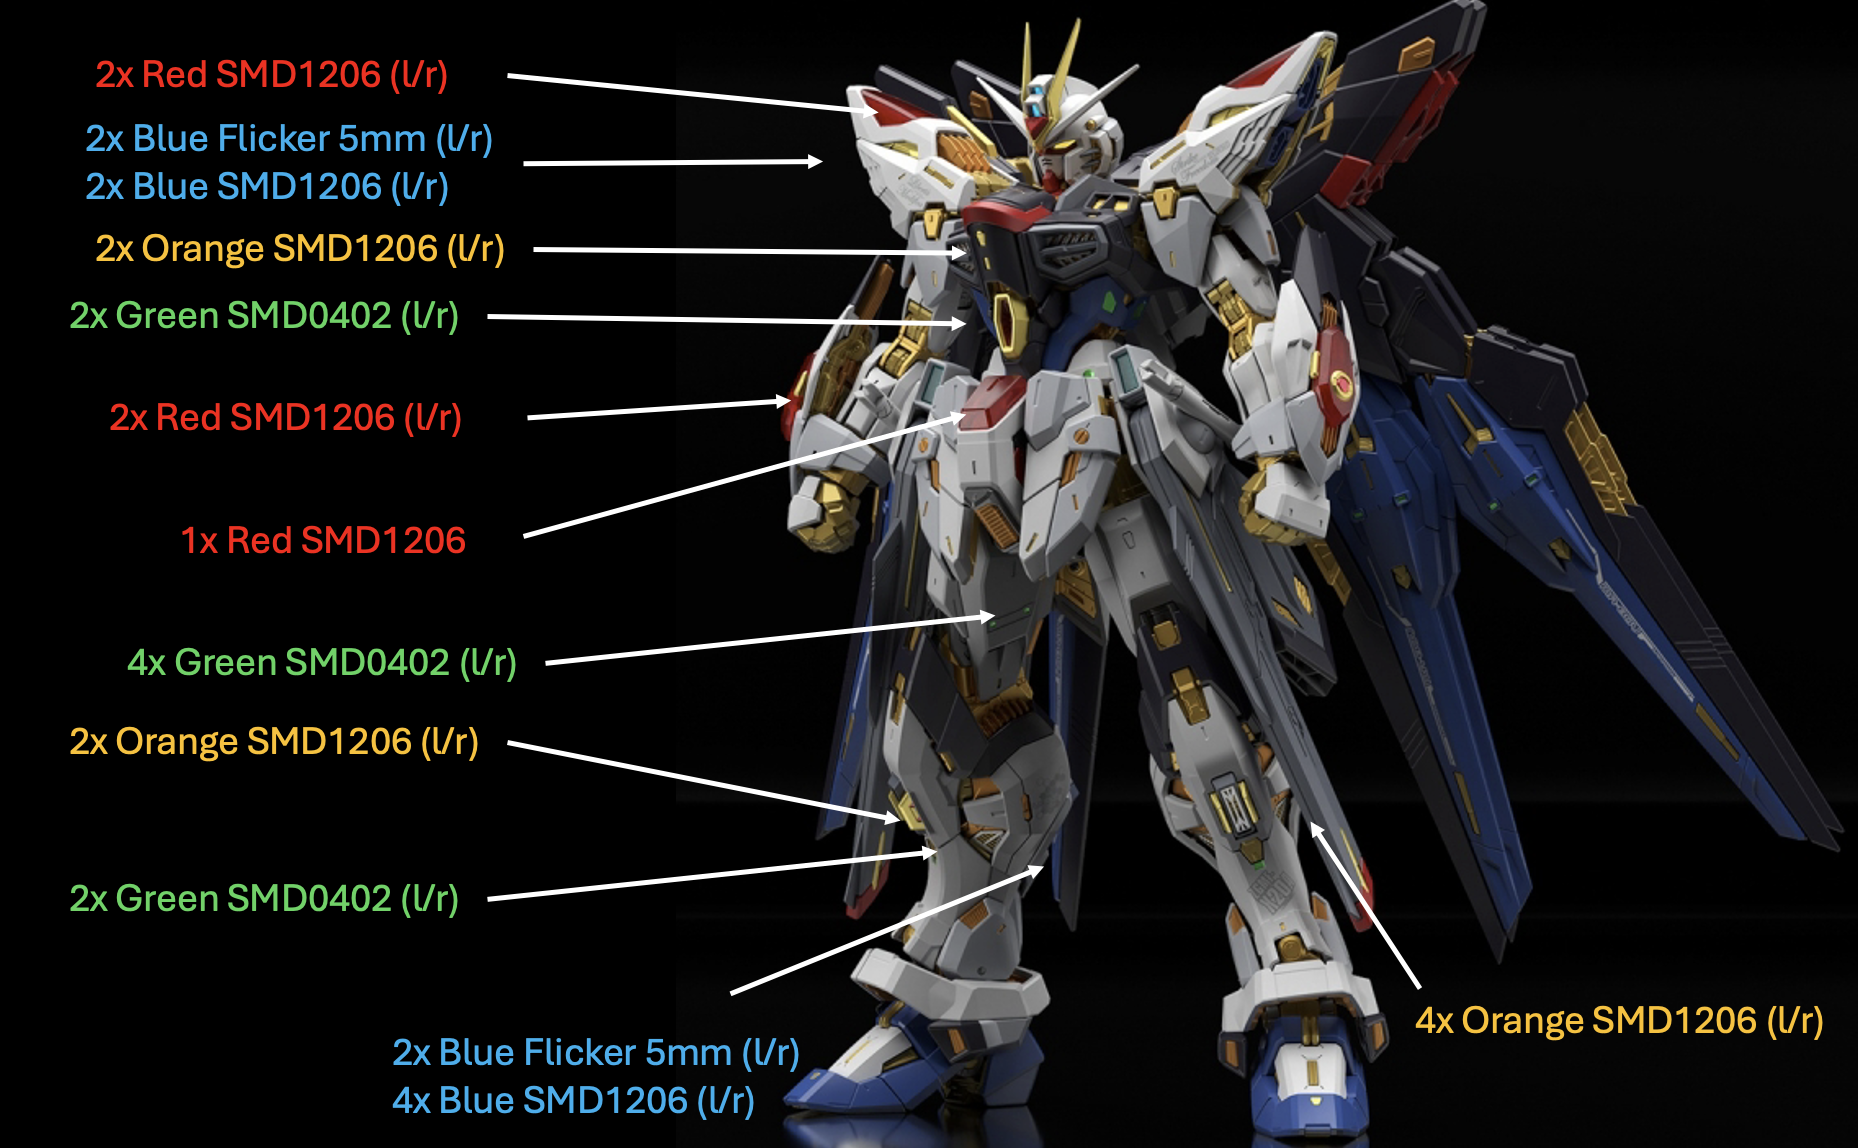
My Kshatriya LEDs are controlled by two Arduinos, during the project I added BLE (Bluetooth Low Energy) module, to have…

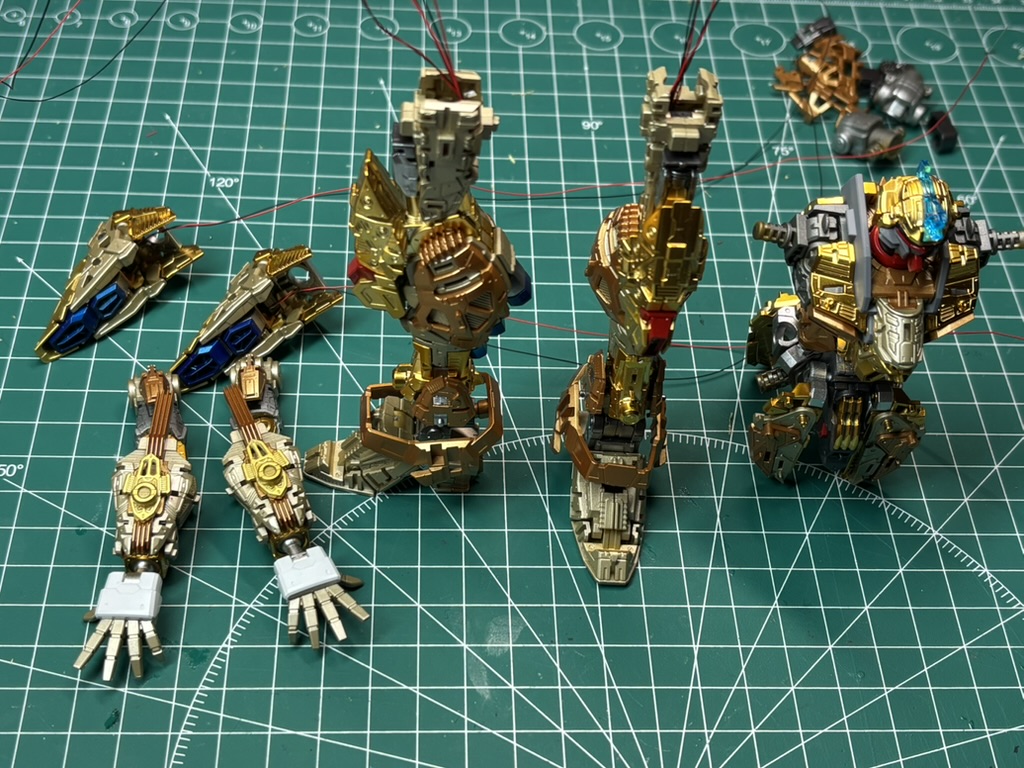
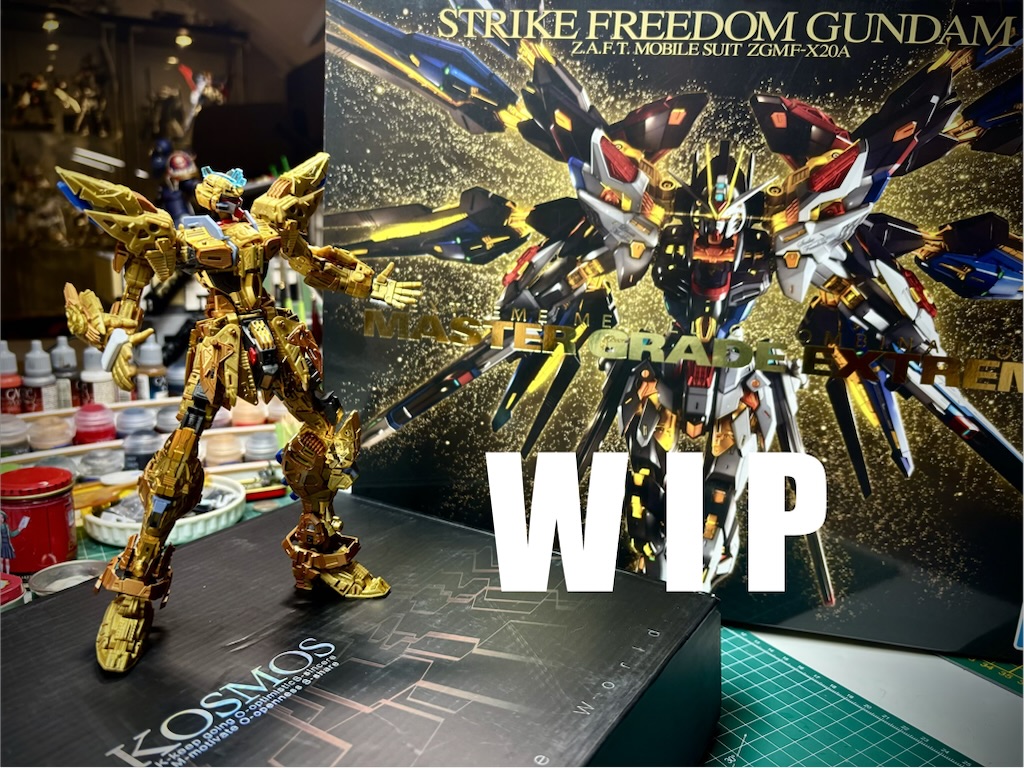
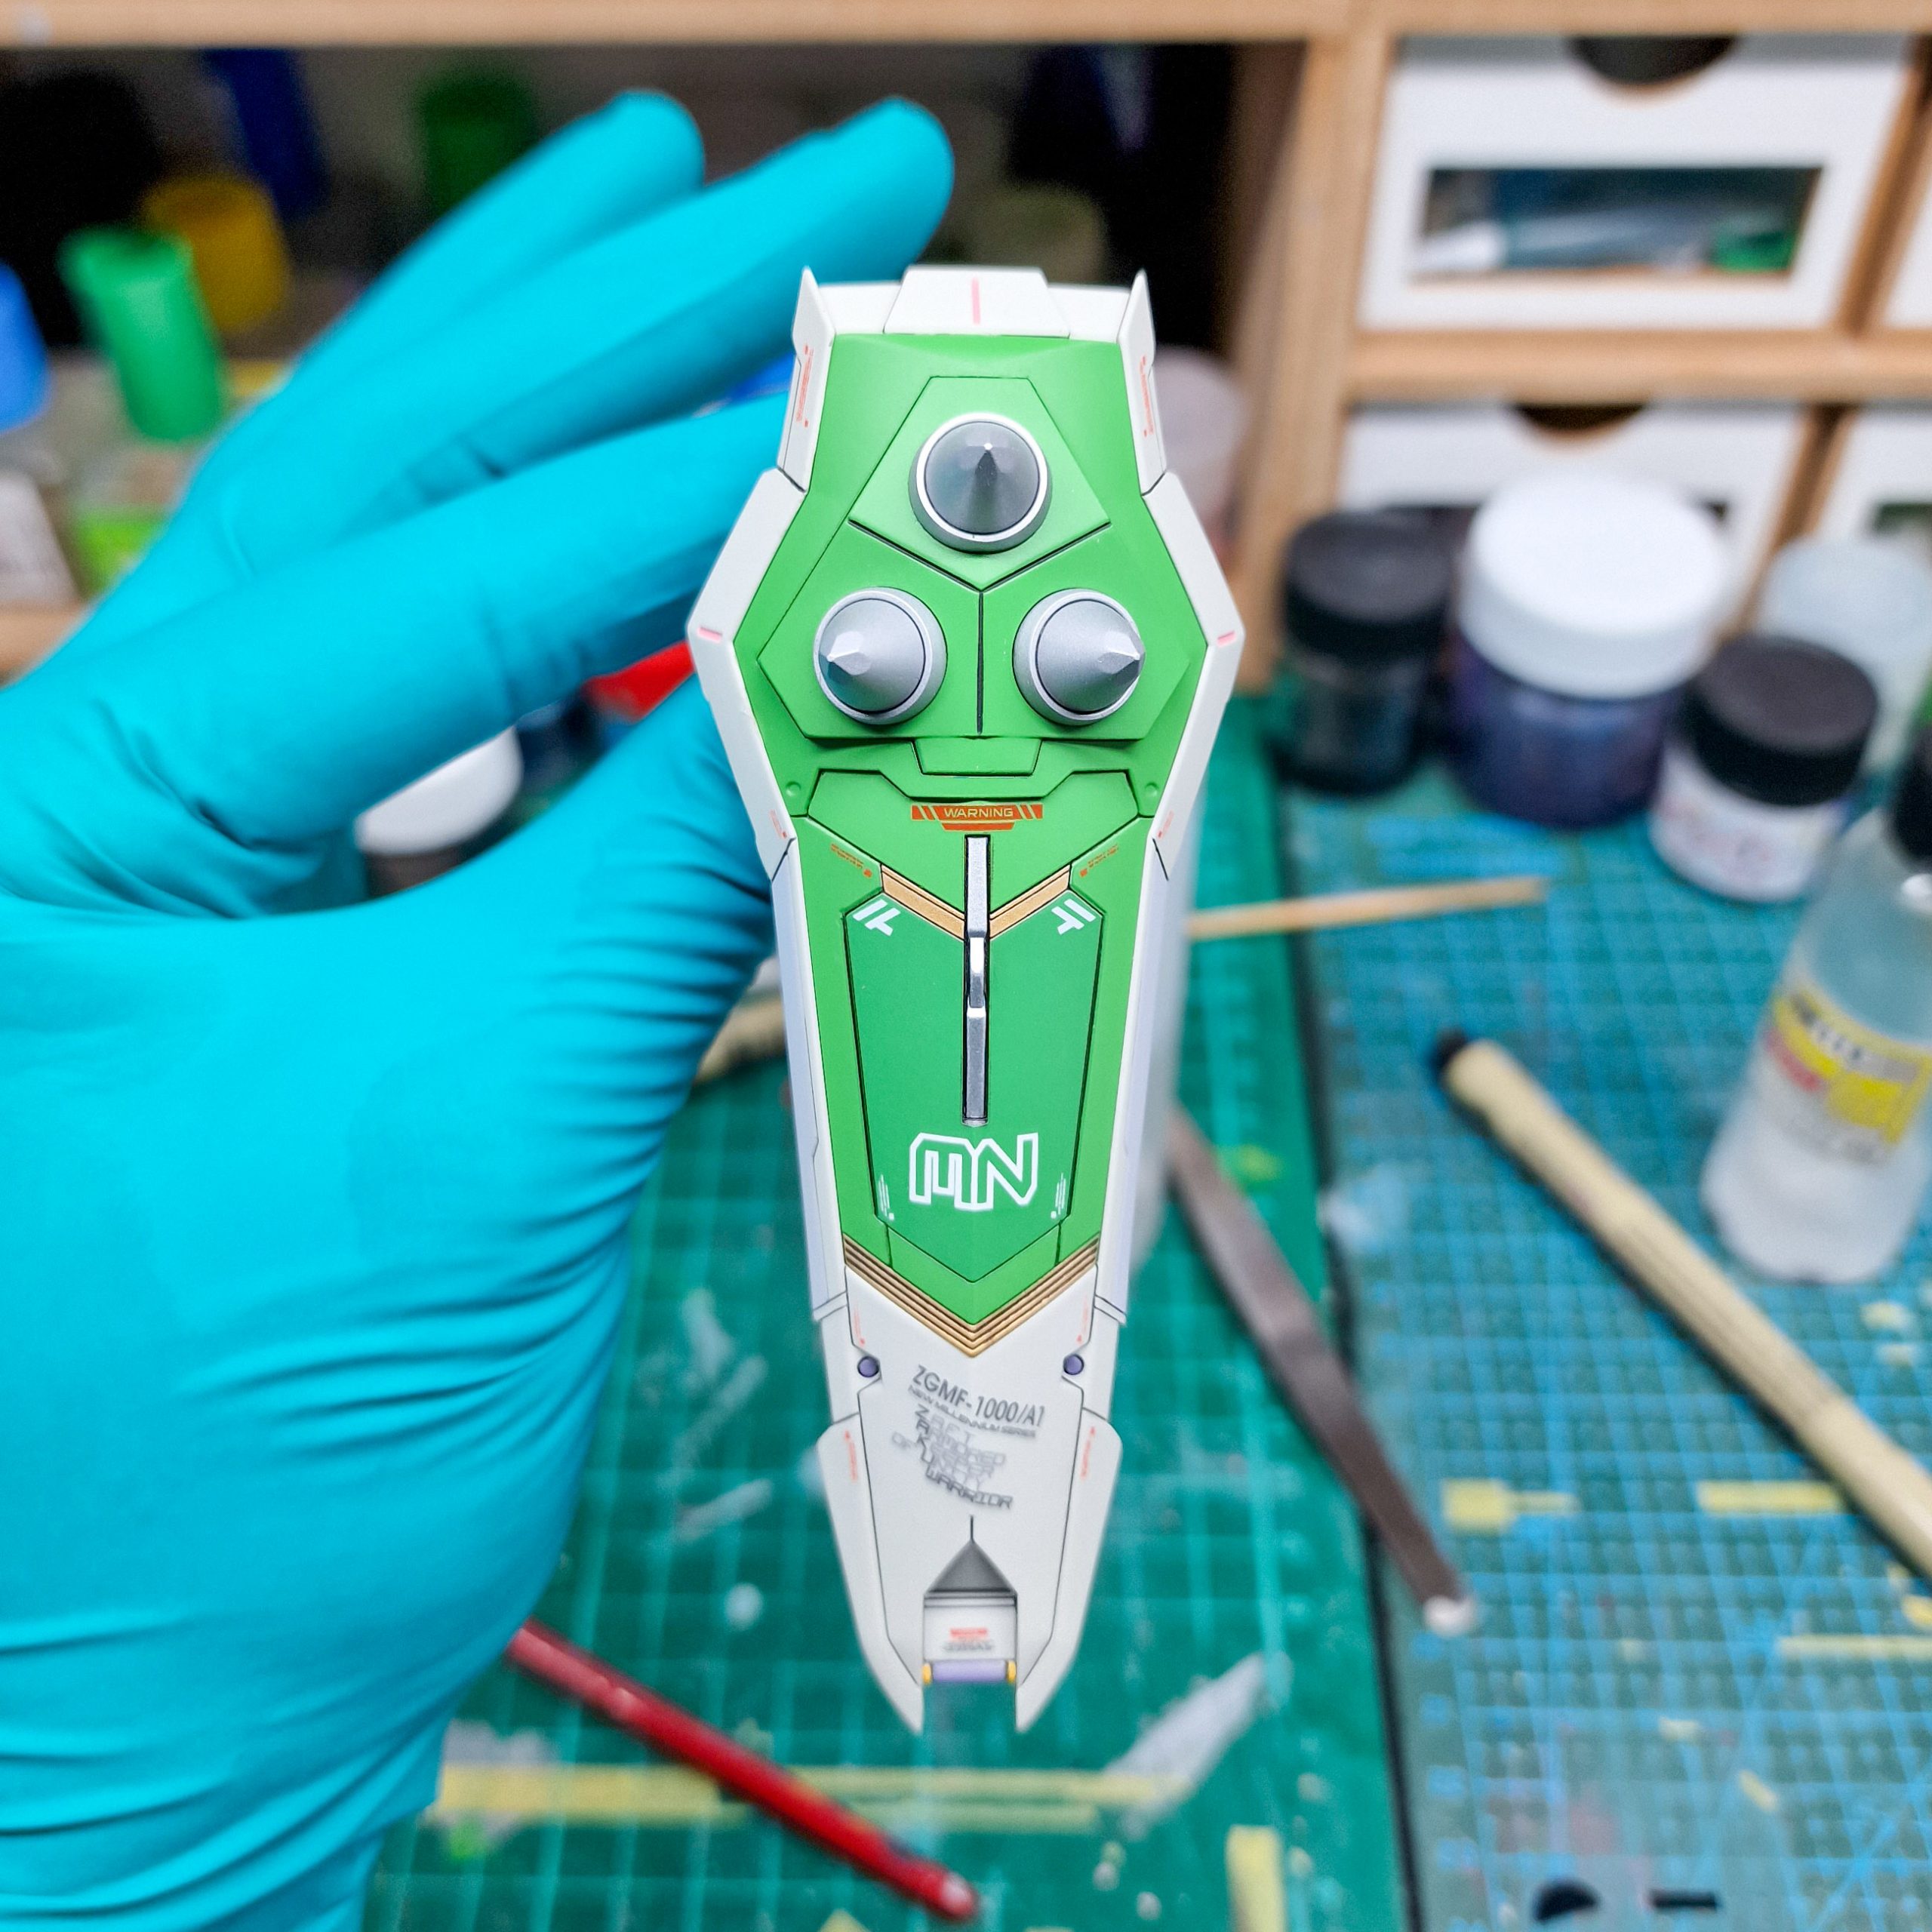
Its time to start new project. Yes – it is MGEX – Master Grade Extreme Strike Freedom Gundam…. There are…
Chest piece and the cockpit are very interesting here. Whole chest piece is build around pilot seat with high attention…
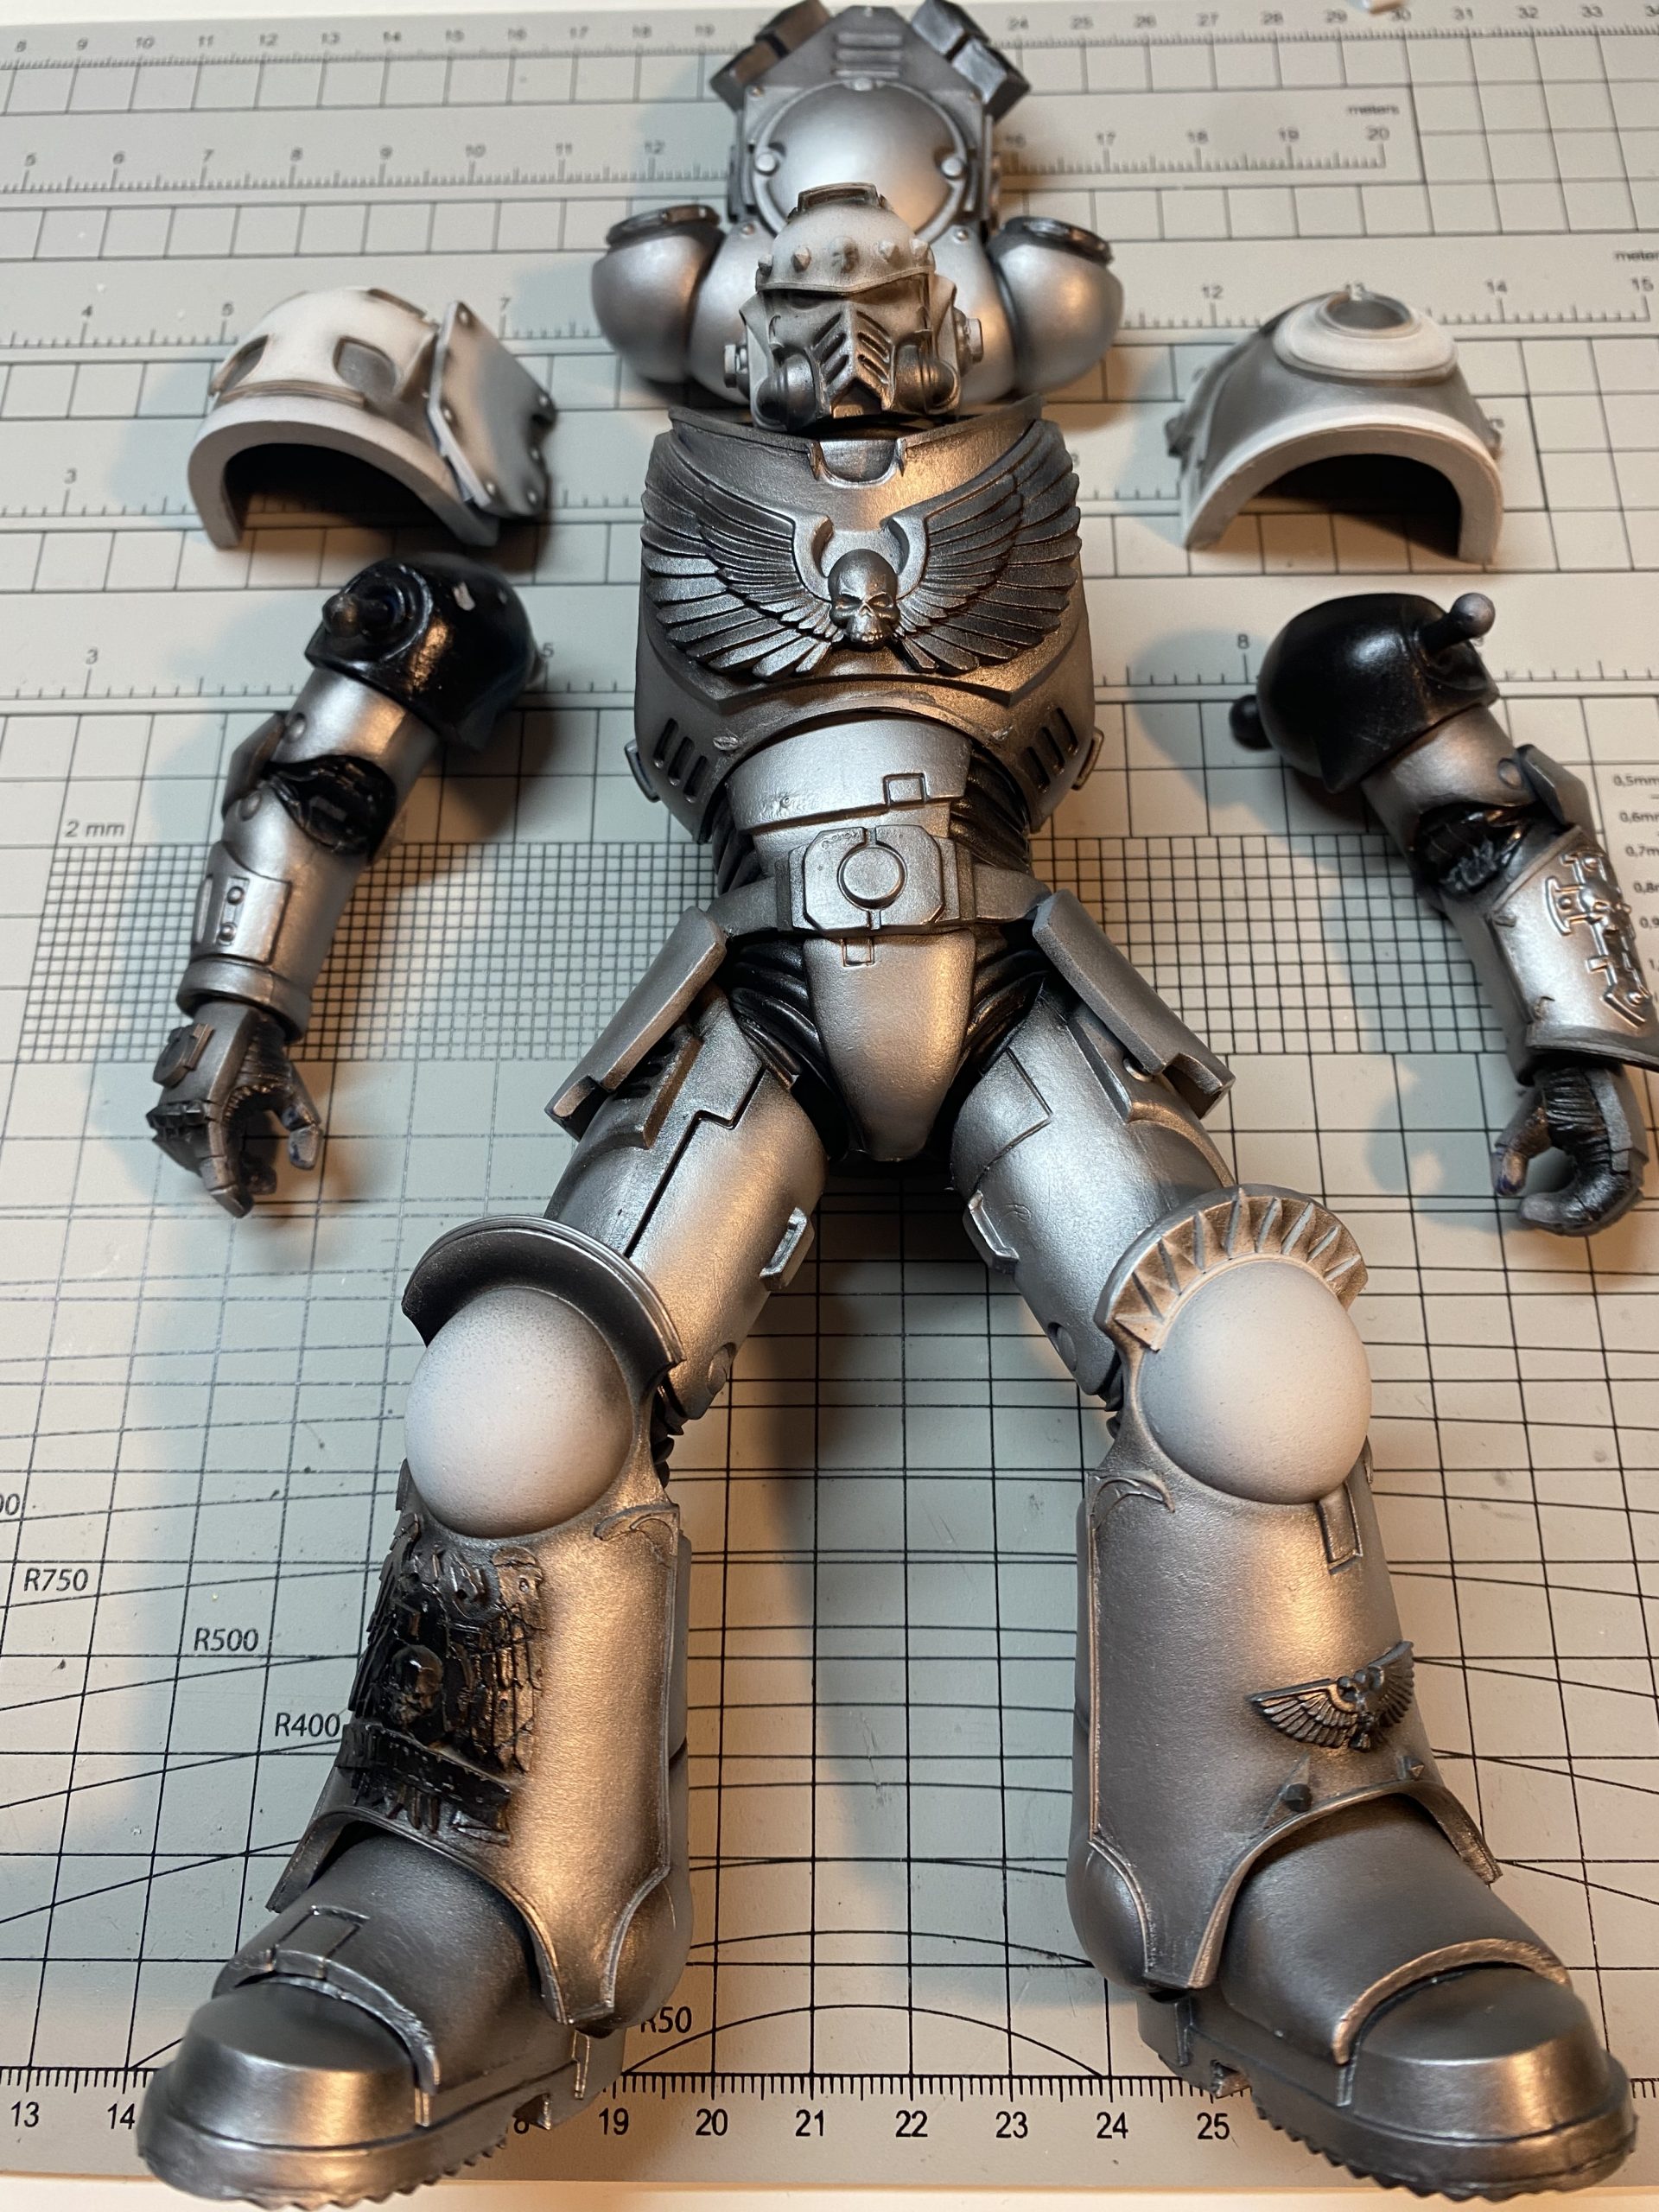
Getting up with them legs. I aways strat with the legs first. I like building my Mecha from bottom…
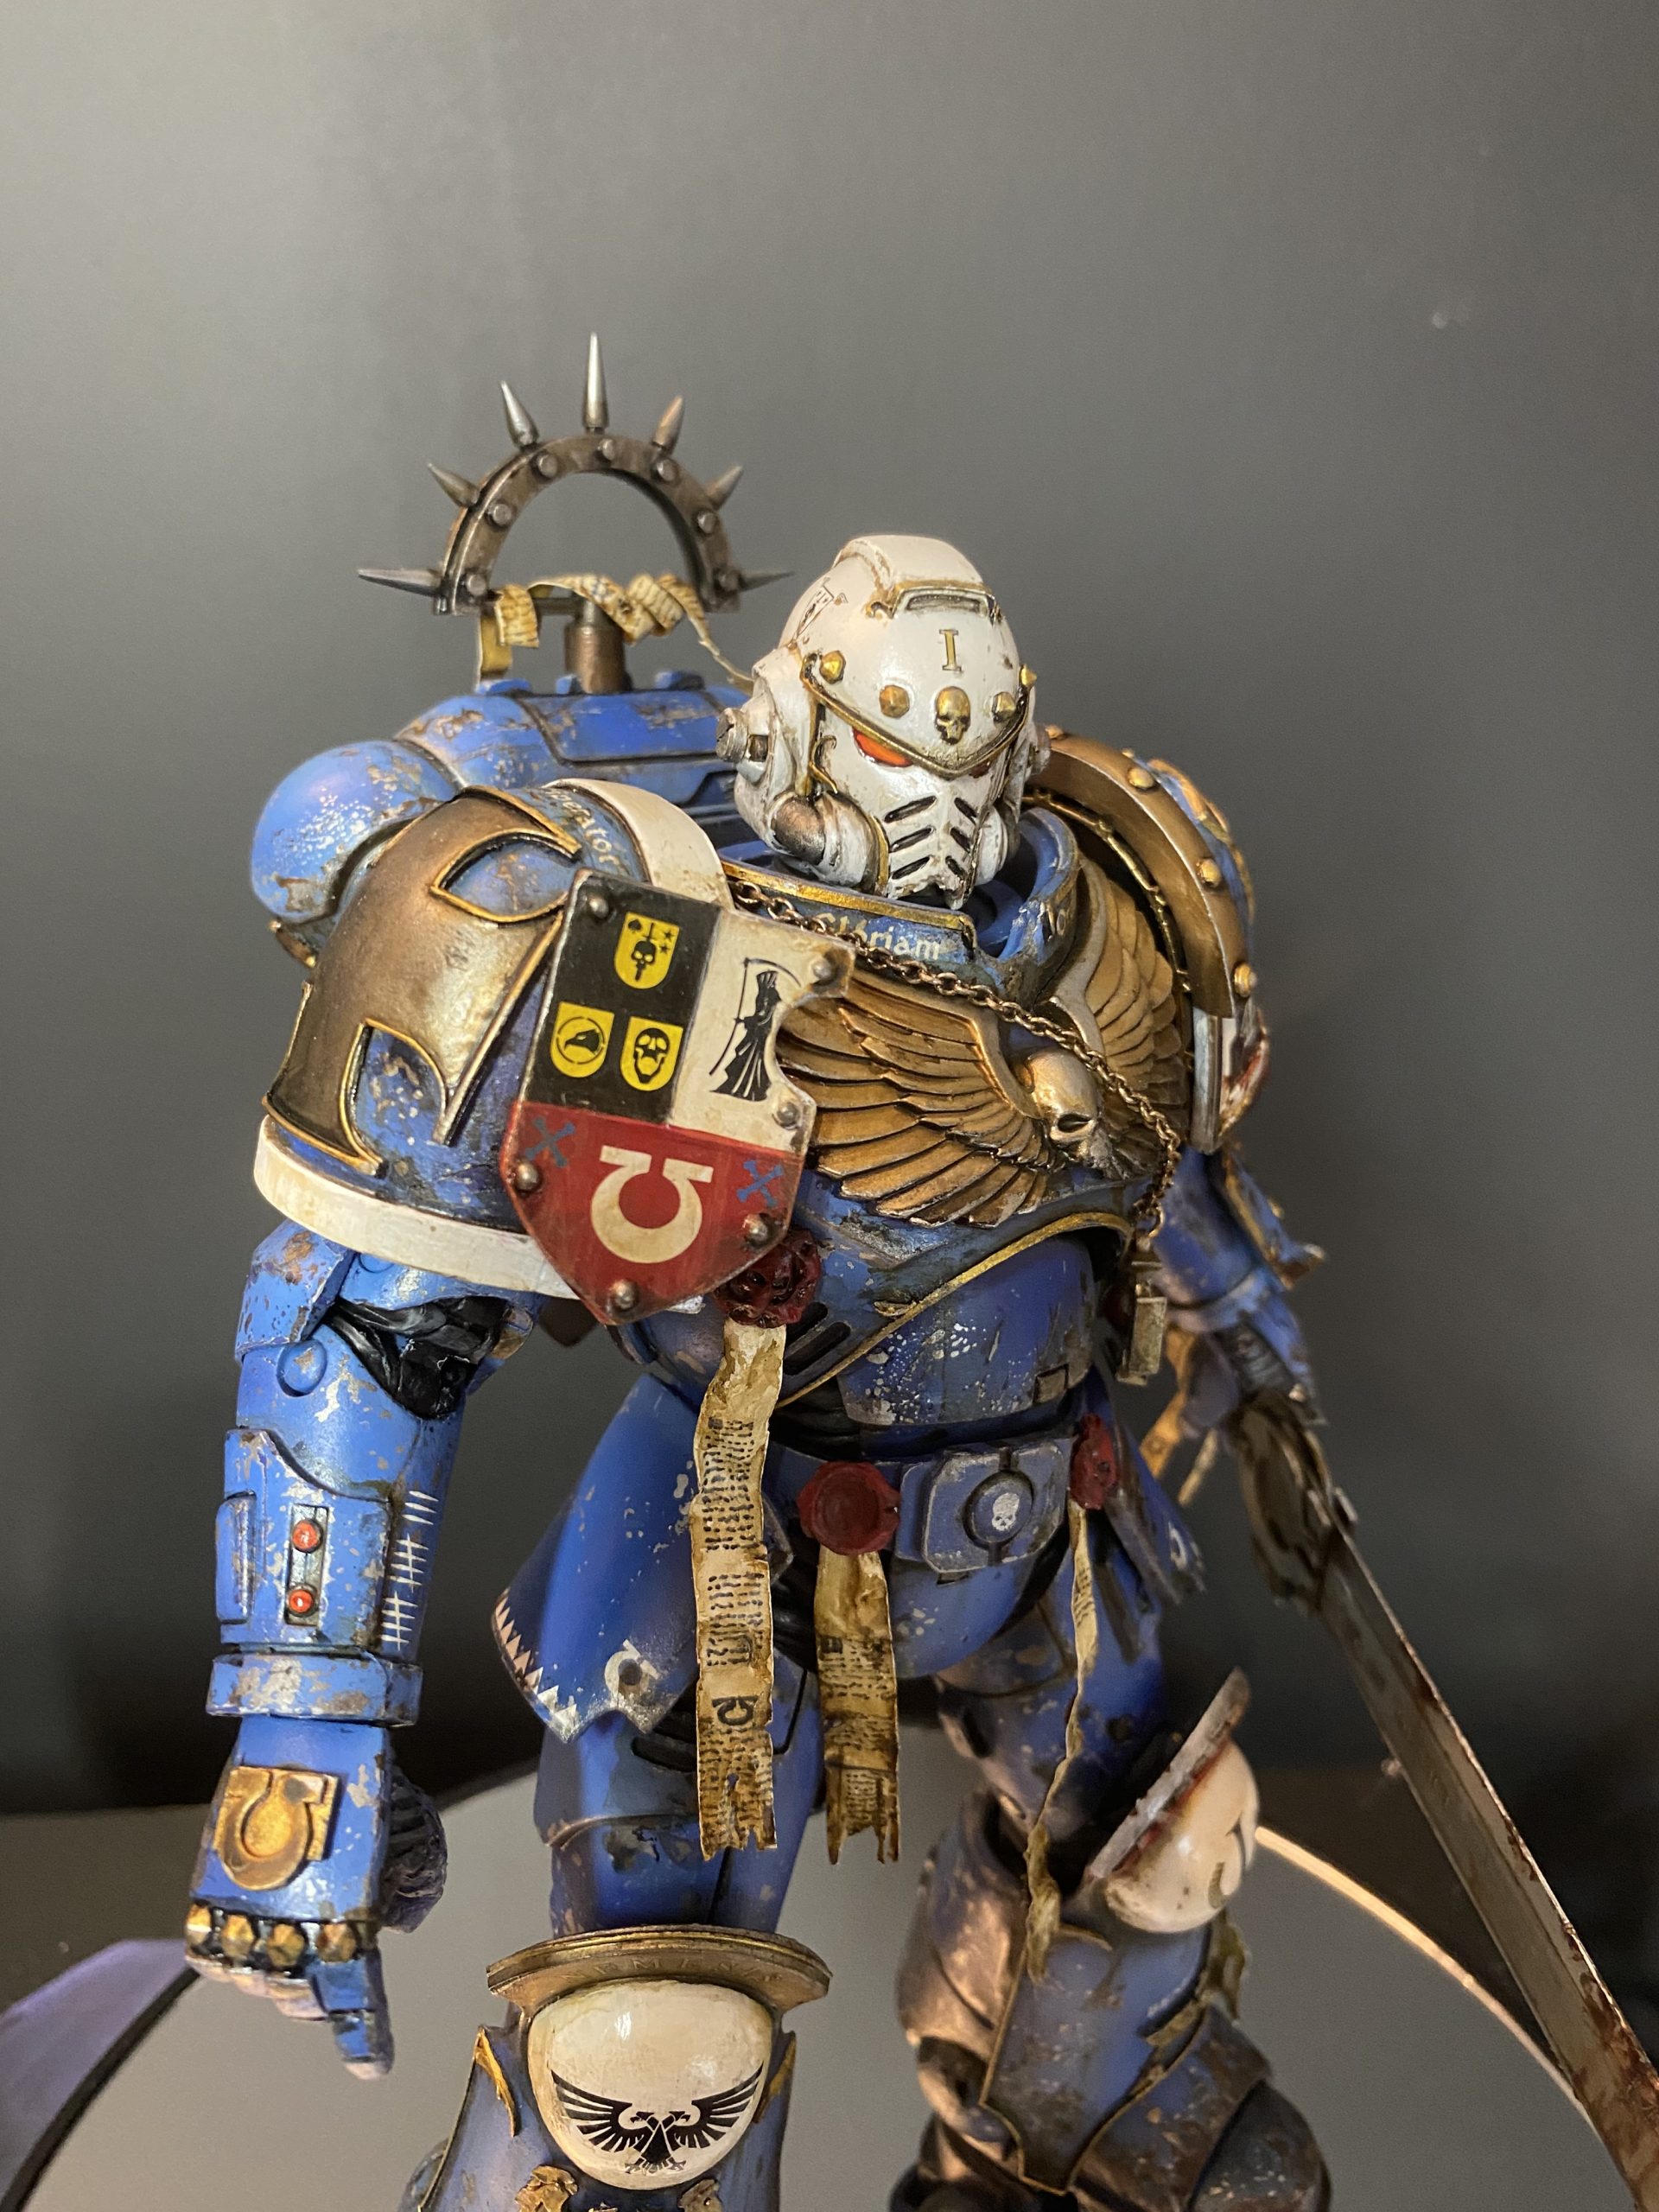
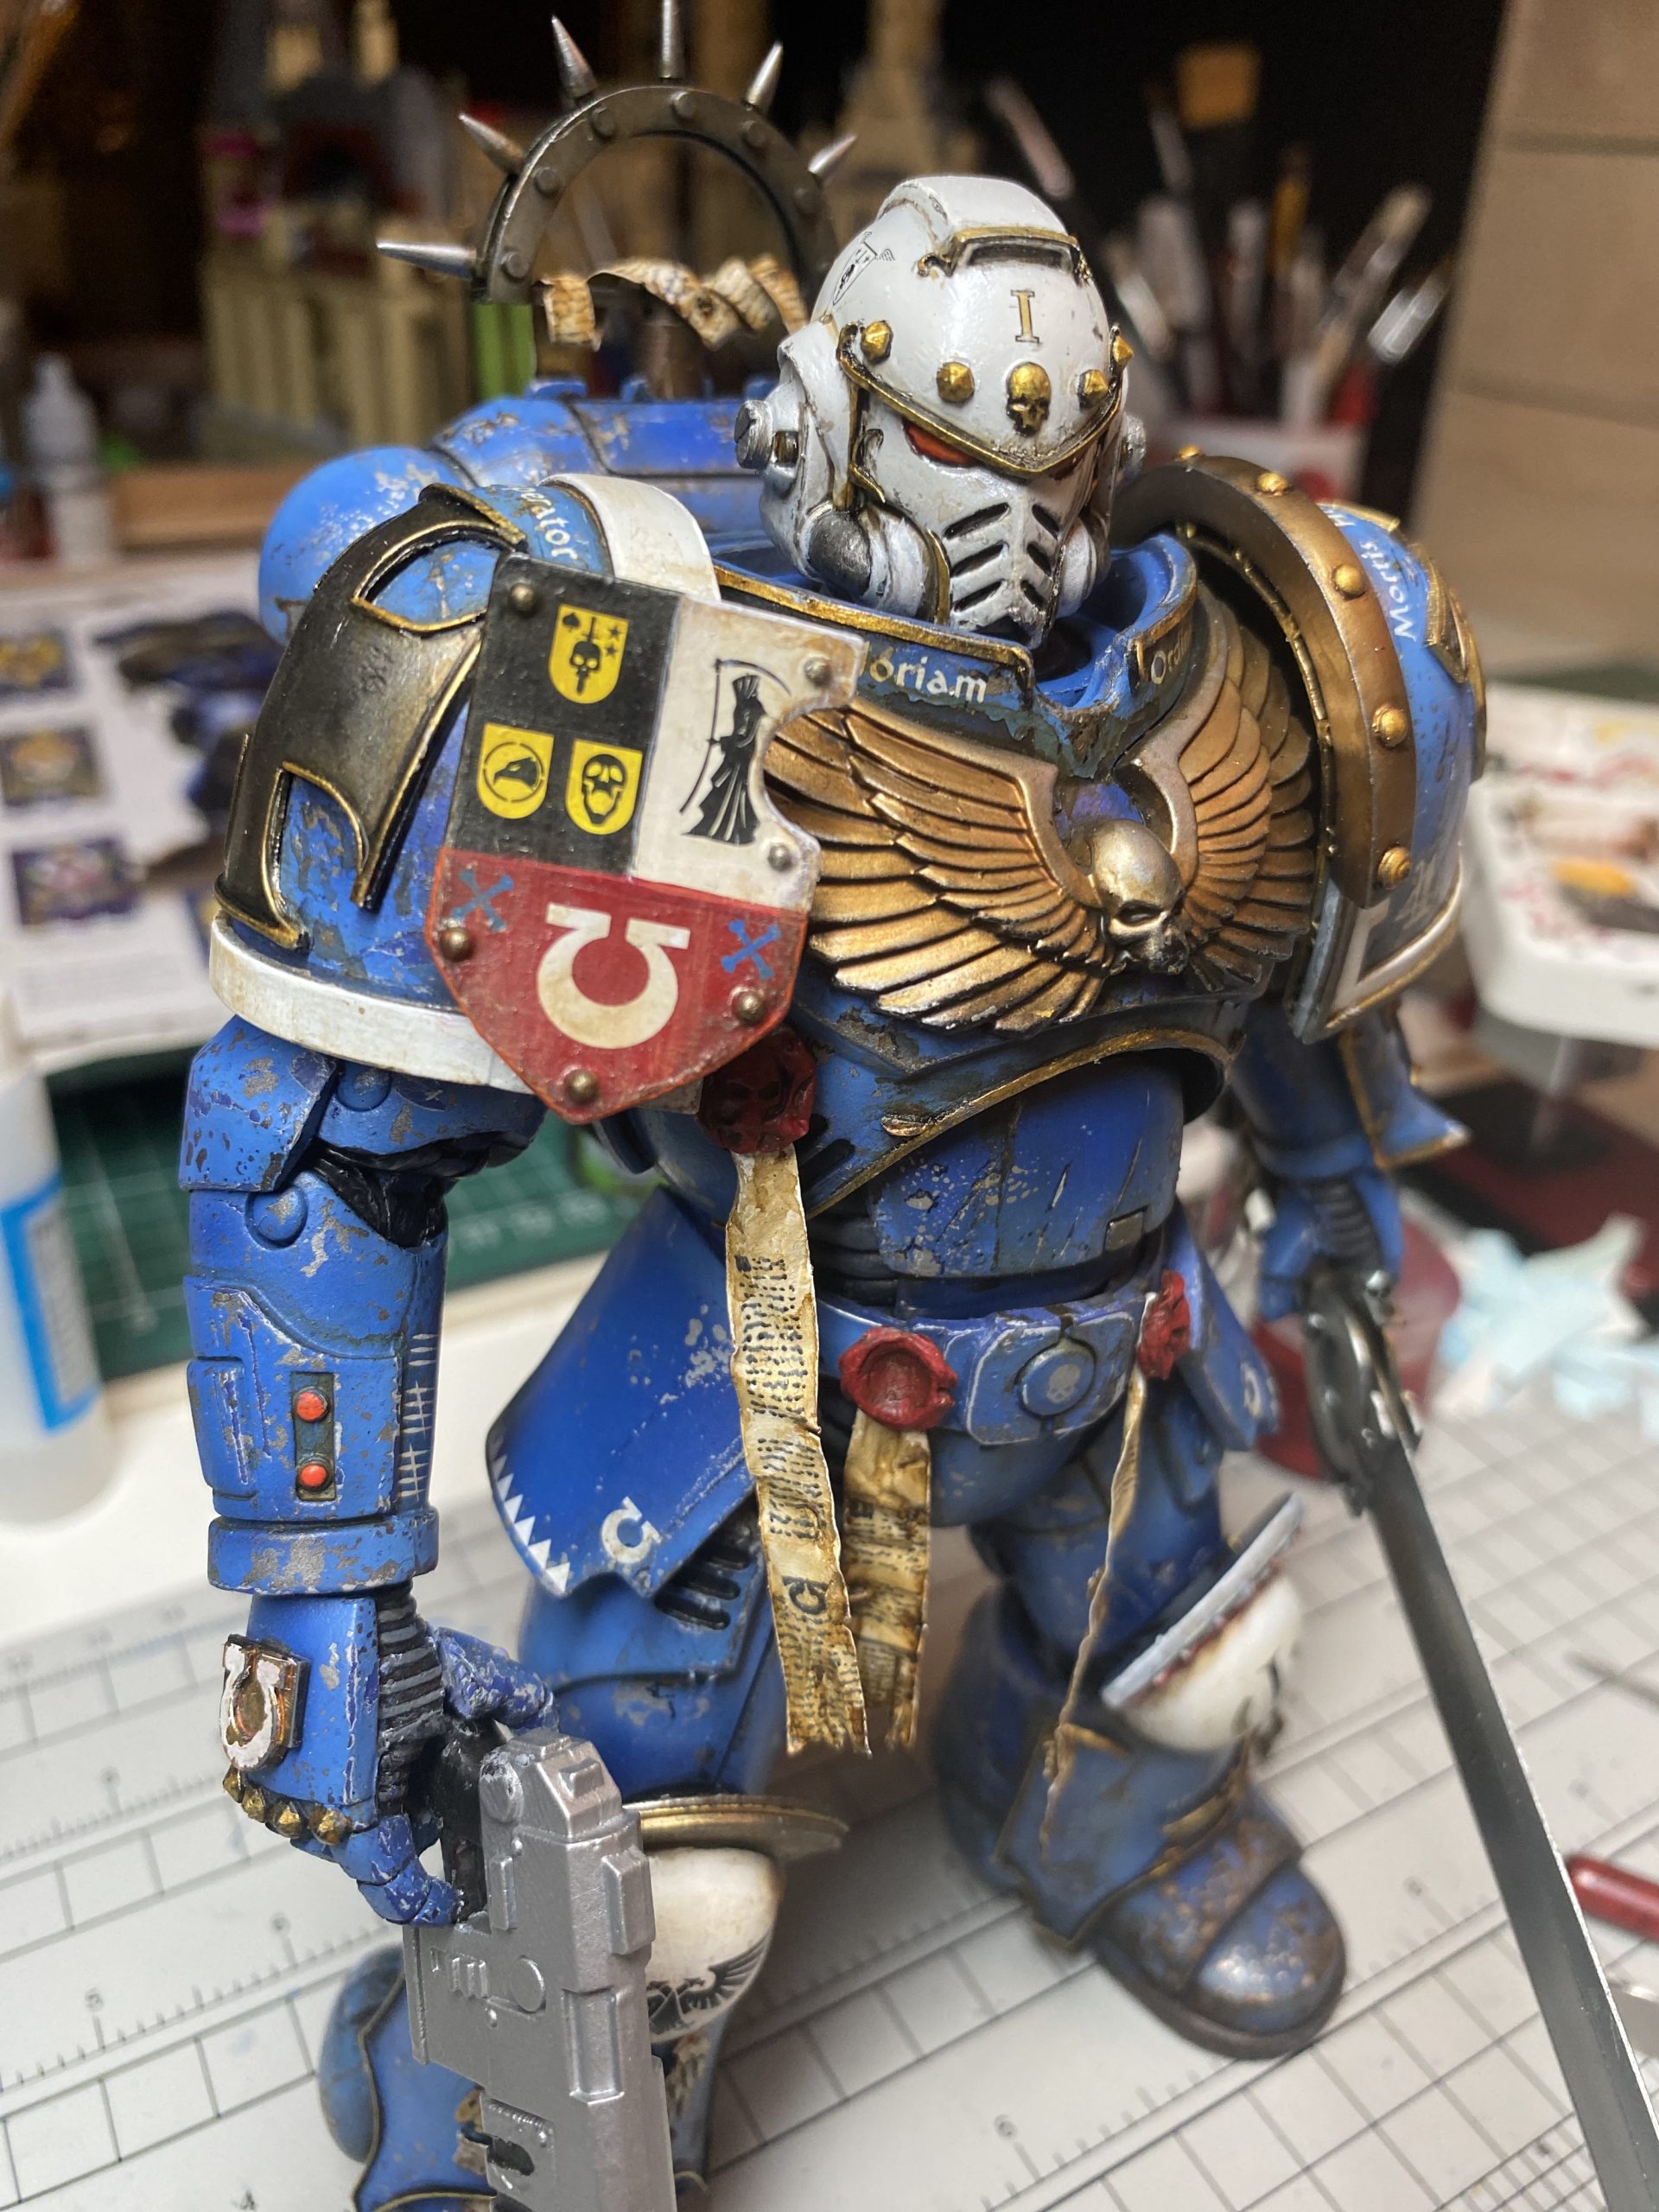
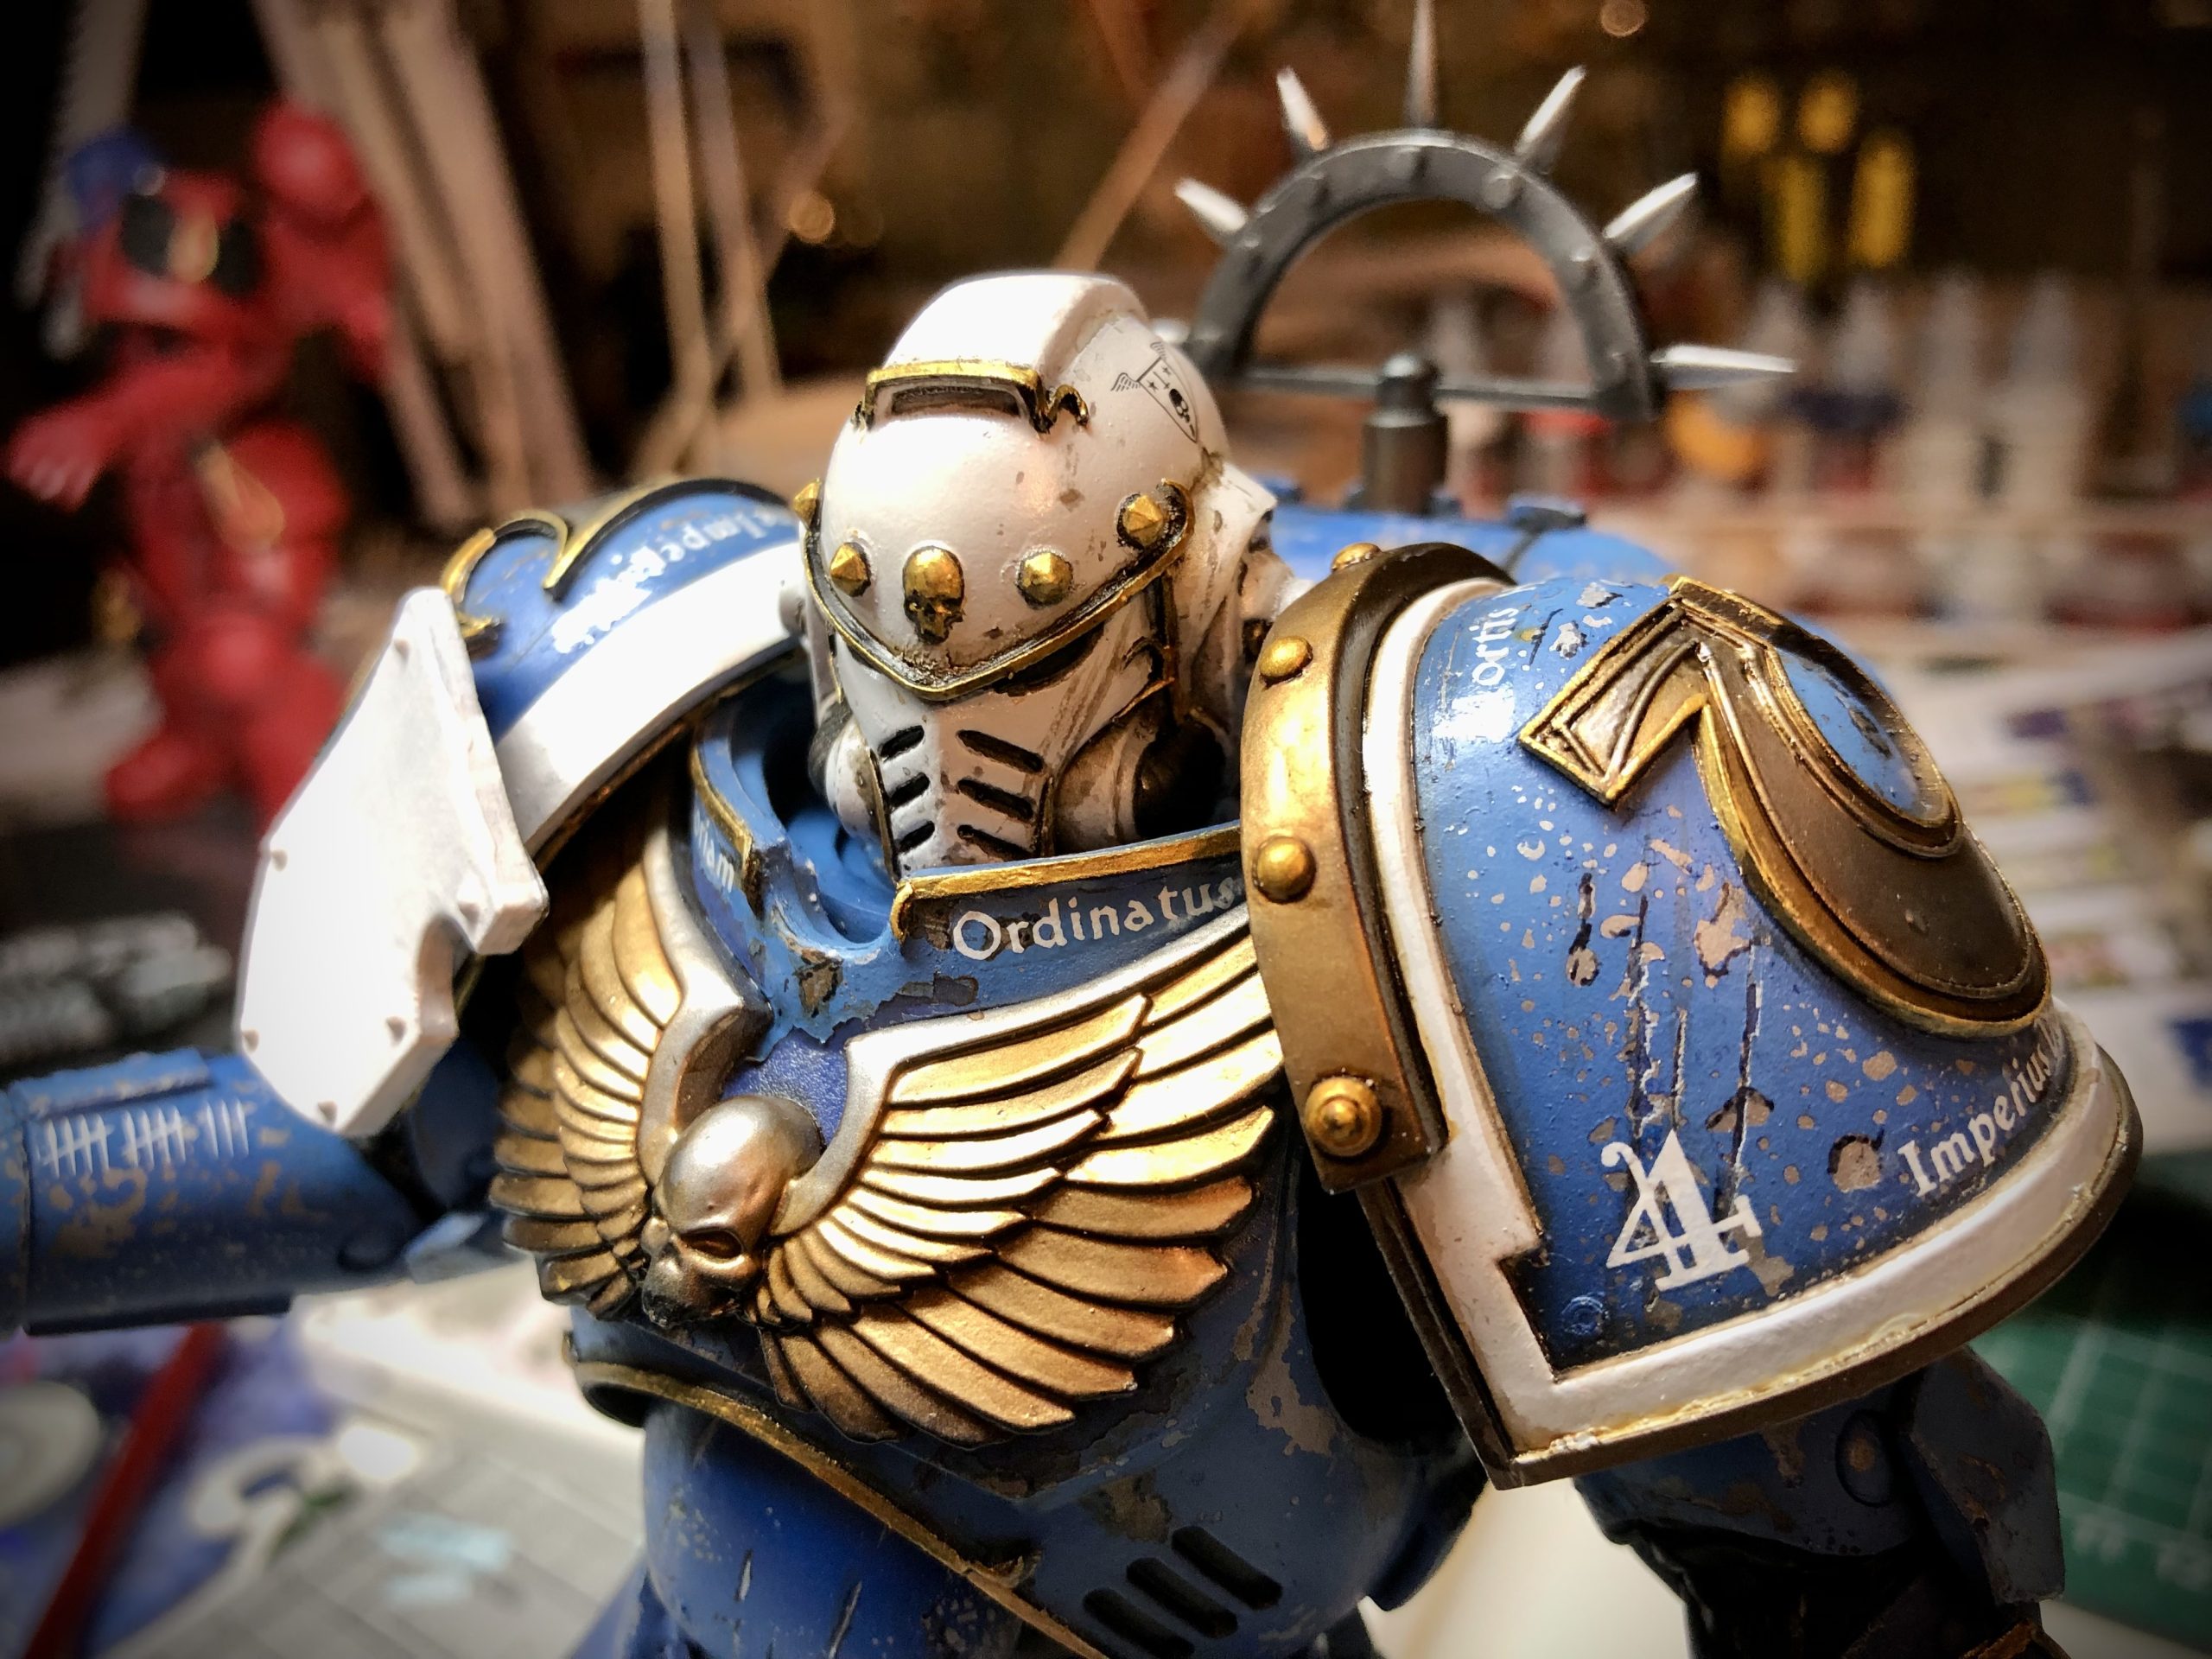
Crux Terminatus with a chain and some additional battle scars/dirt applied (the sword was beaten as well) – now I…
This has been in a hiatus for quite a bit. This time time has come for something different then usual…
As final touches for my project I decided to approach hand-made purity seals. Personally I don’t like that seal and…
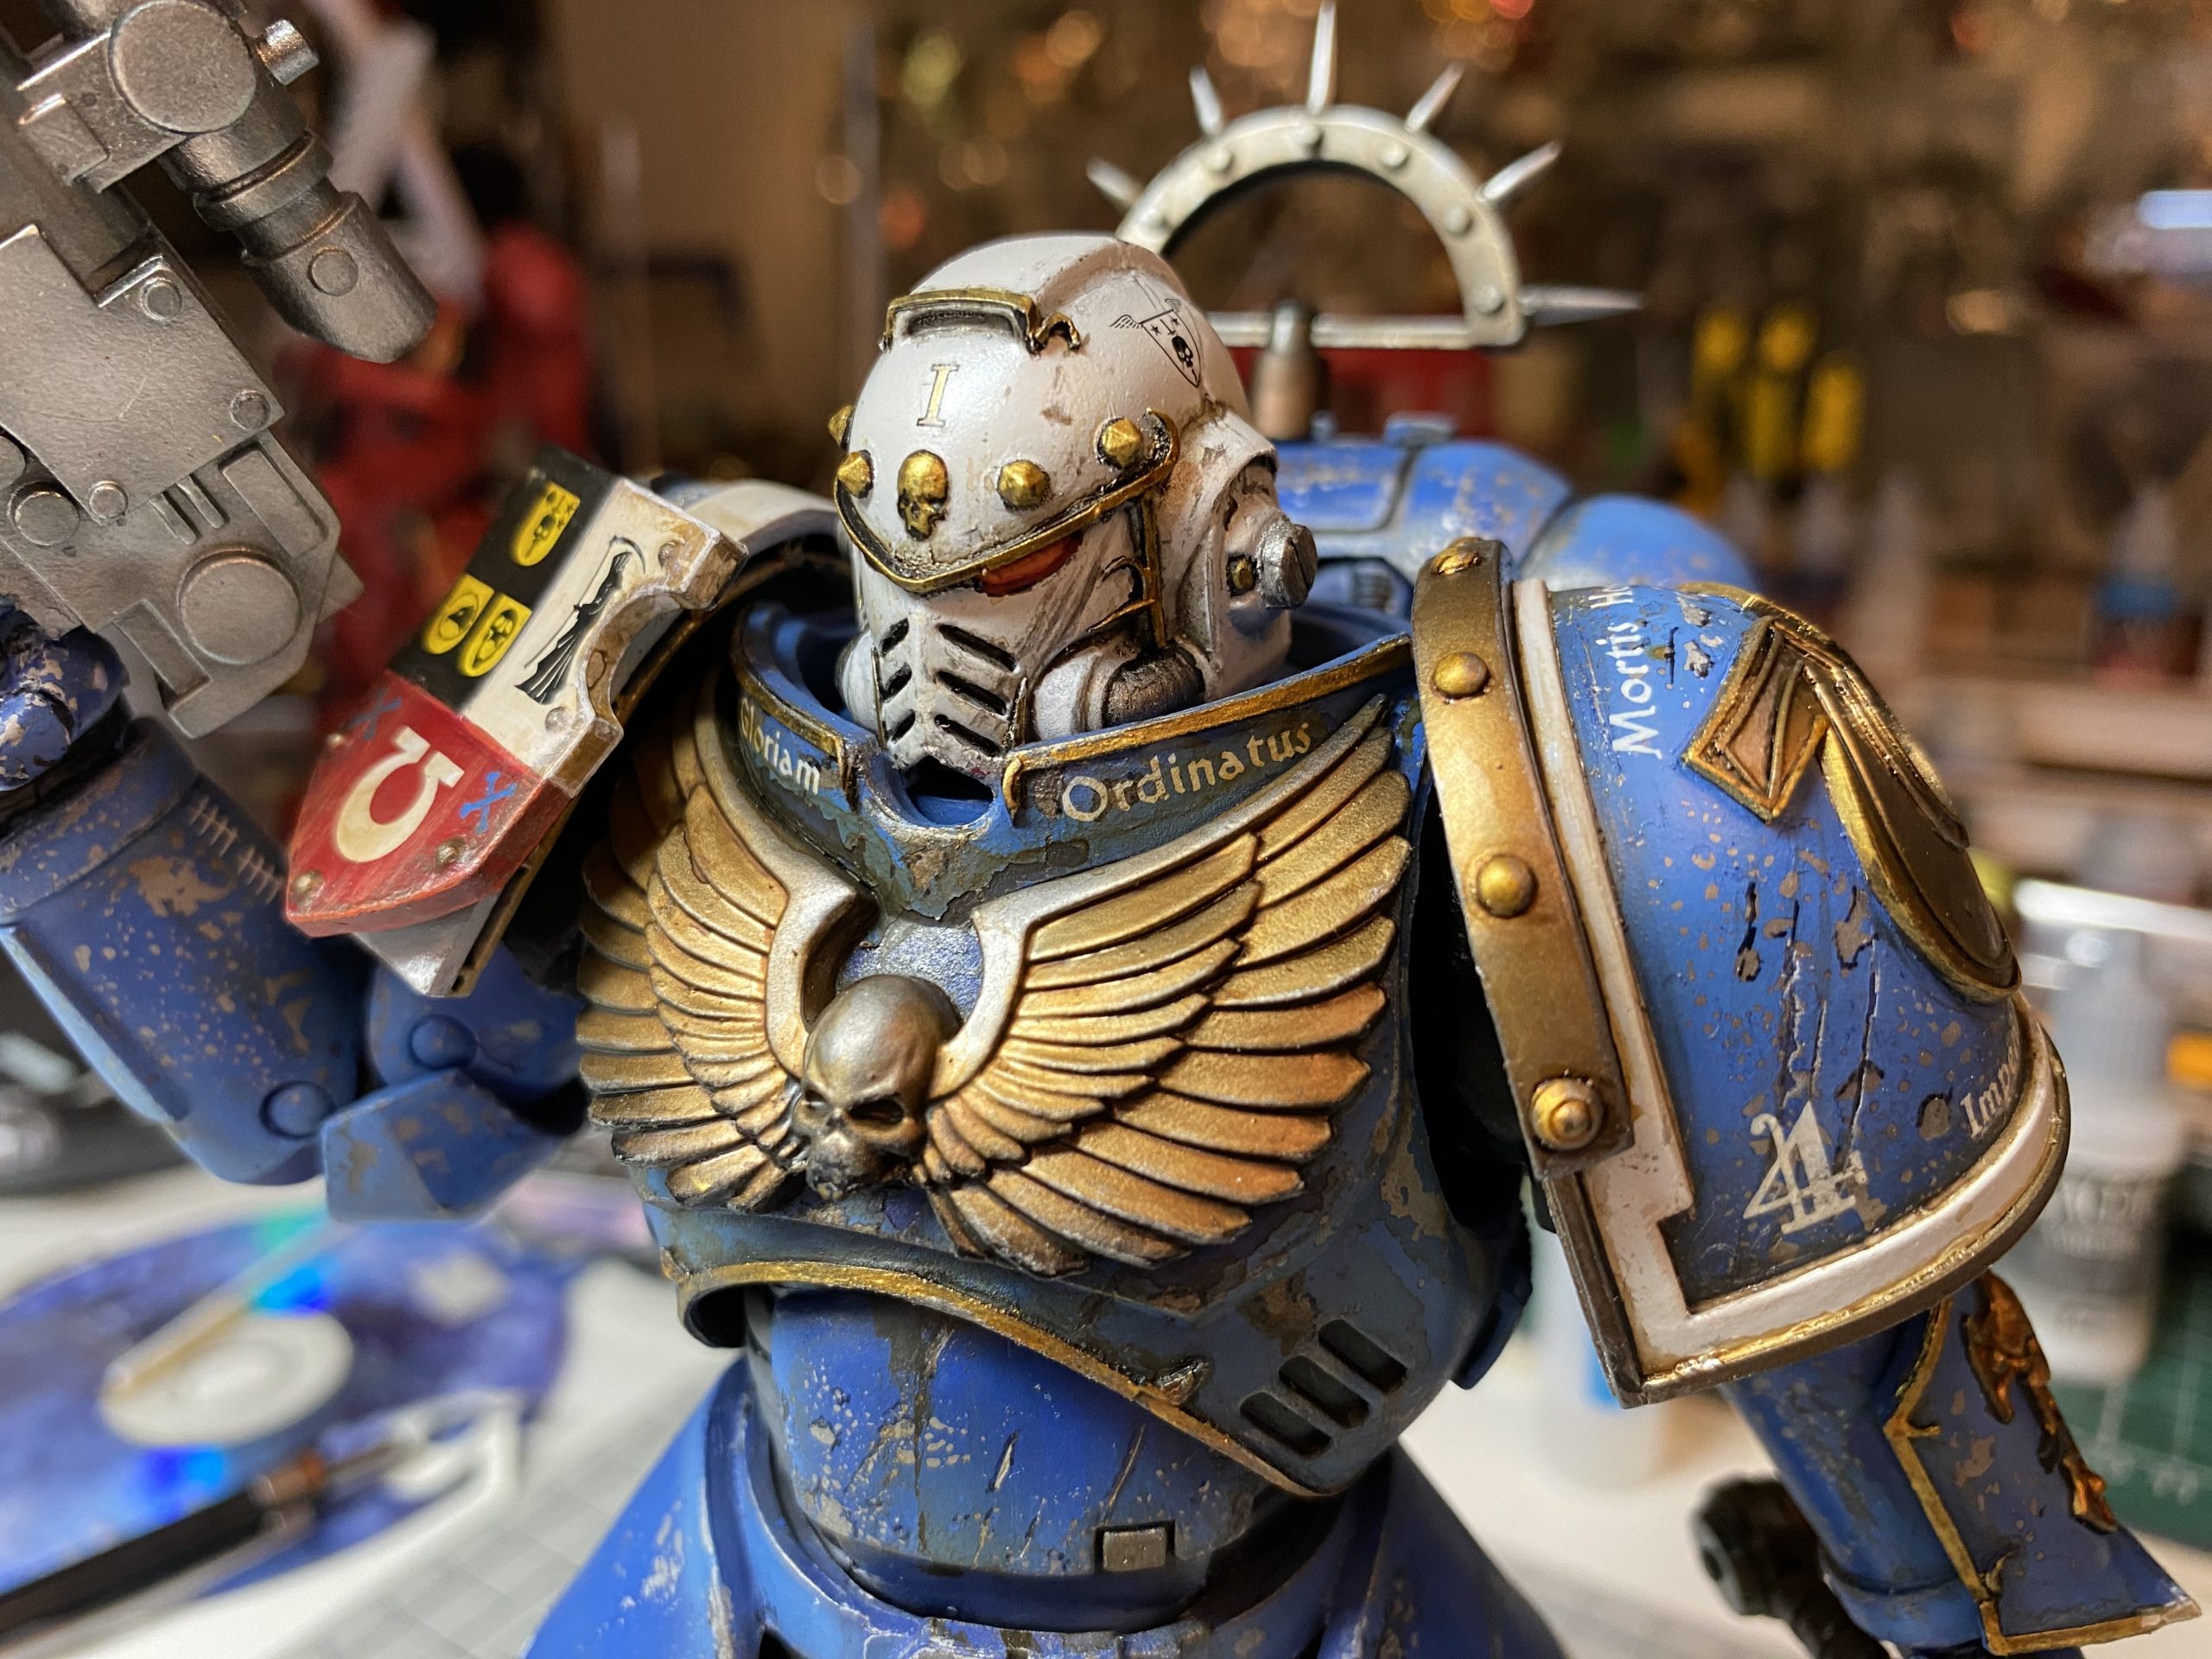
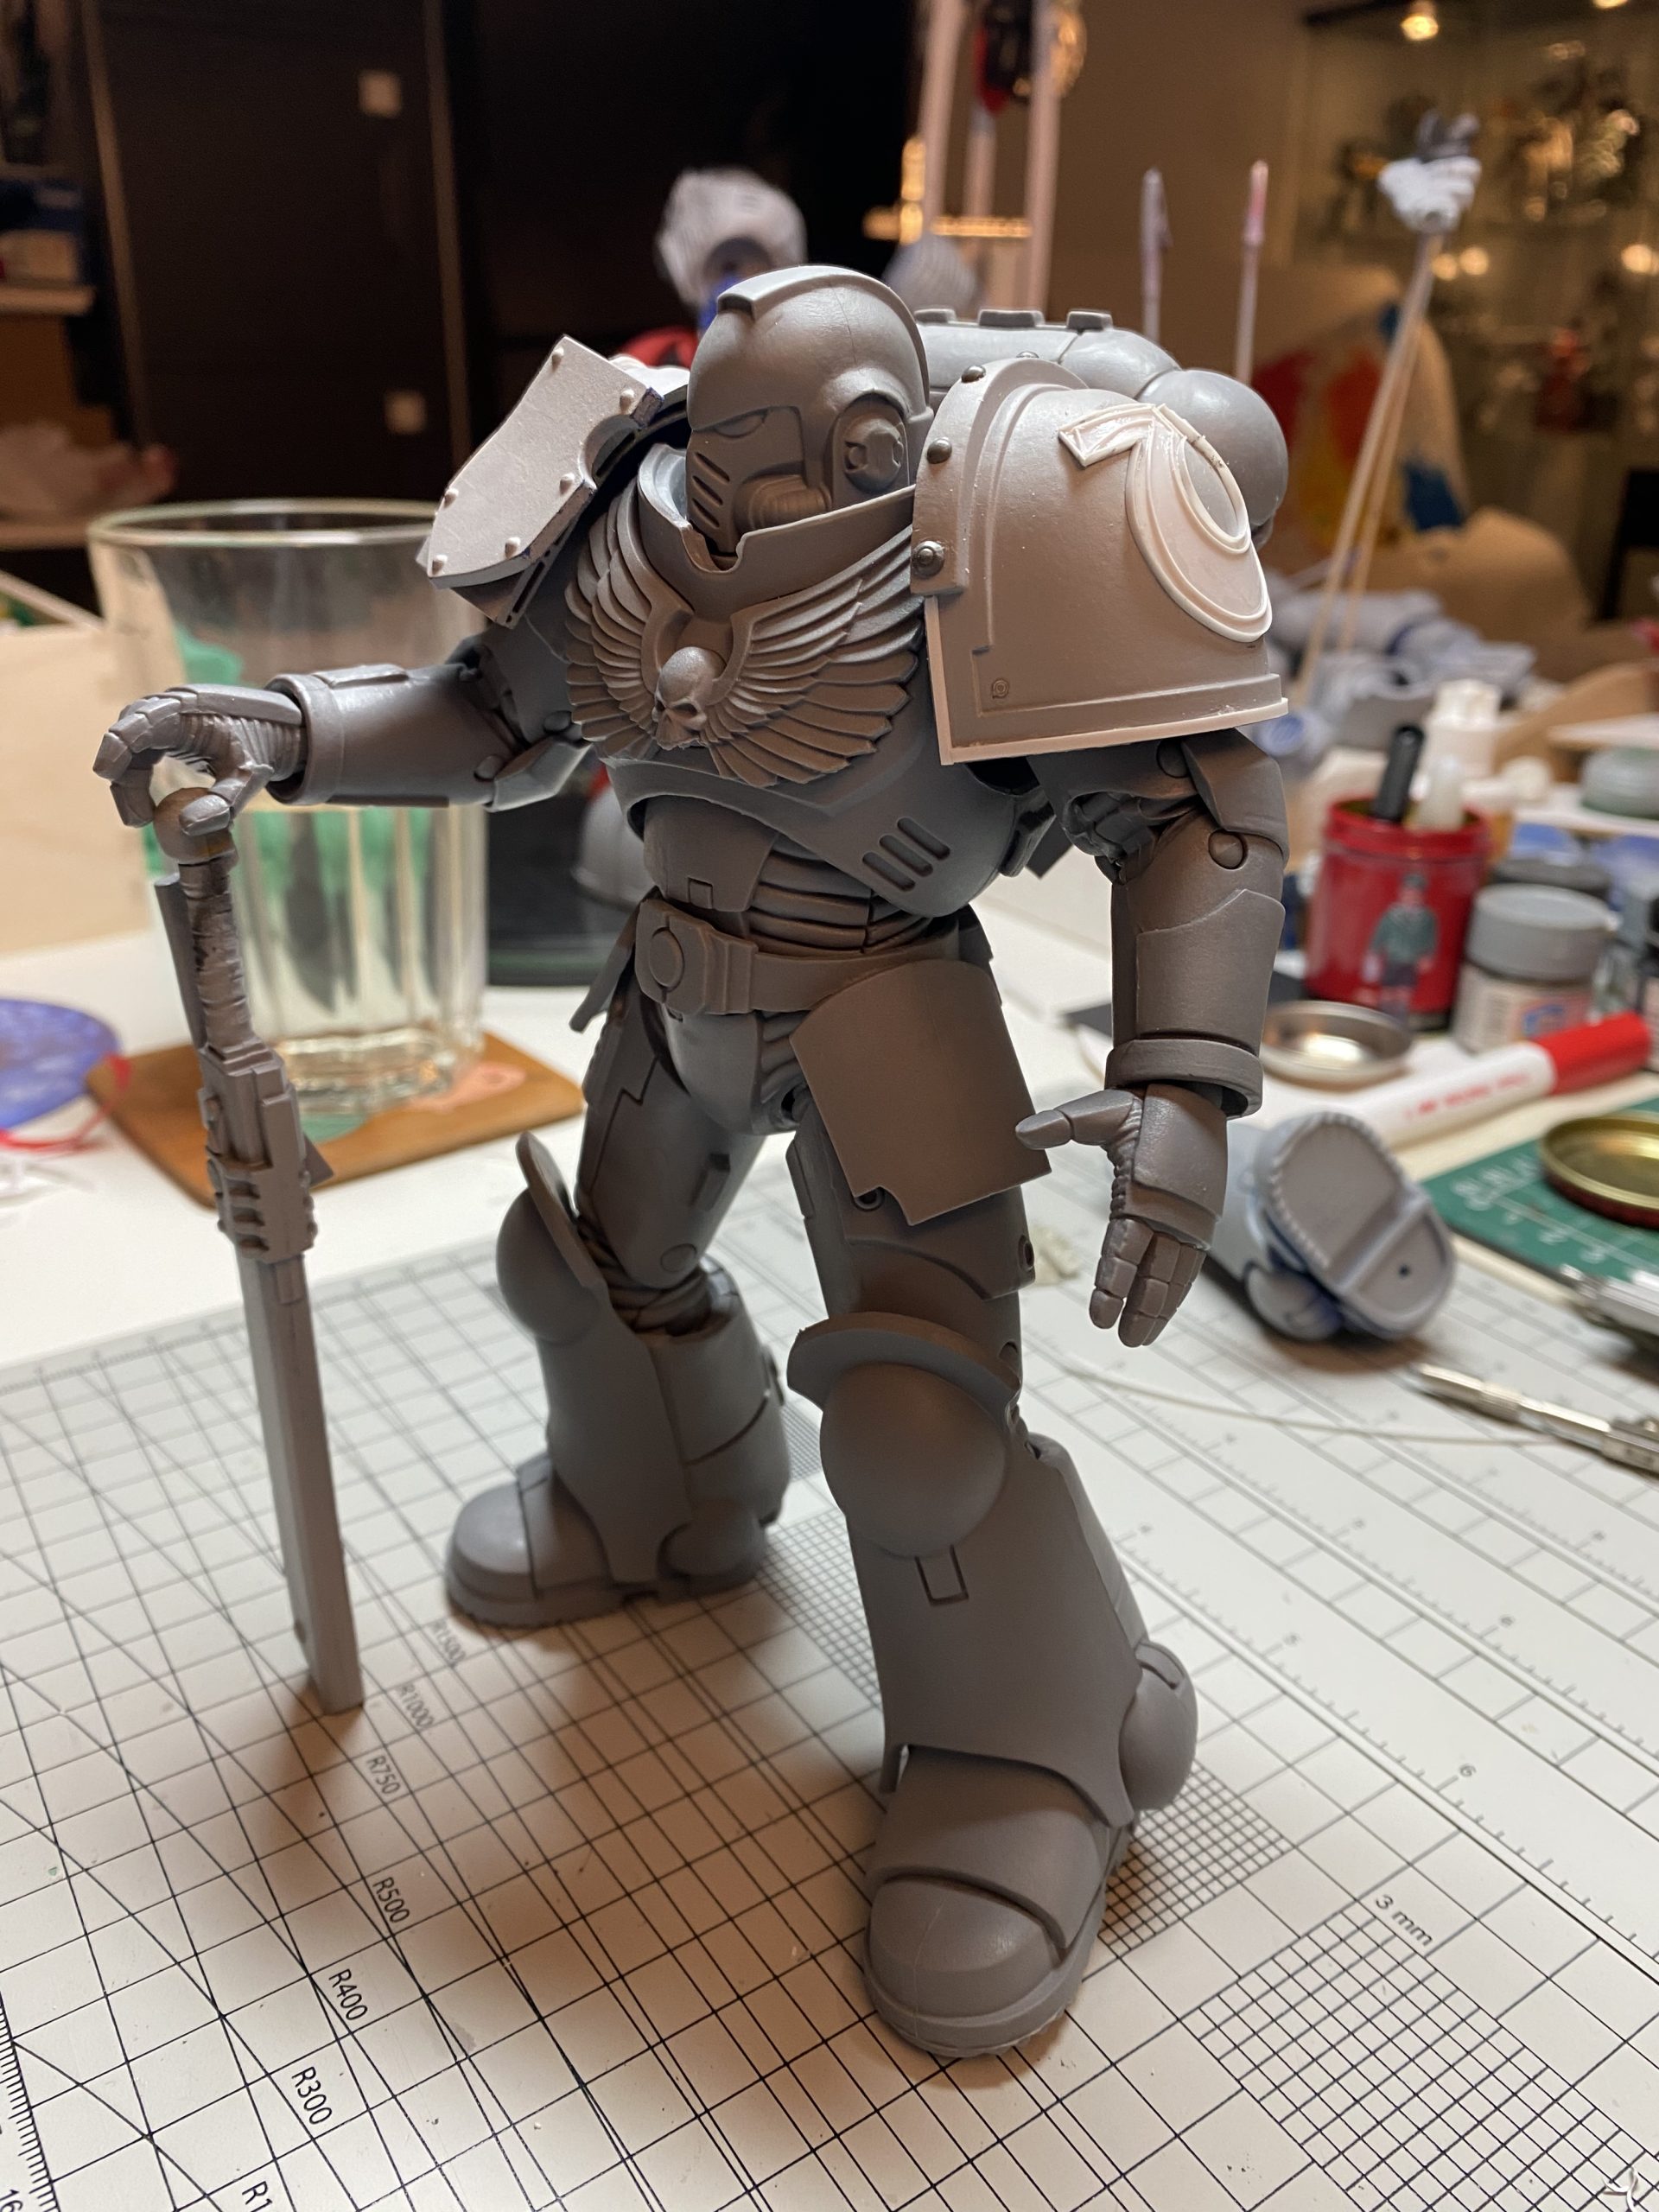
My take of shoulder shield design finalized as some kind of campaign specific. It is hand painted with Citadel/Vallejo Game…
It was quite a time from last update – there are times in life when you need to take a…
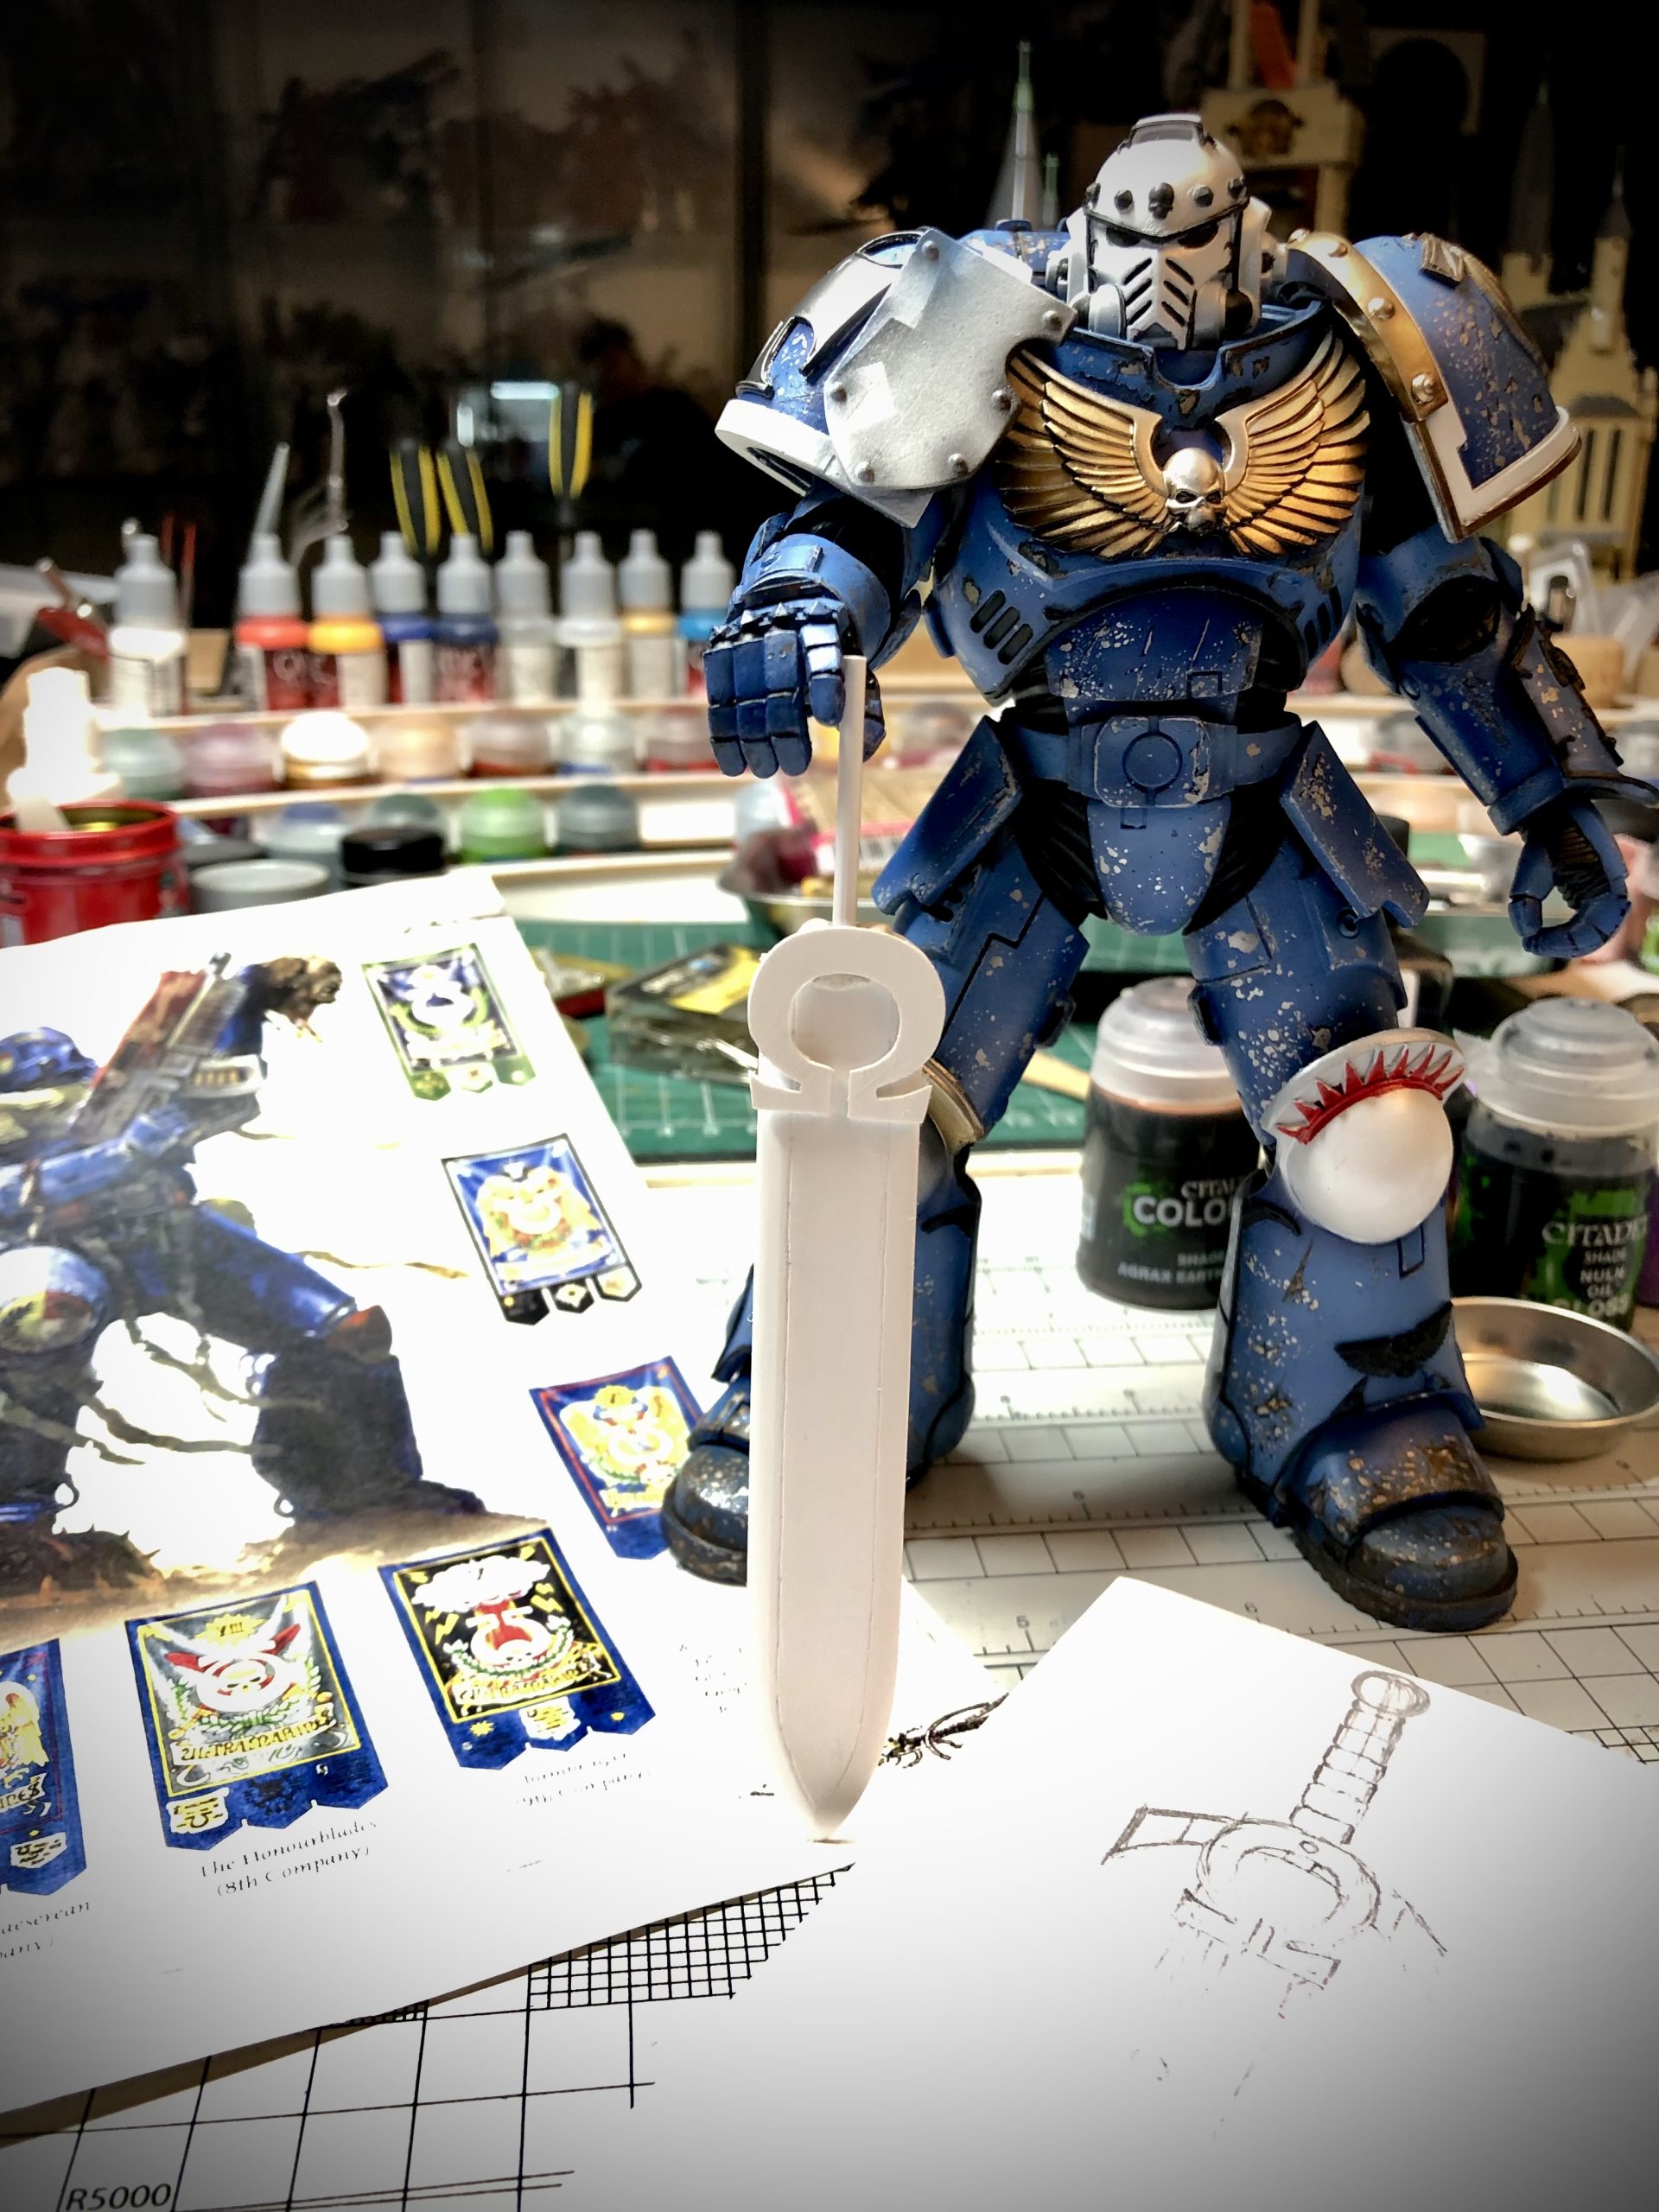
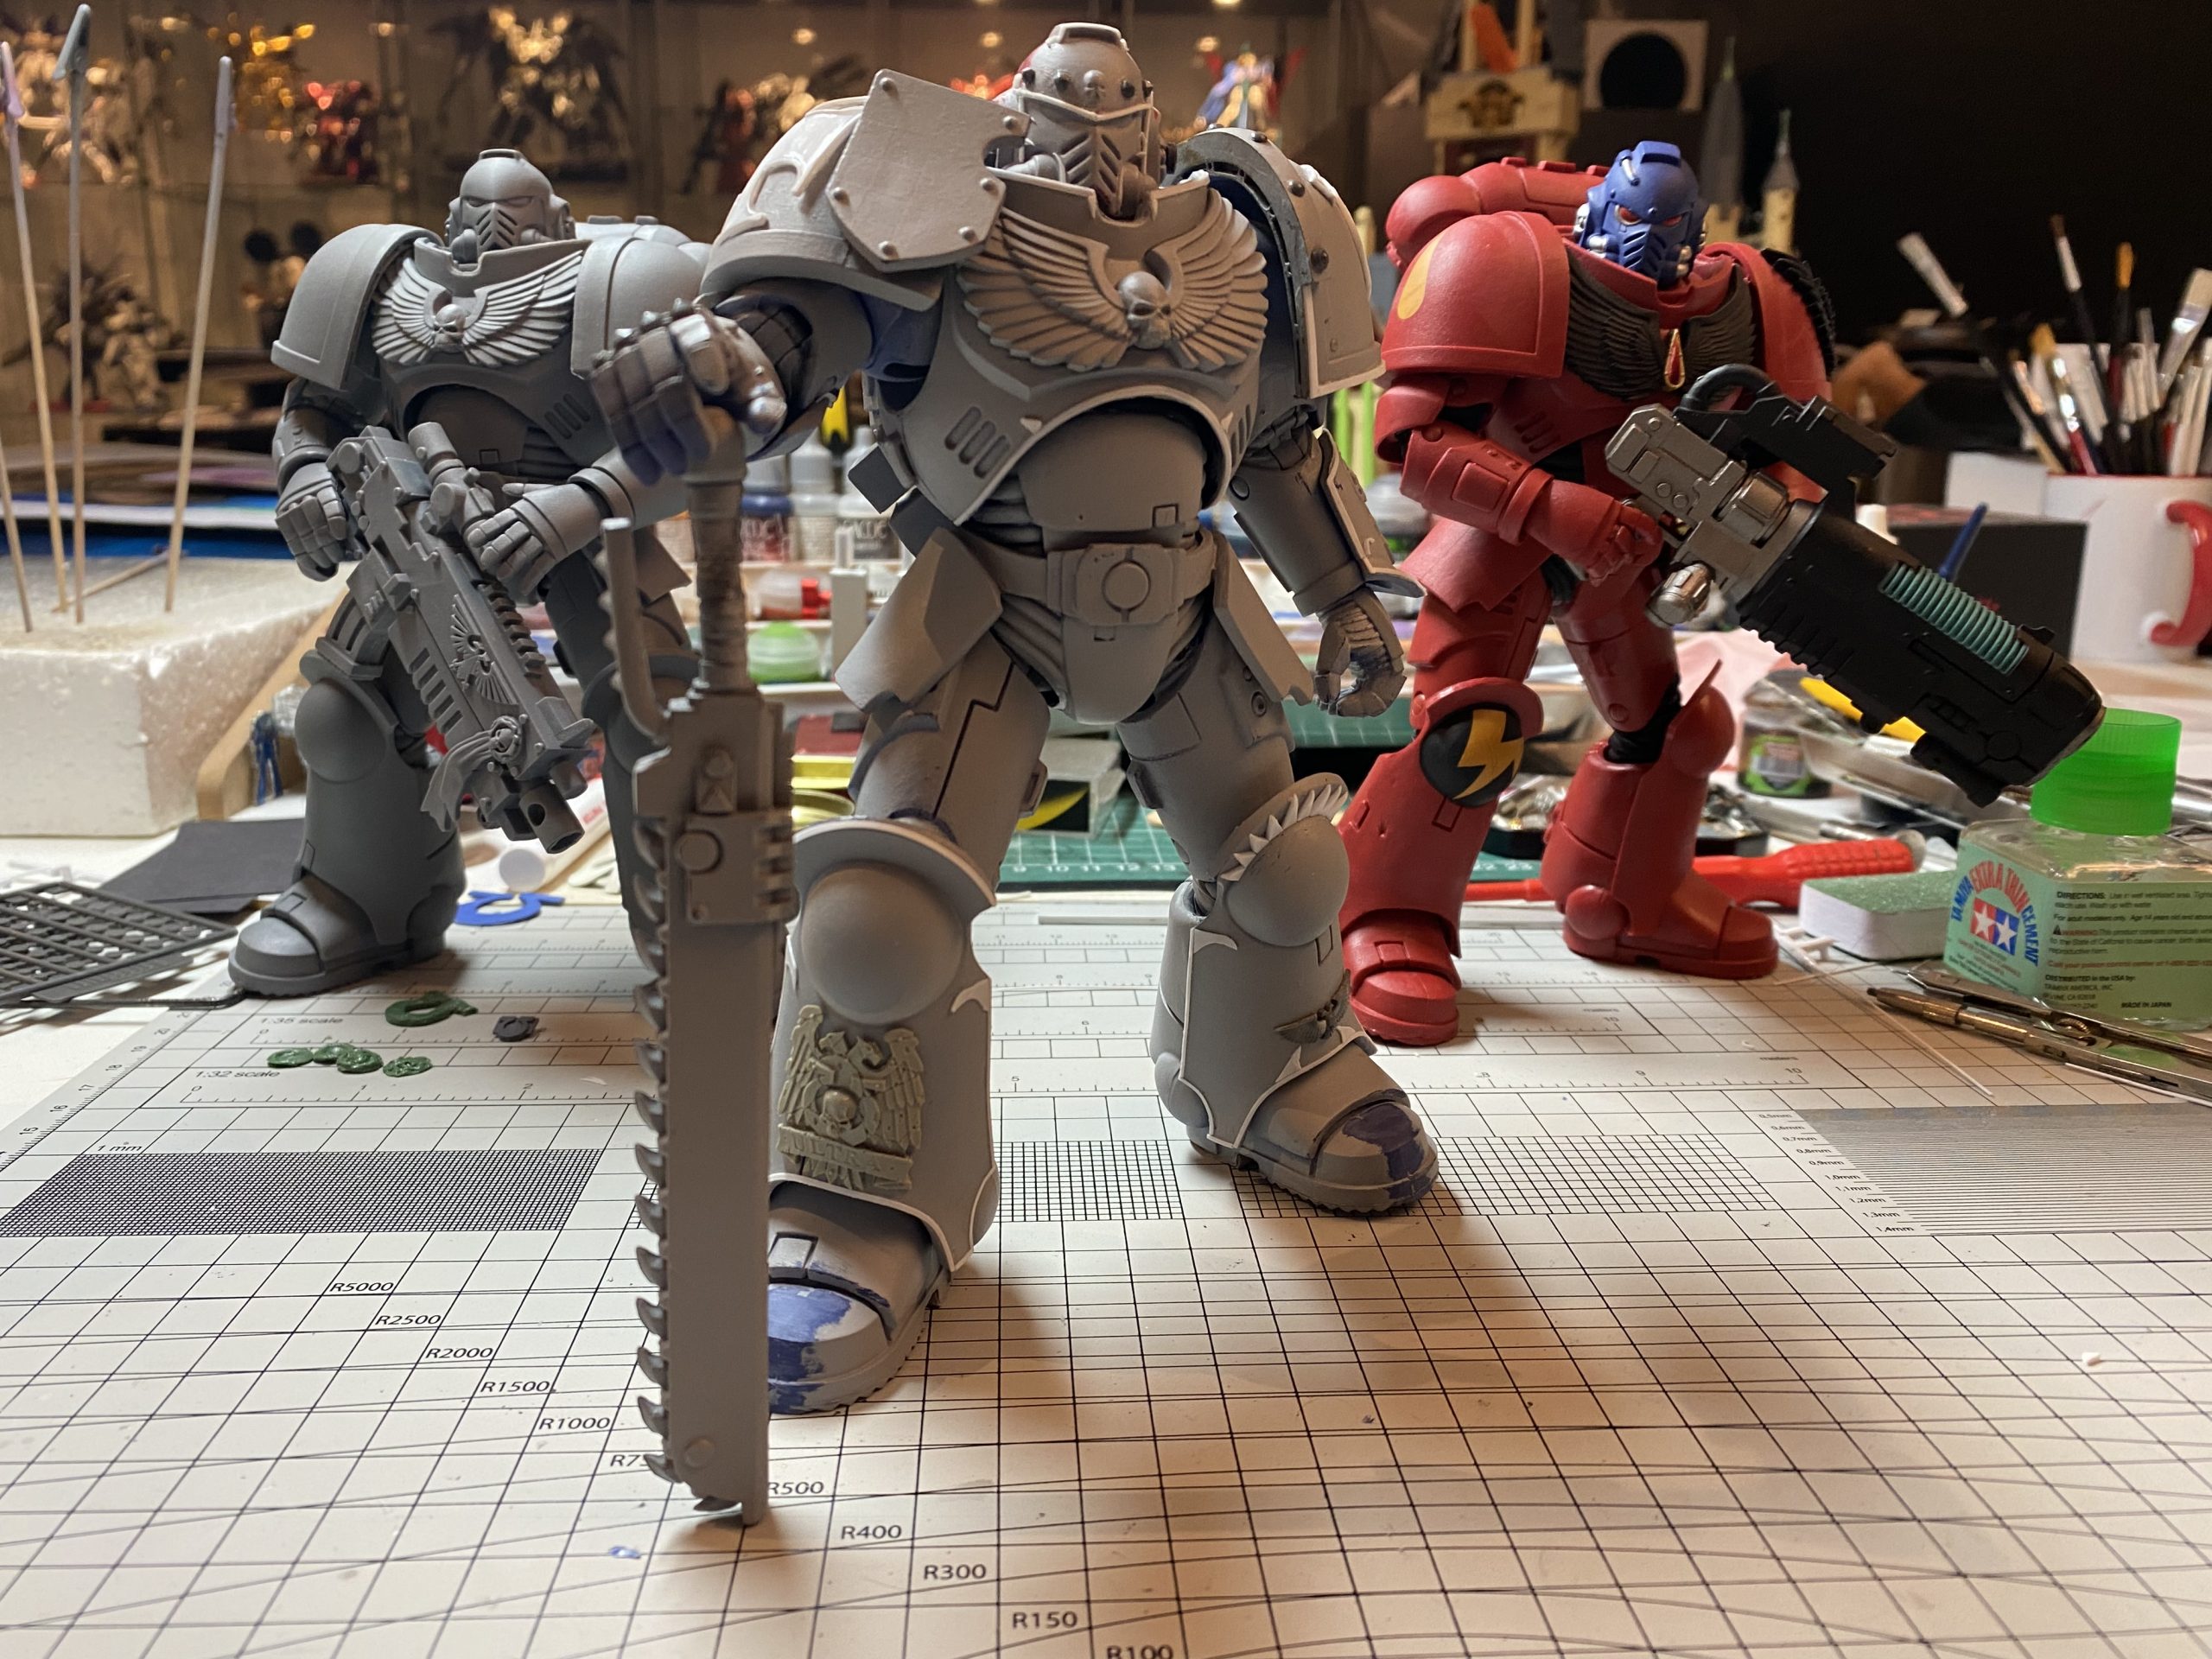
Ultramarine sword getting proper shape, following my drawing, I started to recreate a sword from plain pla plates. In meantime,…
AK Xtreme metal gold/bronze/and steel metallic paints were used to paint Imperialis and shoulder icons.I was a hell of masking…

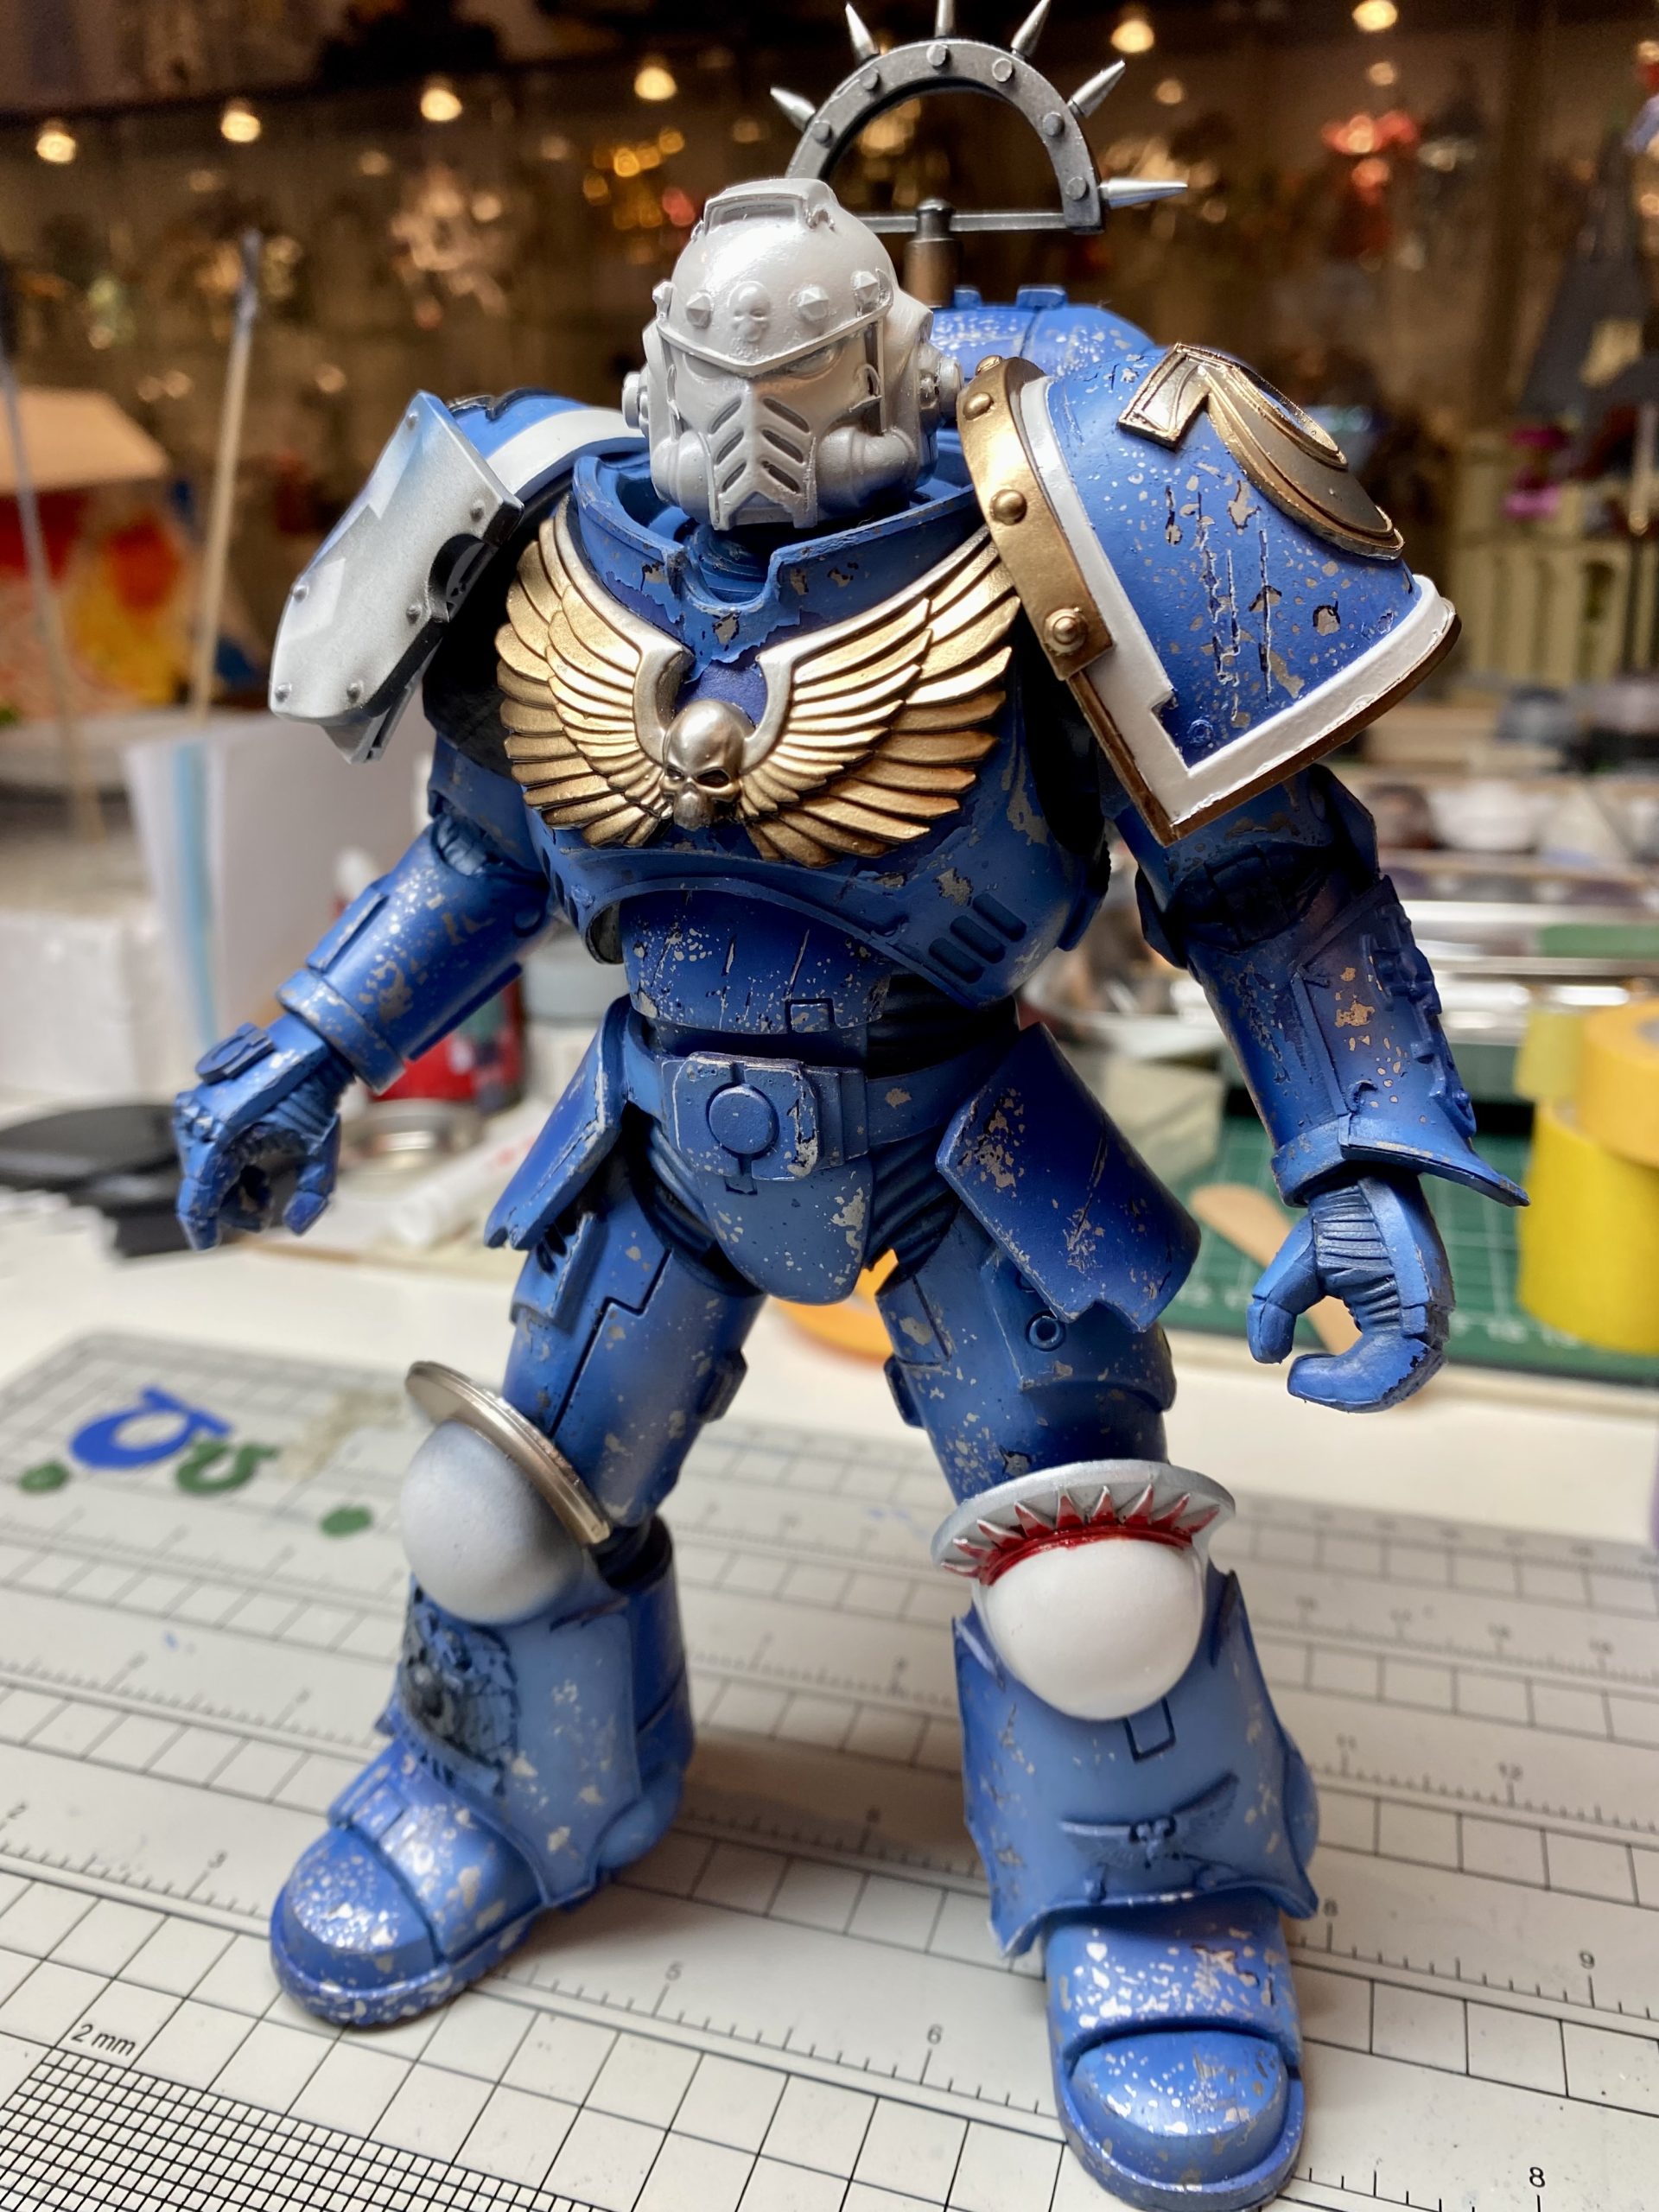
I applied Vallejo Chipping medium and started to paint blue shades from Vallejo Mecha range. I was not so happy…
Tamiya Silver and black from LP line as preshade airbrushed. In meantime I started to think about additional weapon for…

I was still missing something for my Ultra Veteran, maybe Iron Halo? Affirmative! Did quick paper drawing to get right…
I found in my WH40k bit-box nice resin ultramarine aquila that fit the leg beautifully! Some other plastic details added…
Space Marines iconic shoulder armor needed some more details and relief iconography. There are a lot of custom 3D printed…
Emperor protects – Oh yes!!! I’m with Warhammer40k from 2nd edition (1993)… Never played a board-game, never had an army,…
I added a bit of dirt on a base 🙂 Enamel Wash from Modeller’s World did the job. After removing…
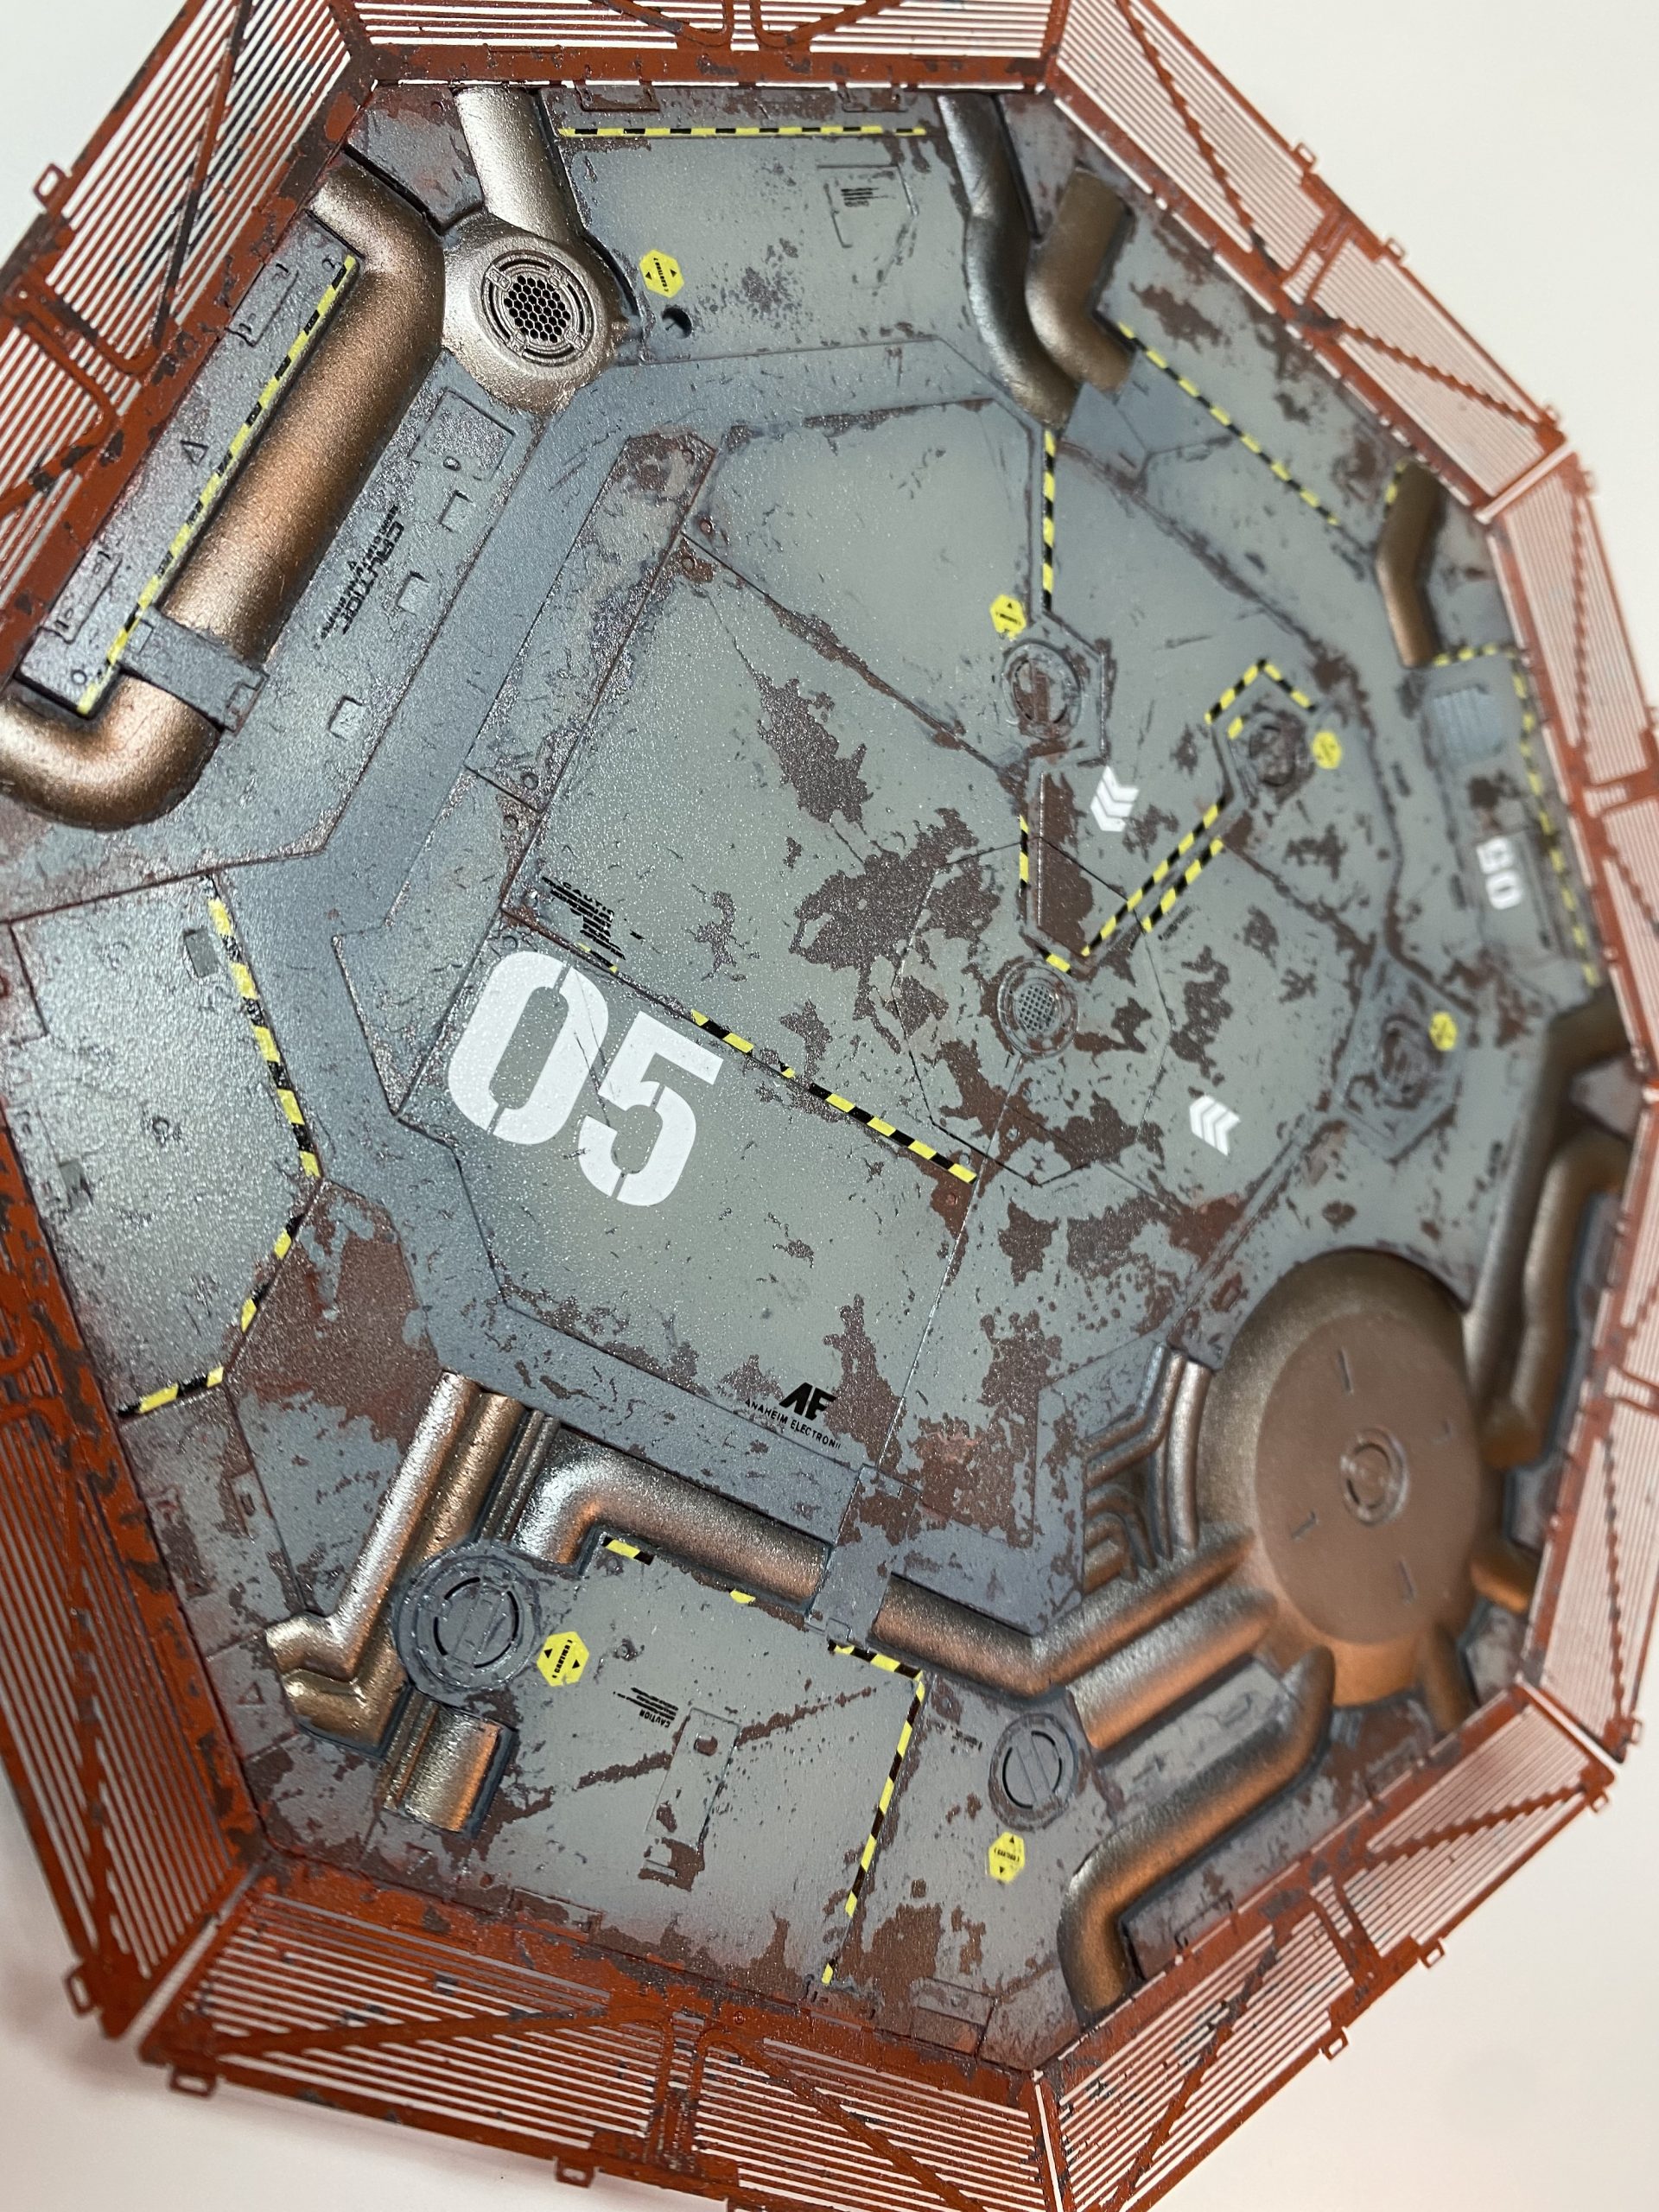
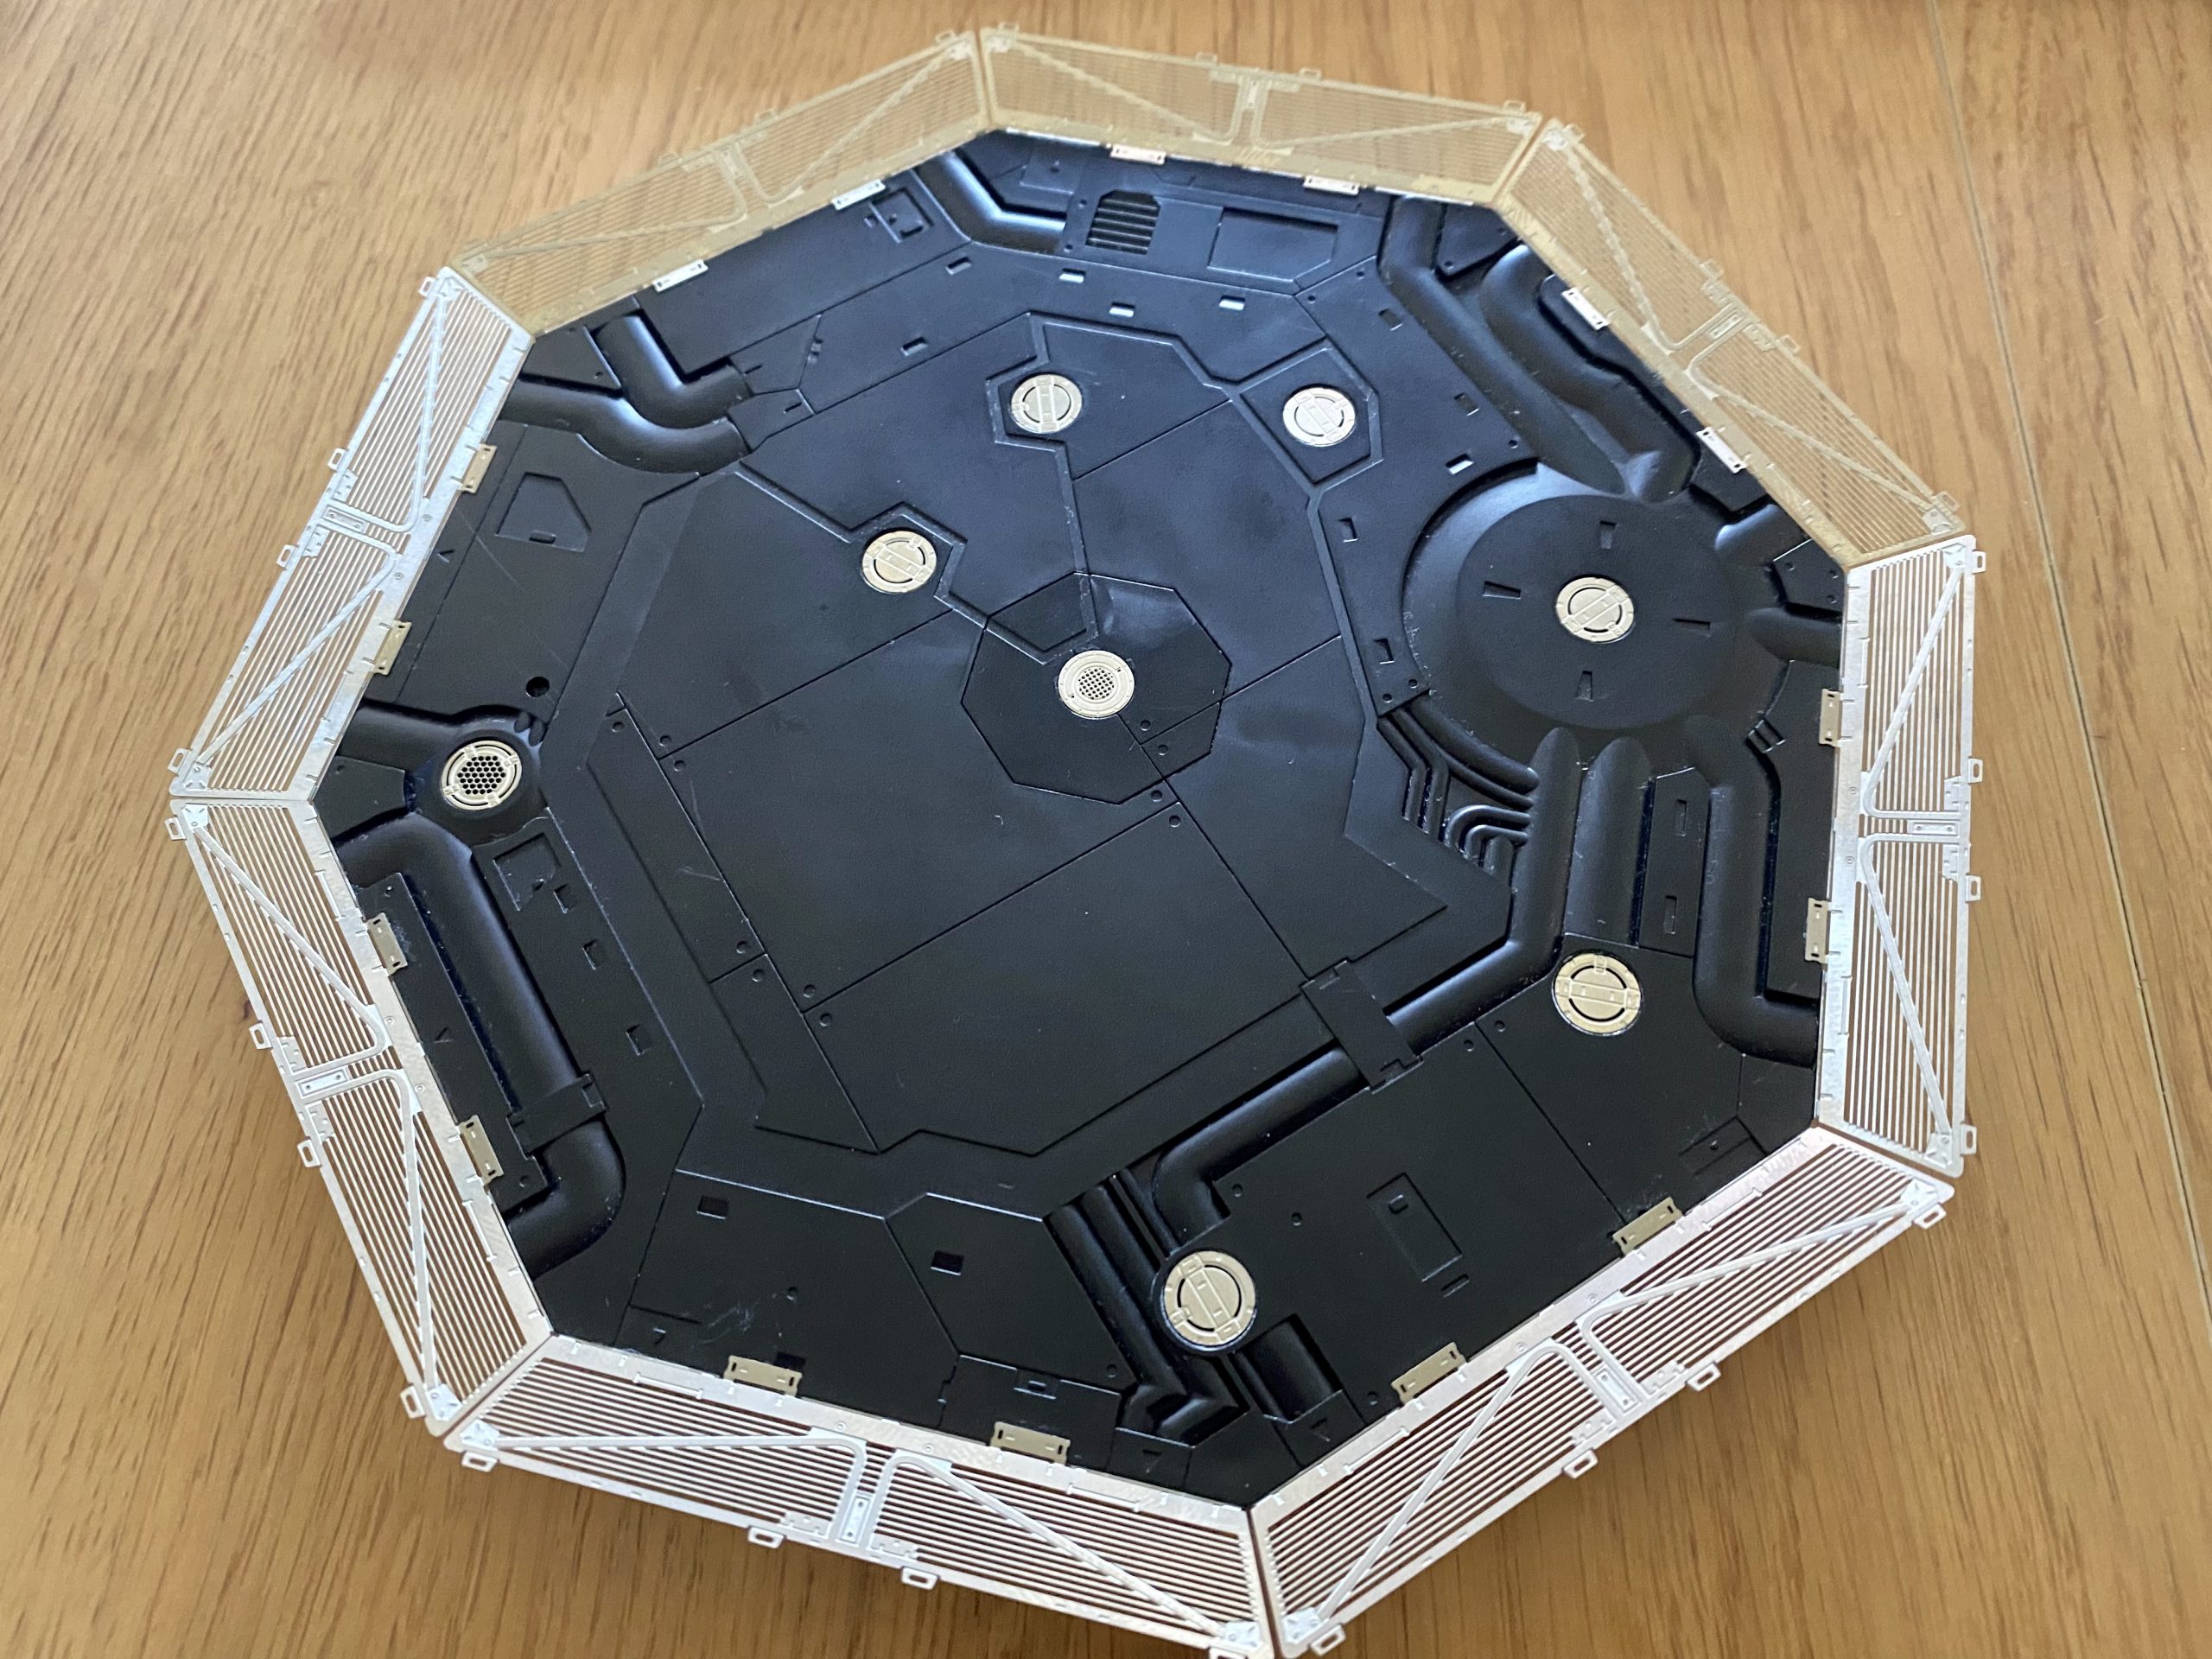
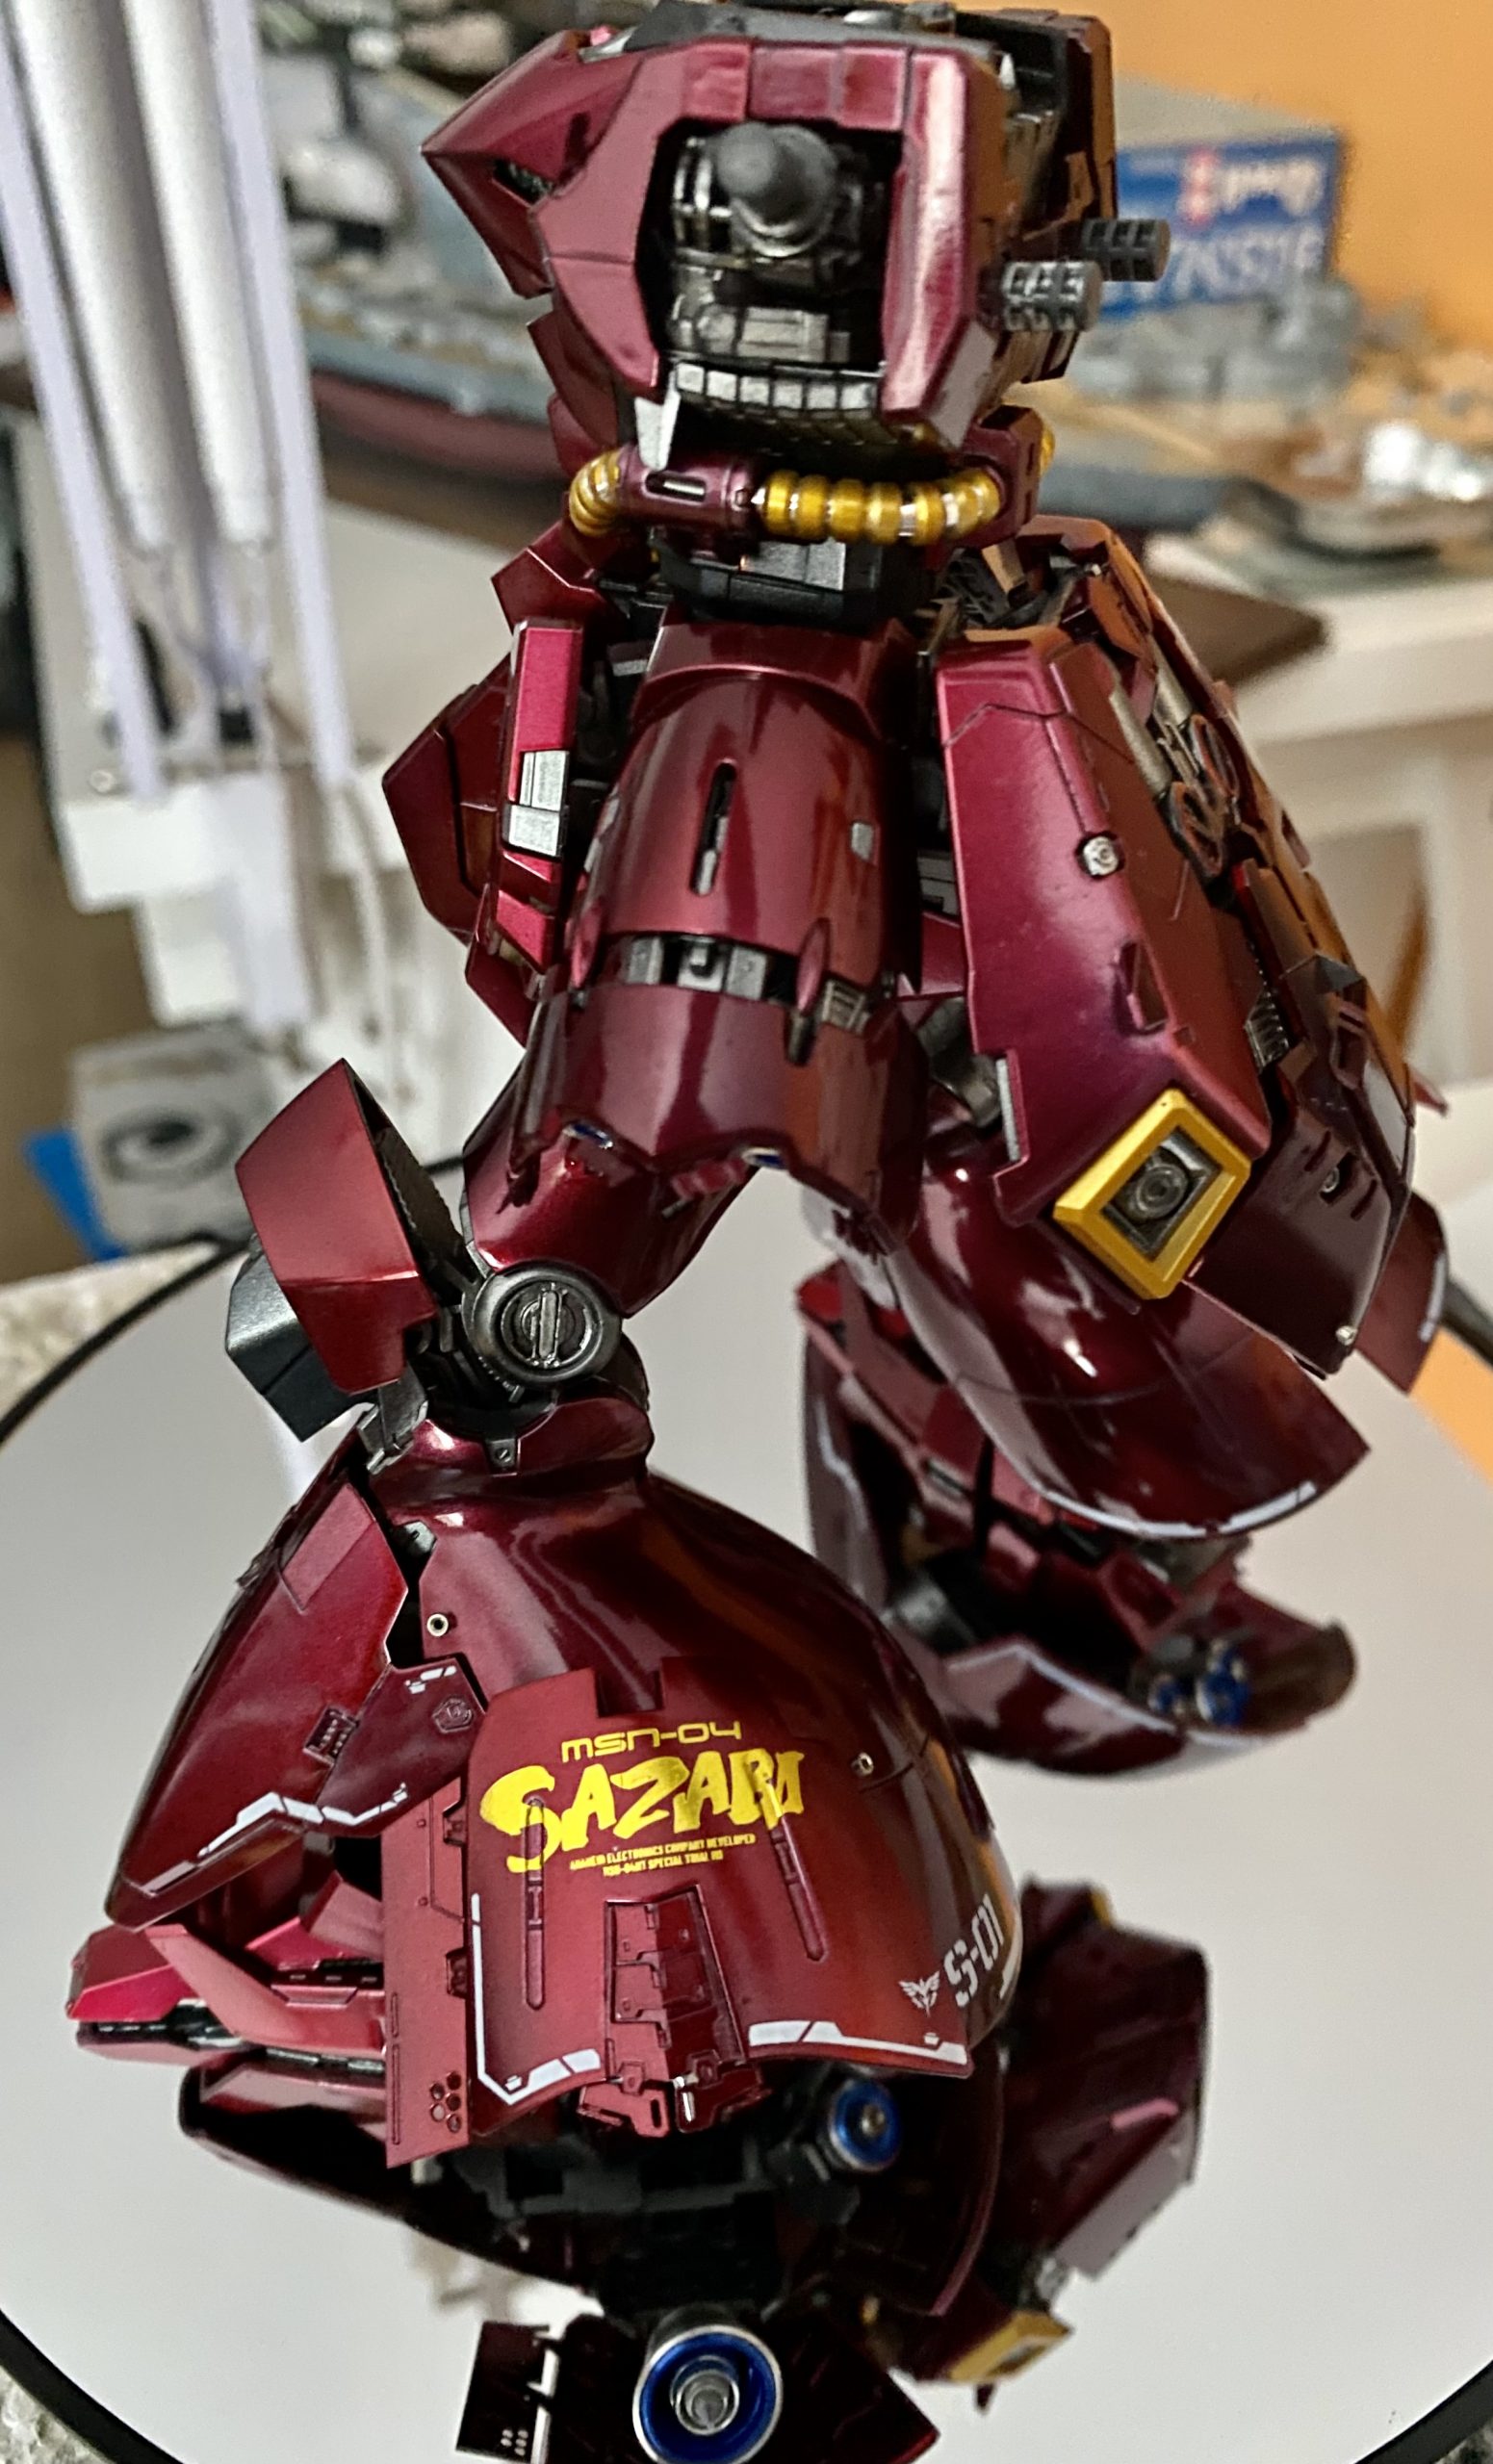
After initial weathering, I applied UX100 from MrHobby and added some decals. Platform no 05 – why not? Then decals…
I’m planning to put little Saz on an old platform – for a contrast between glossy mech and used/worn deck…
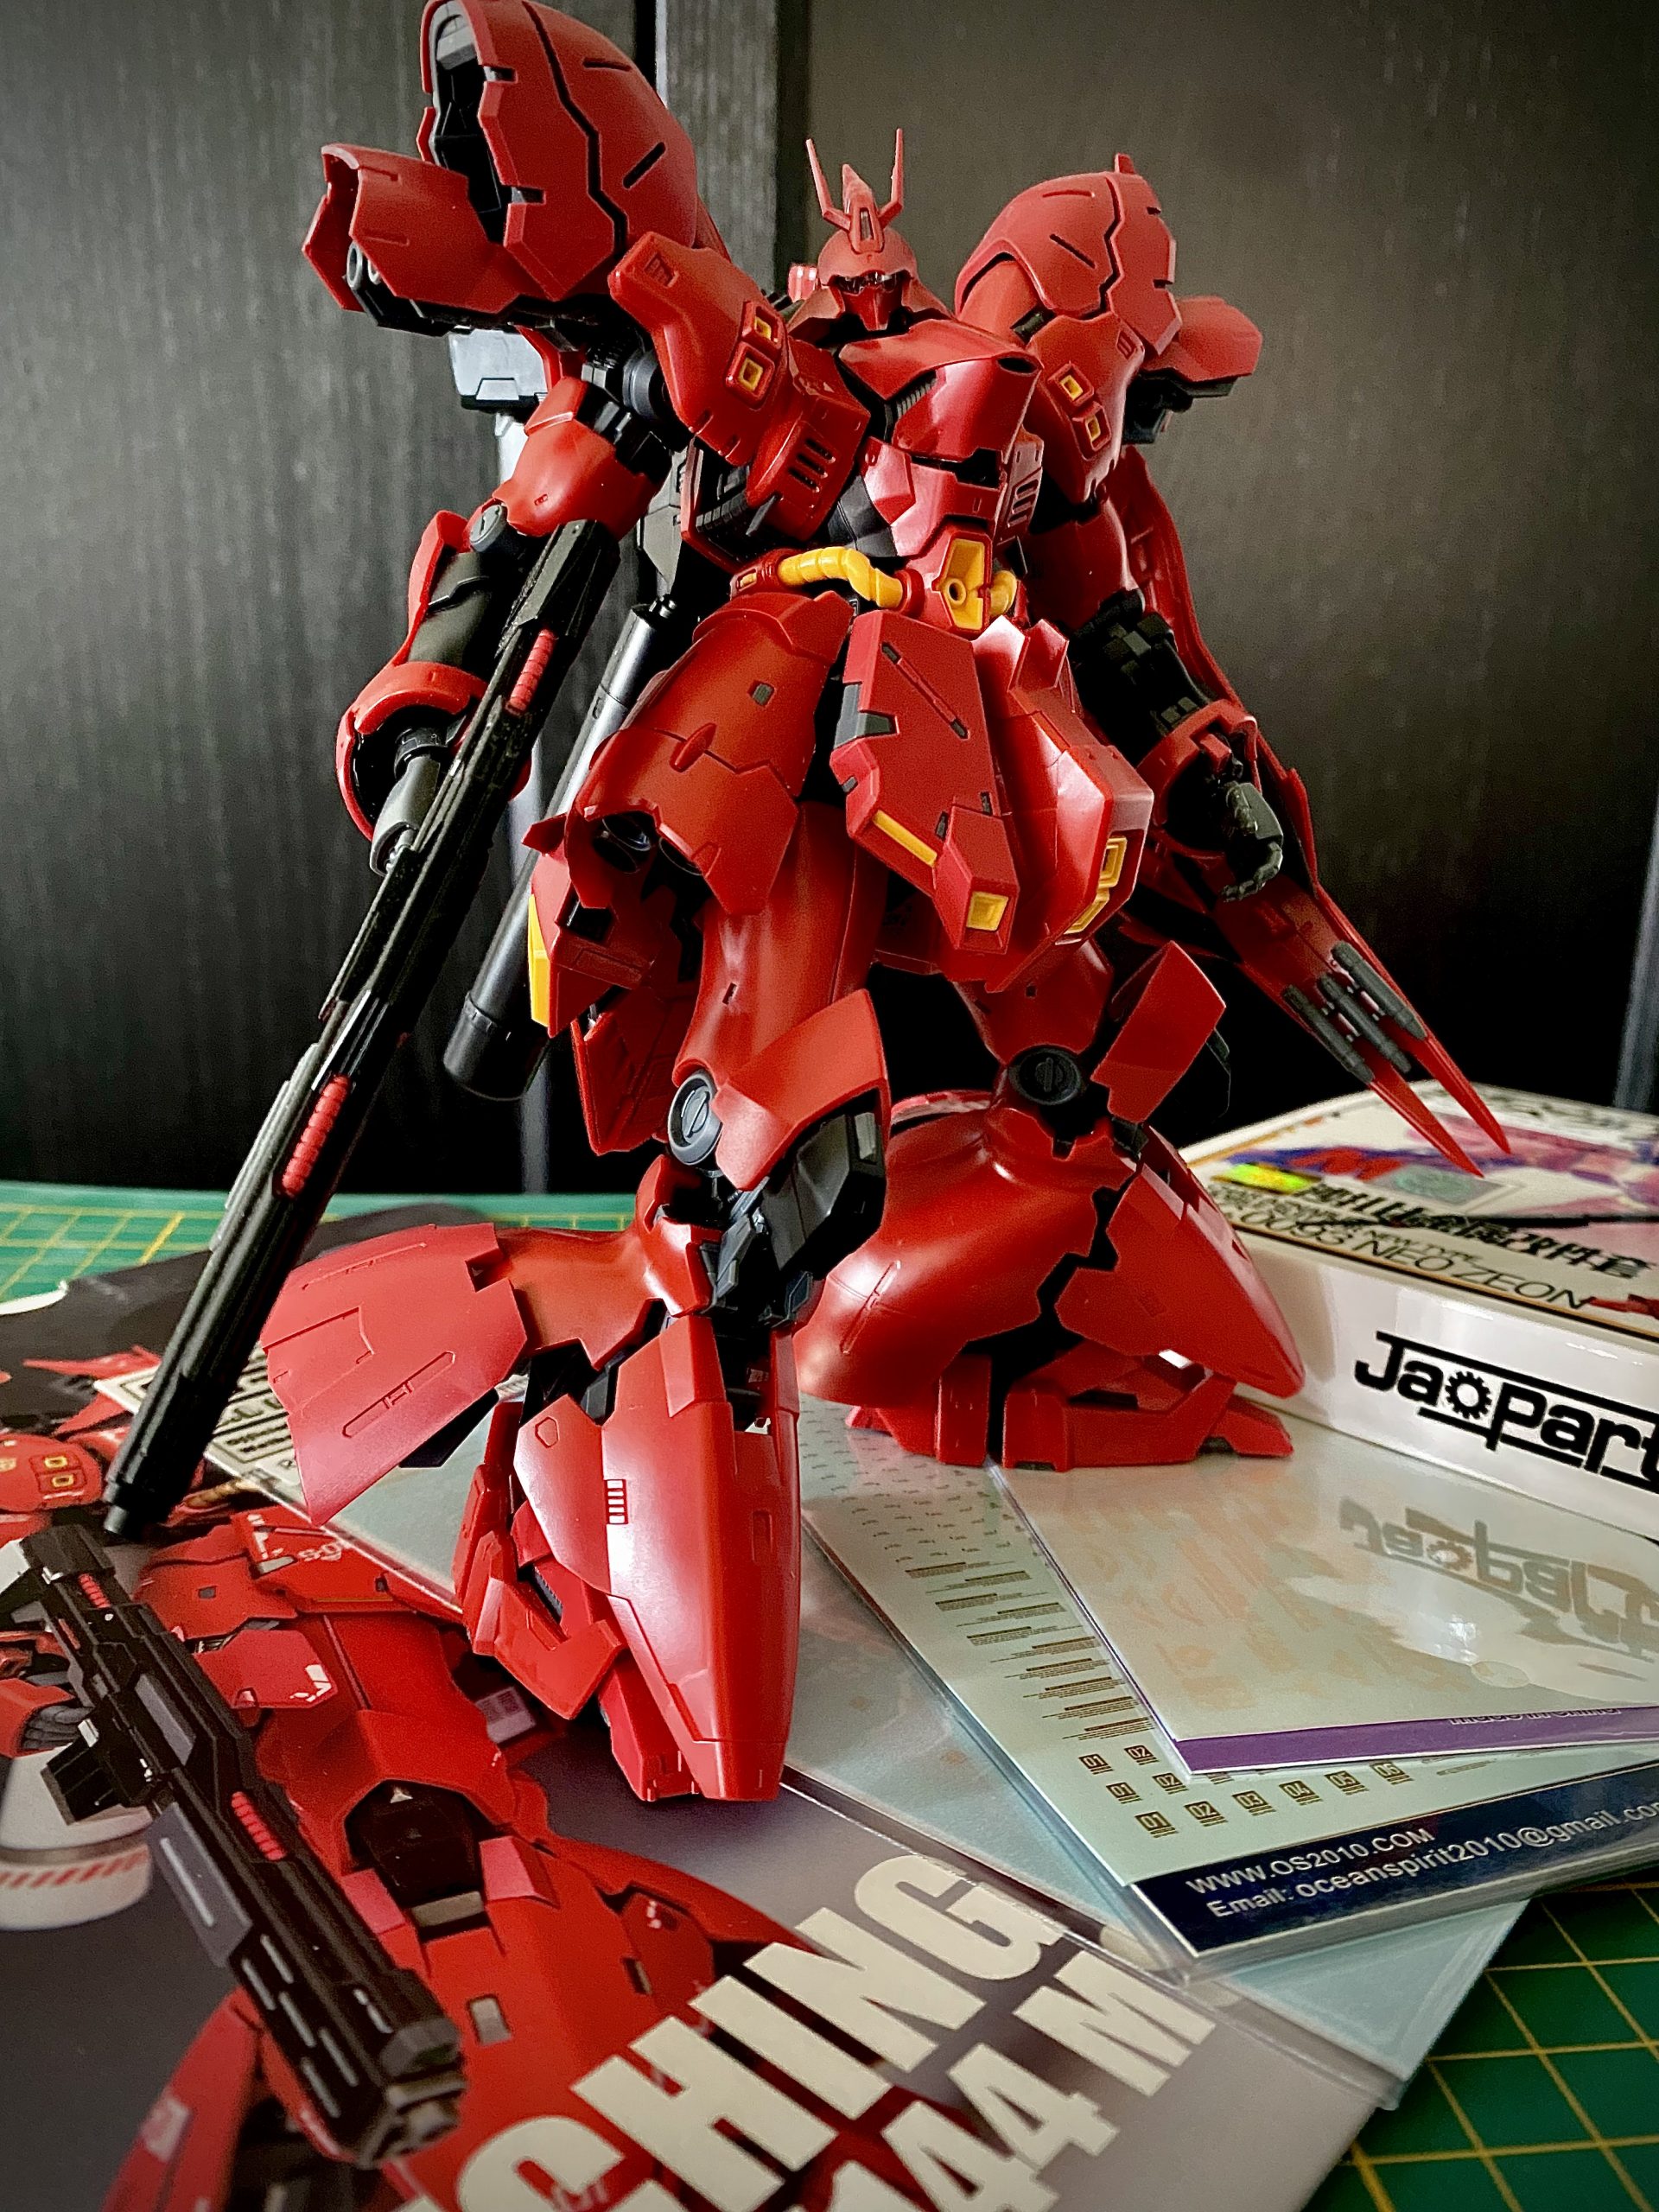
Parts were disassembled (again) and prepared for clear cote application. MrHobby GX100 applied – damn I love this one! Colors…
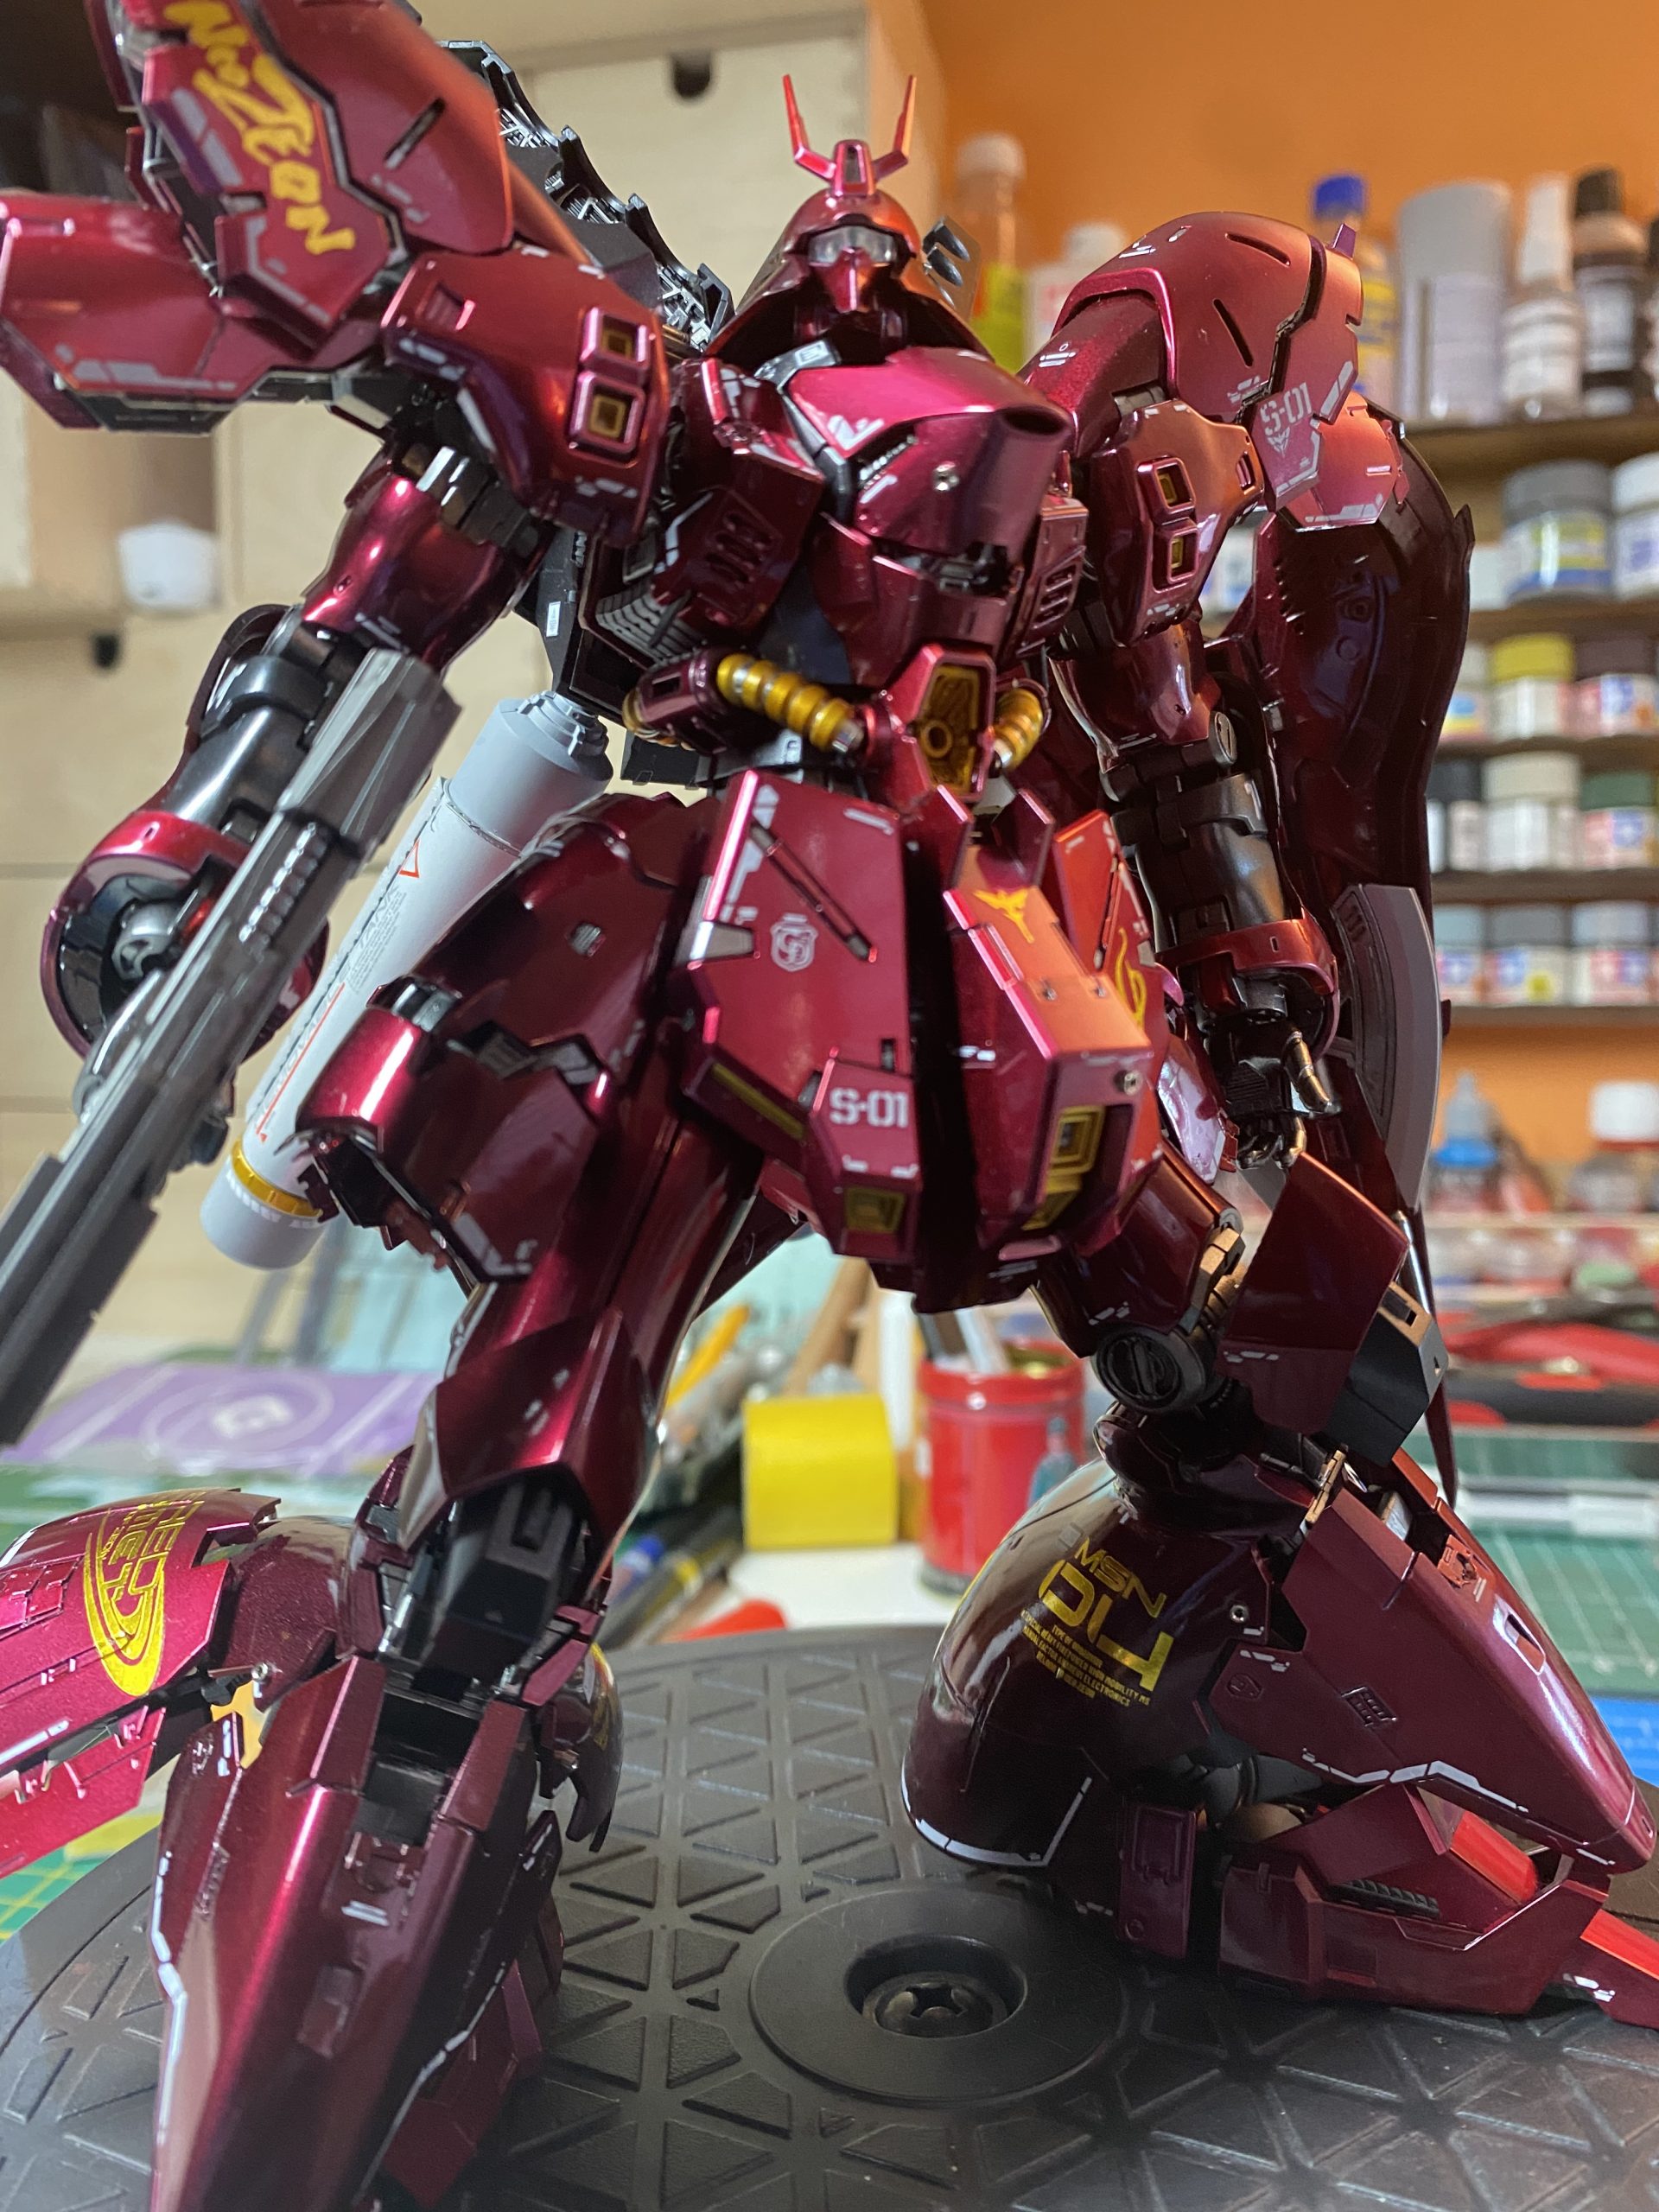
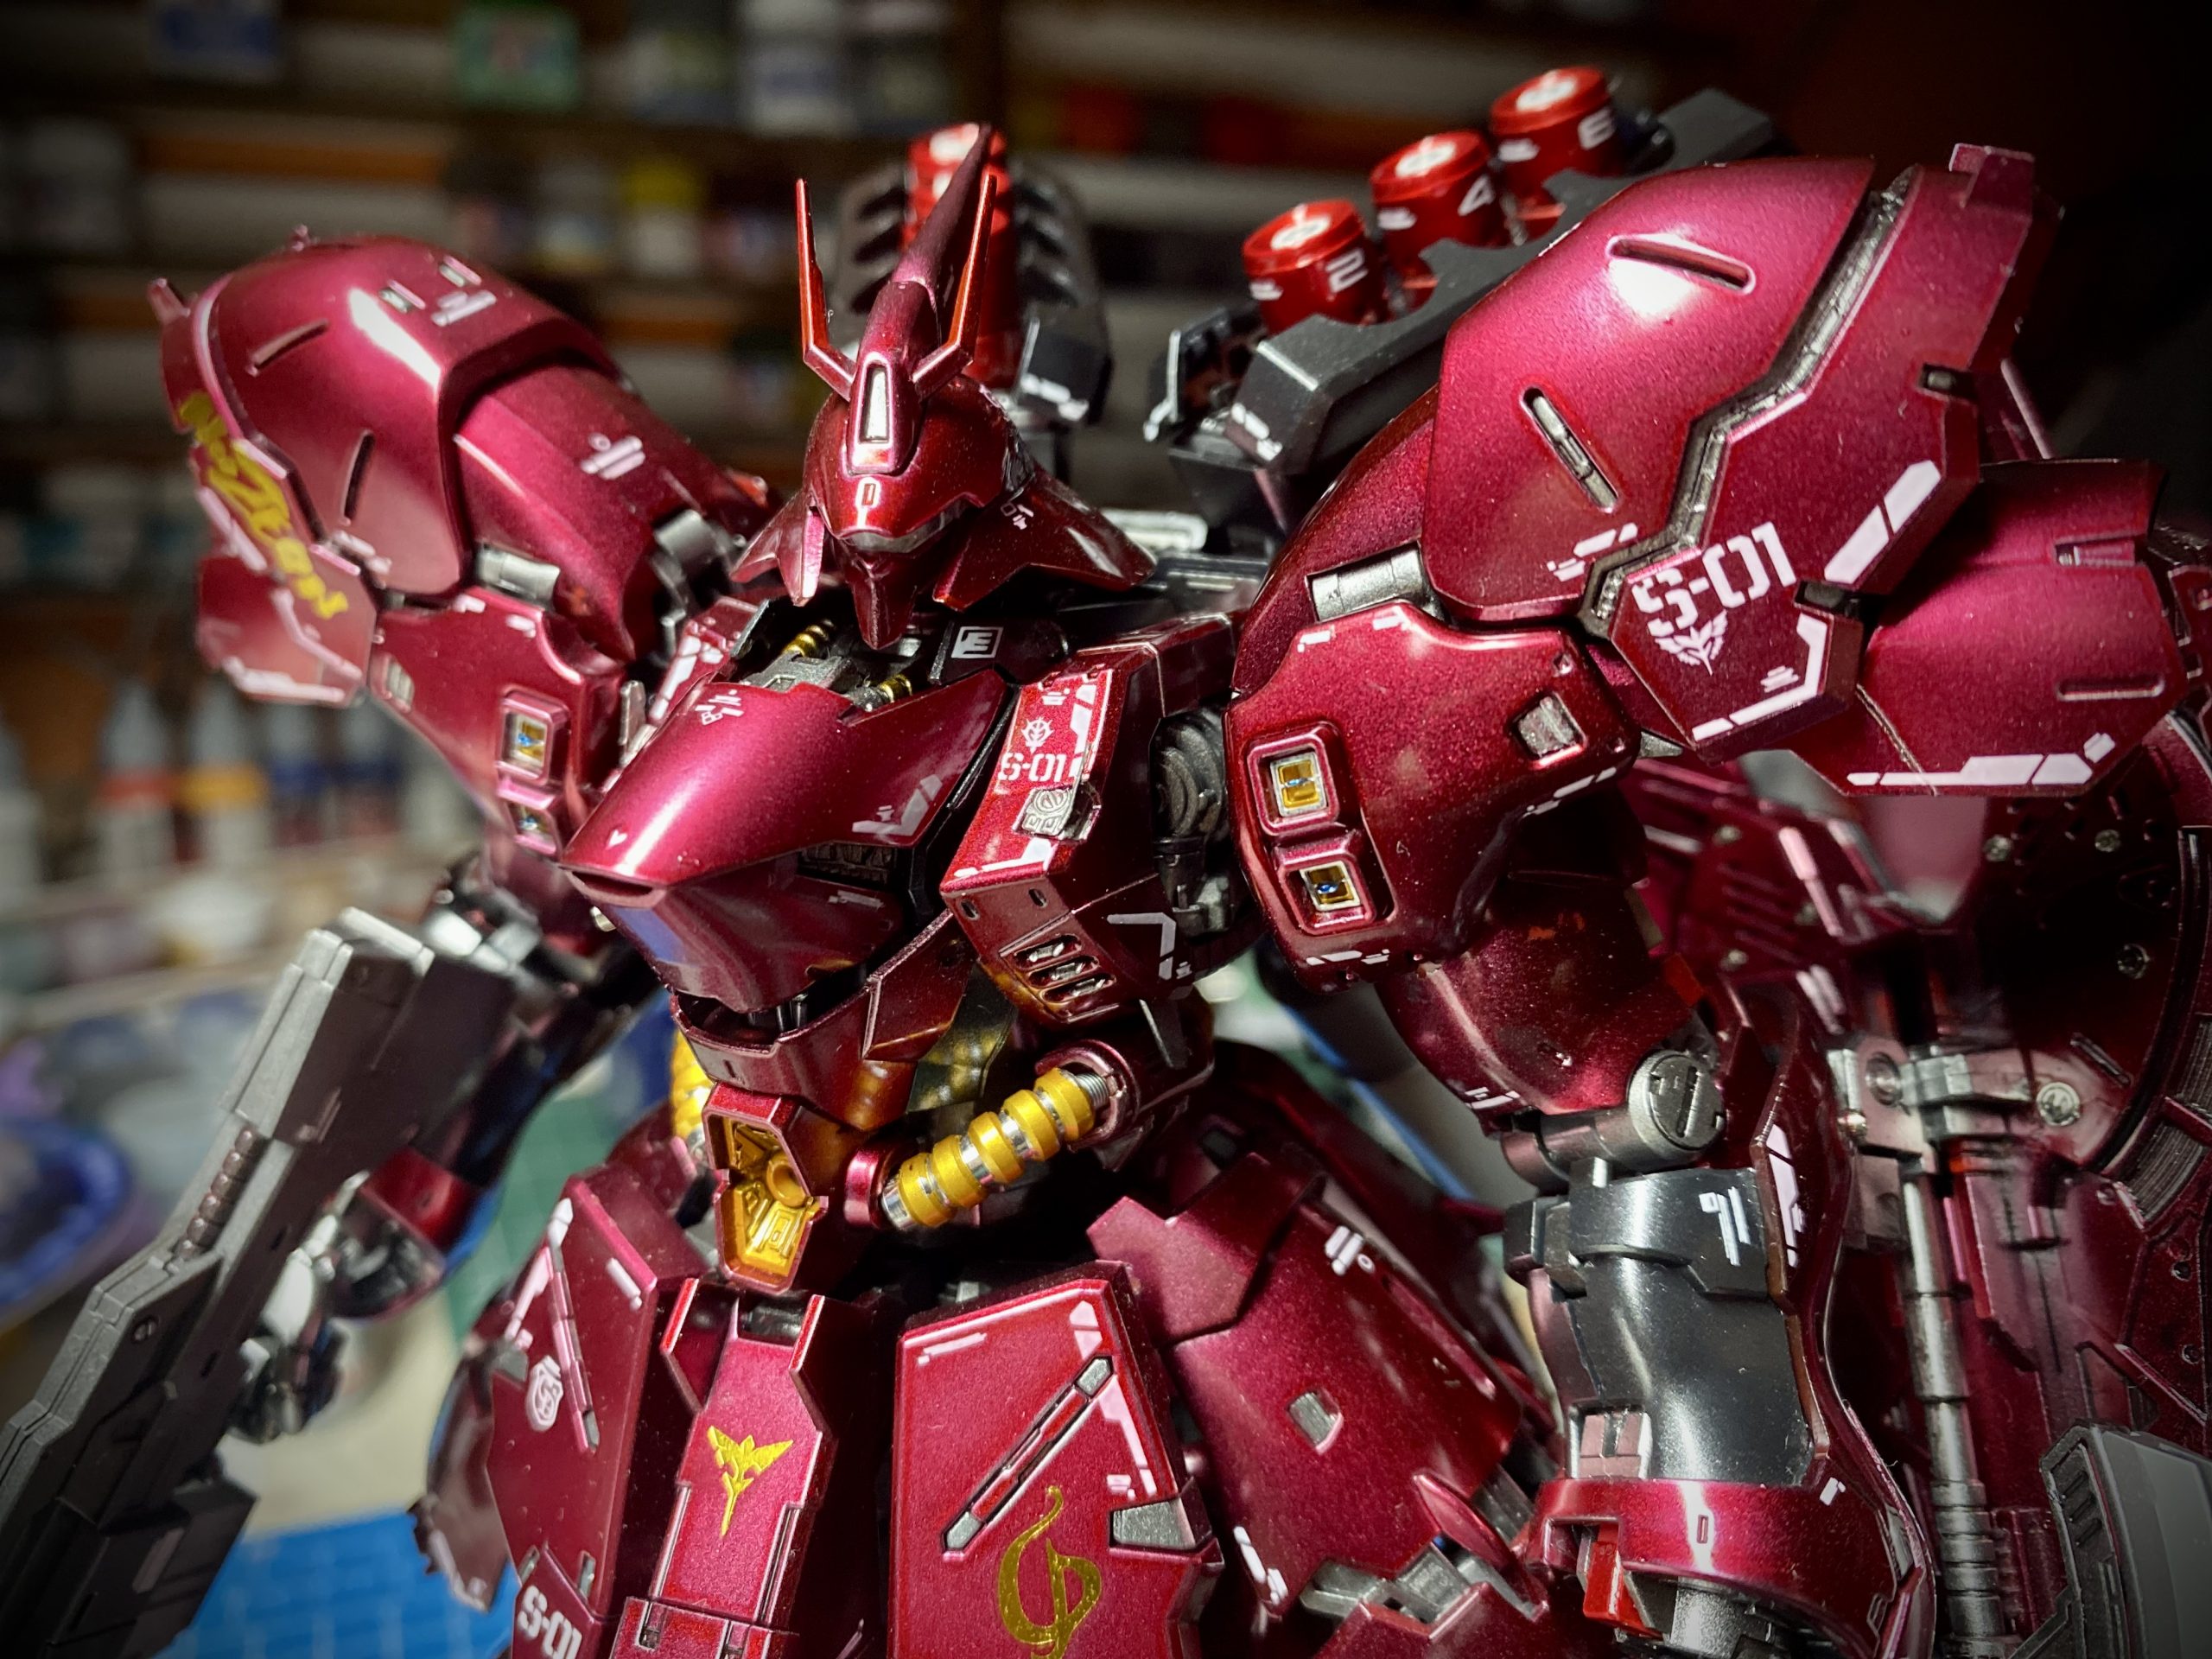
After few water-decals sessions I finished ”by the book” markings. With those tiny symbols Sazabi started to look like a…
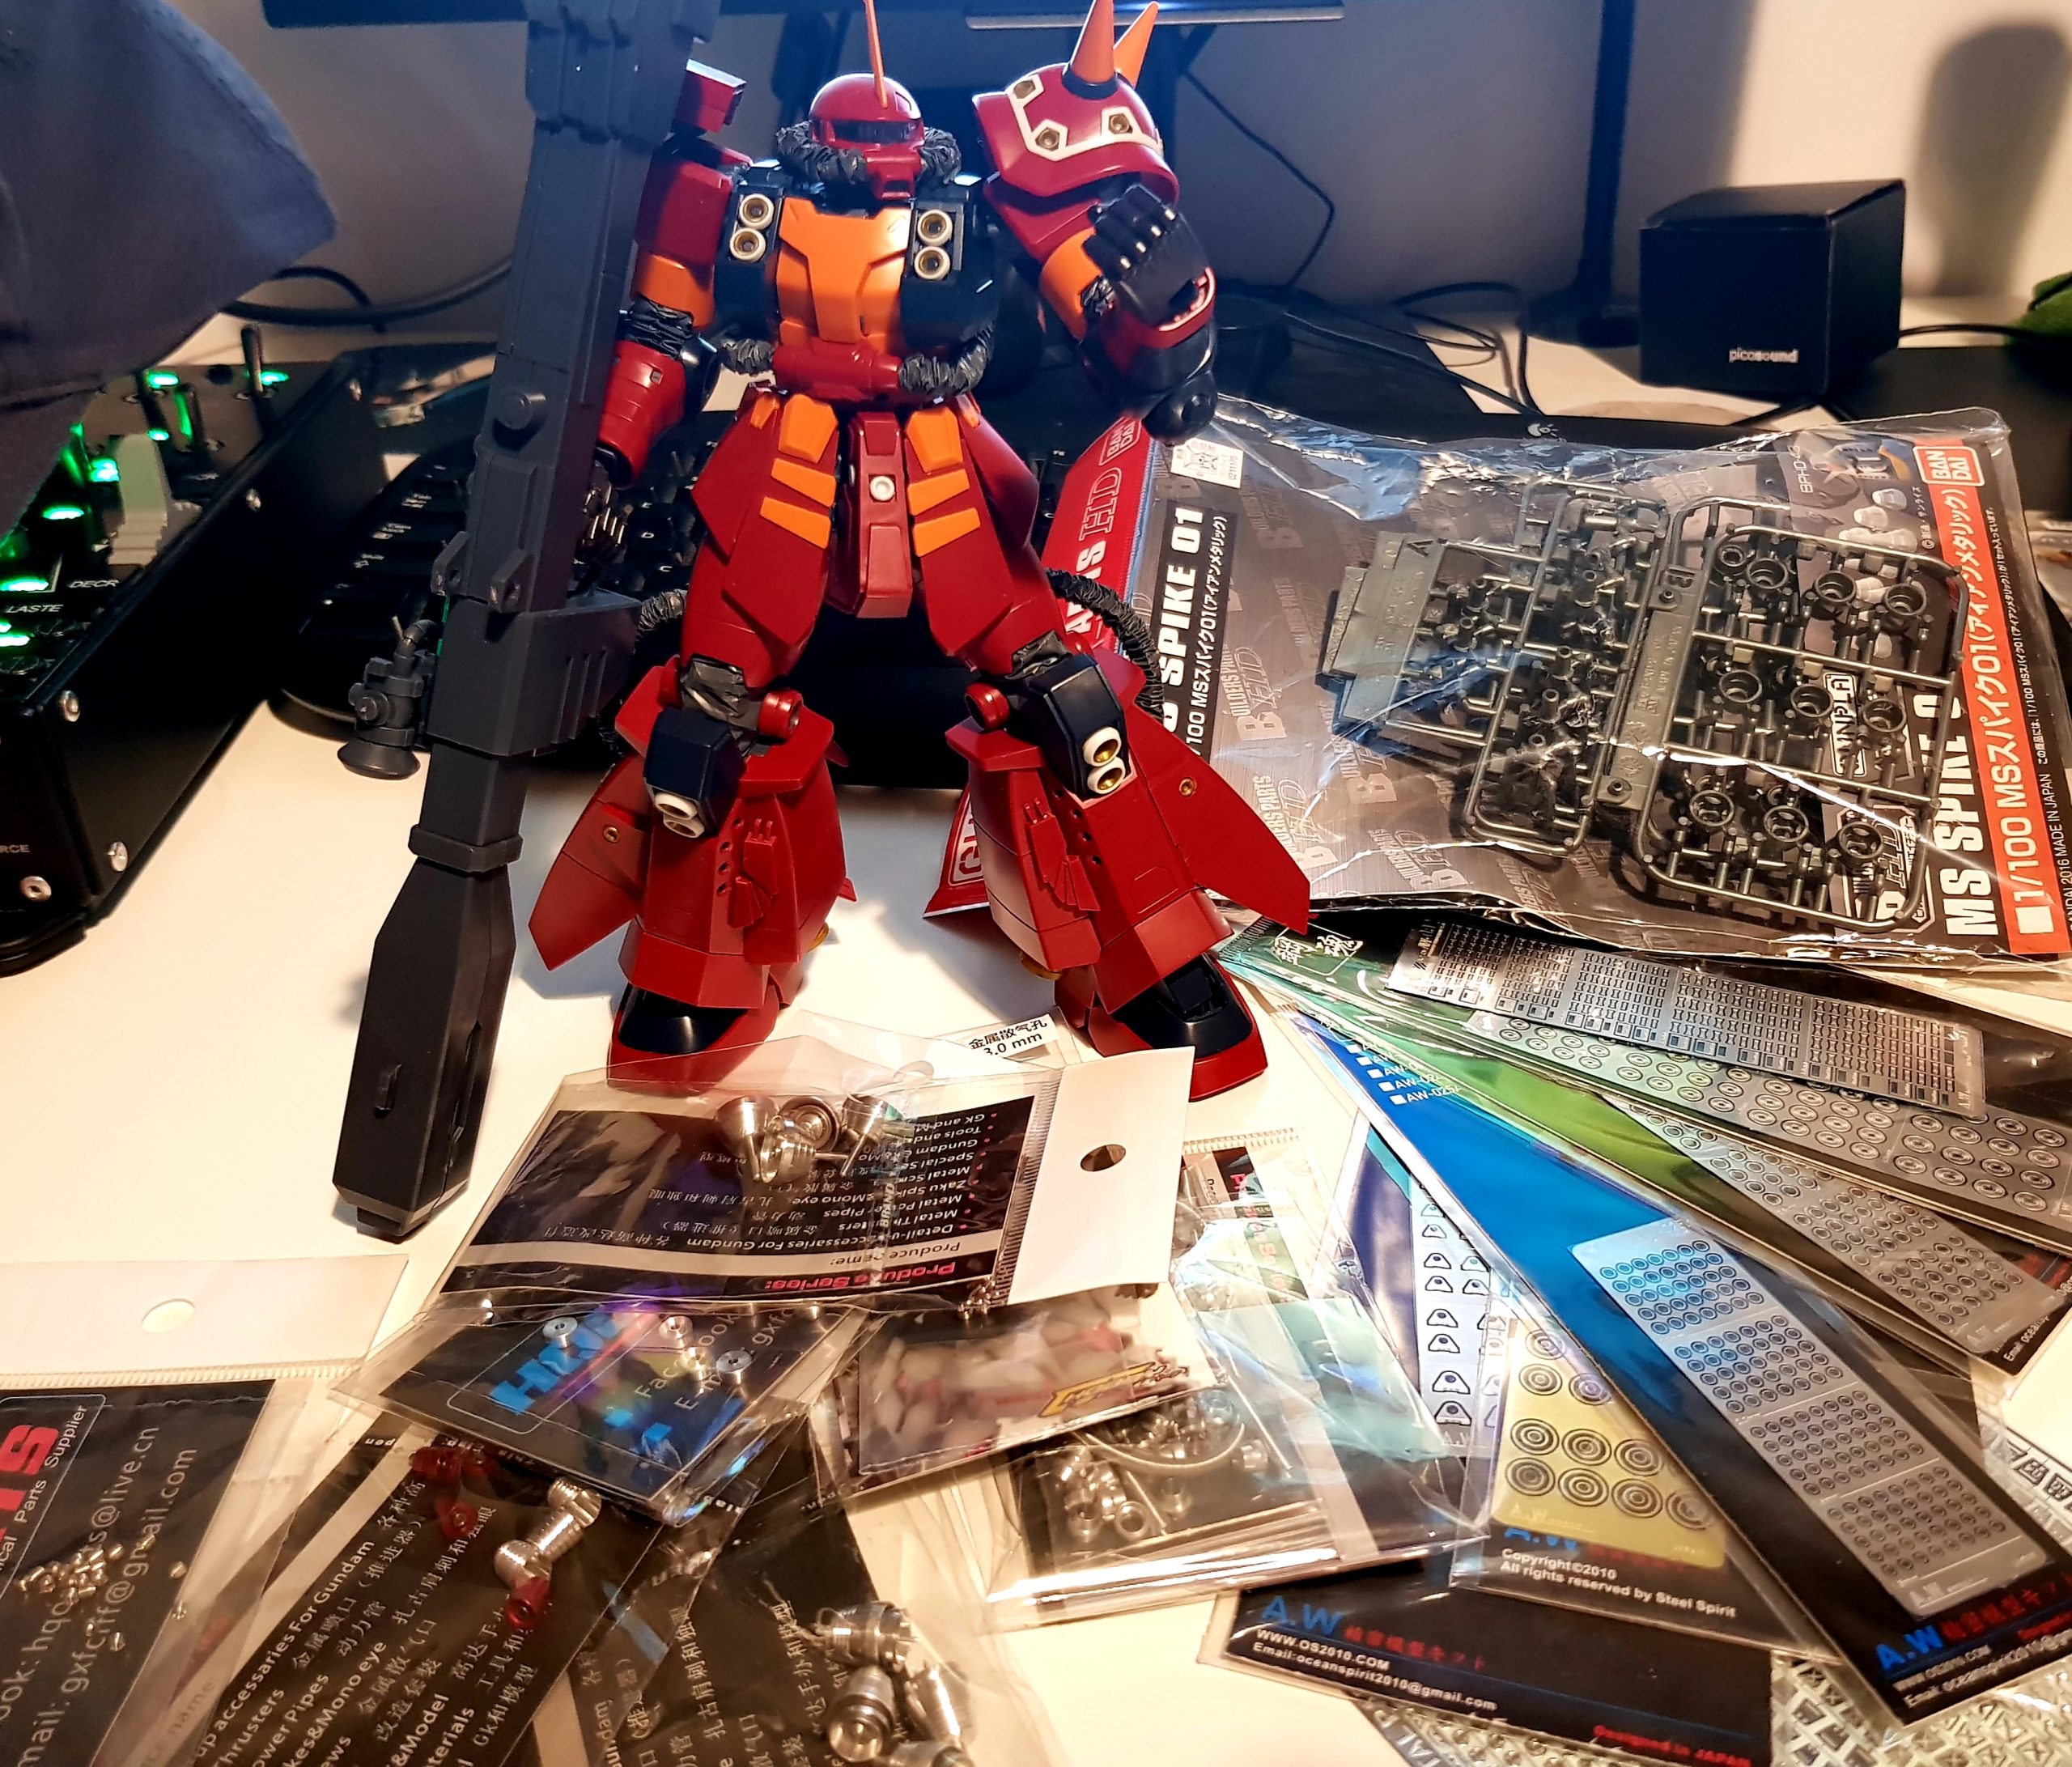
I chose “realgrade” version for decals with some additonal custom golden logos etc. Started with shield by the book. DL…
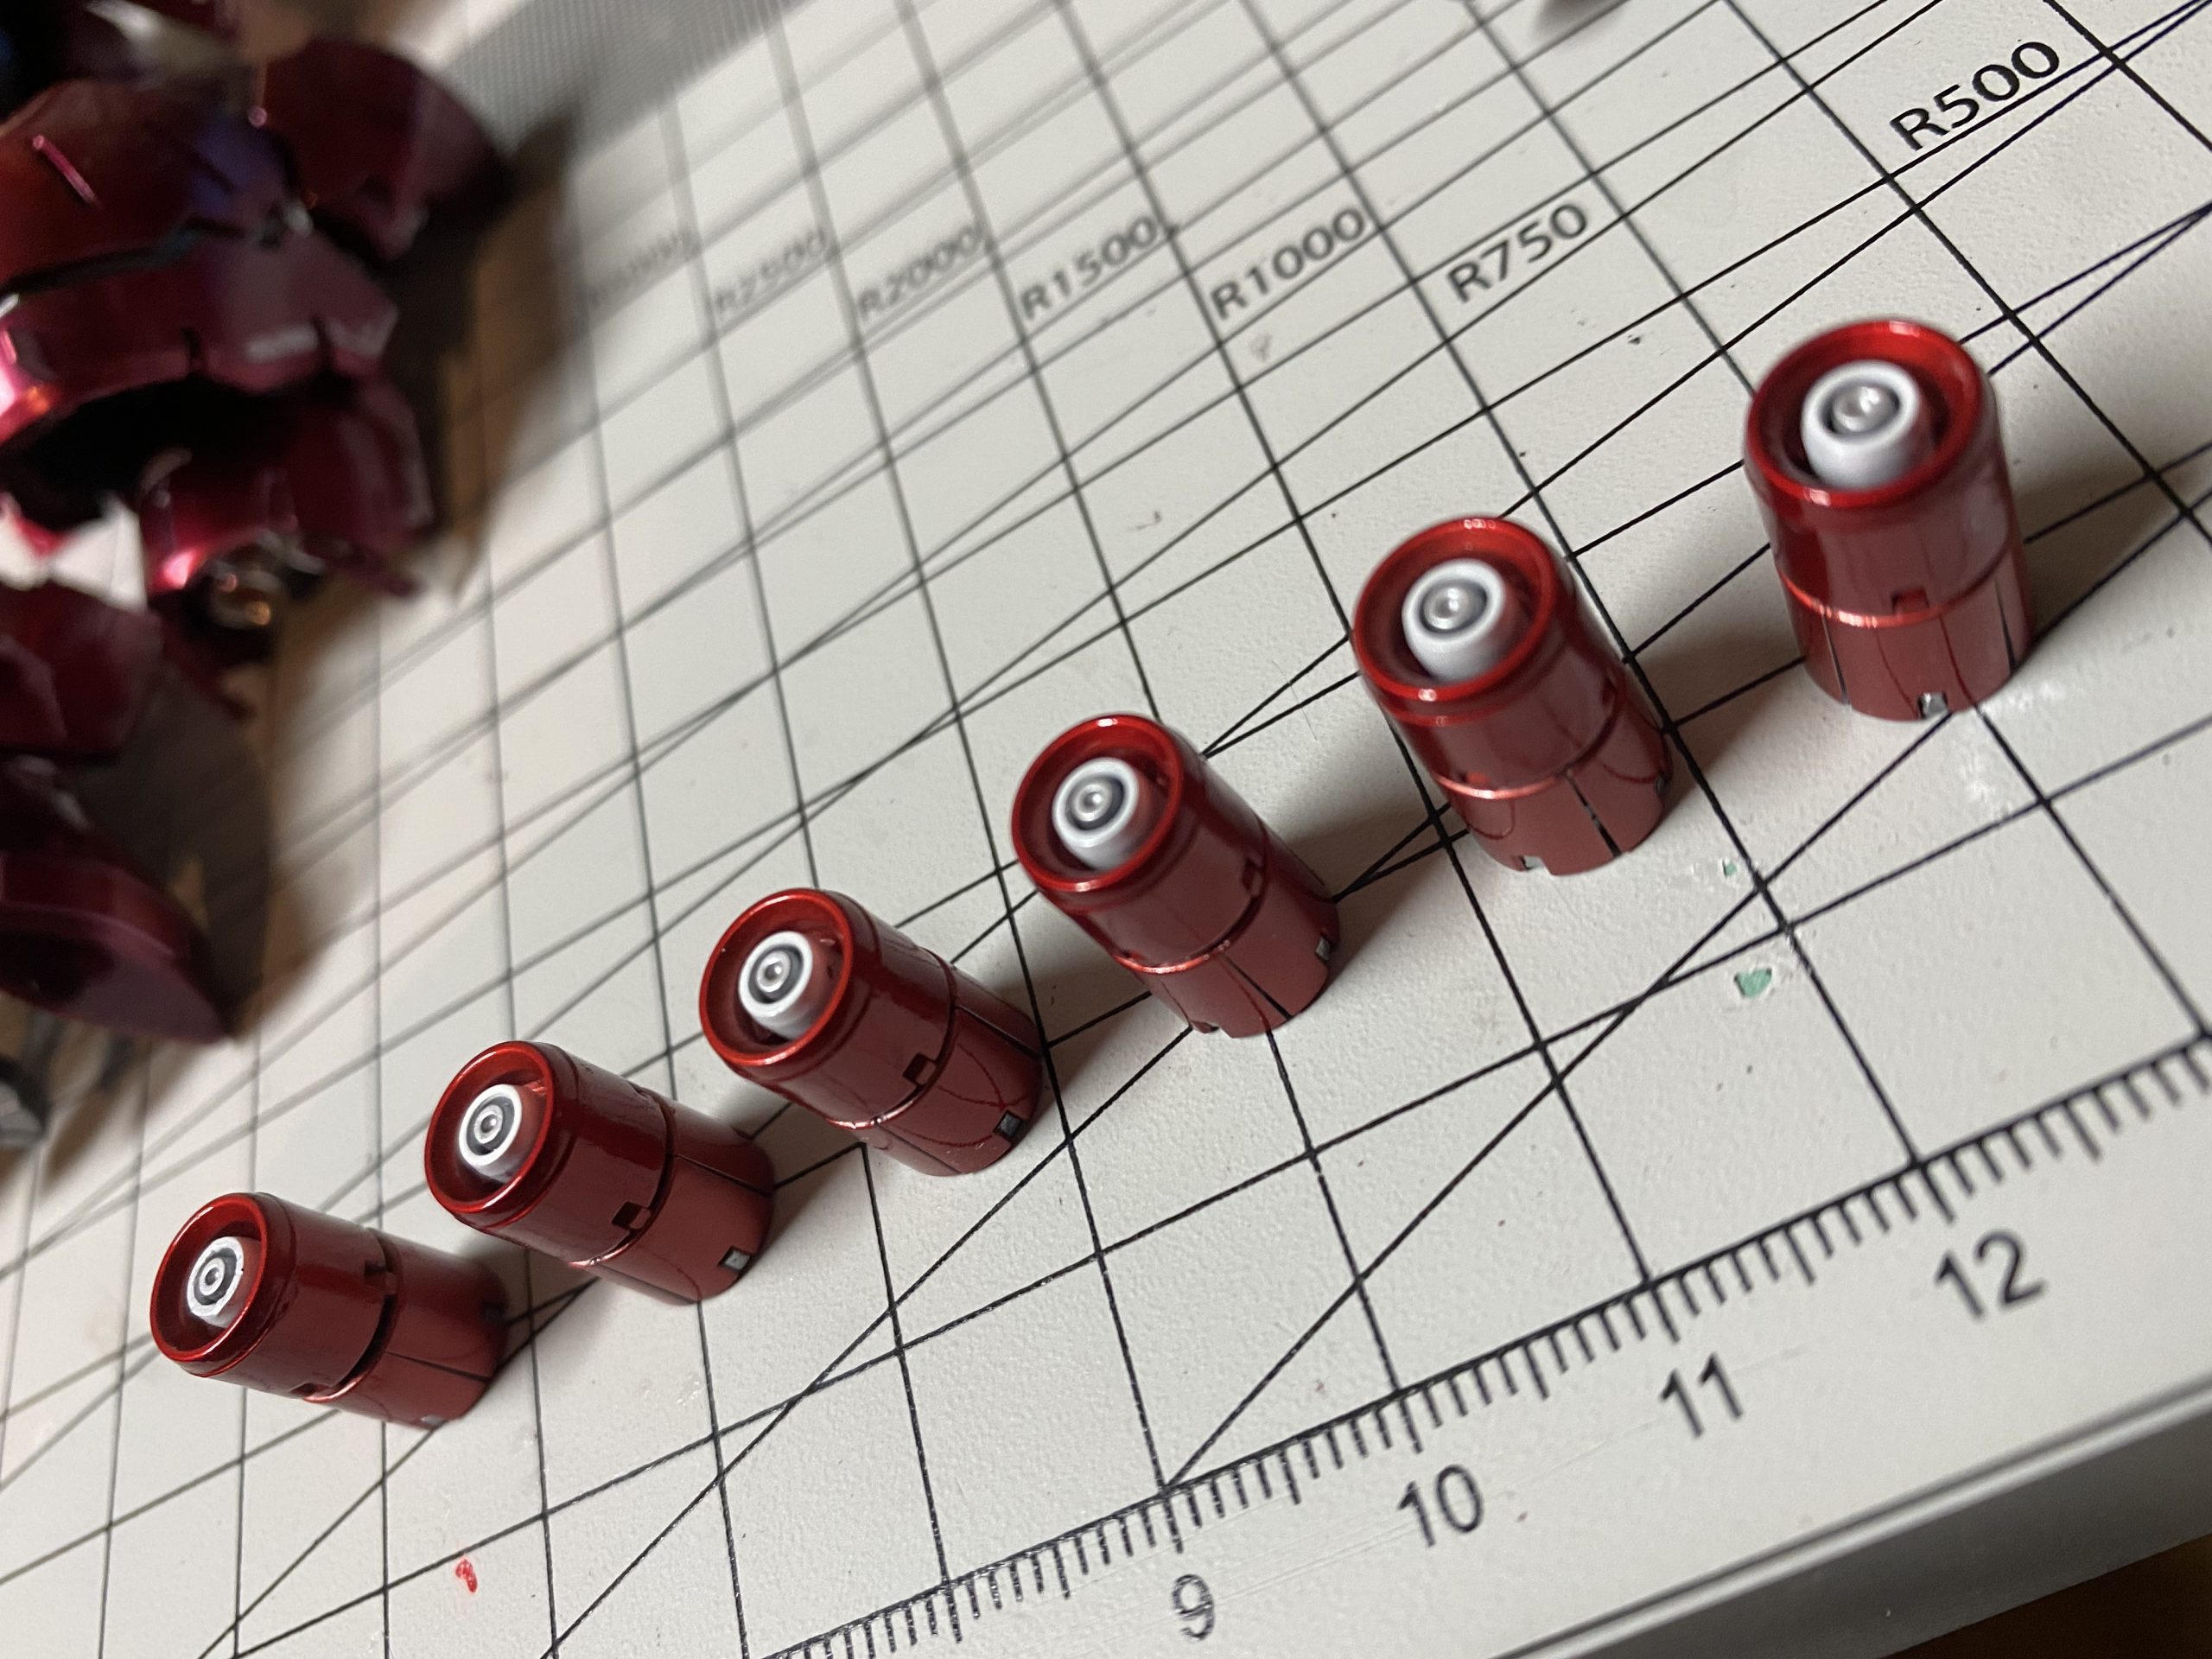
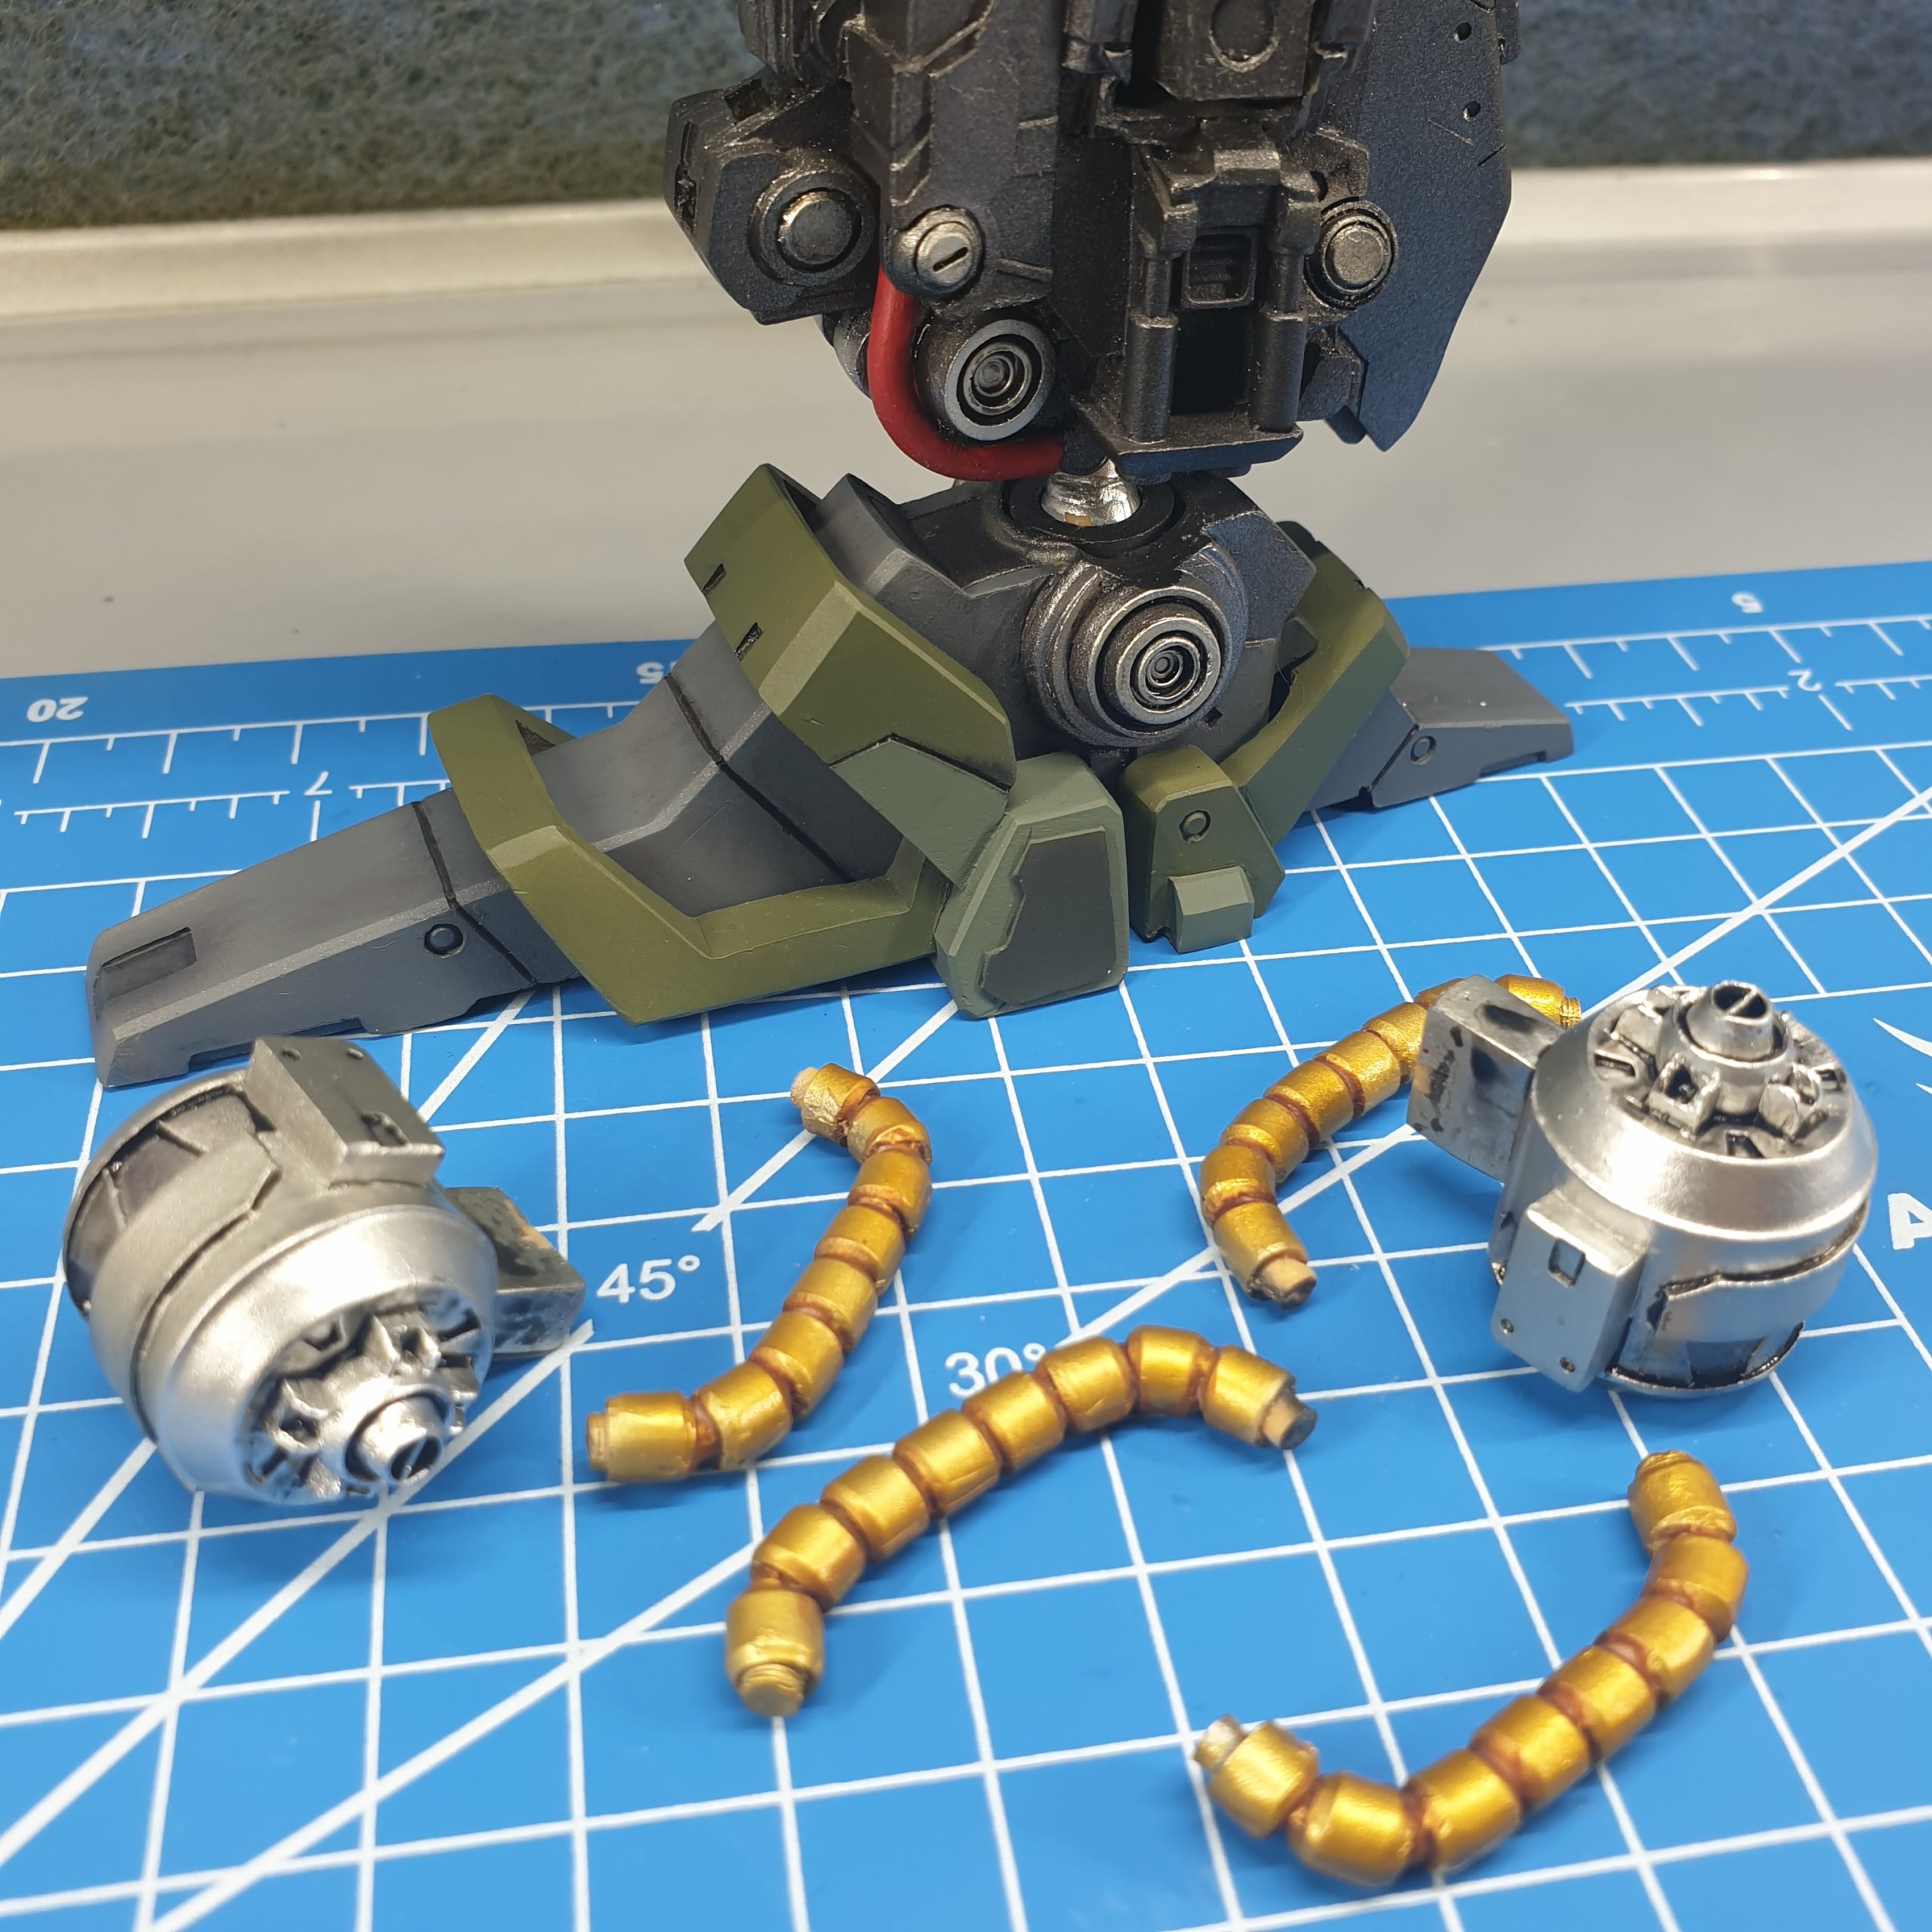
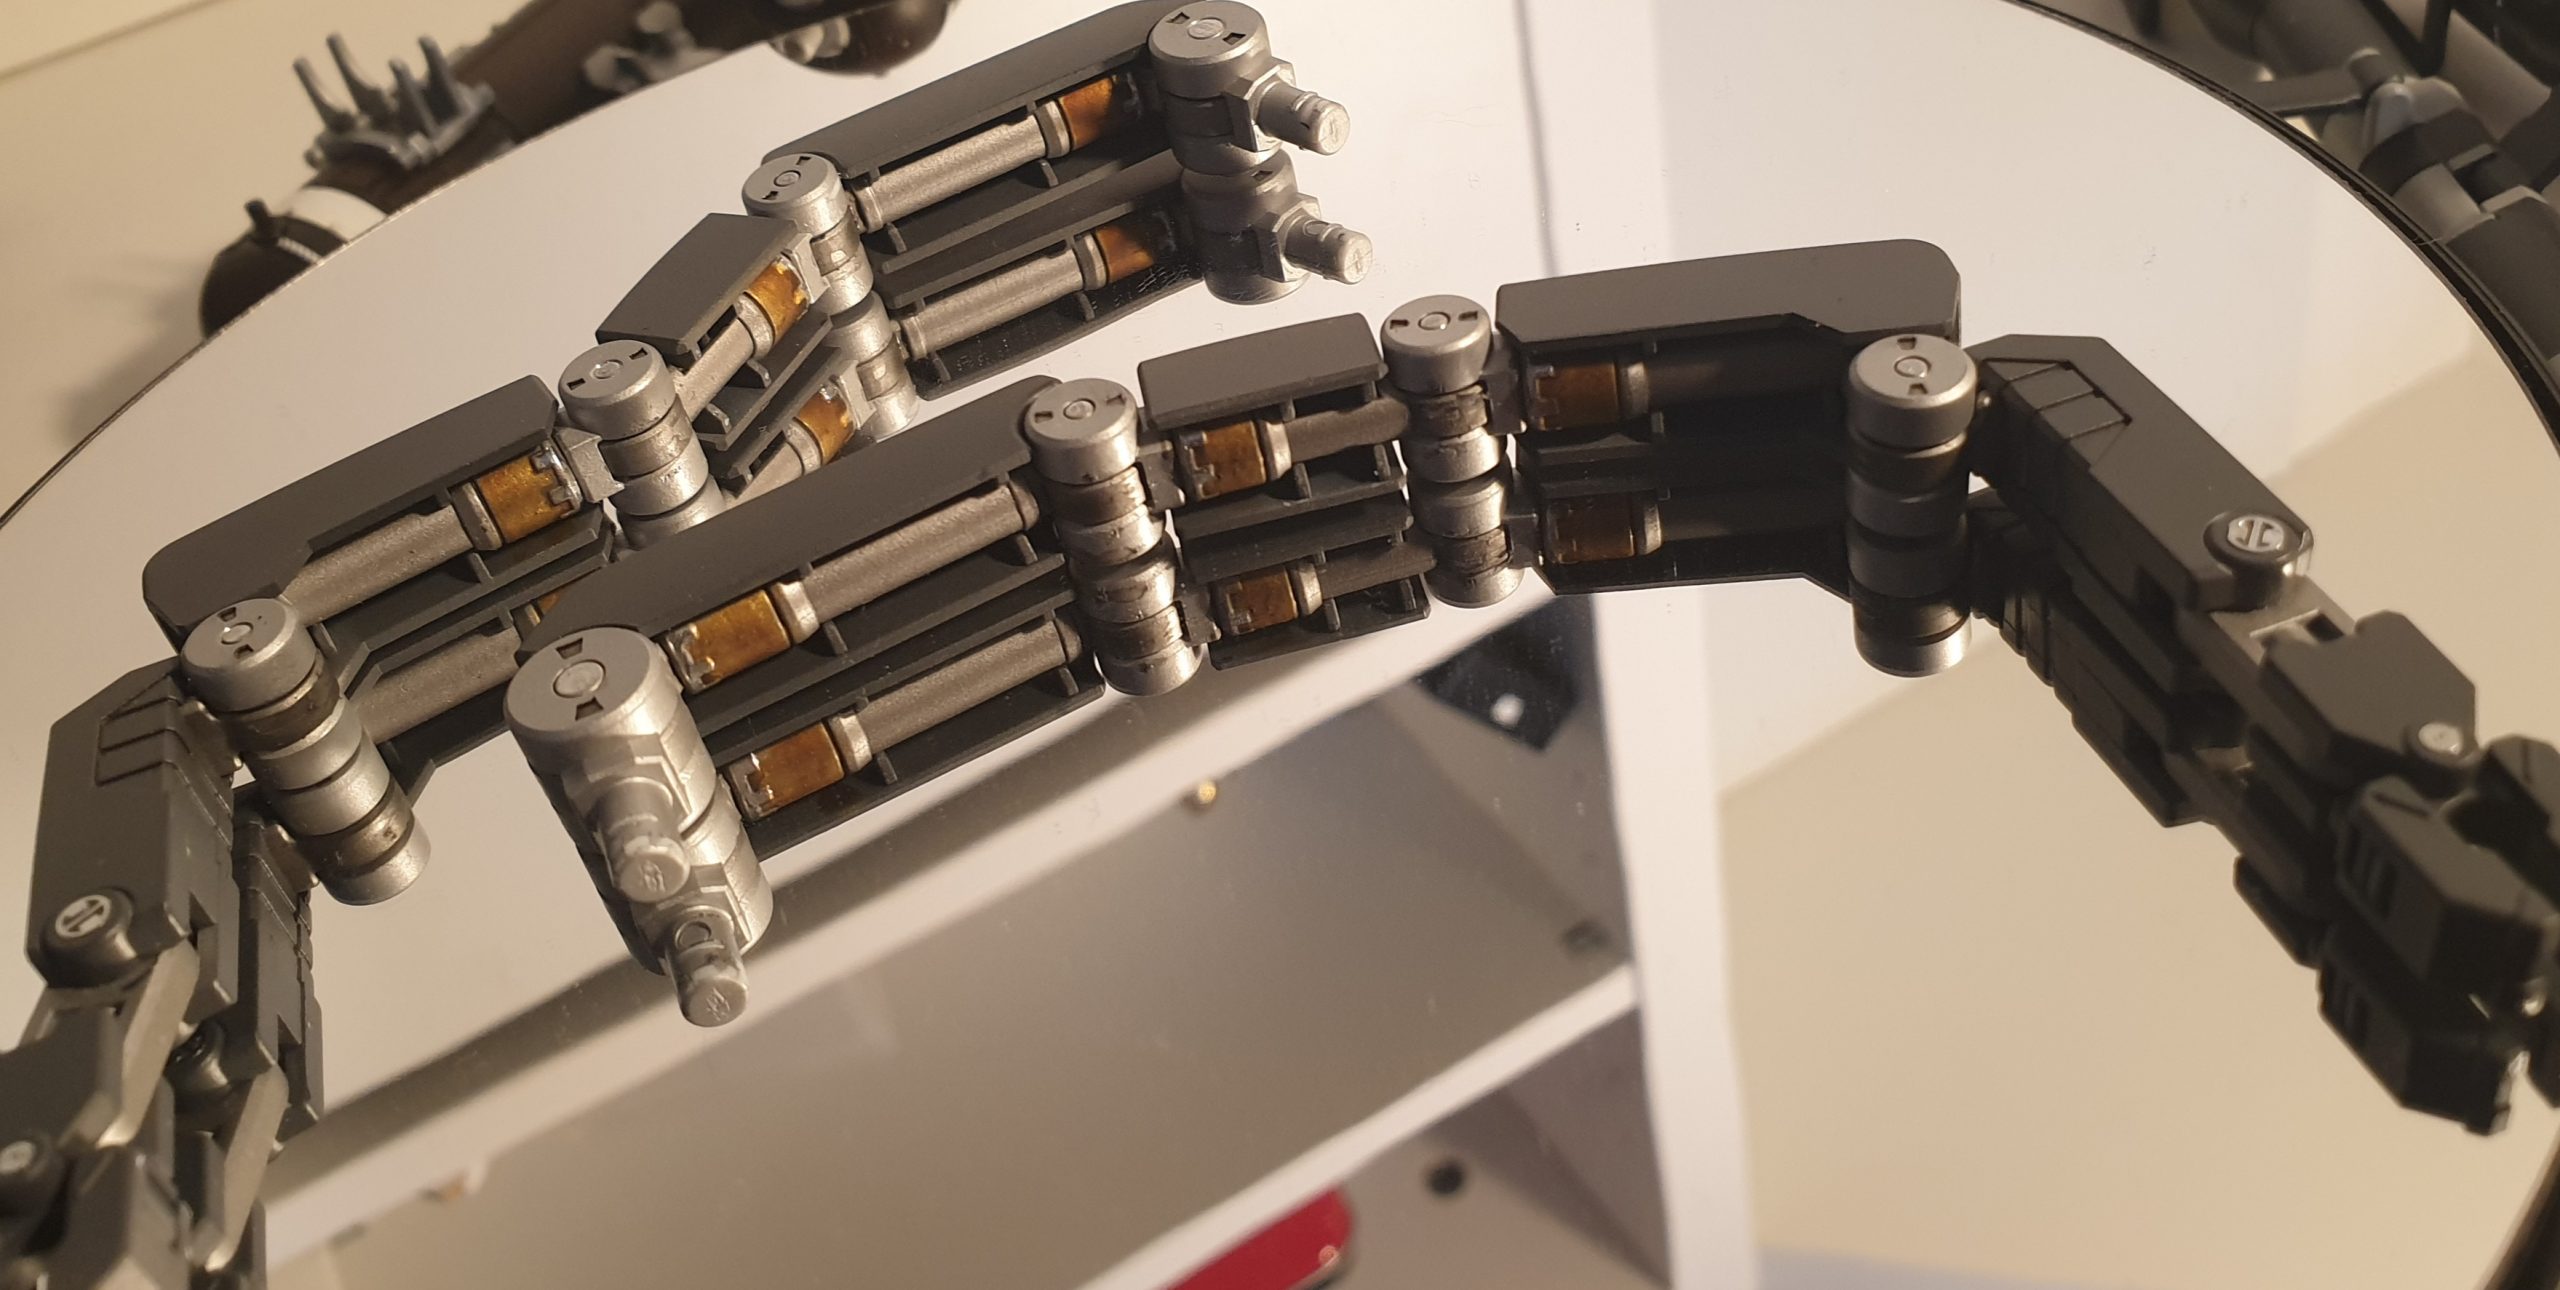
I was playing with metal parts to complete powertube for Saz’s belt – I really didn’t liked that, all beads…
JaoParts kit fits well, thrusters are replaced and other small details from the set. Late night parts construction 🙂 Hands…
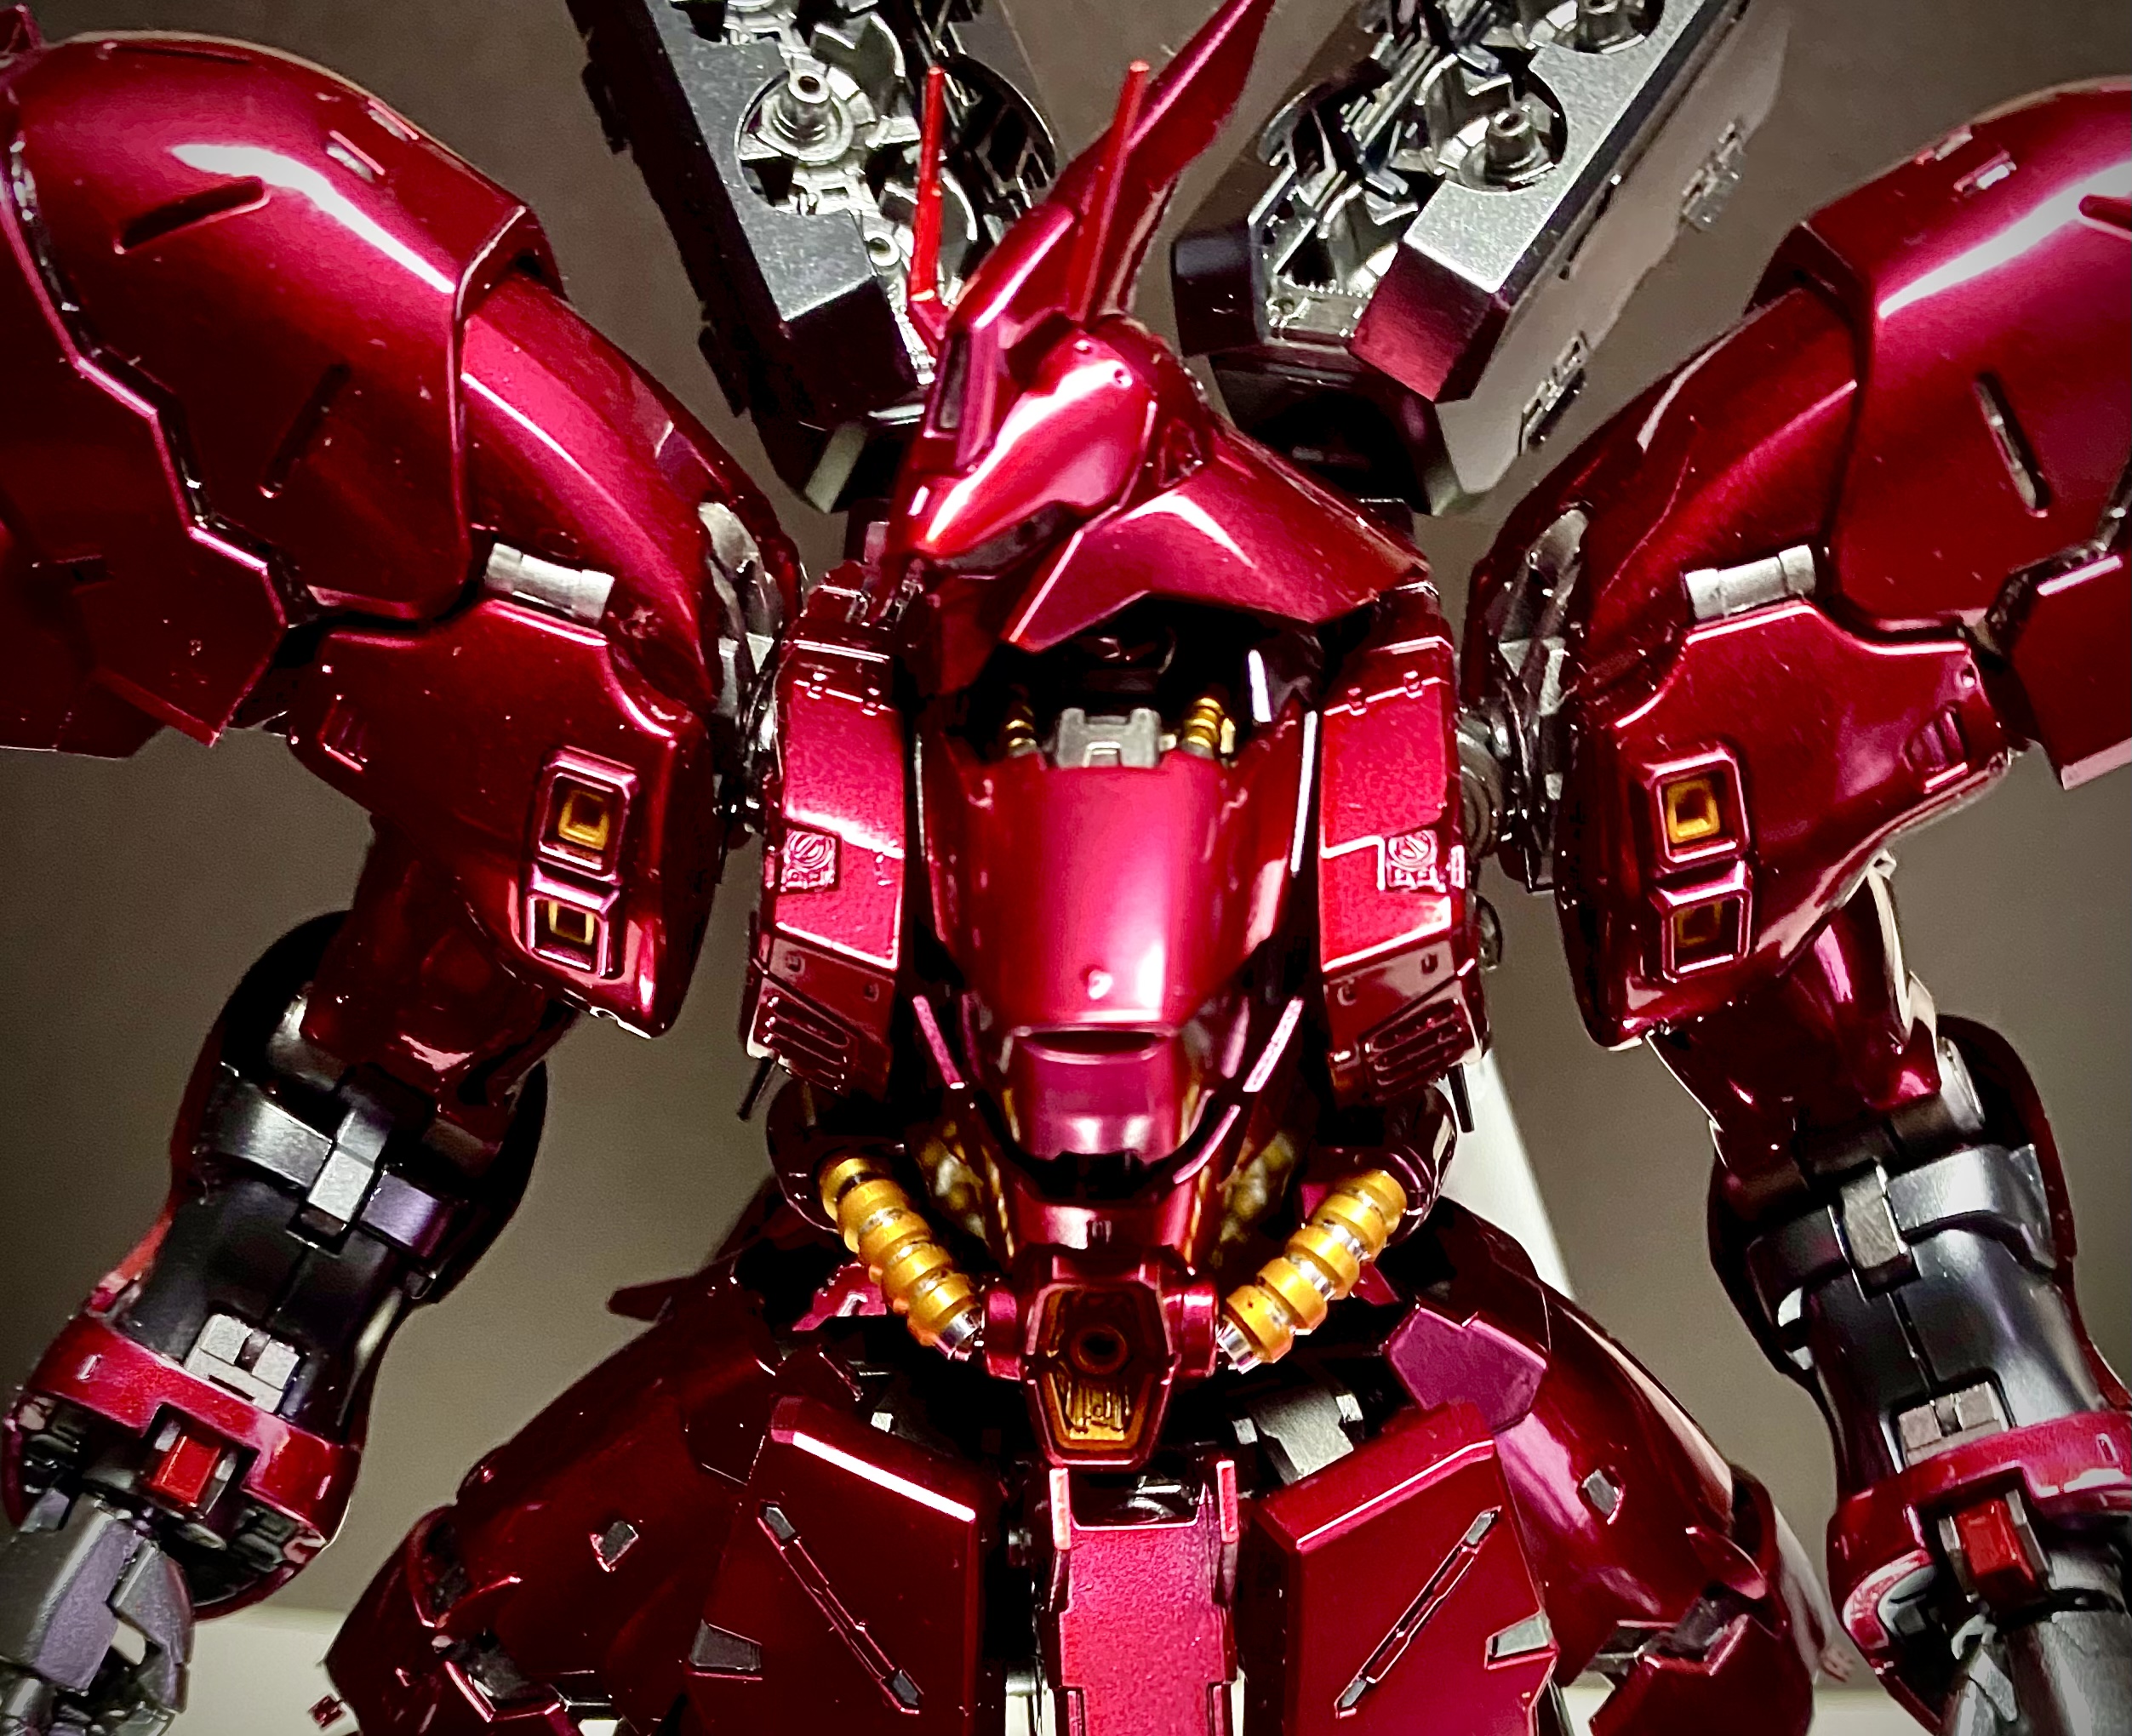
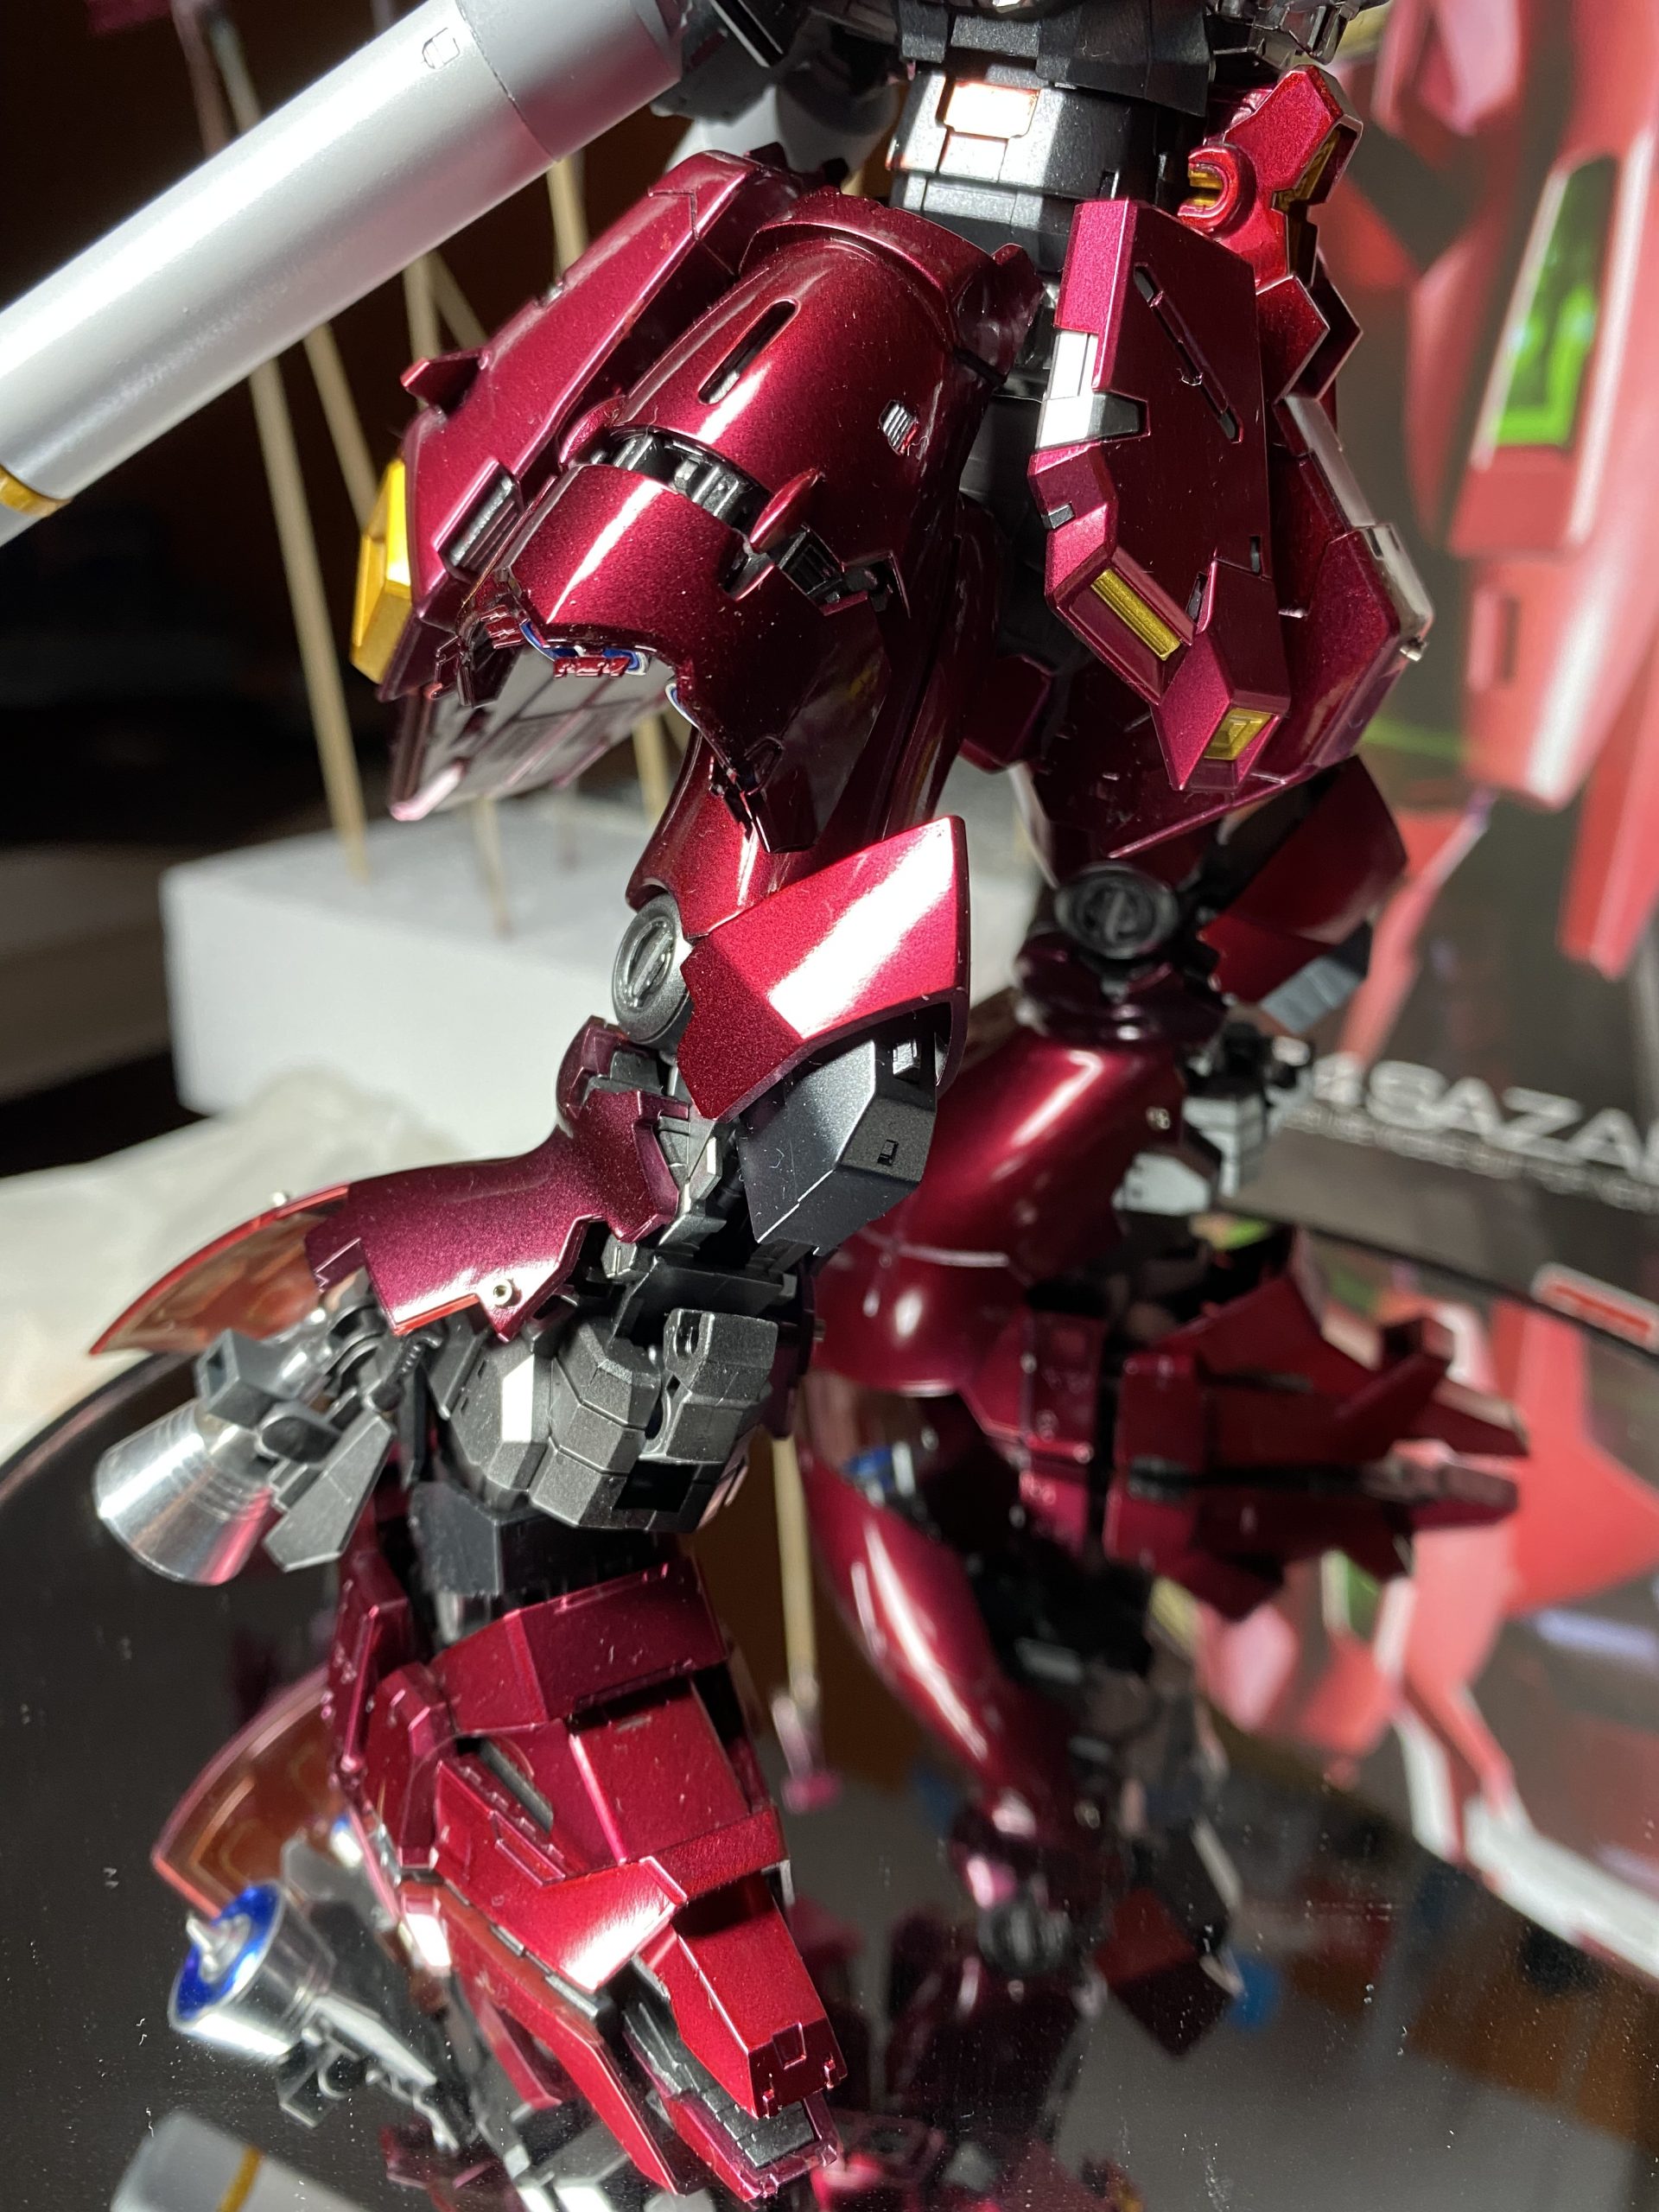
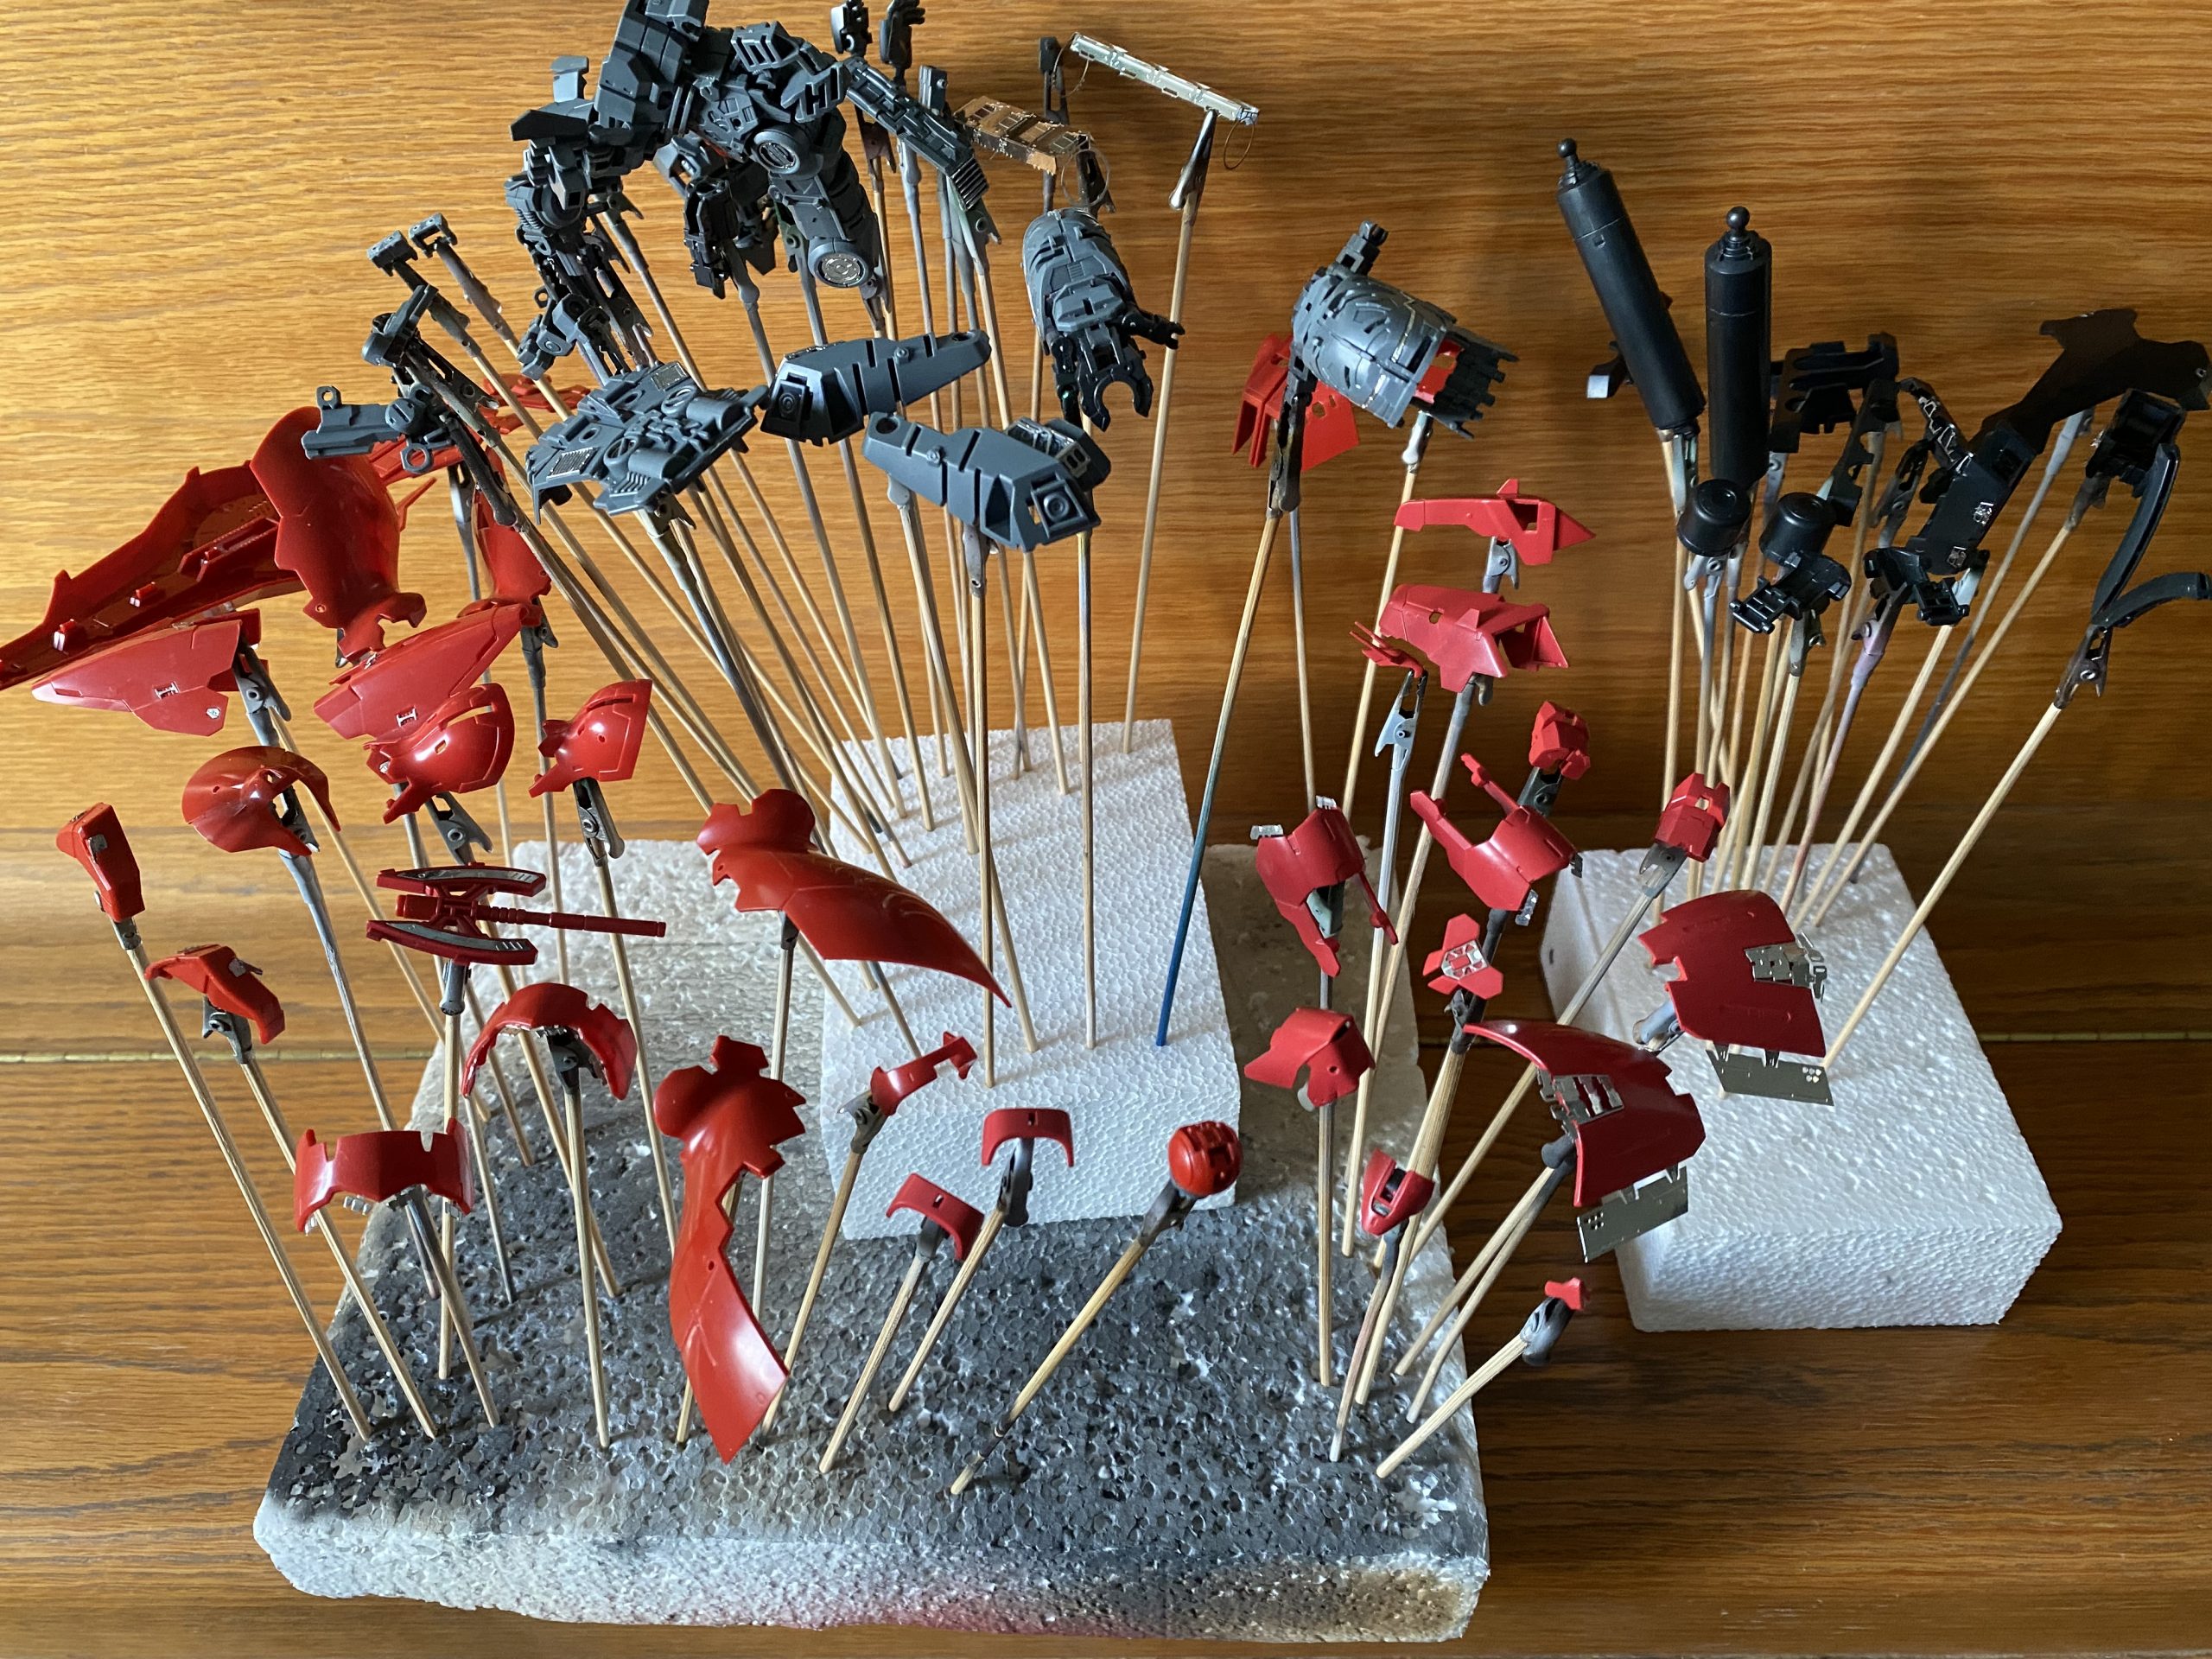
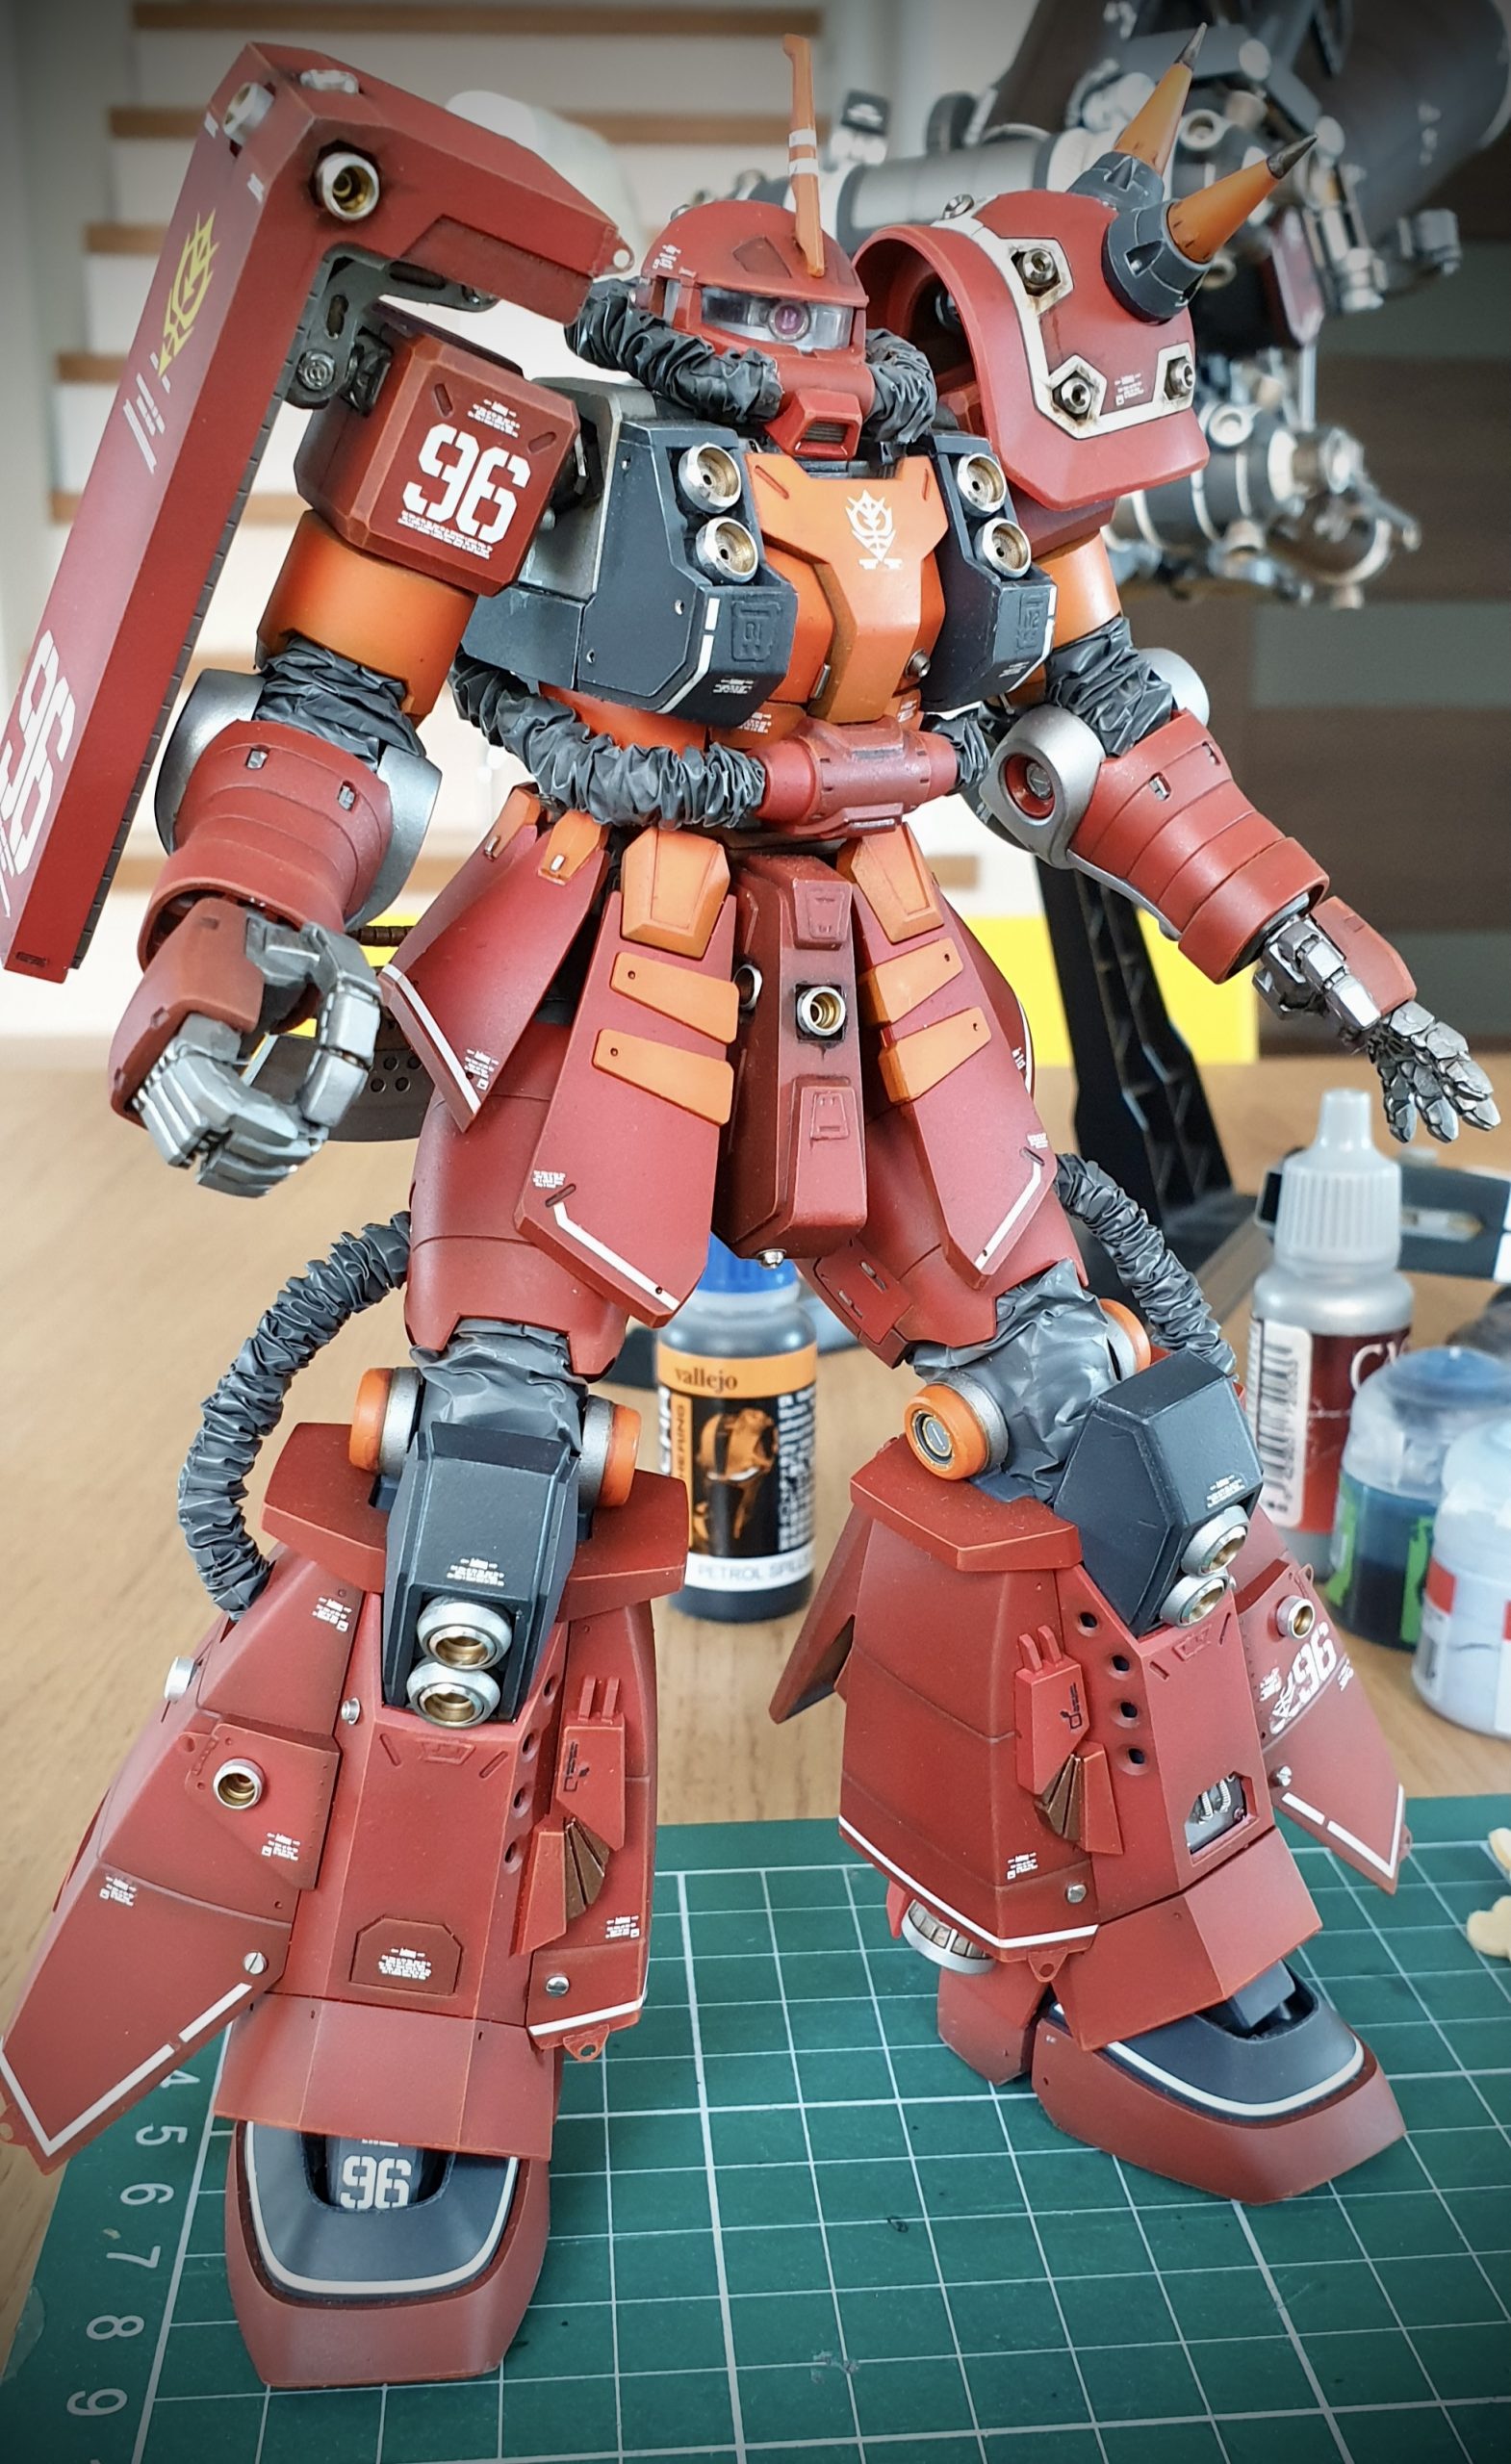
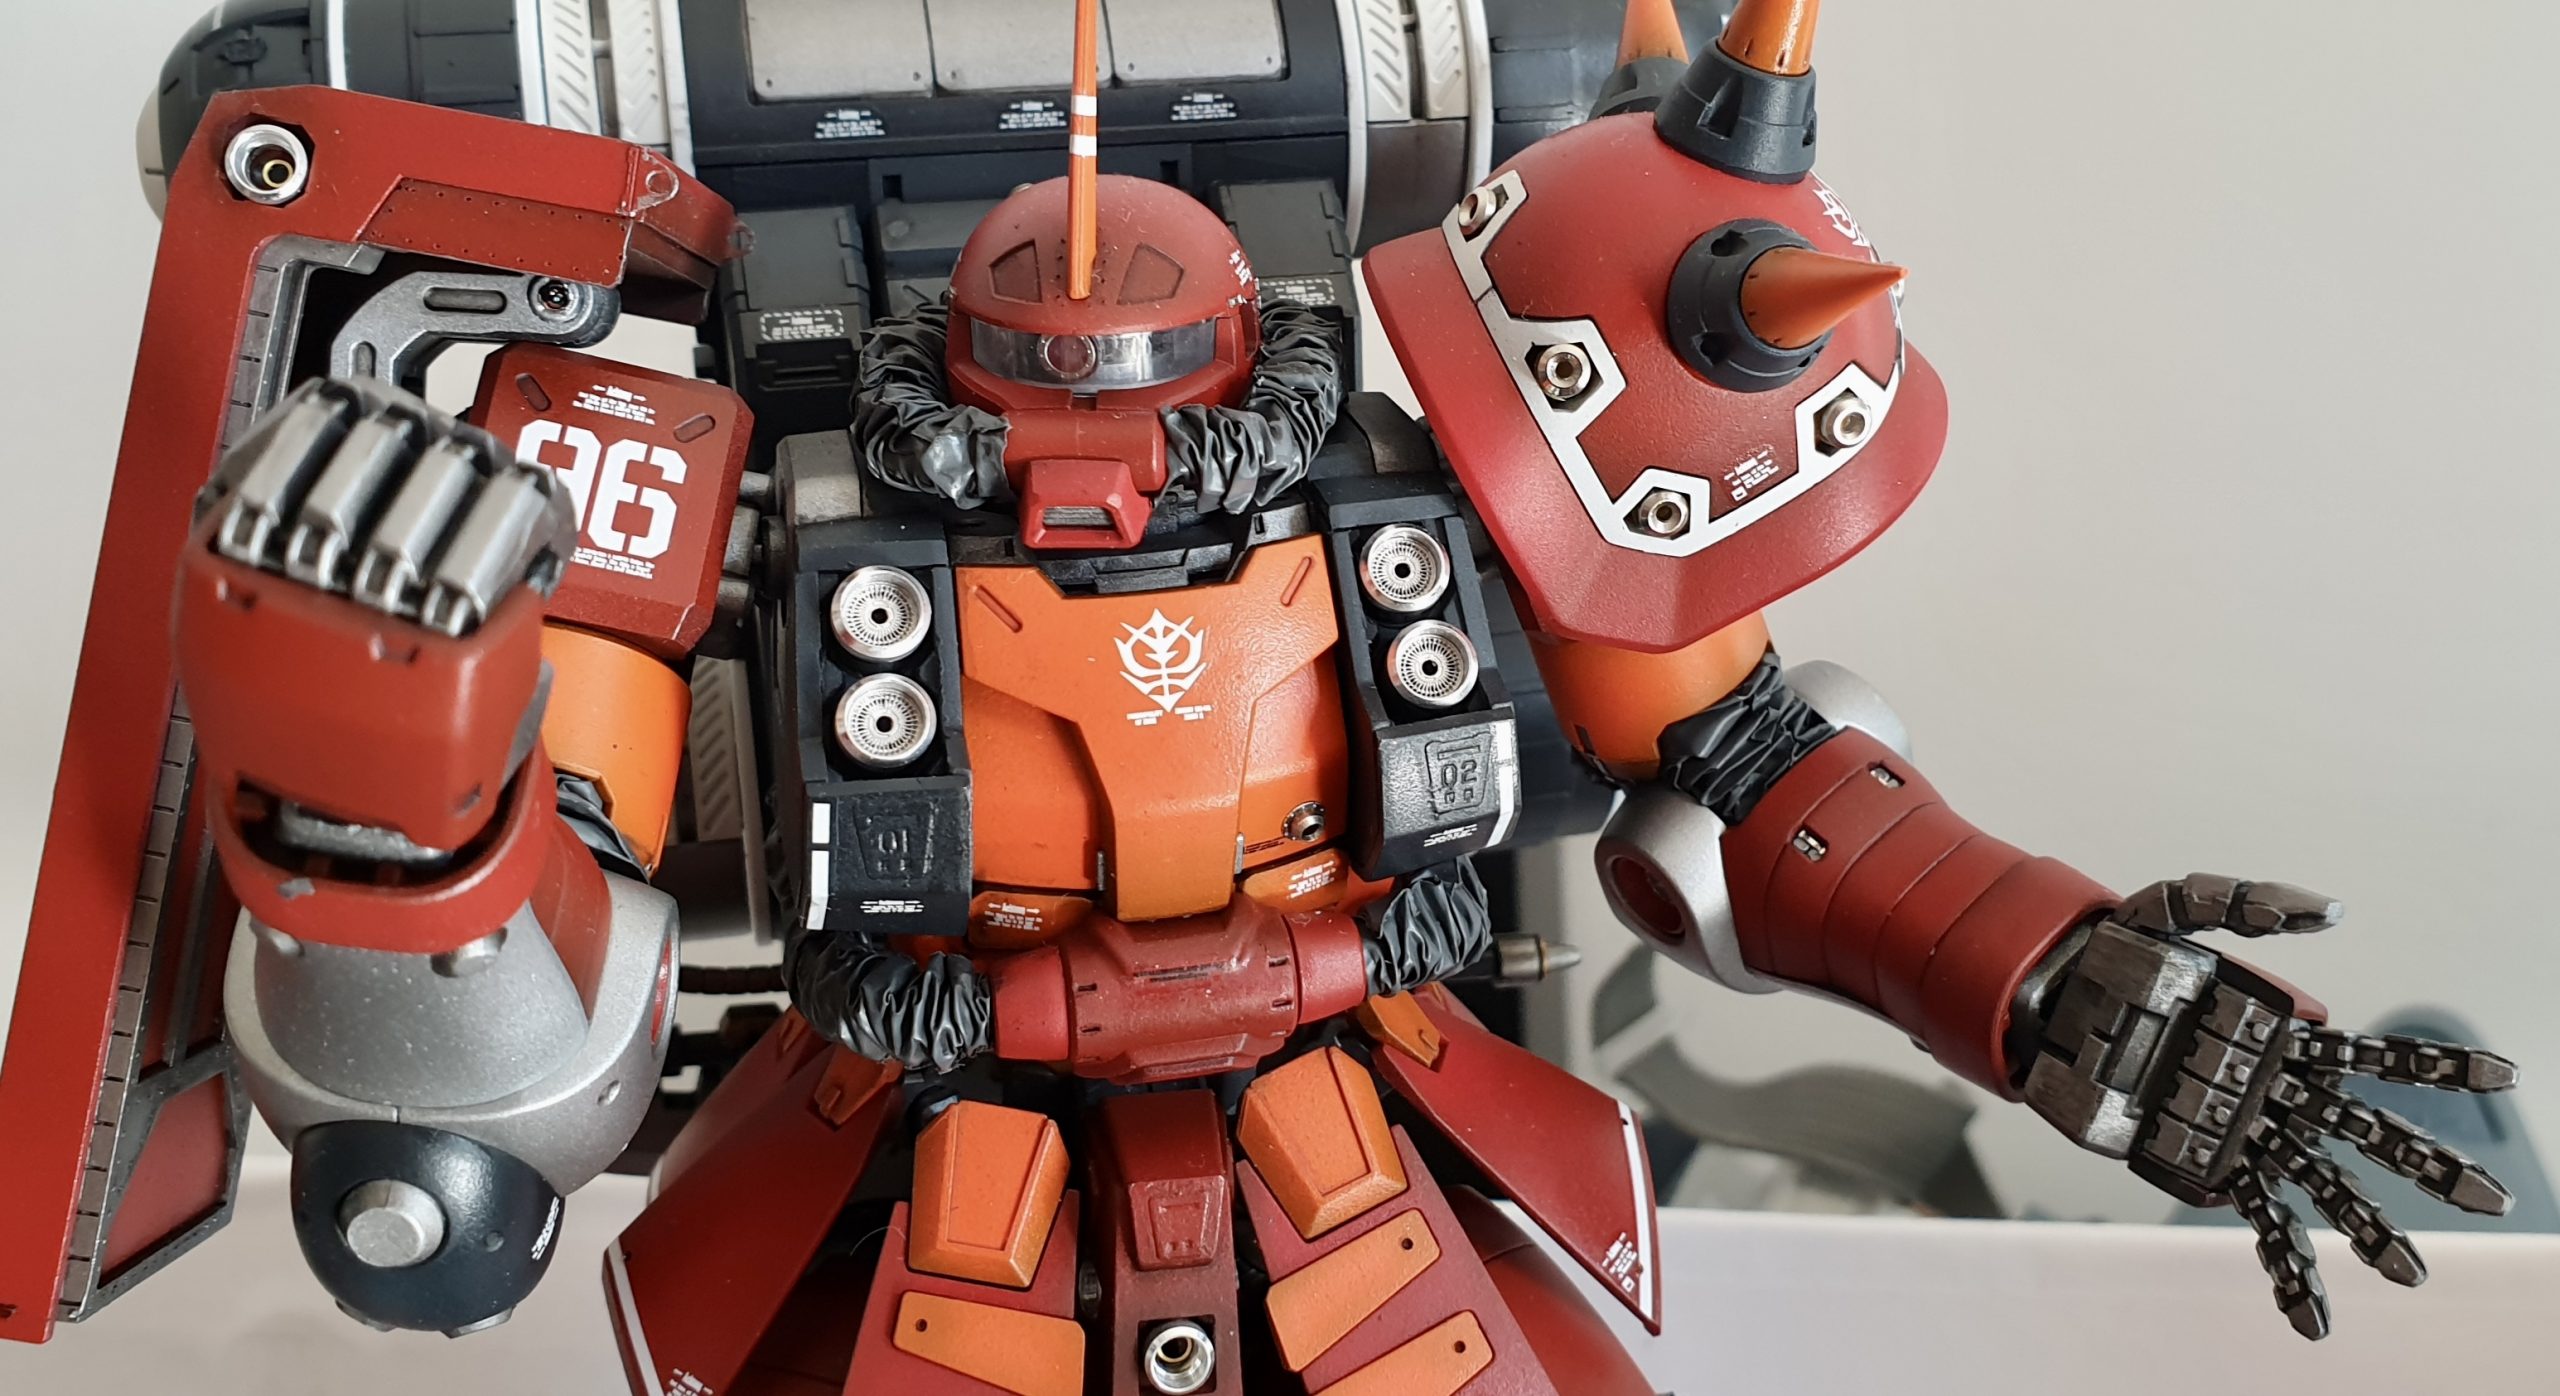
I’m starting to fall in this color – cool shades of red looks great on metal like frame! Love it!…
For black parts of model I used Tamiya LP Black Metallic – no primer – just applied on plastic. Sazabi’s…

Candy factory started! Clear Red from MrGunze H line applied, thinned with Gunze Levelling thinner. Looks sweet already!!! Two shades…
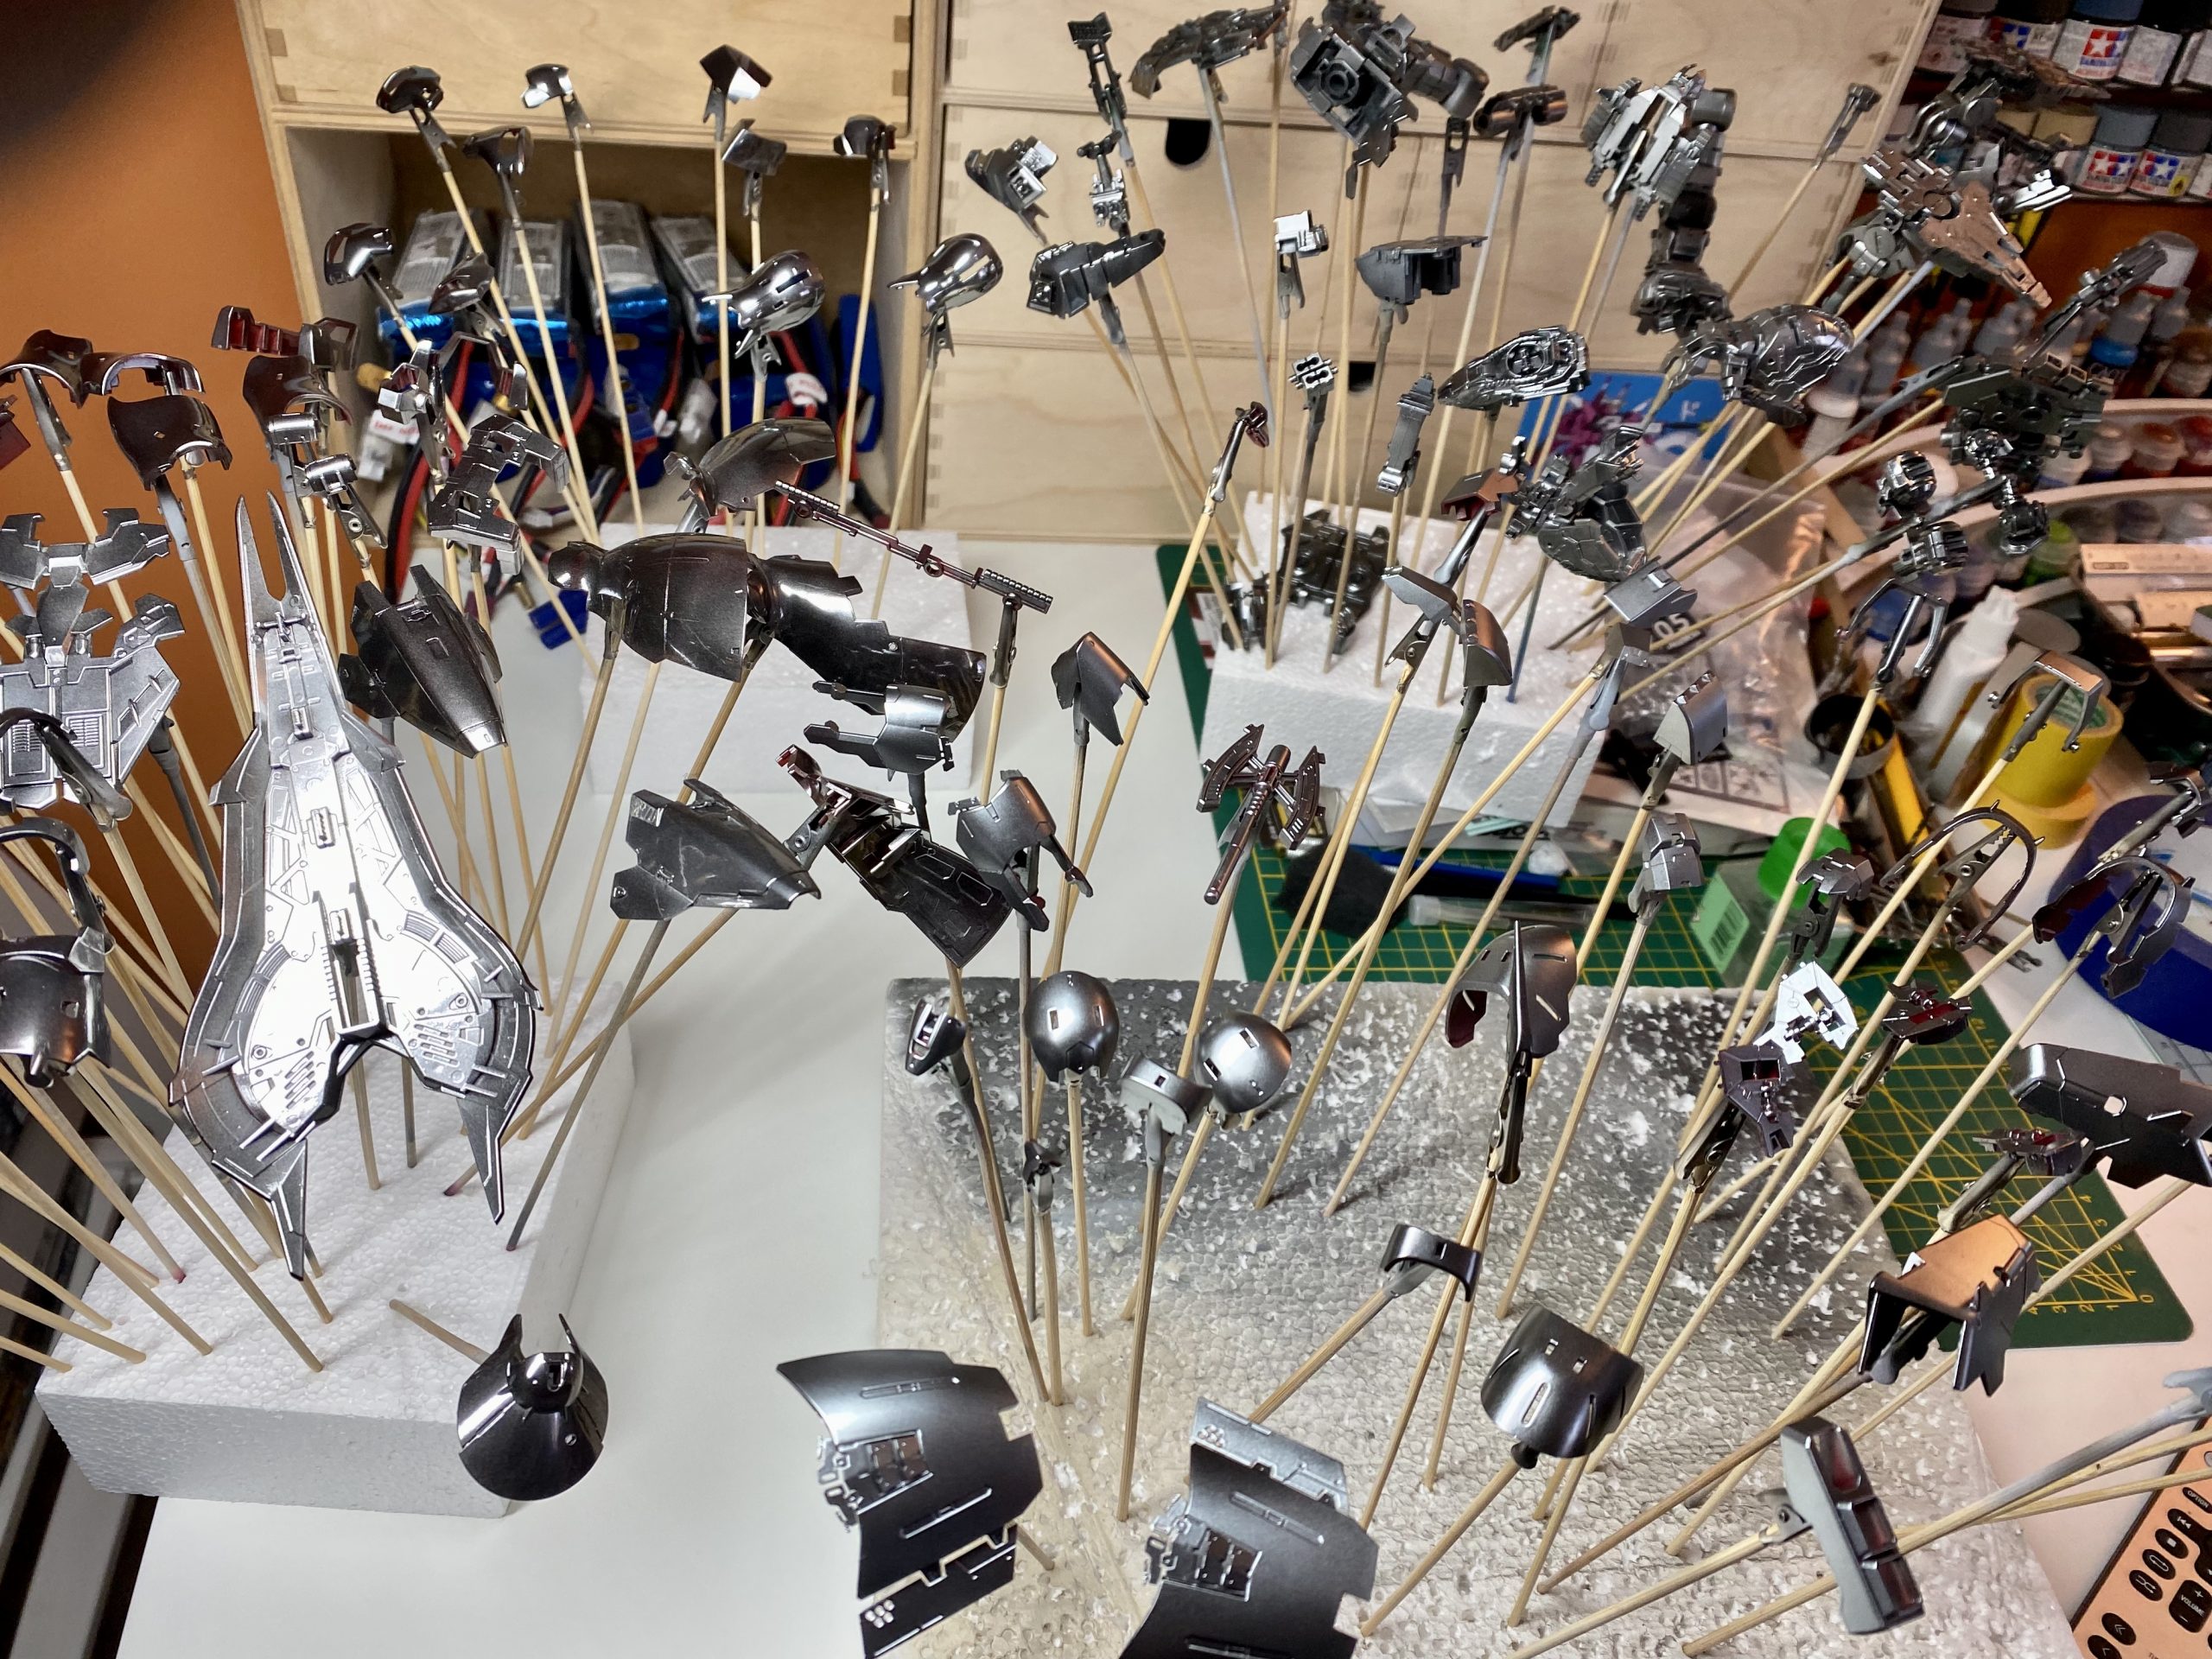
Let the painting begin!!! I went this time with AK Xtreme Metal. The goal is candy finish.There are many approaches…
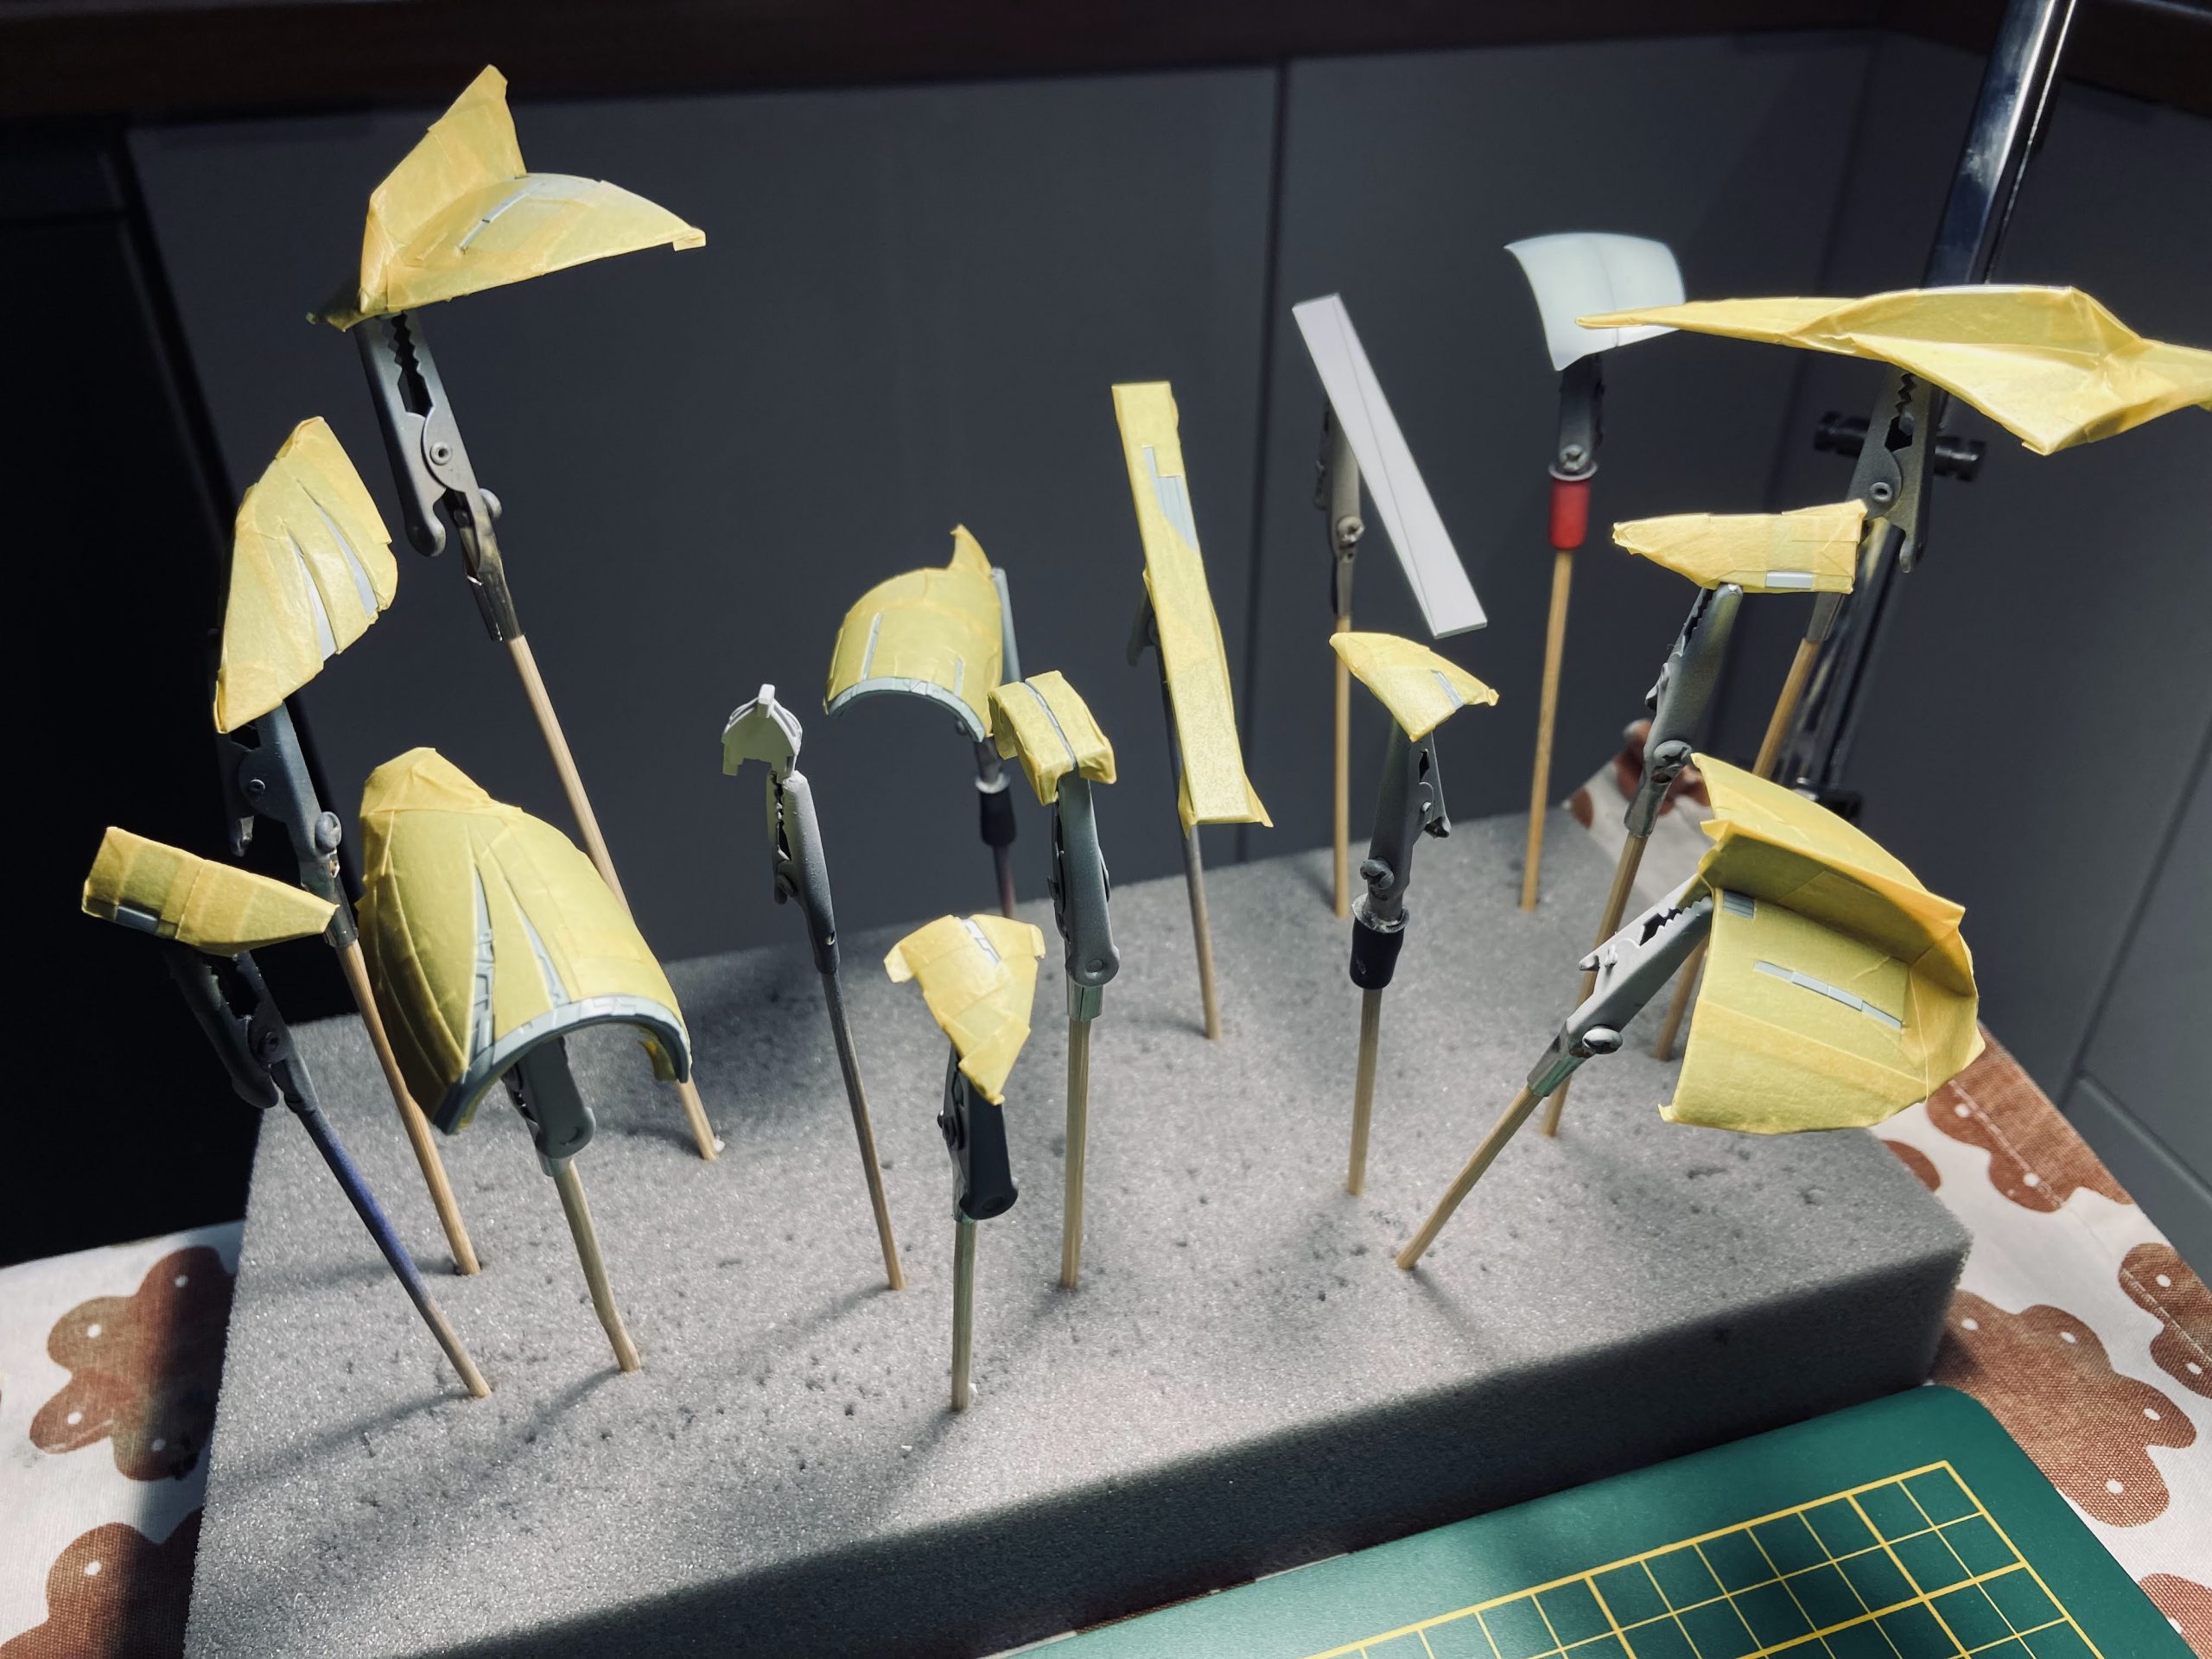
I have set of painting clips. It was fine for my previous buids, as for little Sazabi almost all paints…
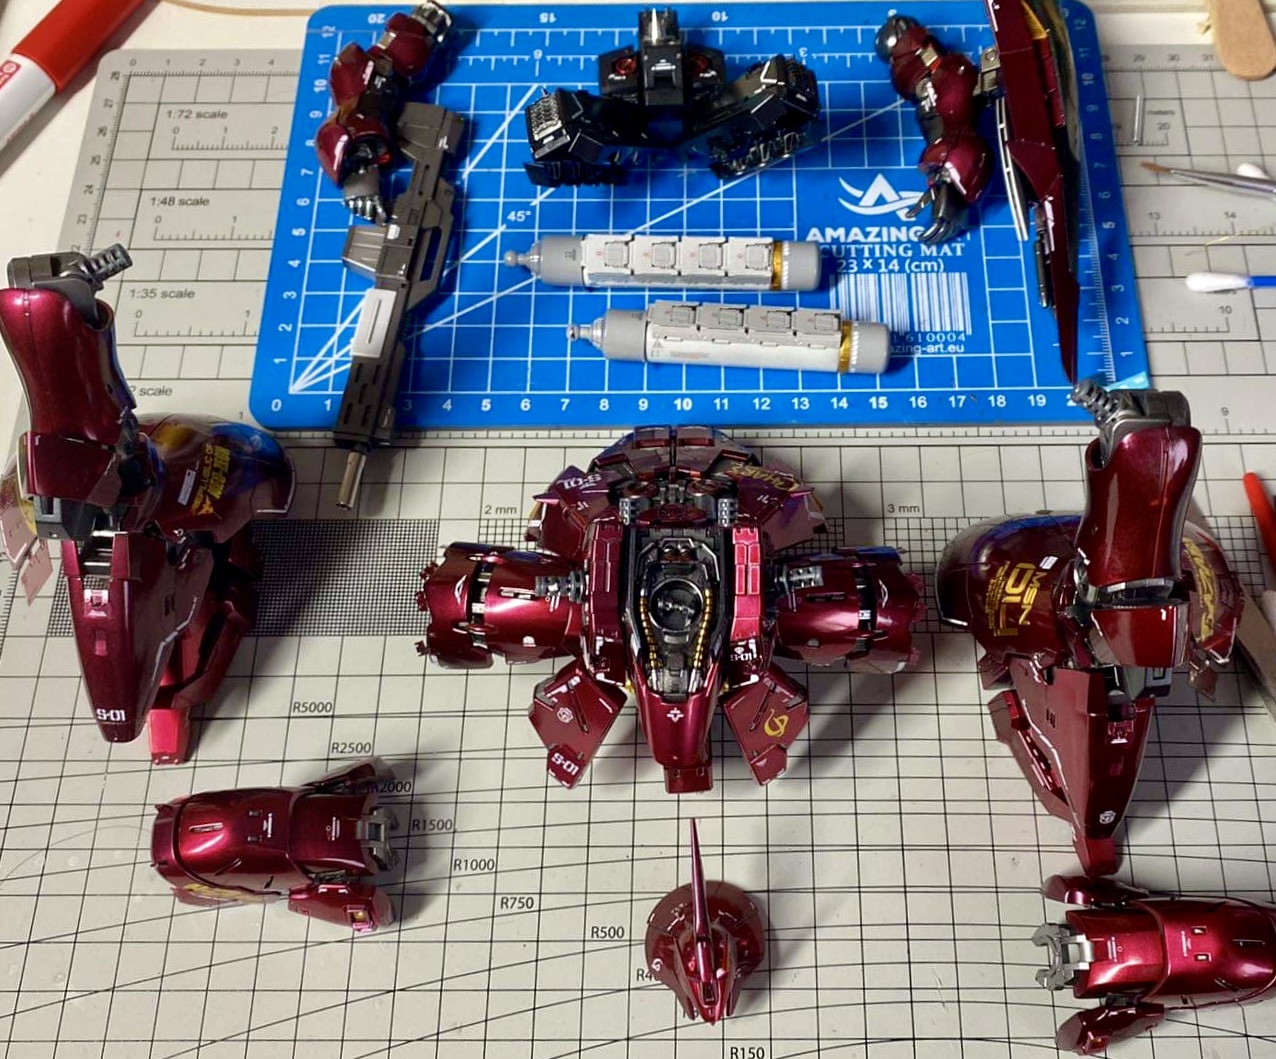
Preparations started. It wan’t so easy to dismount Sazabi RG without breaking any parts – I finished deconstruction successfully with…
Yes – the time has come to make something clean and shiny.I builded Sazabi RG some time ago – just…
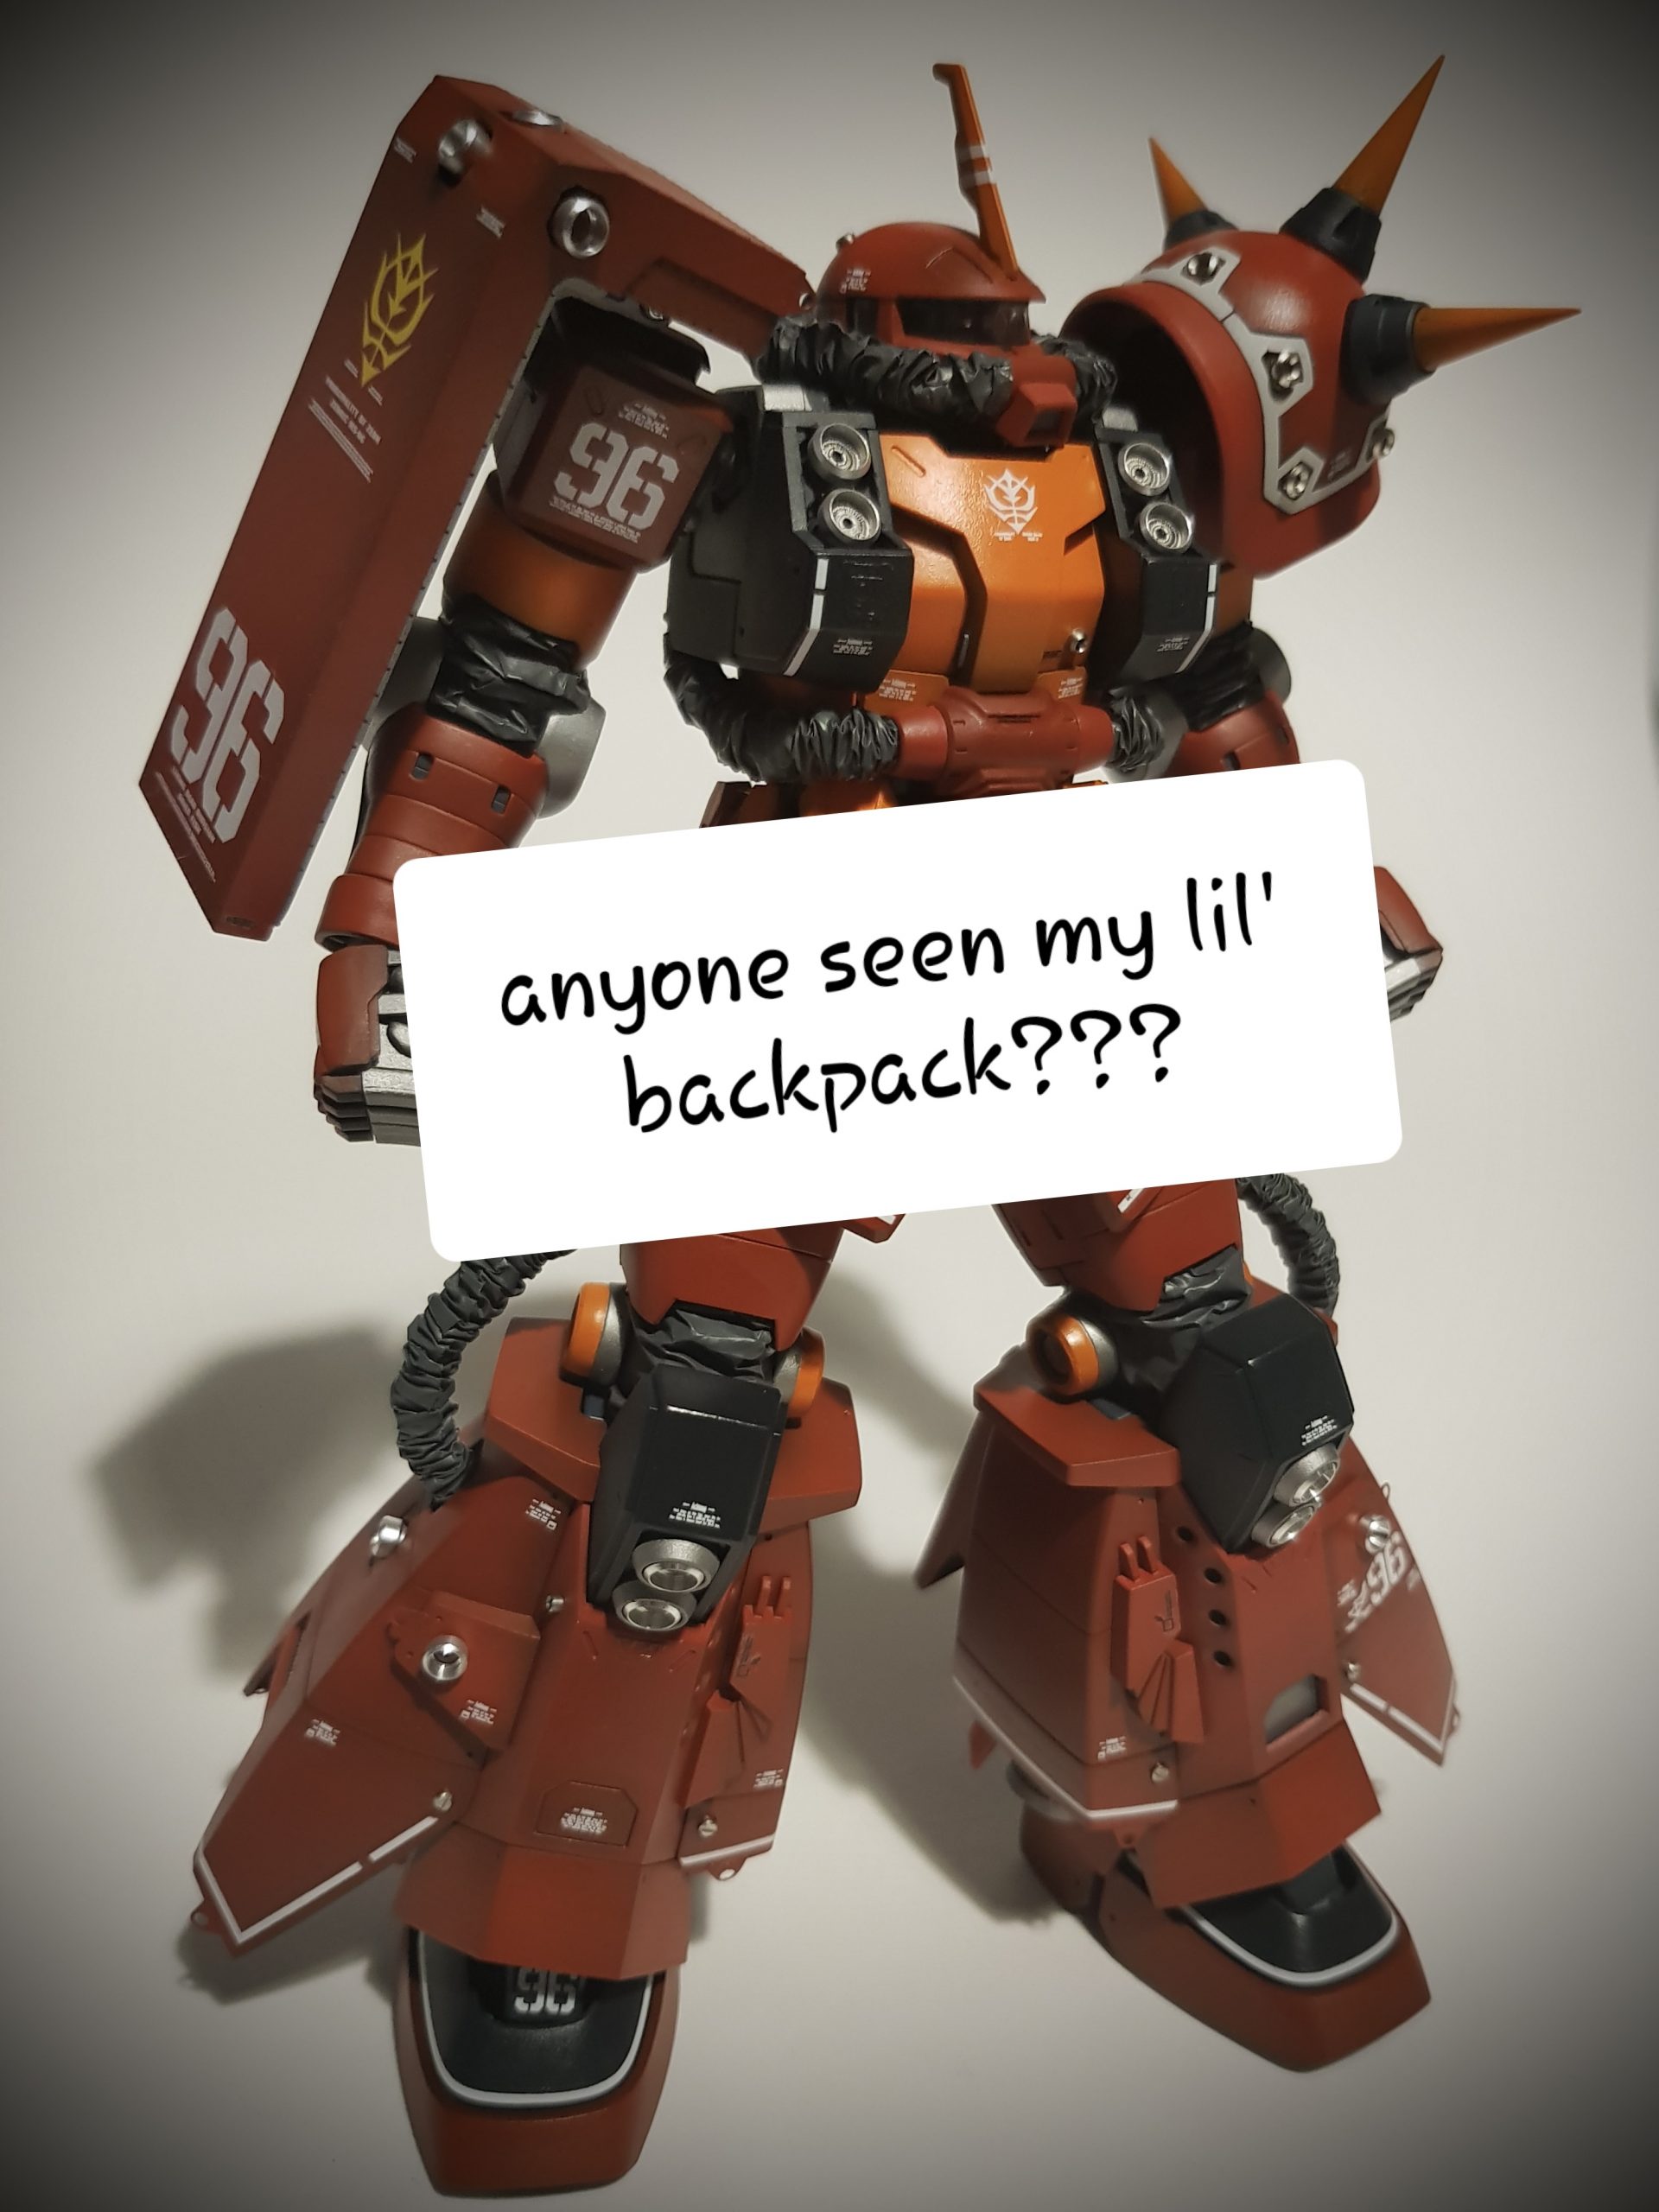
Backpack, weapon, shield and final thoughts. Shield – I forgot to fit it at the beginning. I had to trim…
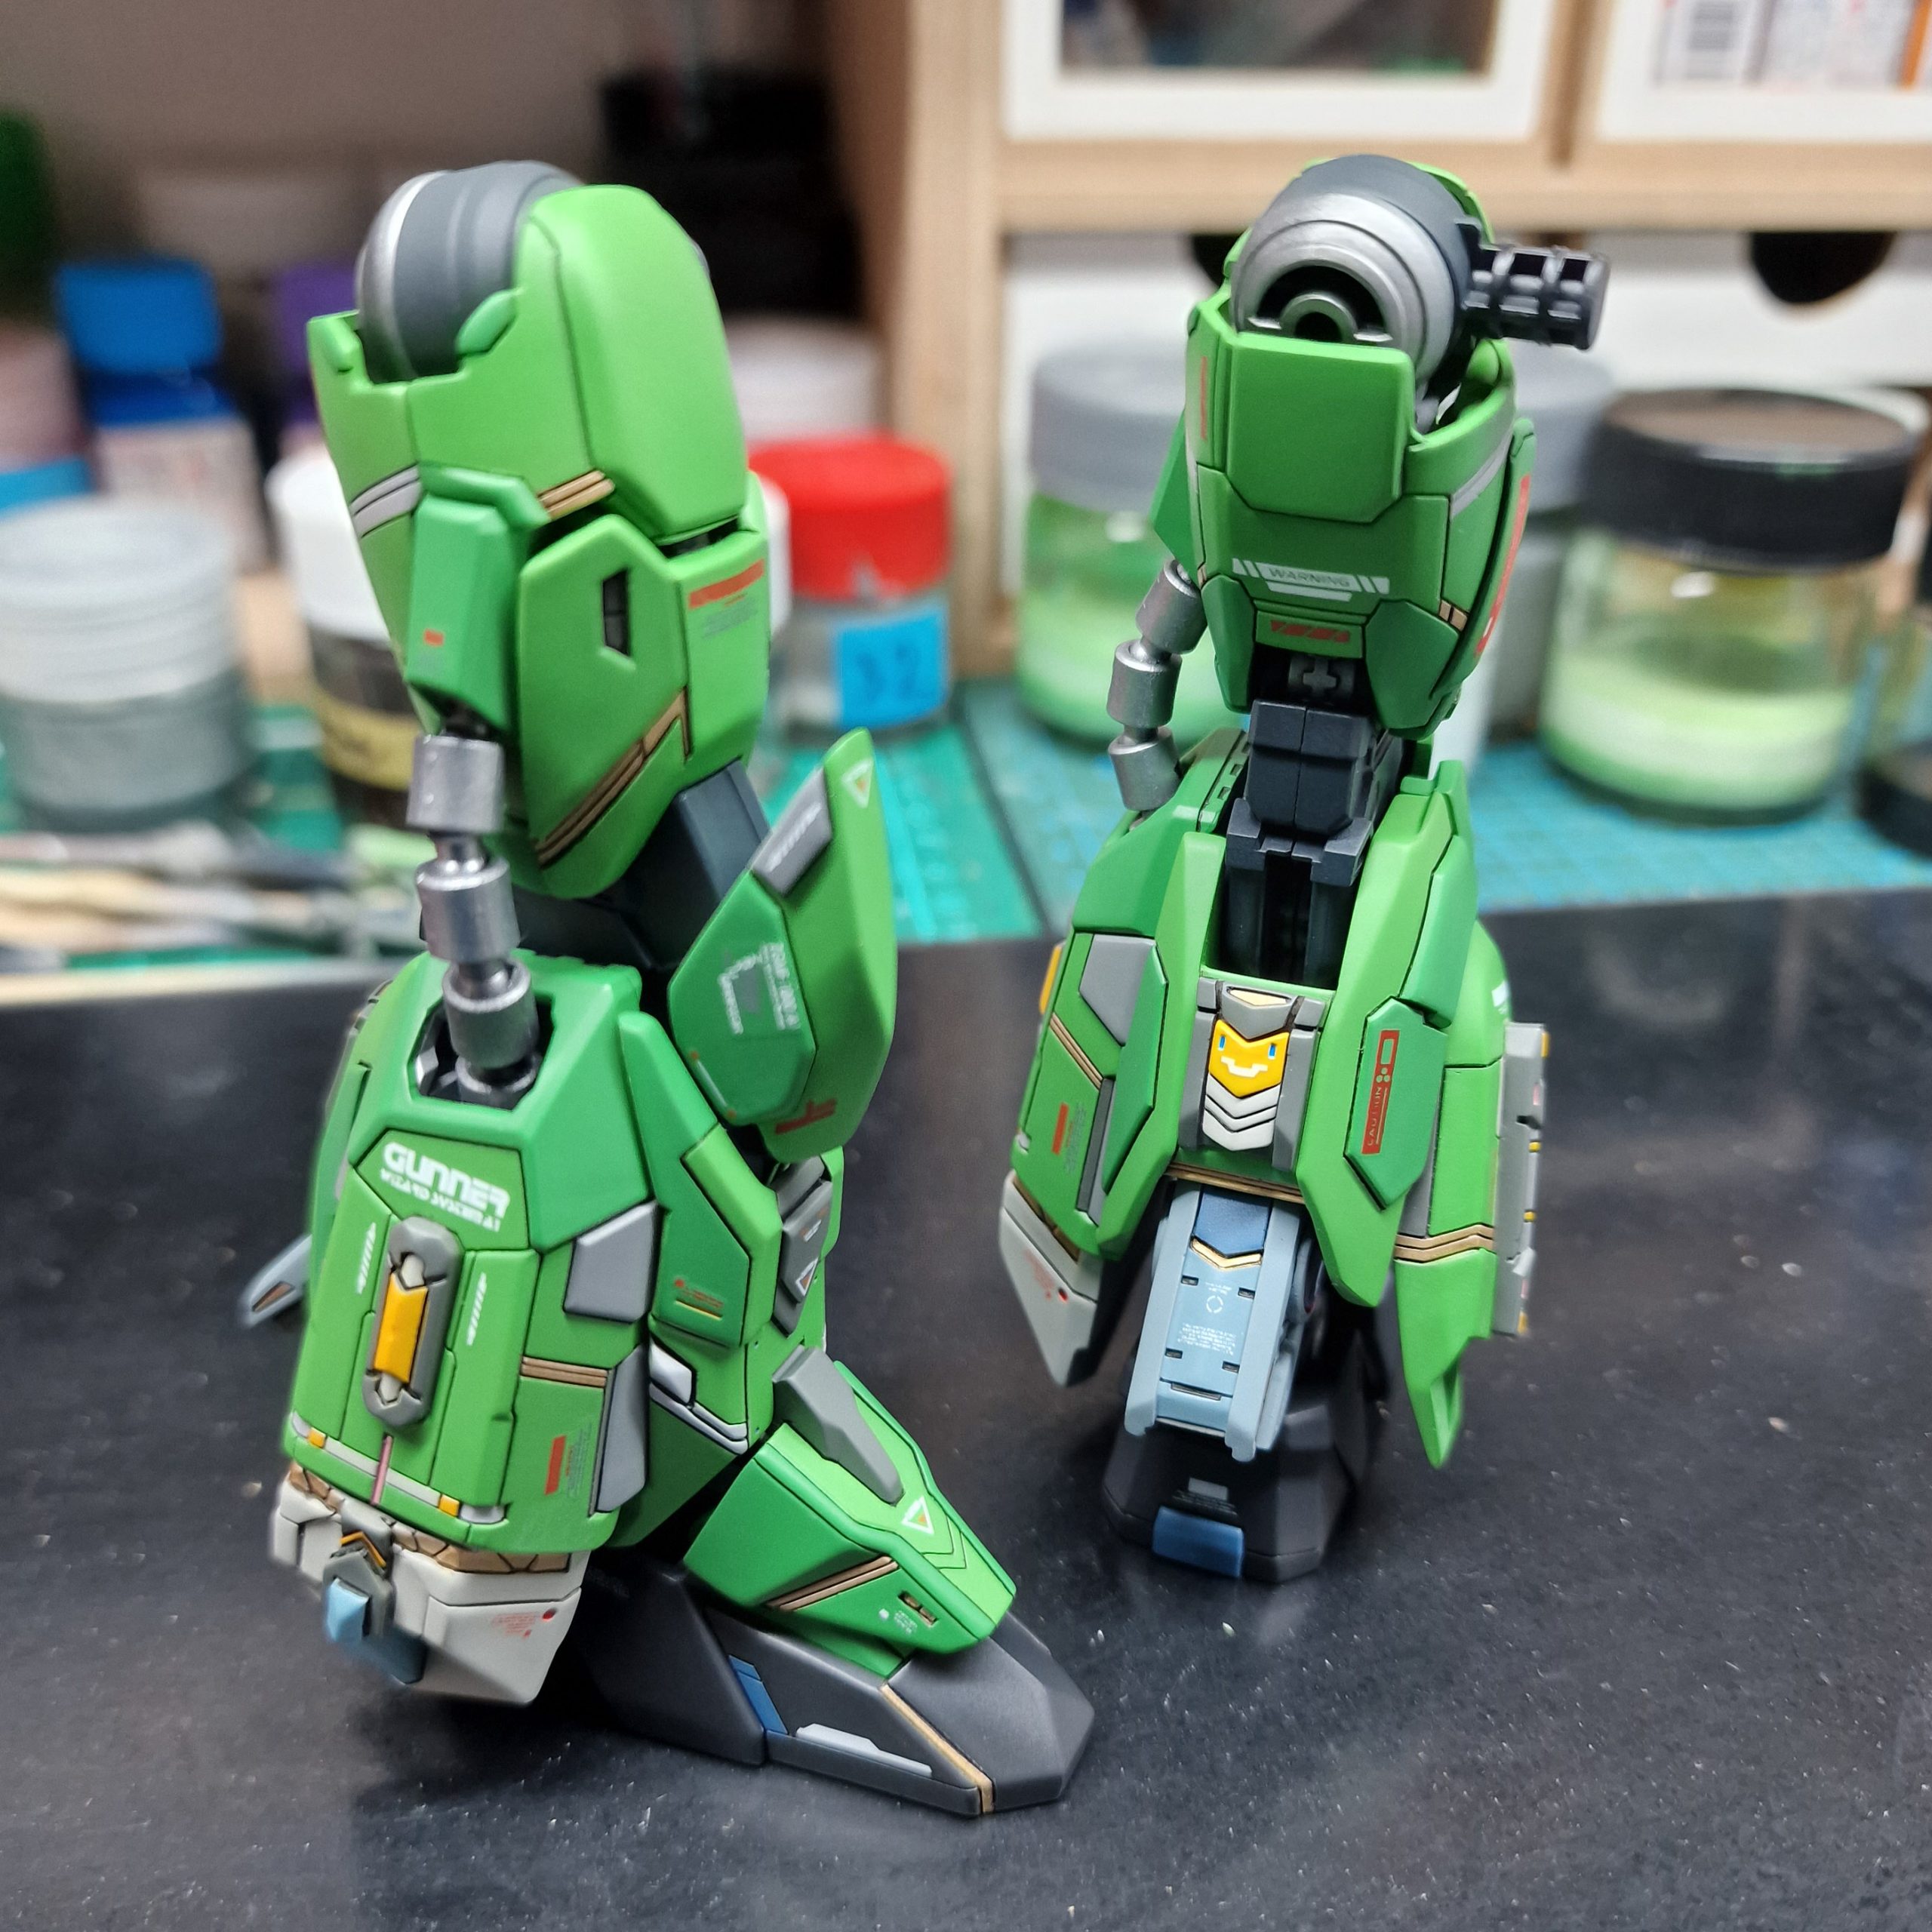
Update on legs/hands. This part was very tricky, there was a huge fitting issue with side parts for legs. With…
It’s been a while but I have gathered a lot for you girls and boys. For starters I just love…
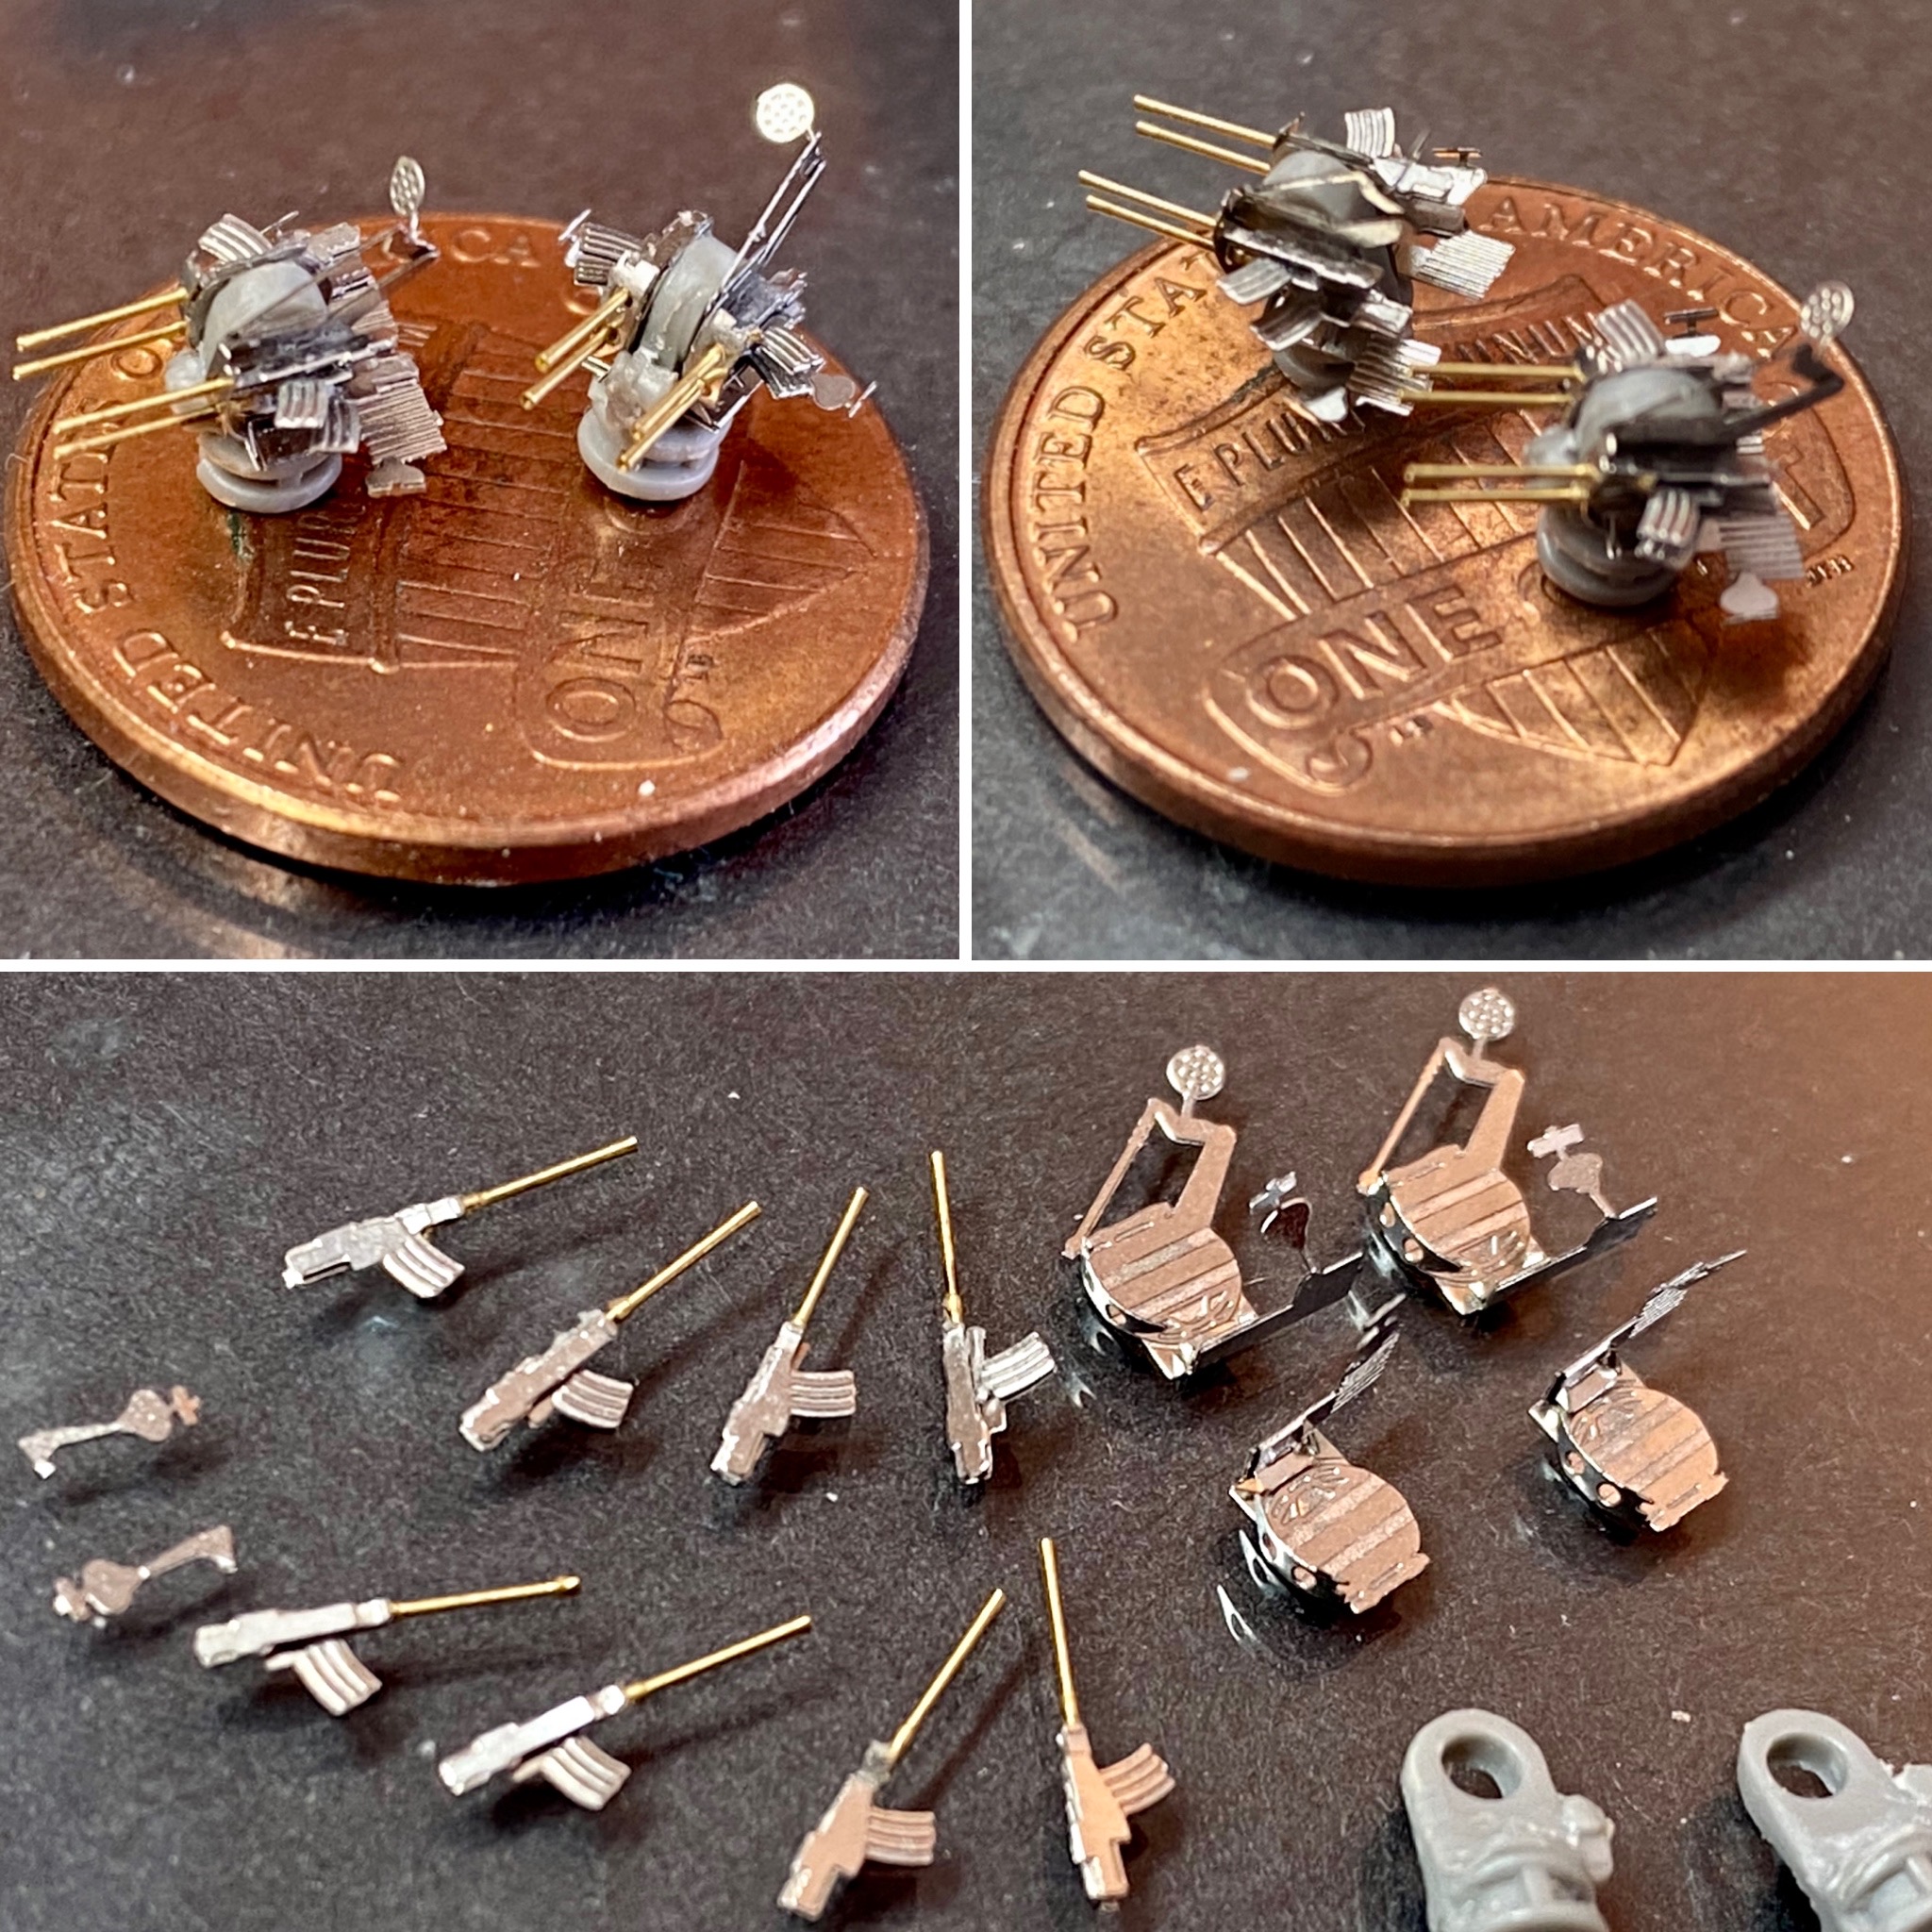
Some A-A cannons get painted and Modellers World Industrial Dirt wash was applied. In meantime I repainted blast-bags on main…
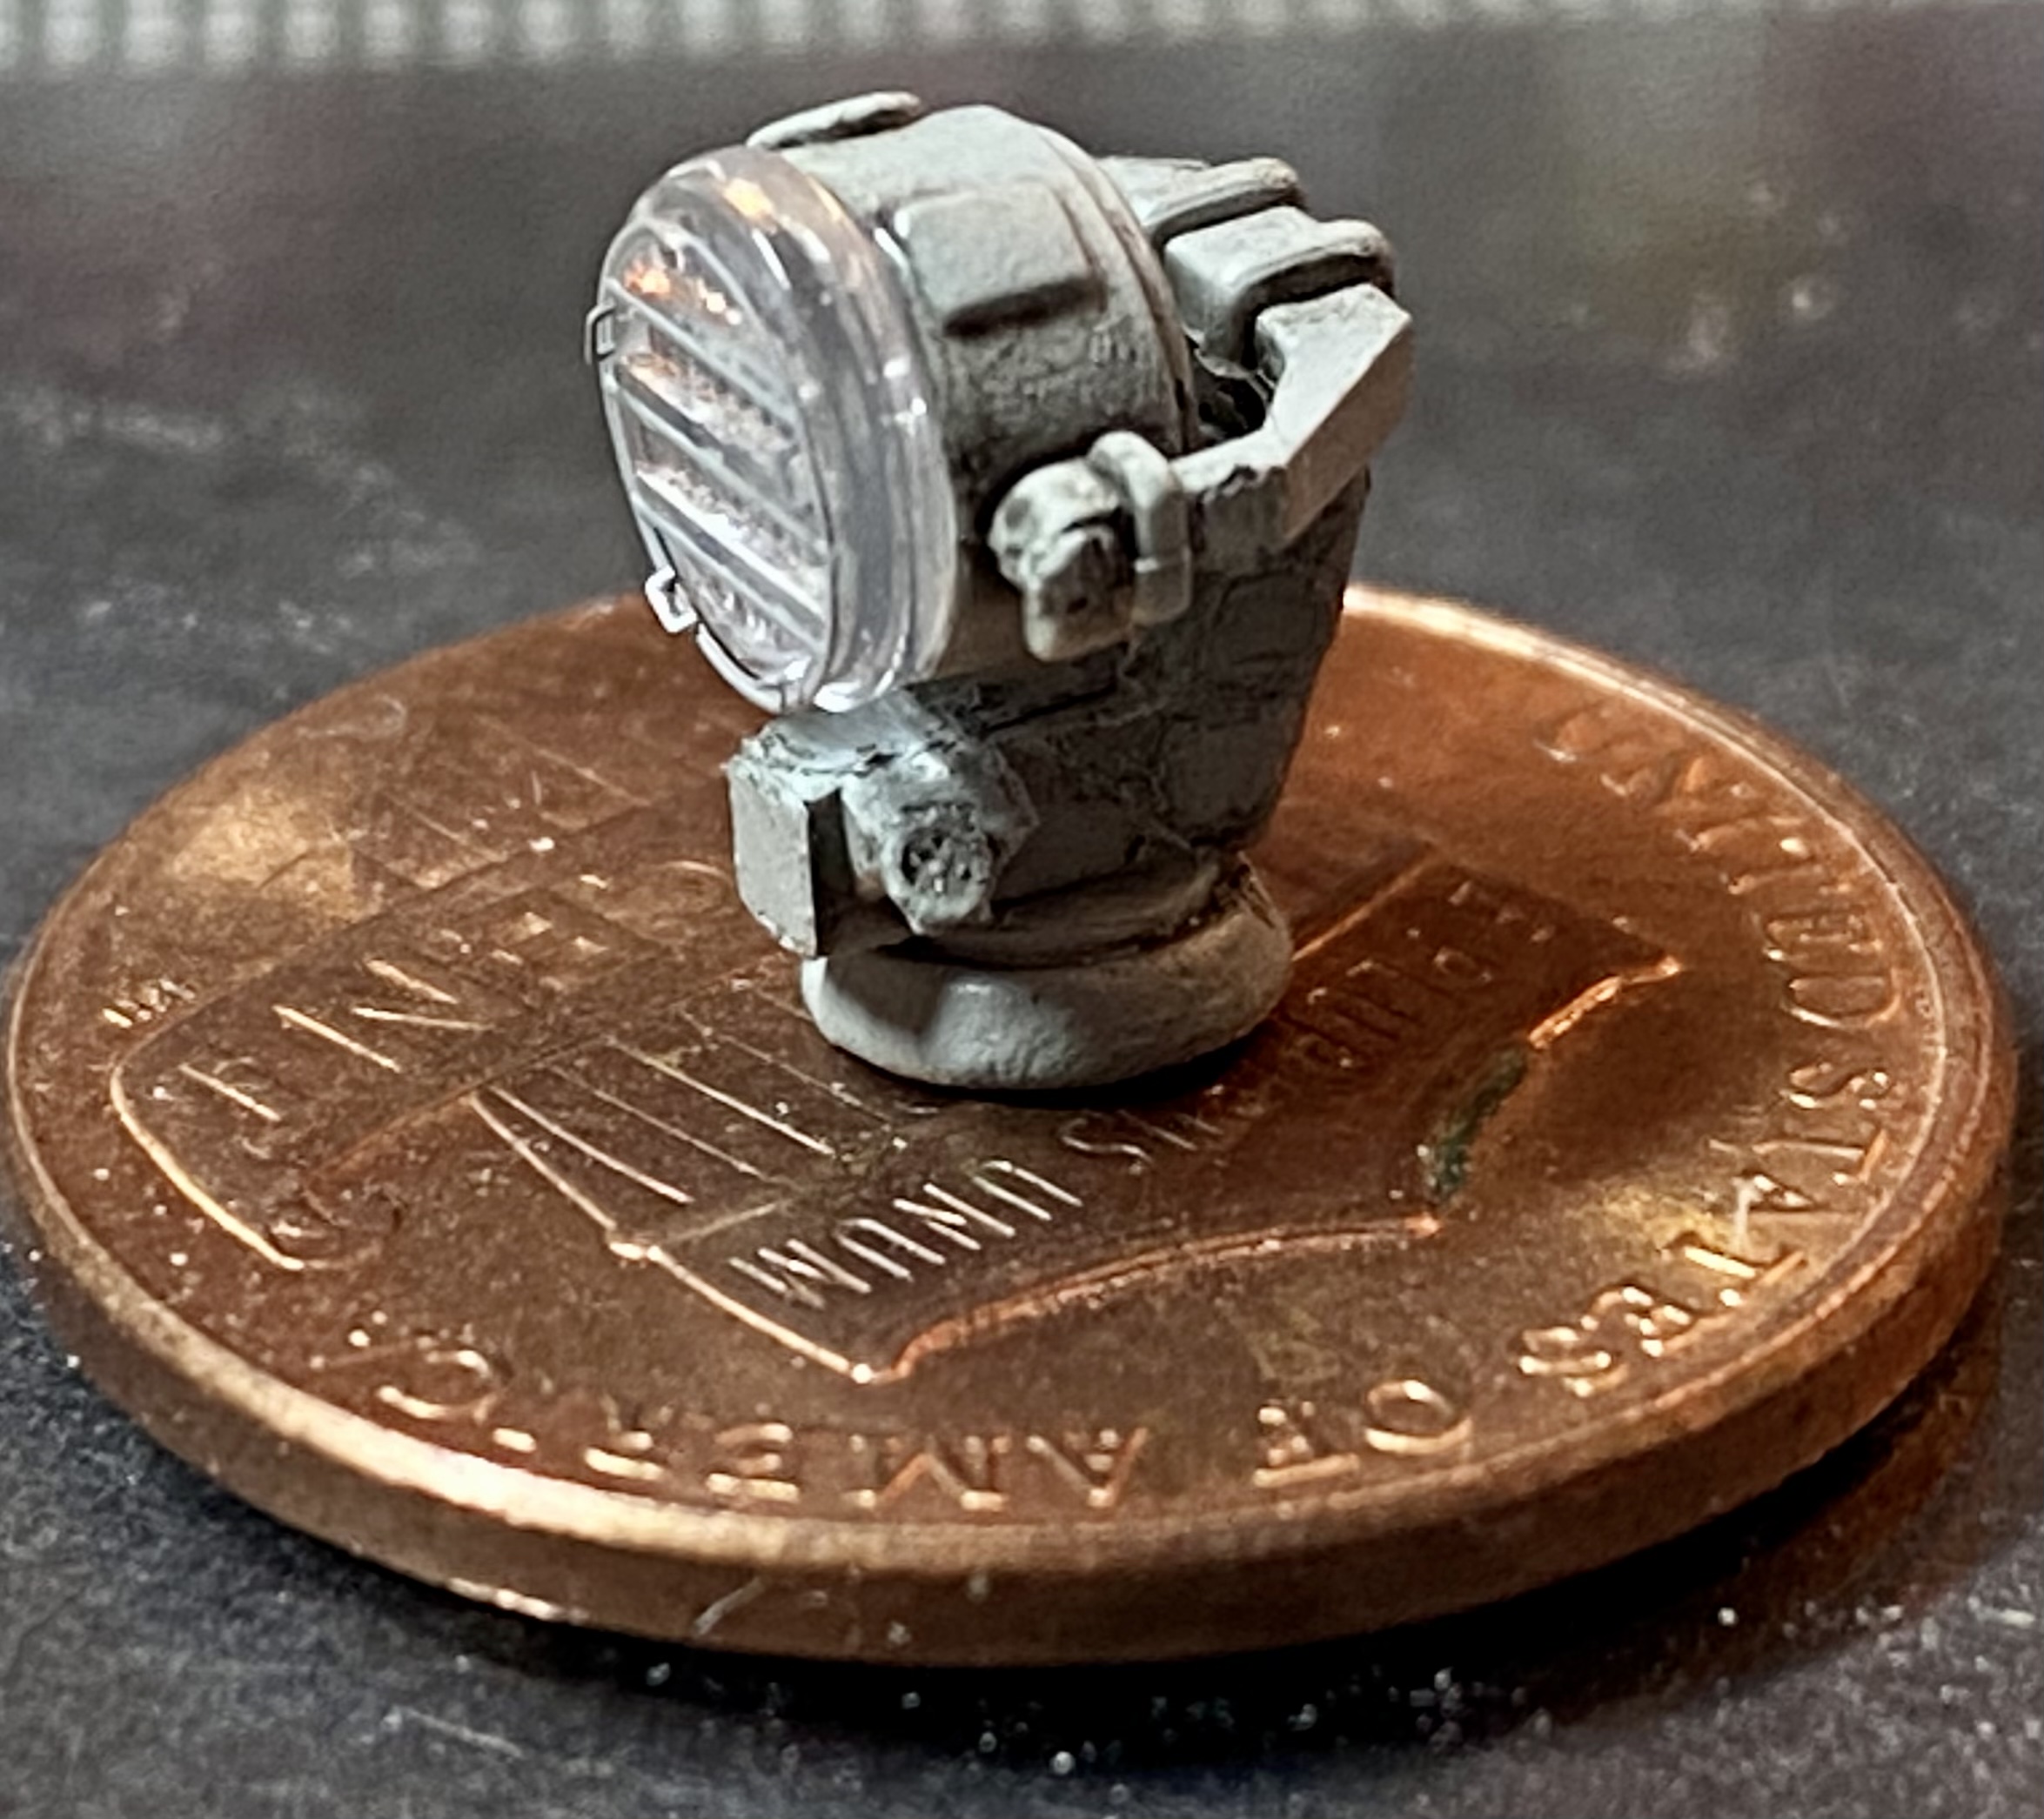
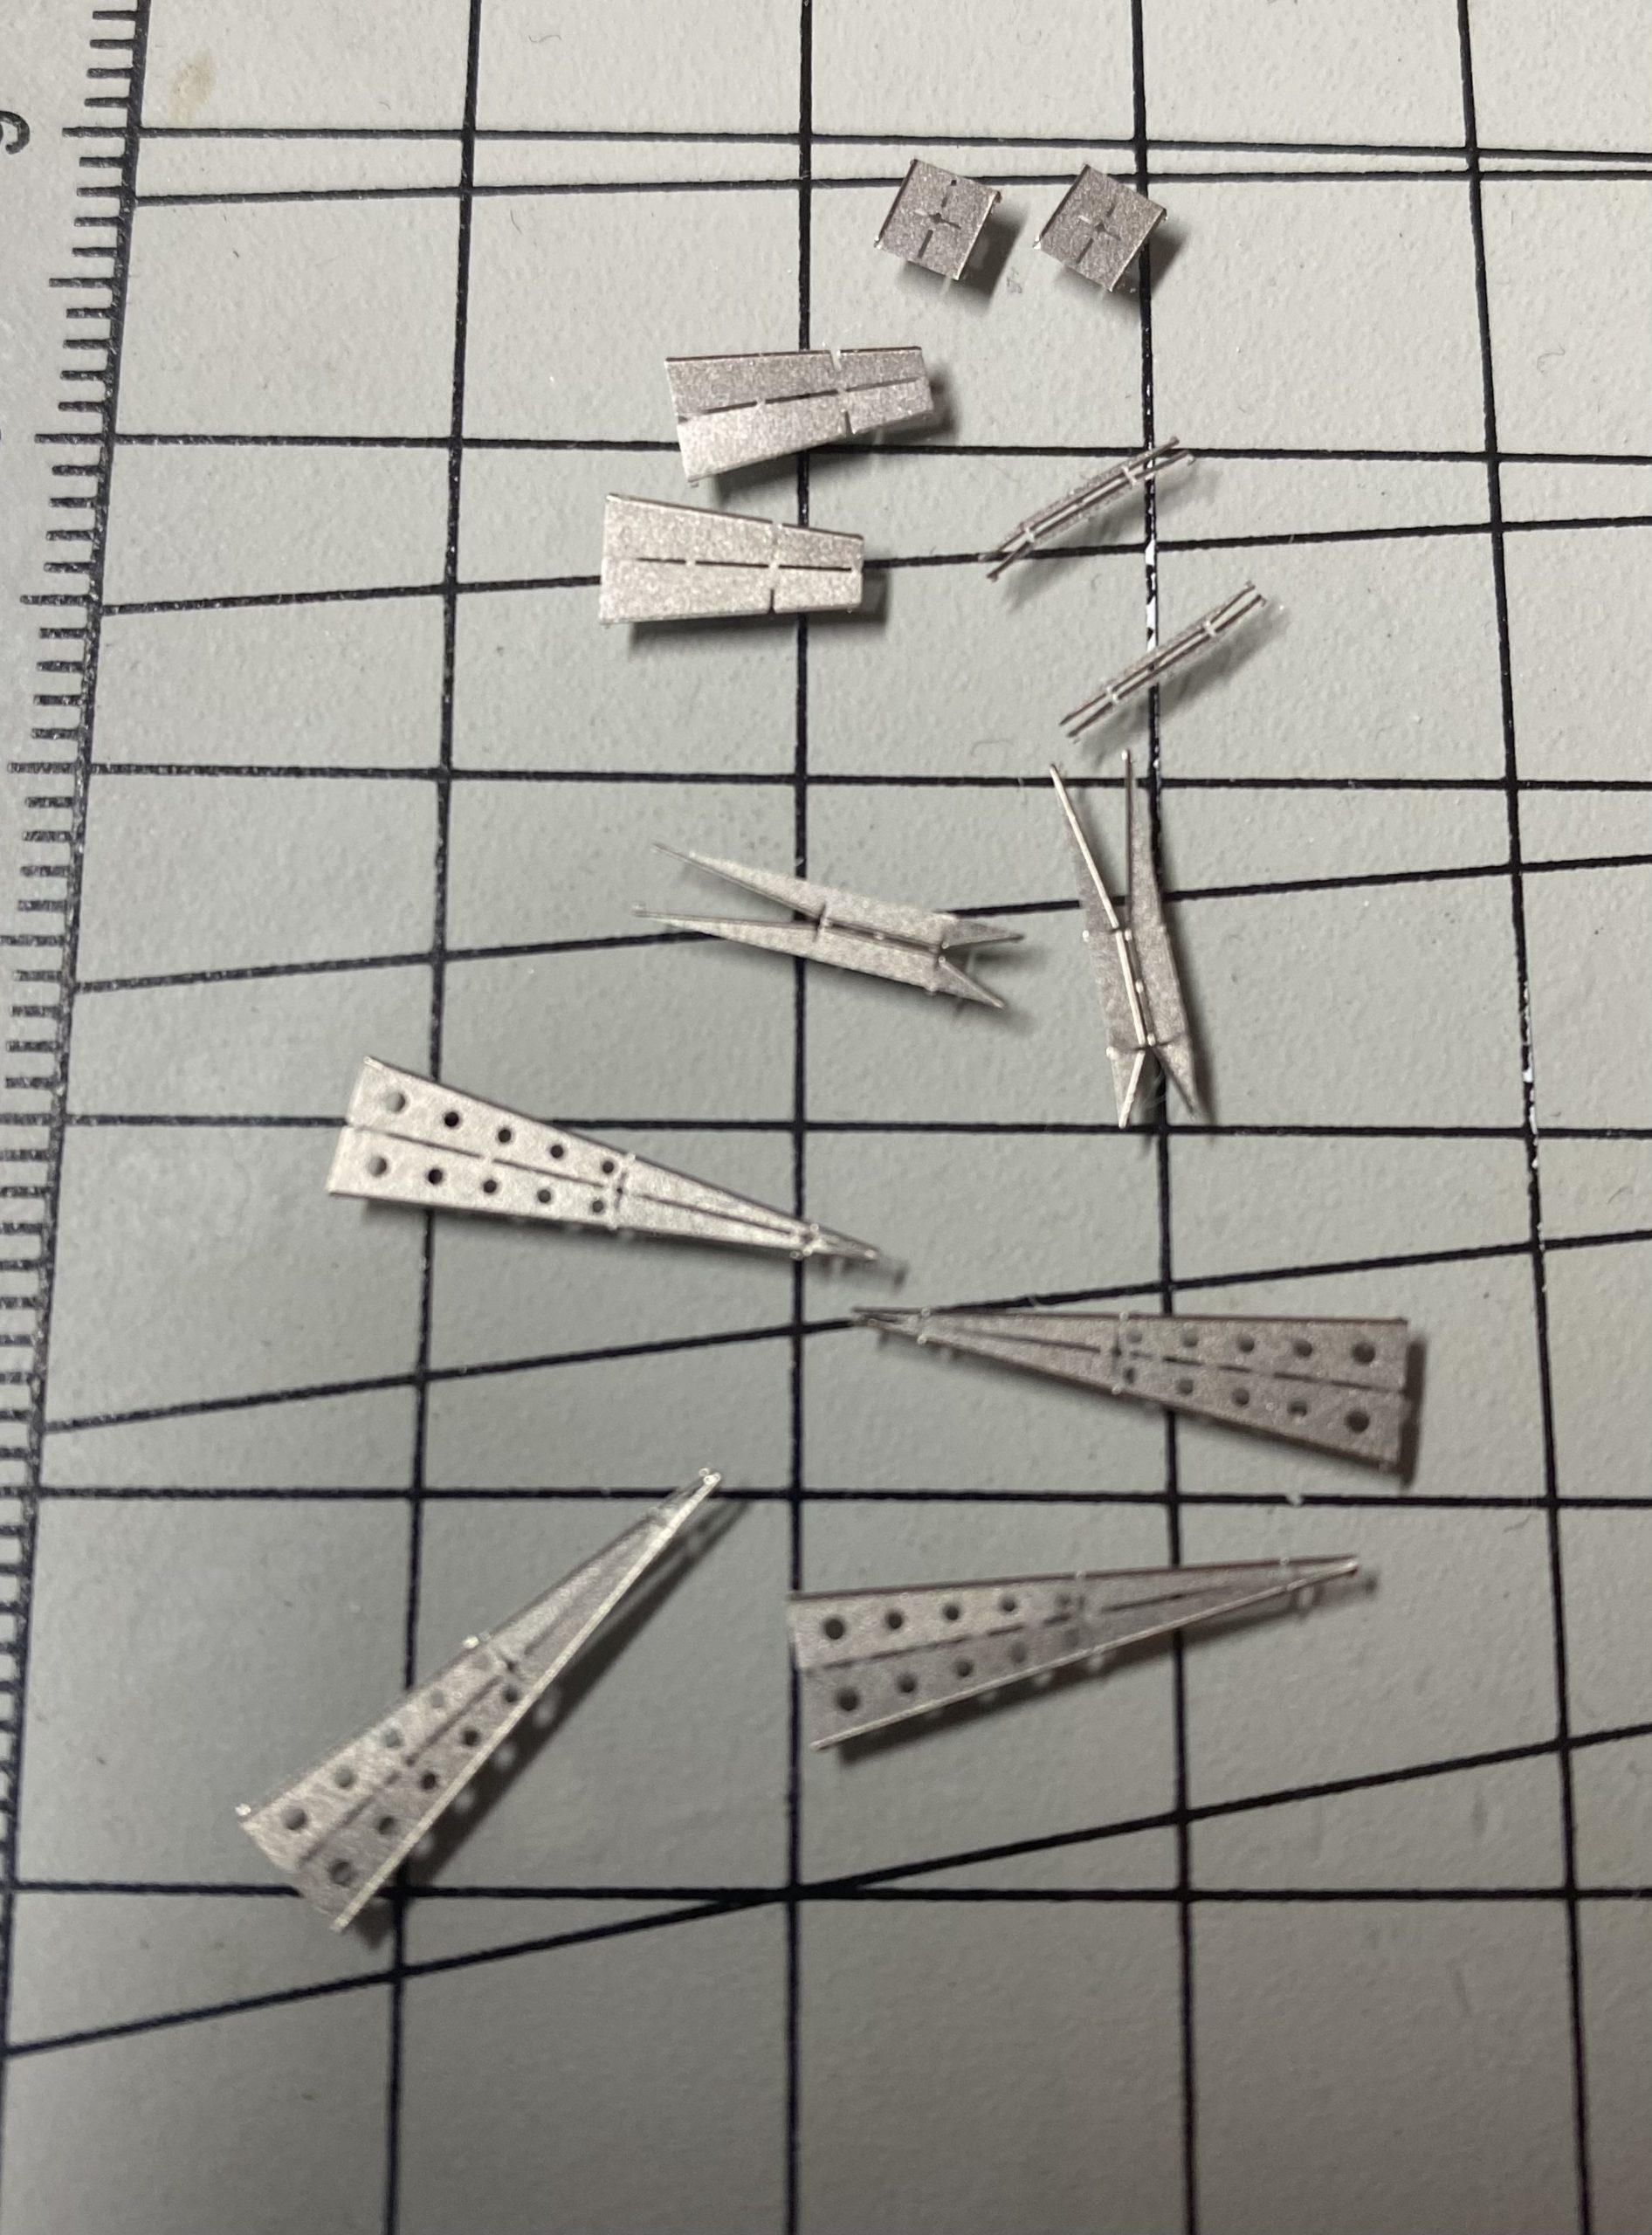
Bismarck had 7 of 150cm wide searchlights. I used photoetching to improve general appearance of those. Around 20 photoetched details…
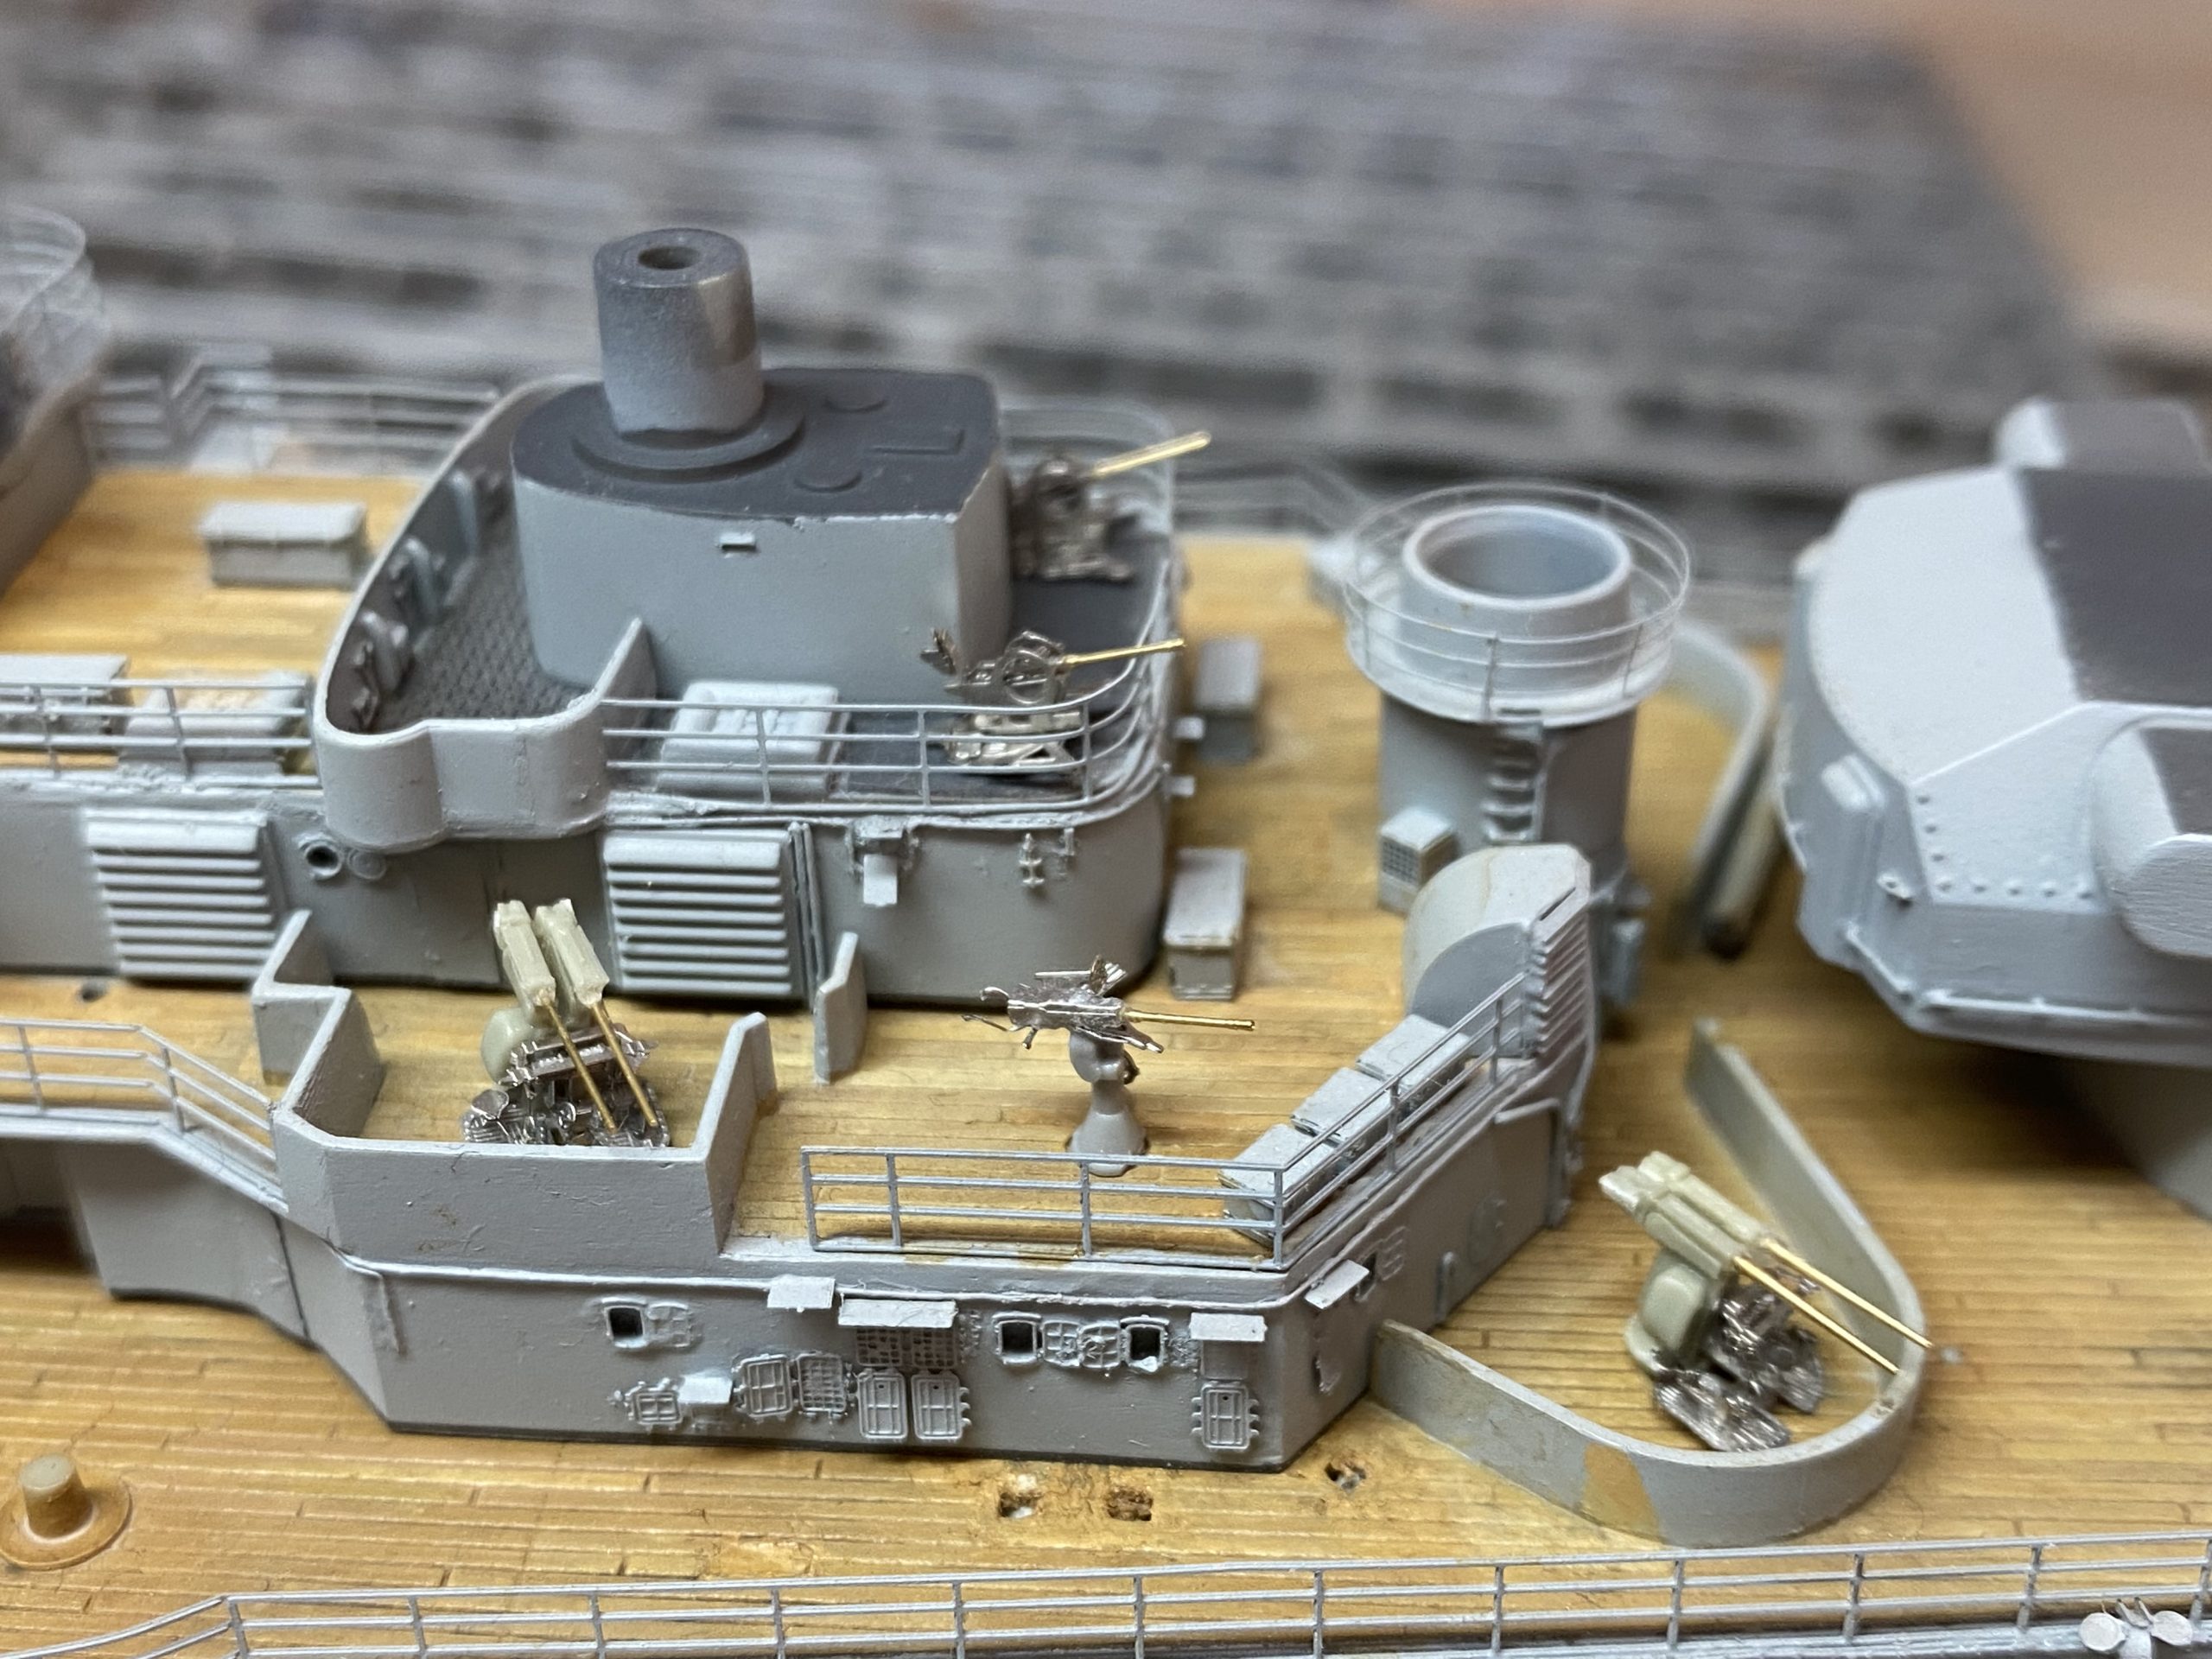
Small 20mm guns are completed. Now its time to move towards 37mm twin SK C/30 anti-aircraft cannons. There were 8…
Belt is finished. Took a while to do this as there was a lot of work with resin and masking.…
Shoulders – Wip update As you can see from the previous work in progress post I’ve decided to paint this…
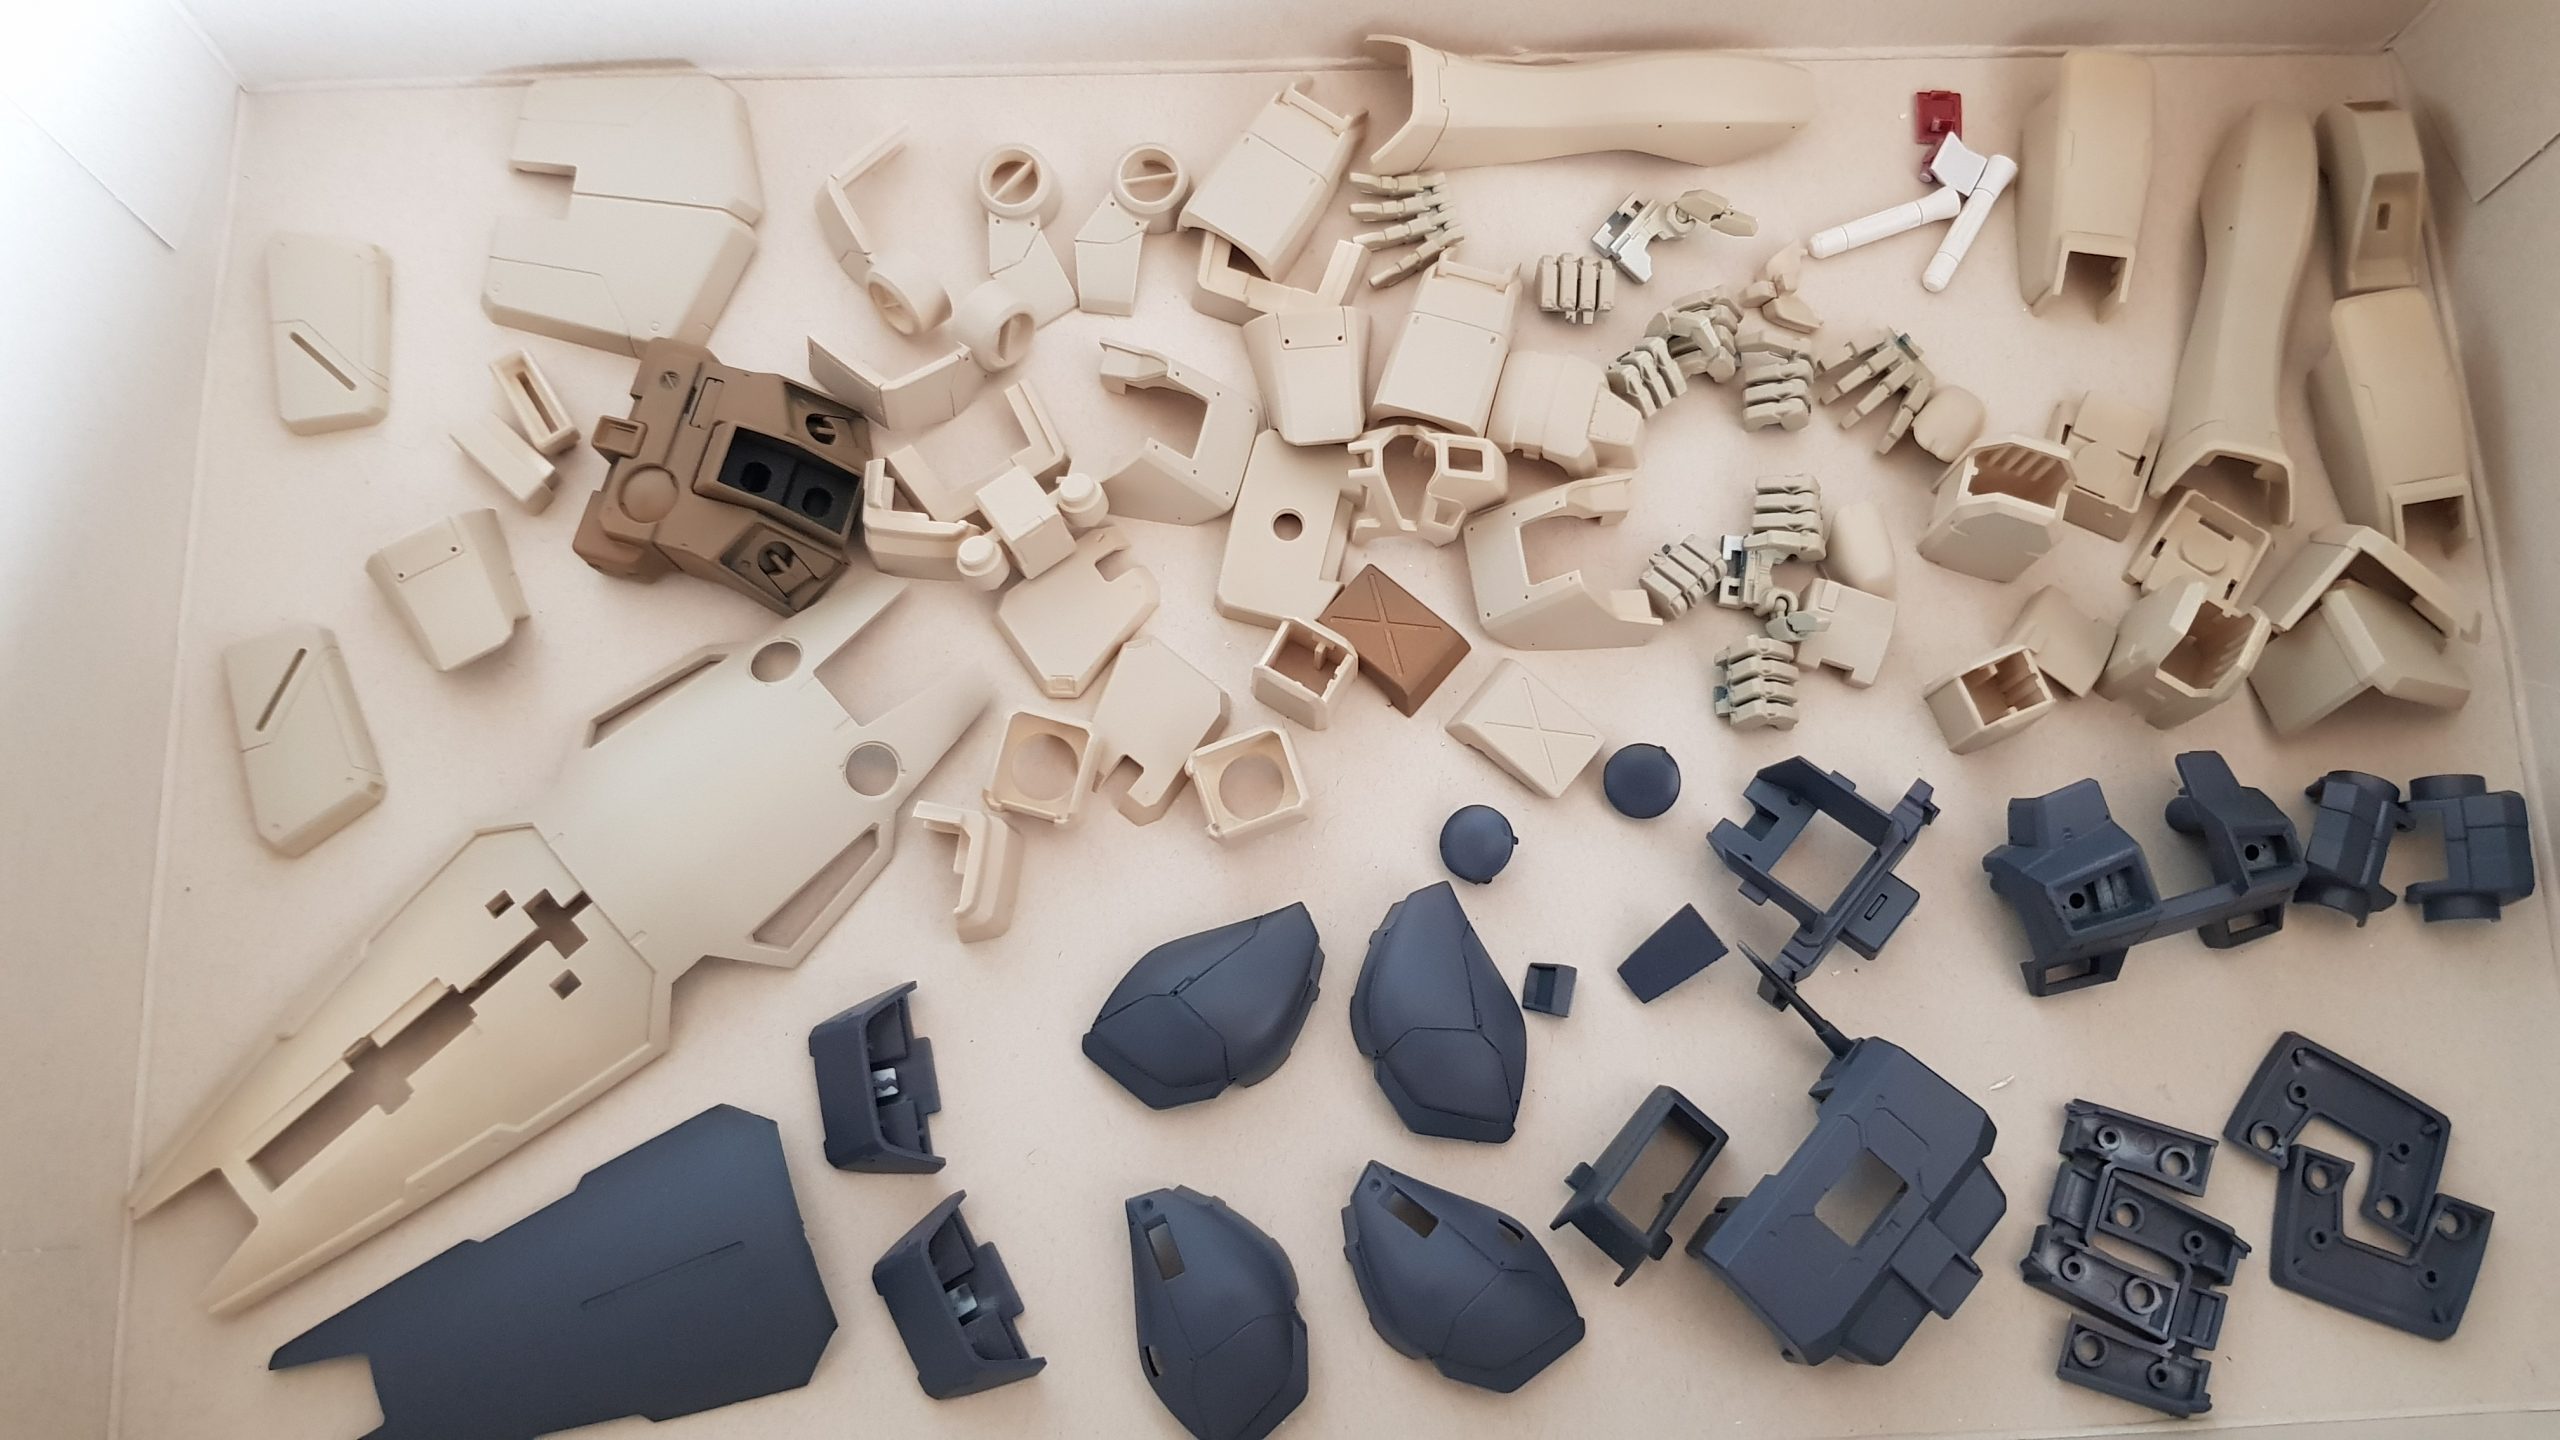
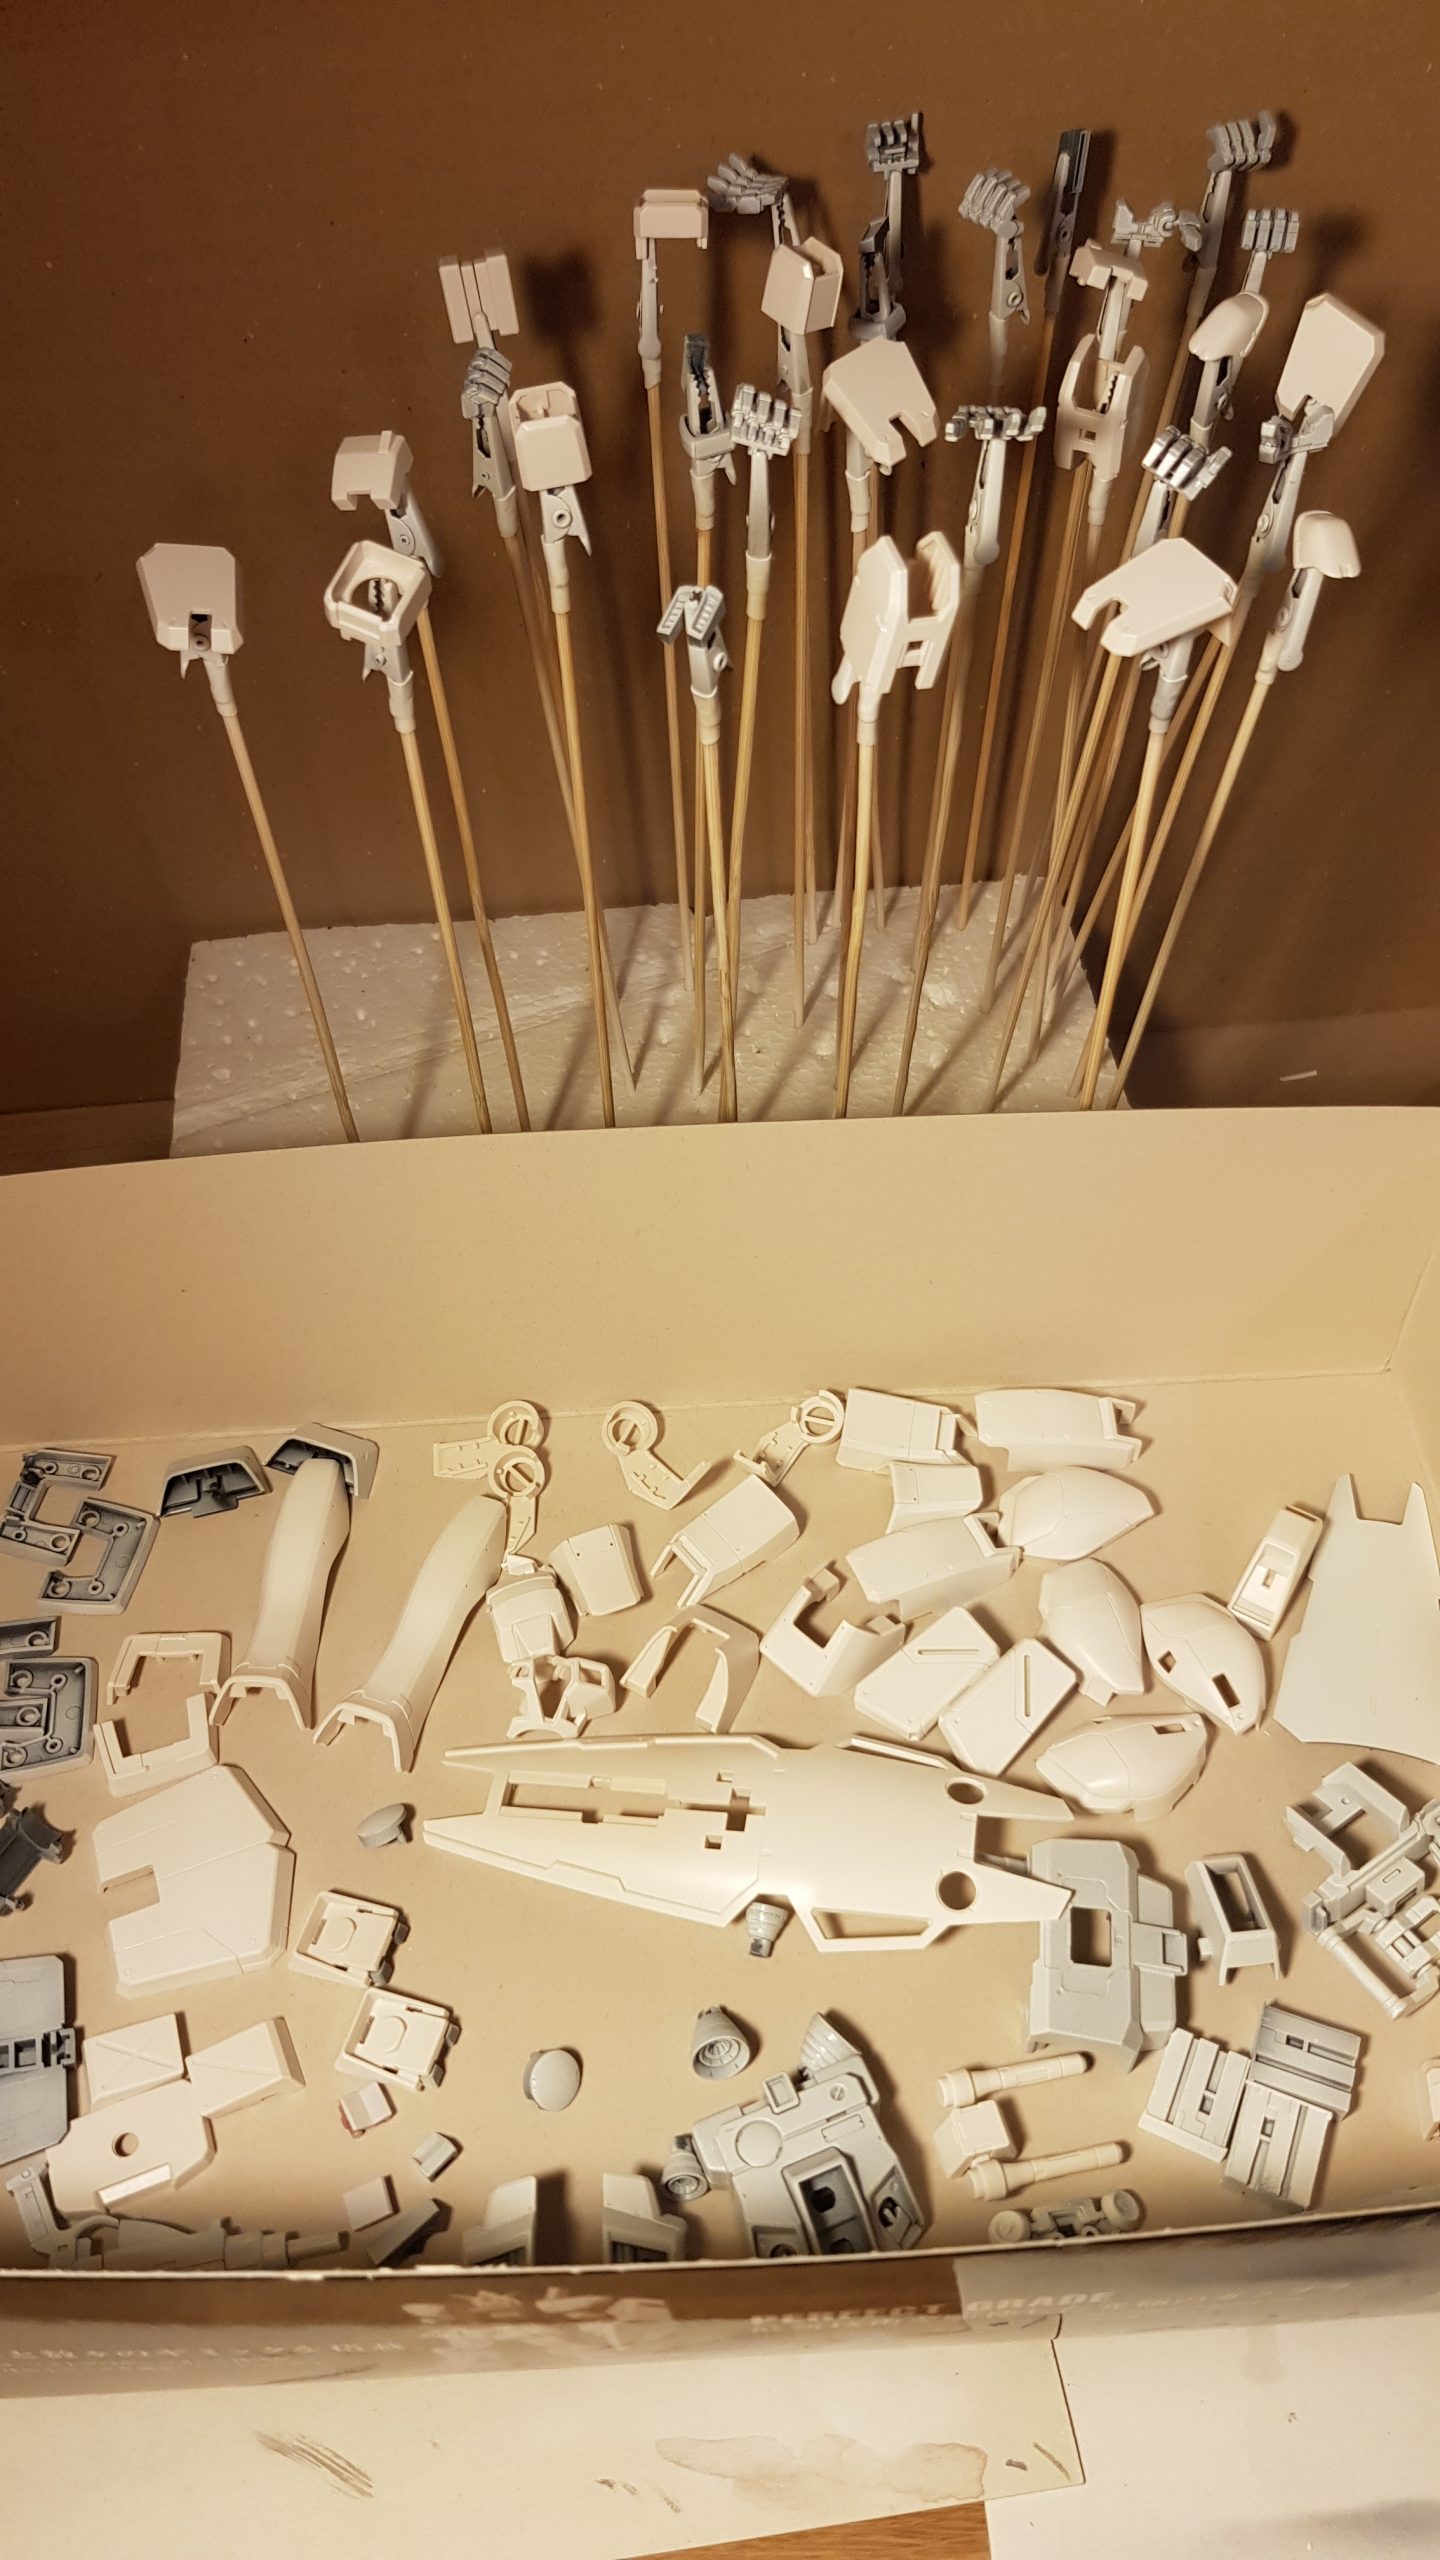
After snap build comes time to disassemble everything, prime it to look for imperfections and get ready for base colors.…
This is my first resin kit to work with so I don’t have much expertise in this area. Thankfully youtube videos…
Its time to add details to Bismarck’s decks. I started with small rangefinders and optical devices, resin parts from LionRoar…
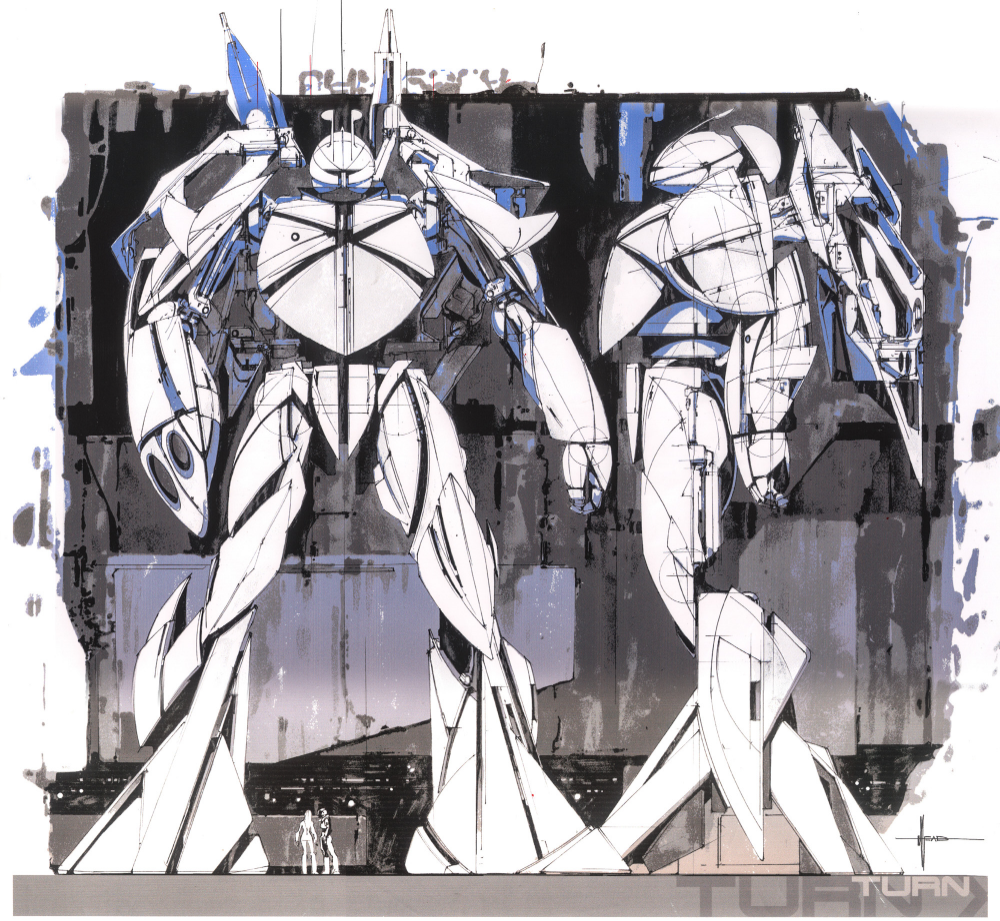
First of many posts to come about ongoing project and my take on 1/100 MG Turn-X Gundam. Project has been…

2h of masking and 20minutes of painting 🙂 Generally I’m impressed with the result. Superstructure looks fine, of course some…
As I started to paint superstructure and let it dry, I looked for a way, how to improve the look…
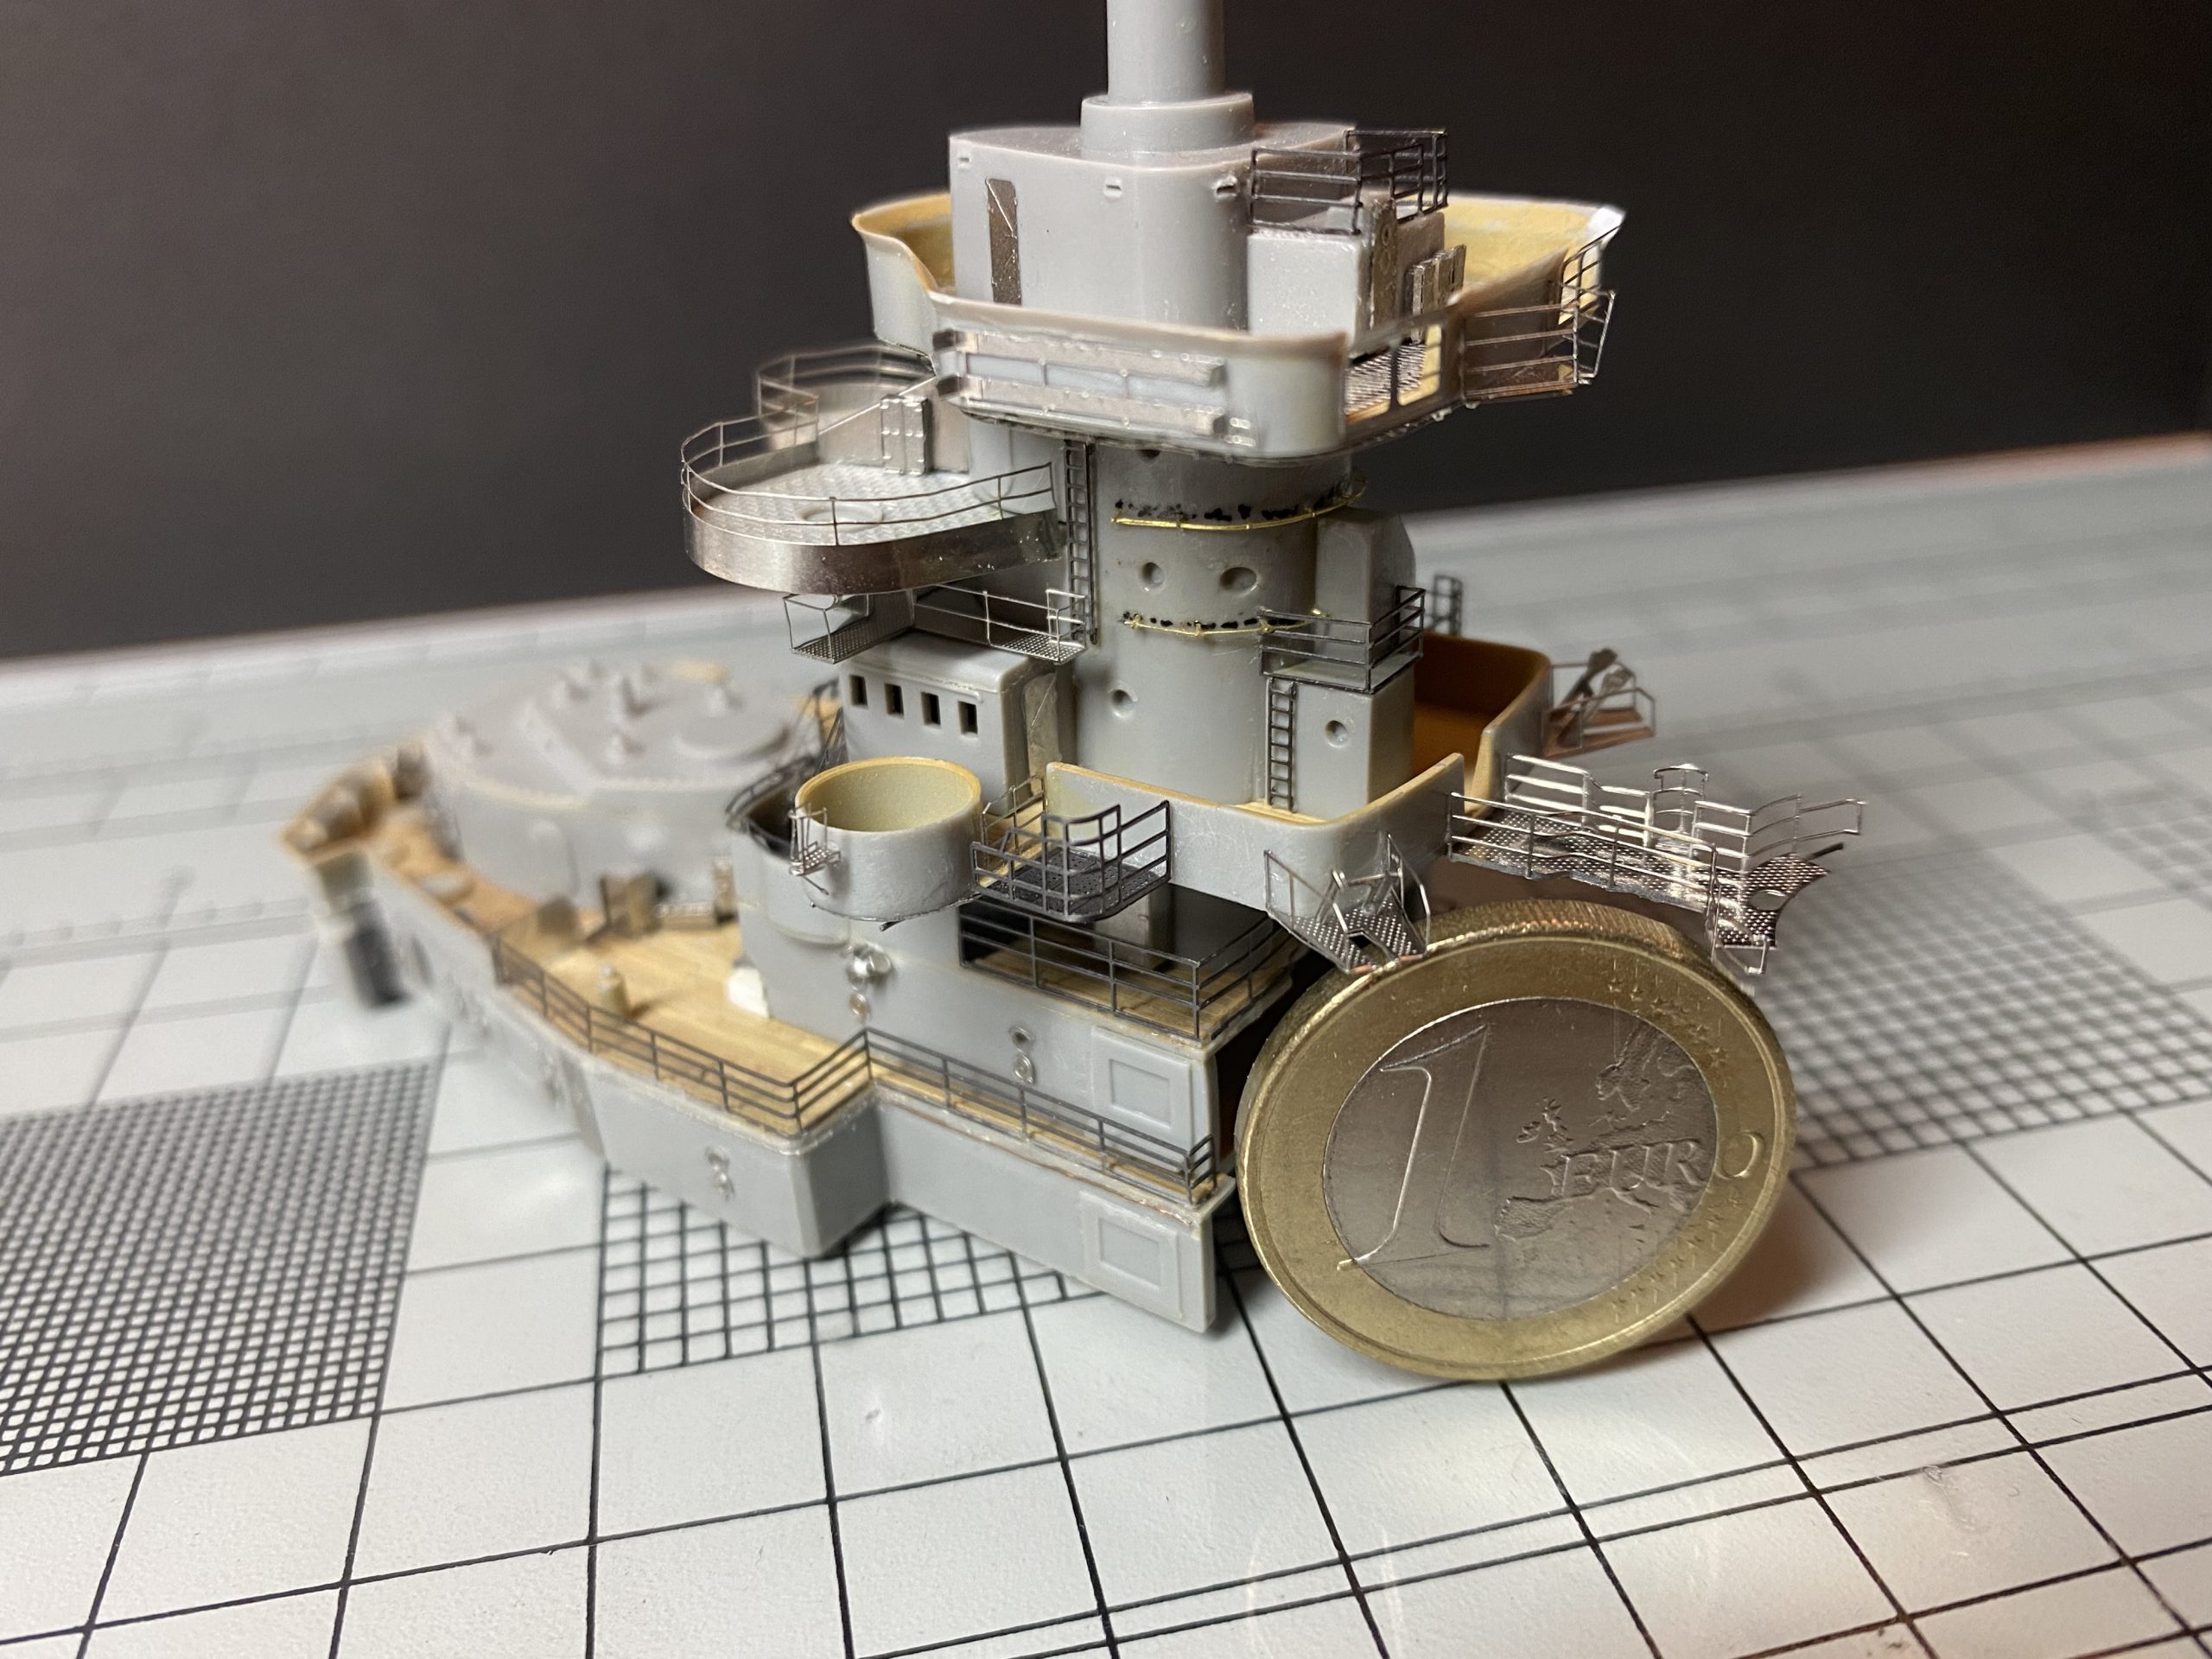
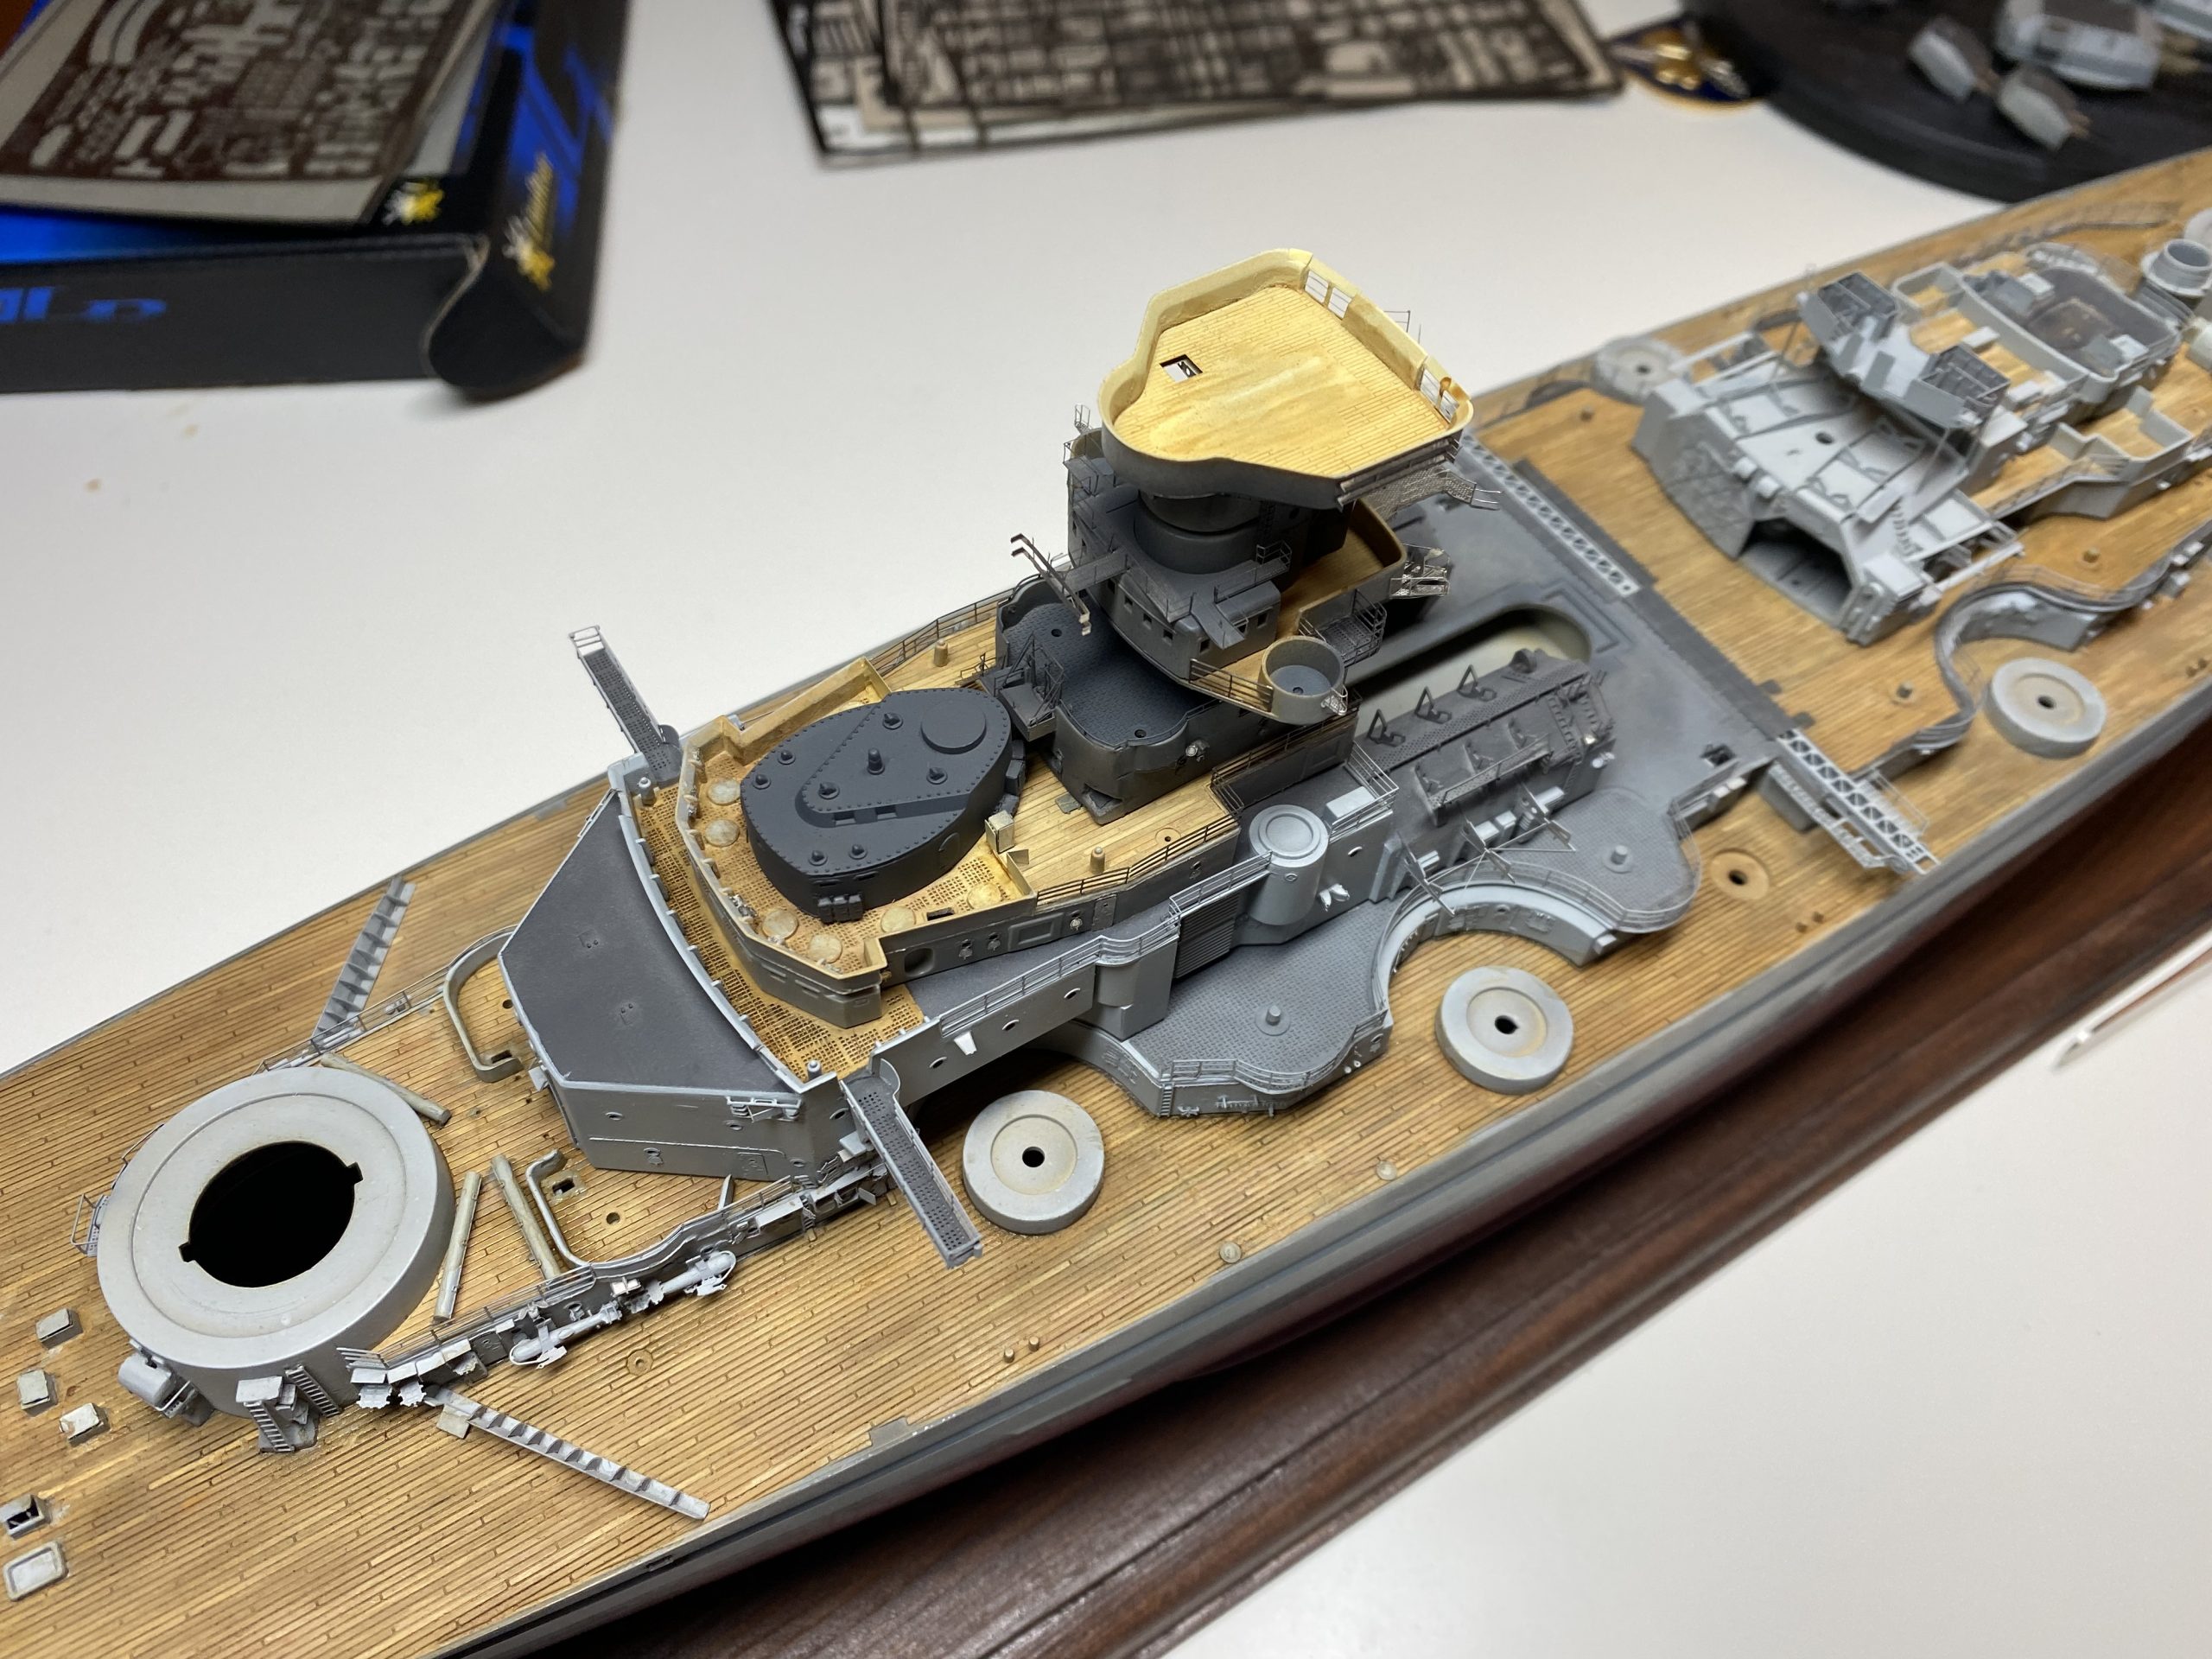
Added last part of ”non equipment” details to front superstructure – one Euro for scale reference…It seems like the next…
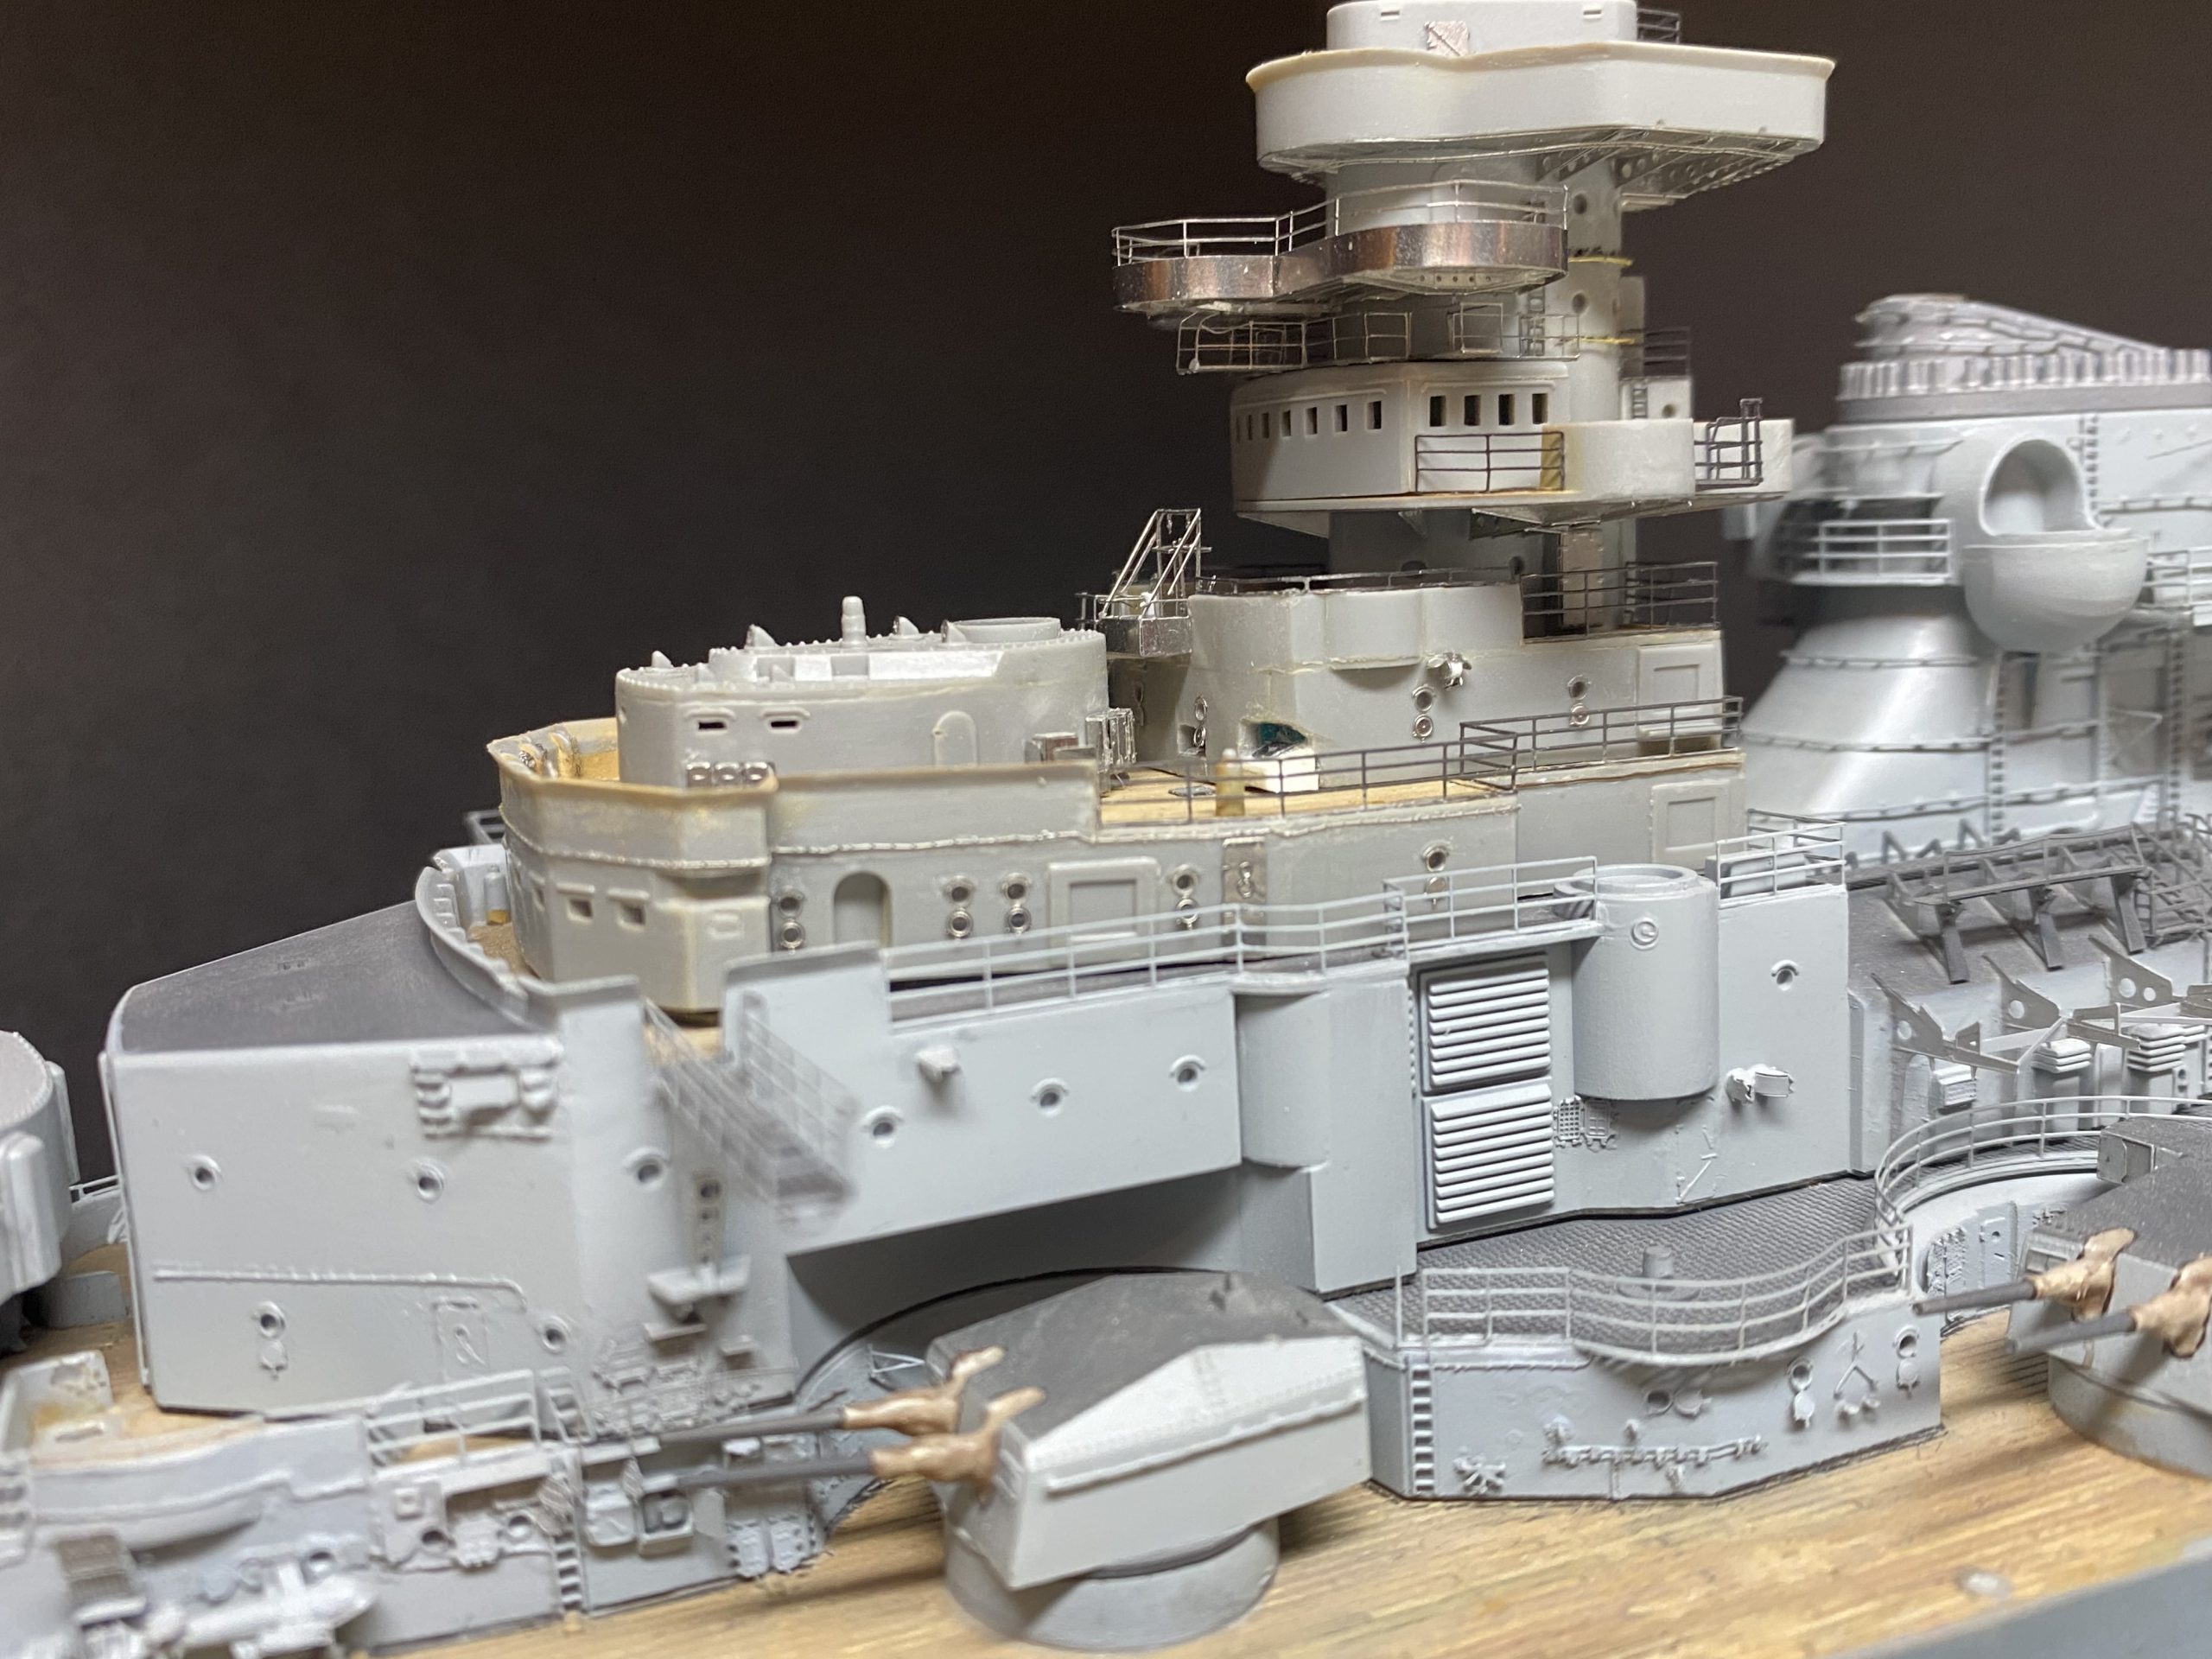
Photoetched parts applied – small corrections is required after painting, specially for extraflimsy railings. Generally I like the way how…
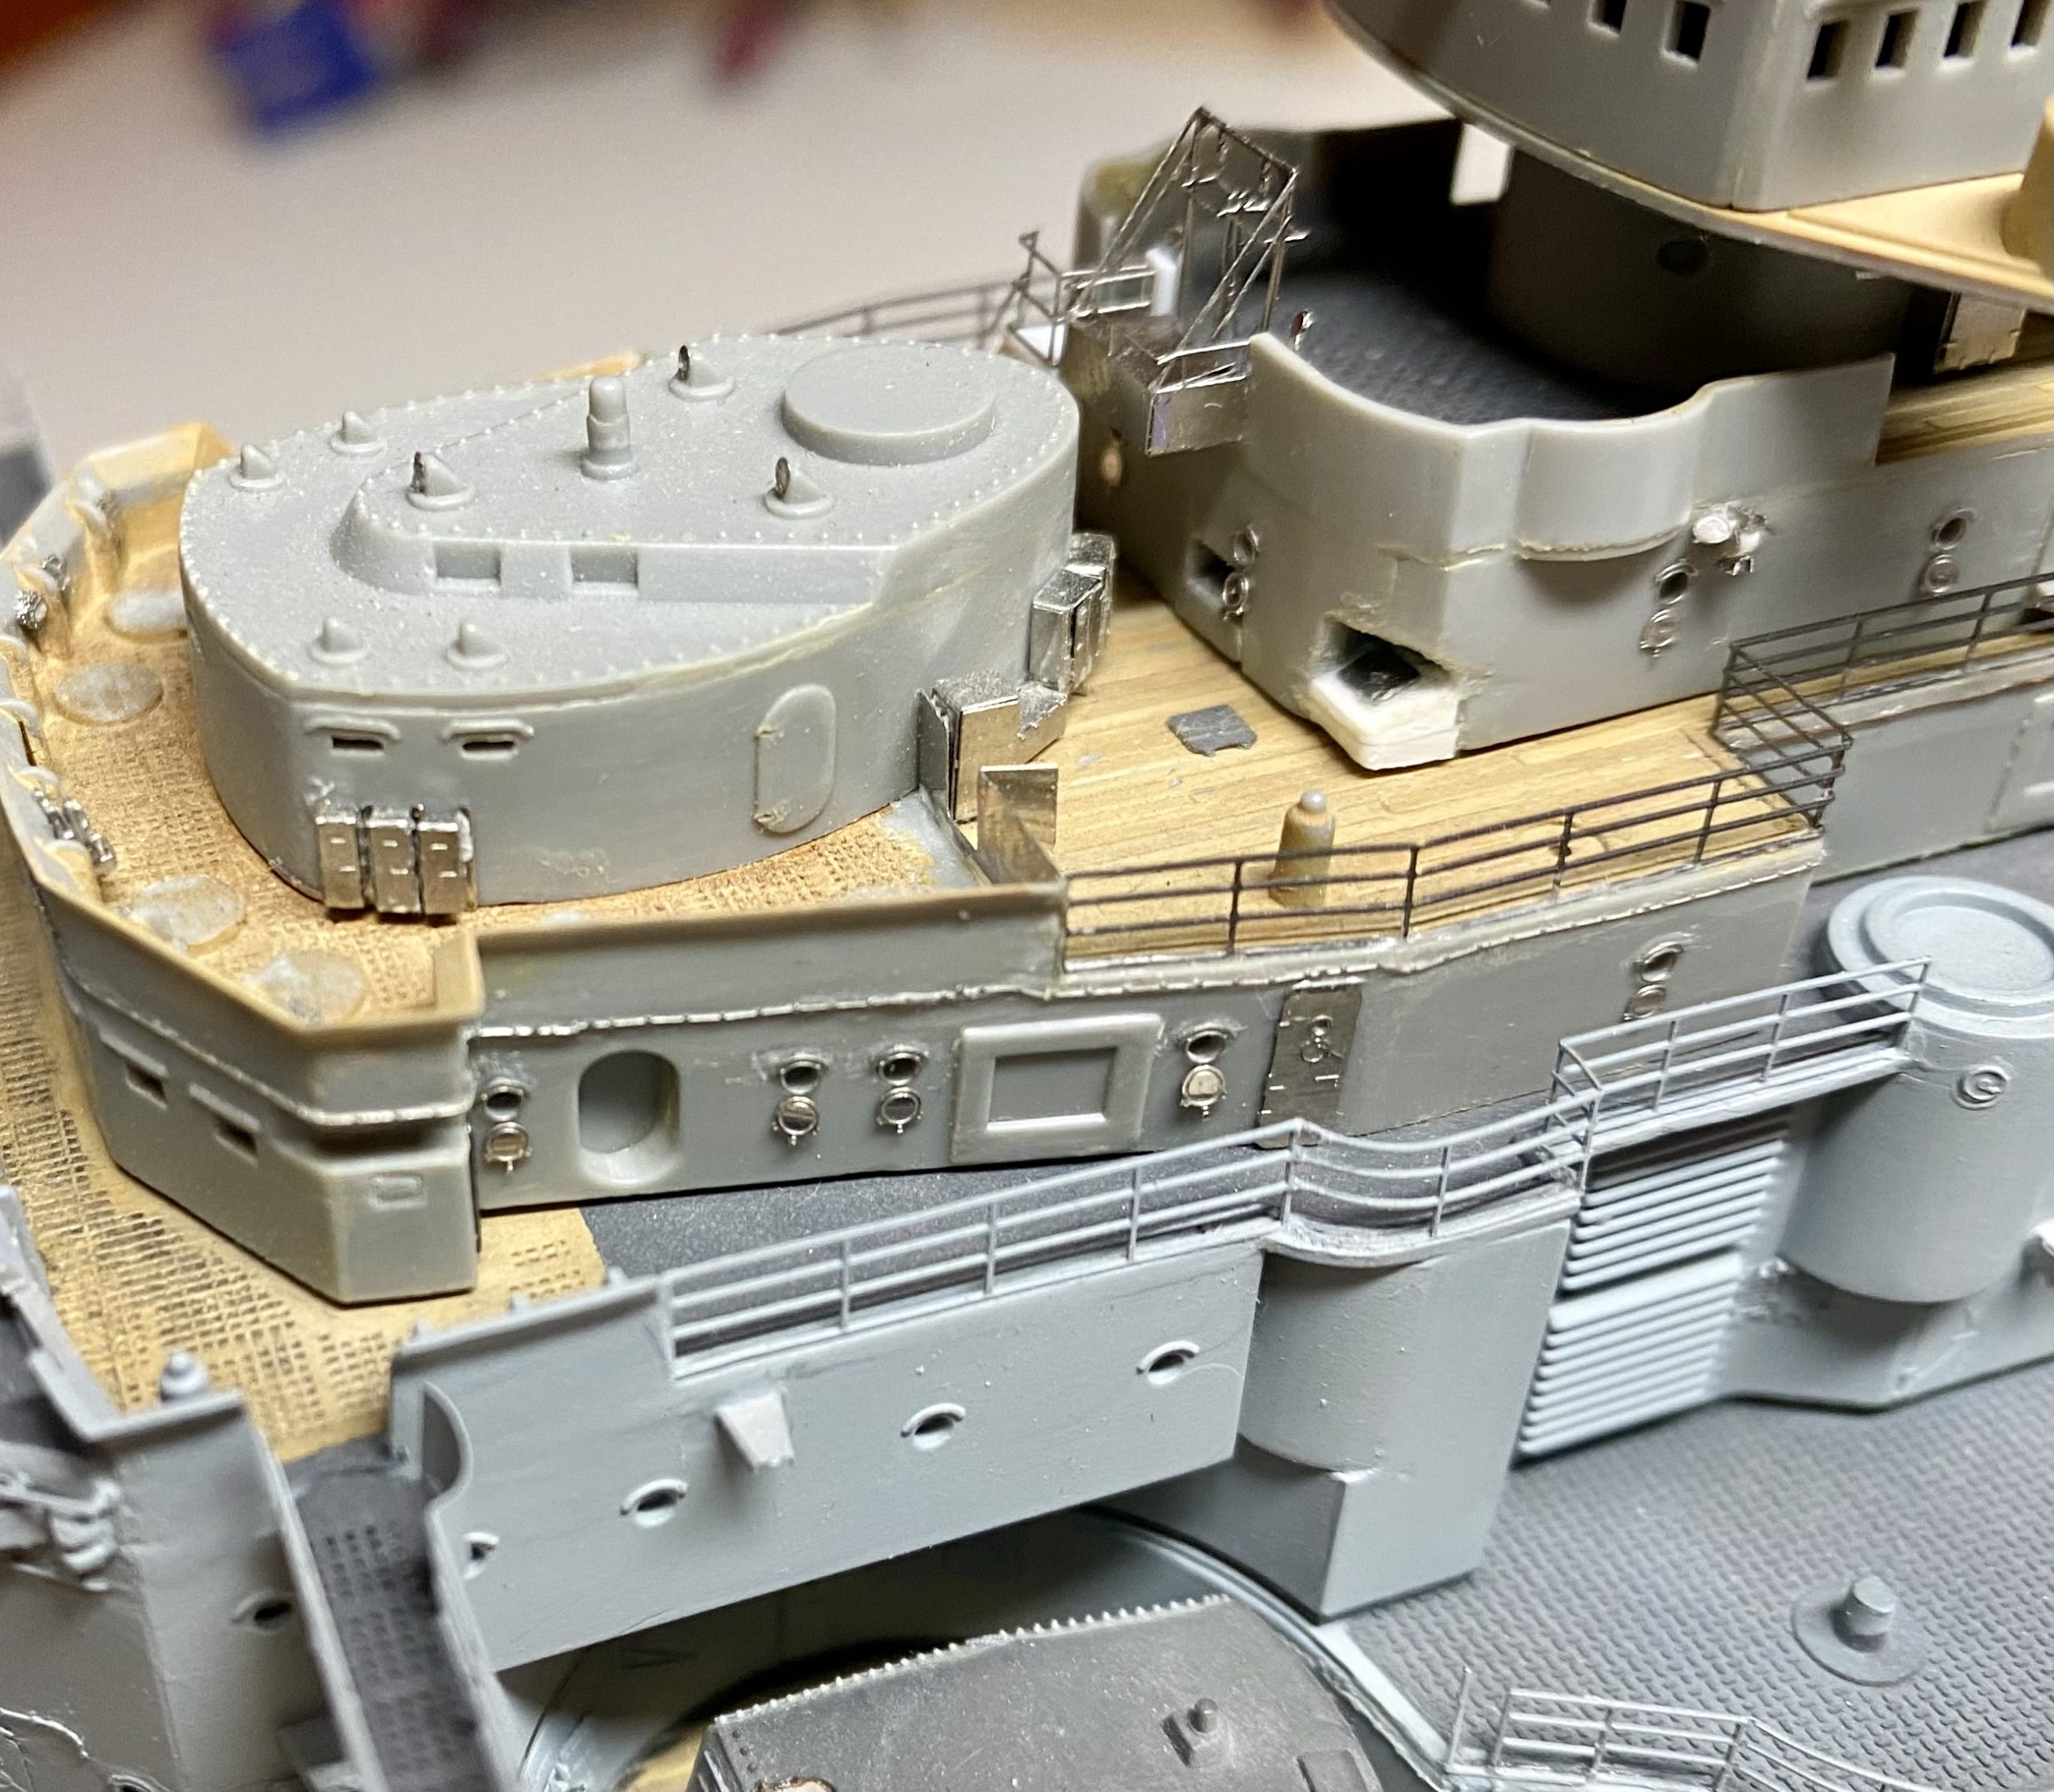
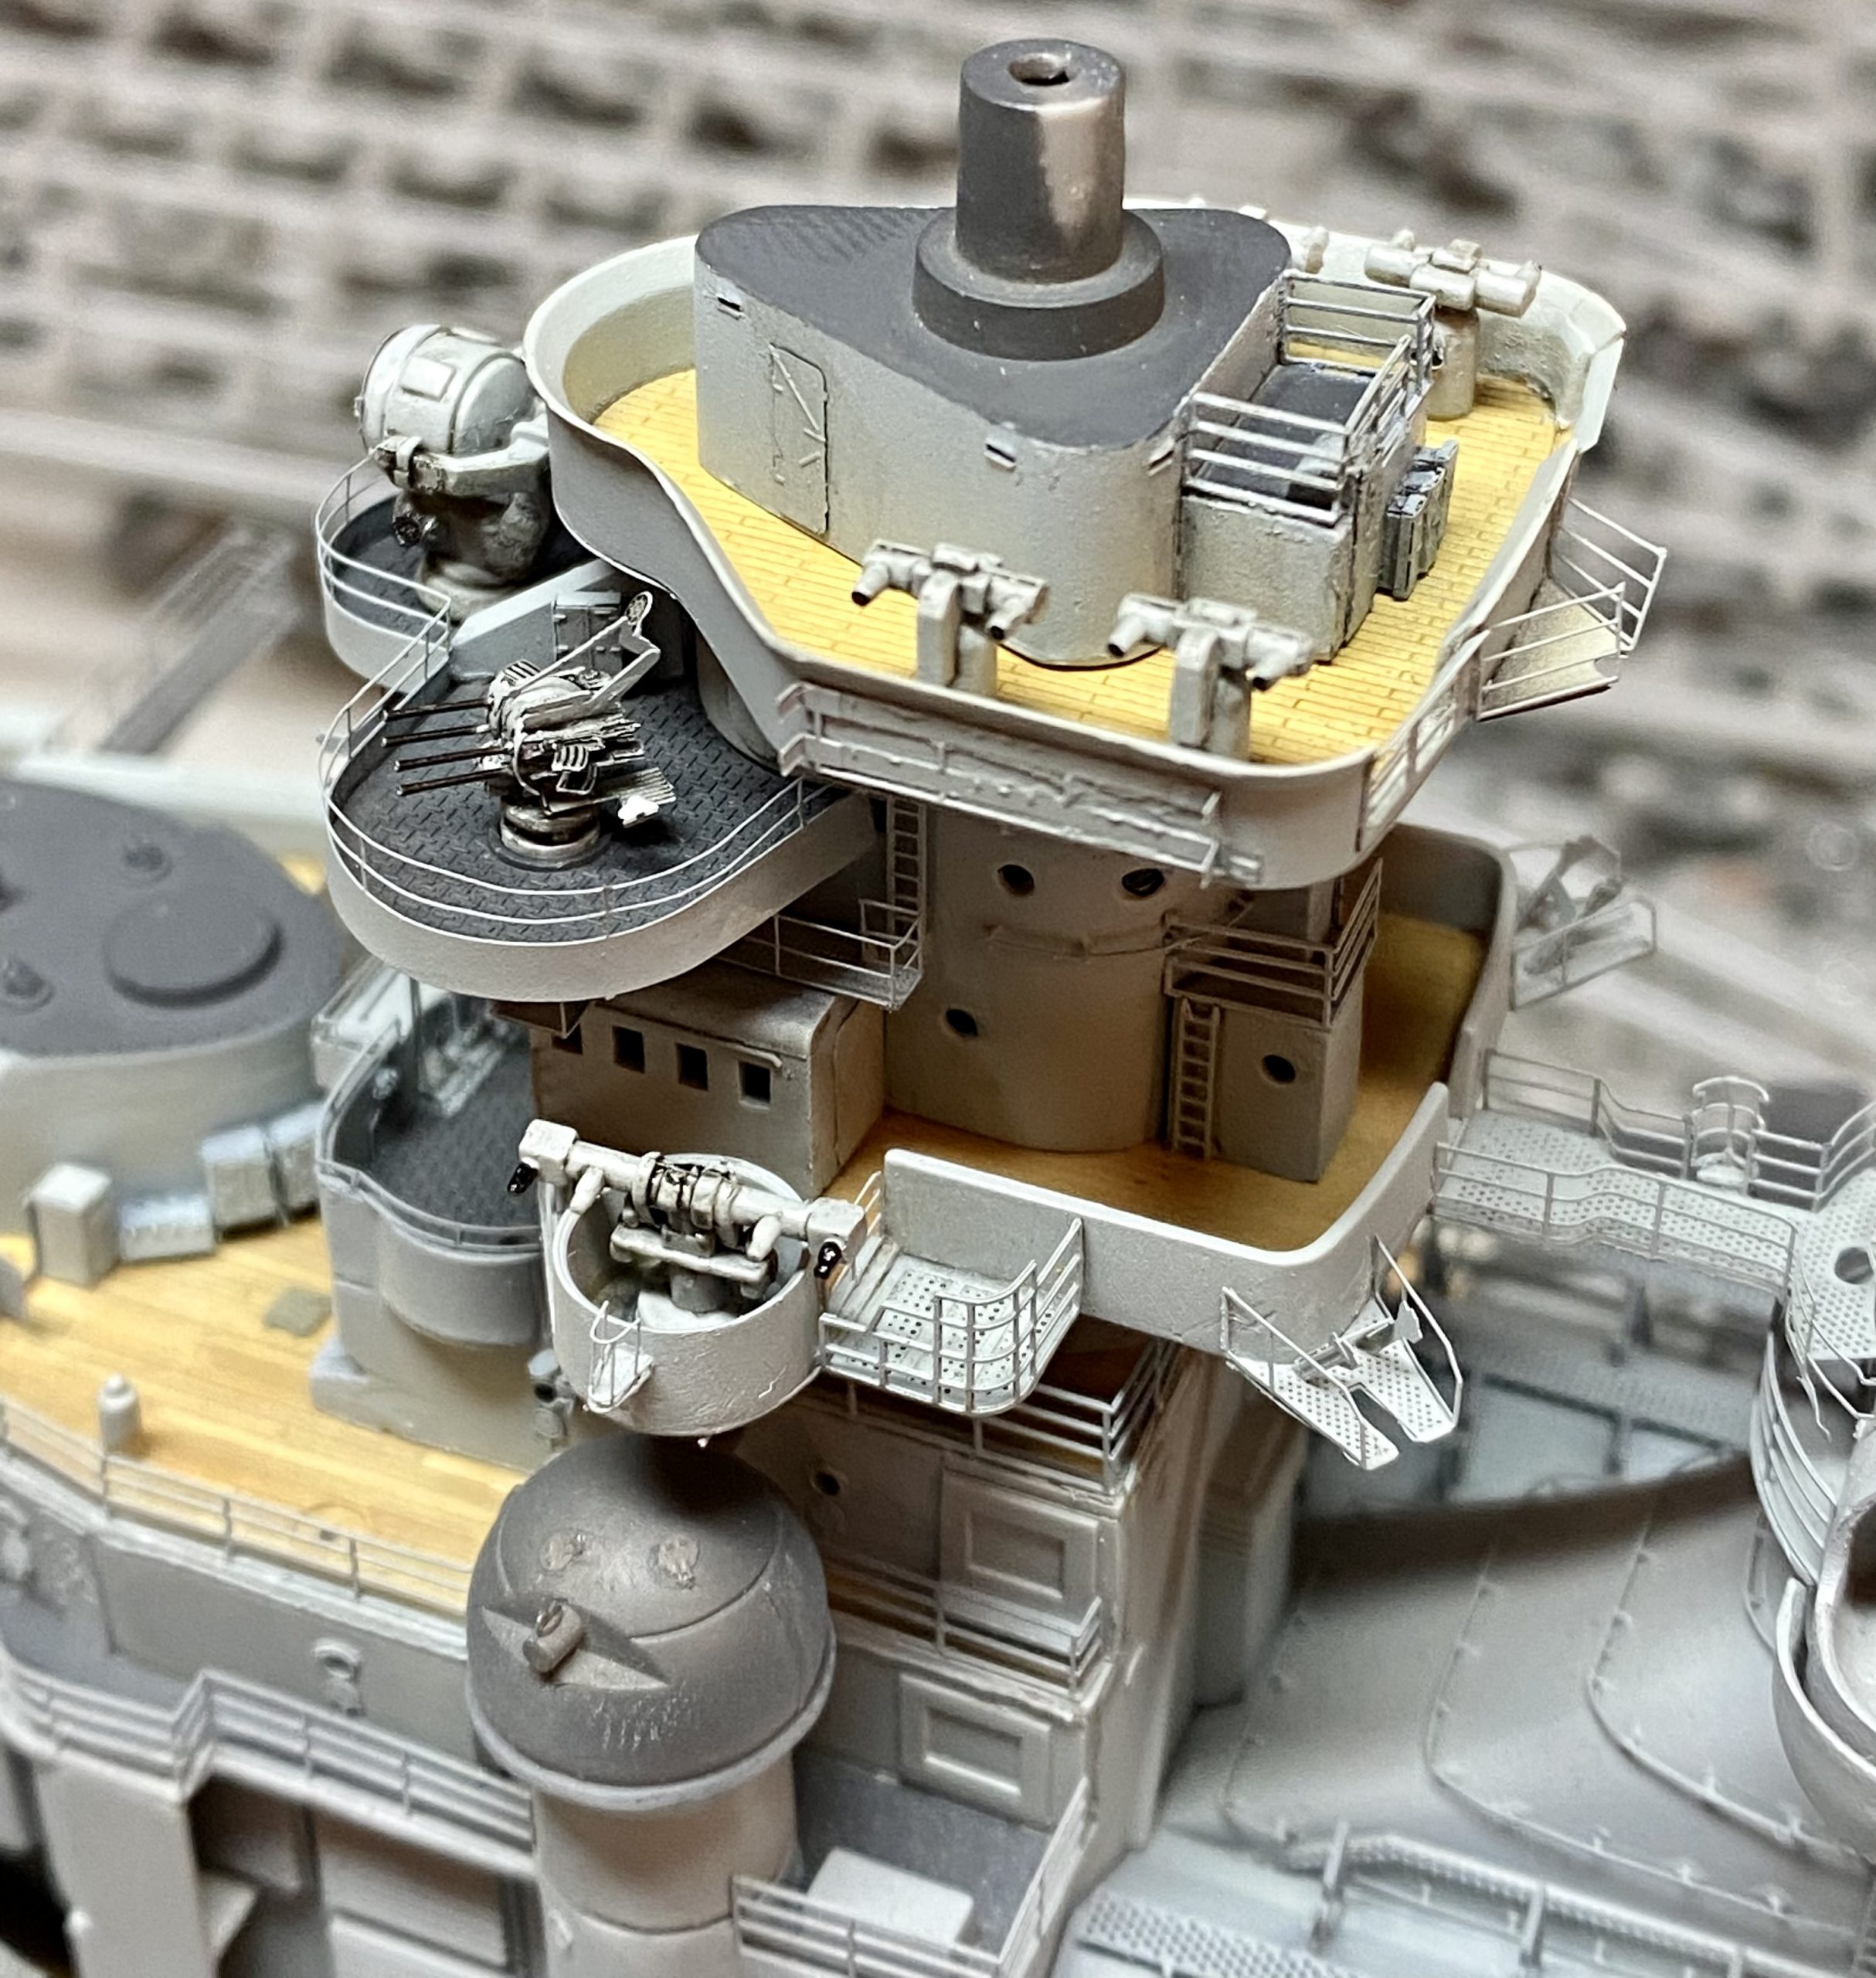
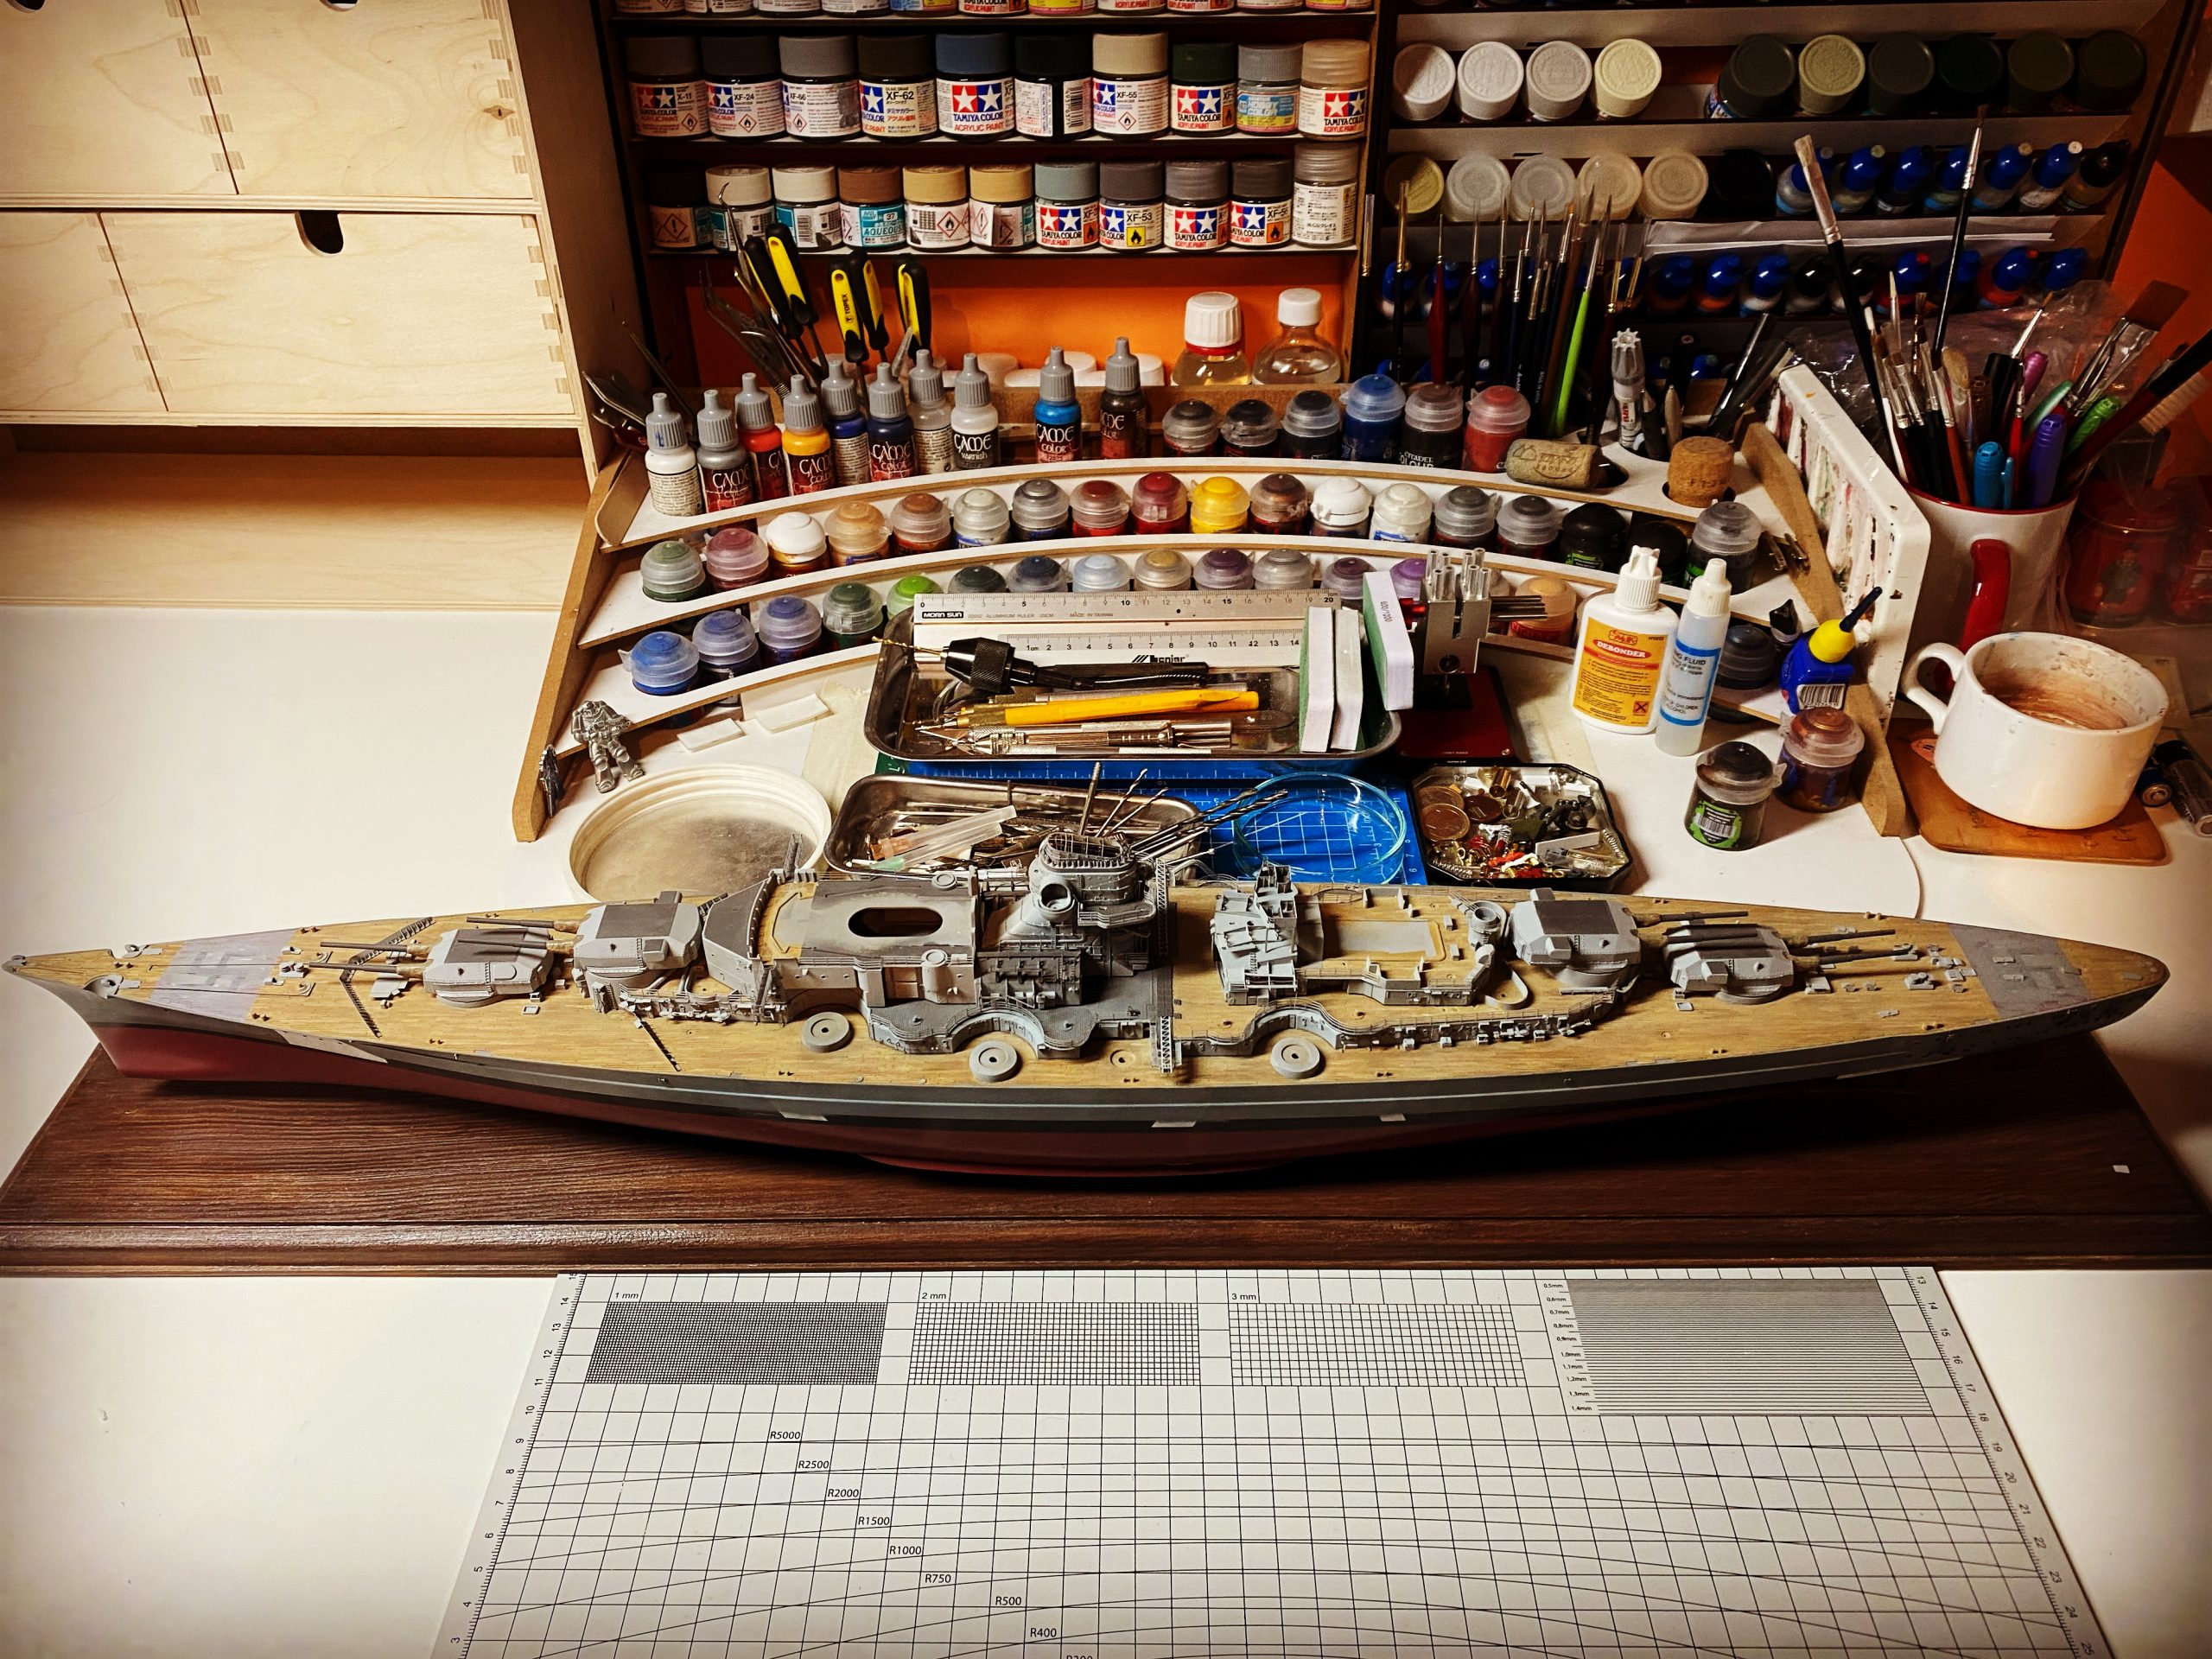
Work with superstructure is progressing. My thinking about maritime models was always as a bit of self-punishment type – building…

This is so called – crazy detailed build. A lot of photoetched parts still left – LionRoar set that I’m…
My last models were Gunplas – I enjoyed this kind of model builds a lot – total freedom. Now I…
Inventory and restore state – where and how to continue project paused for 9 long years…After long study of materials/manuals…
Revell 1/350 DKM Bismarck – I started this build in 2009, 10 years out of workshop, now its time to…
In fact there will be 12 LED electric circuits. The plan is to put Arduino as a controller and add…
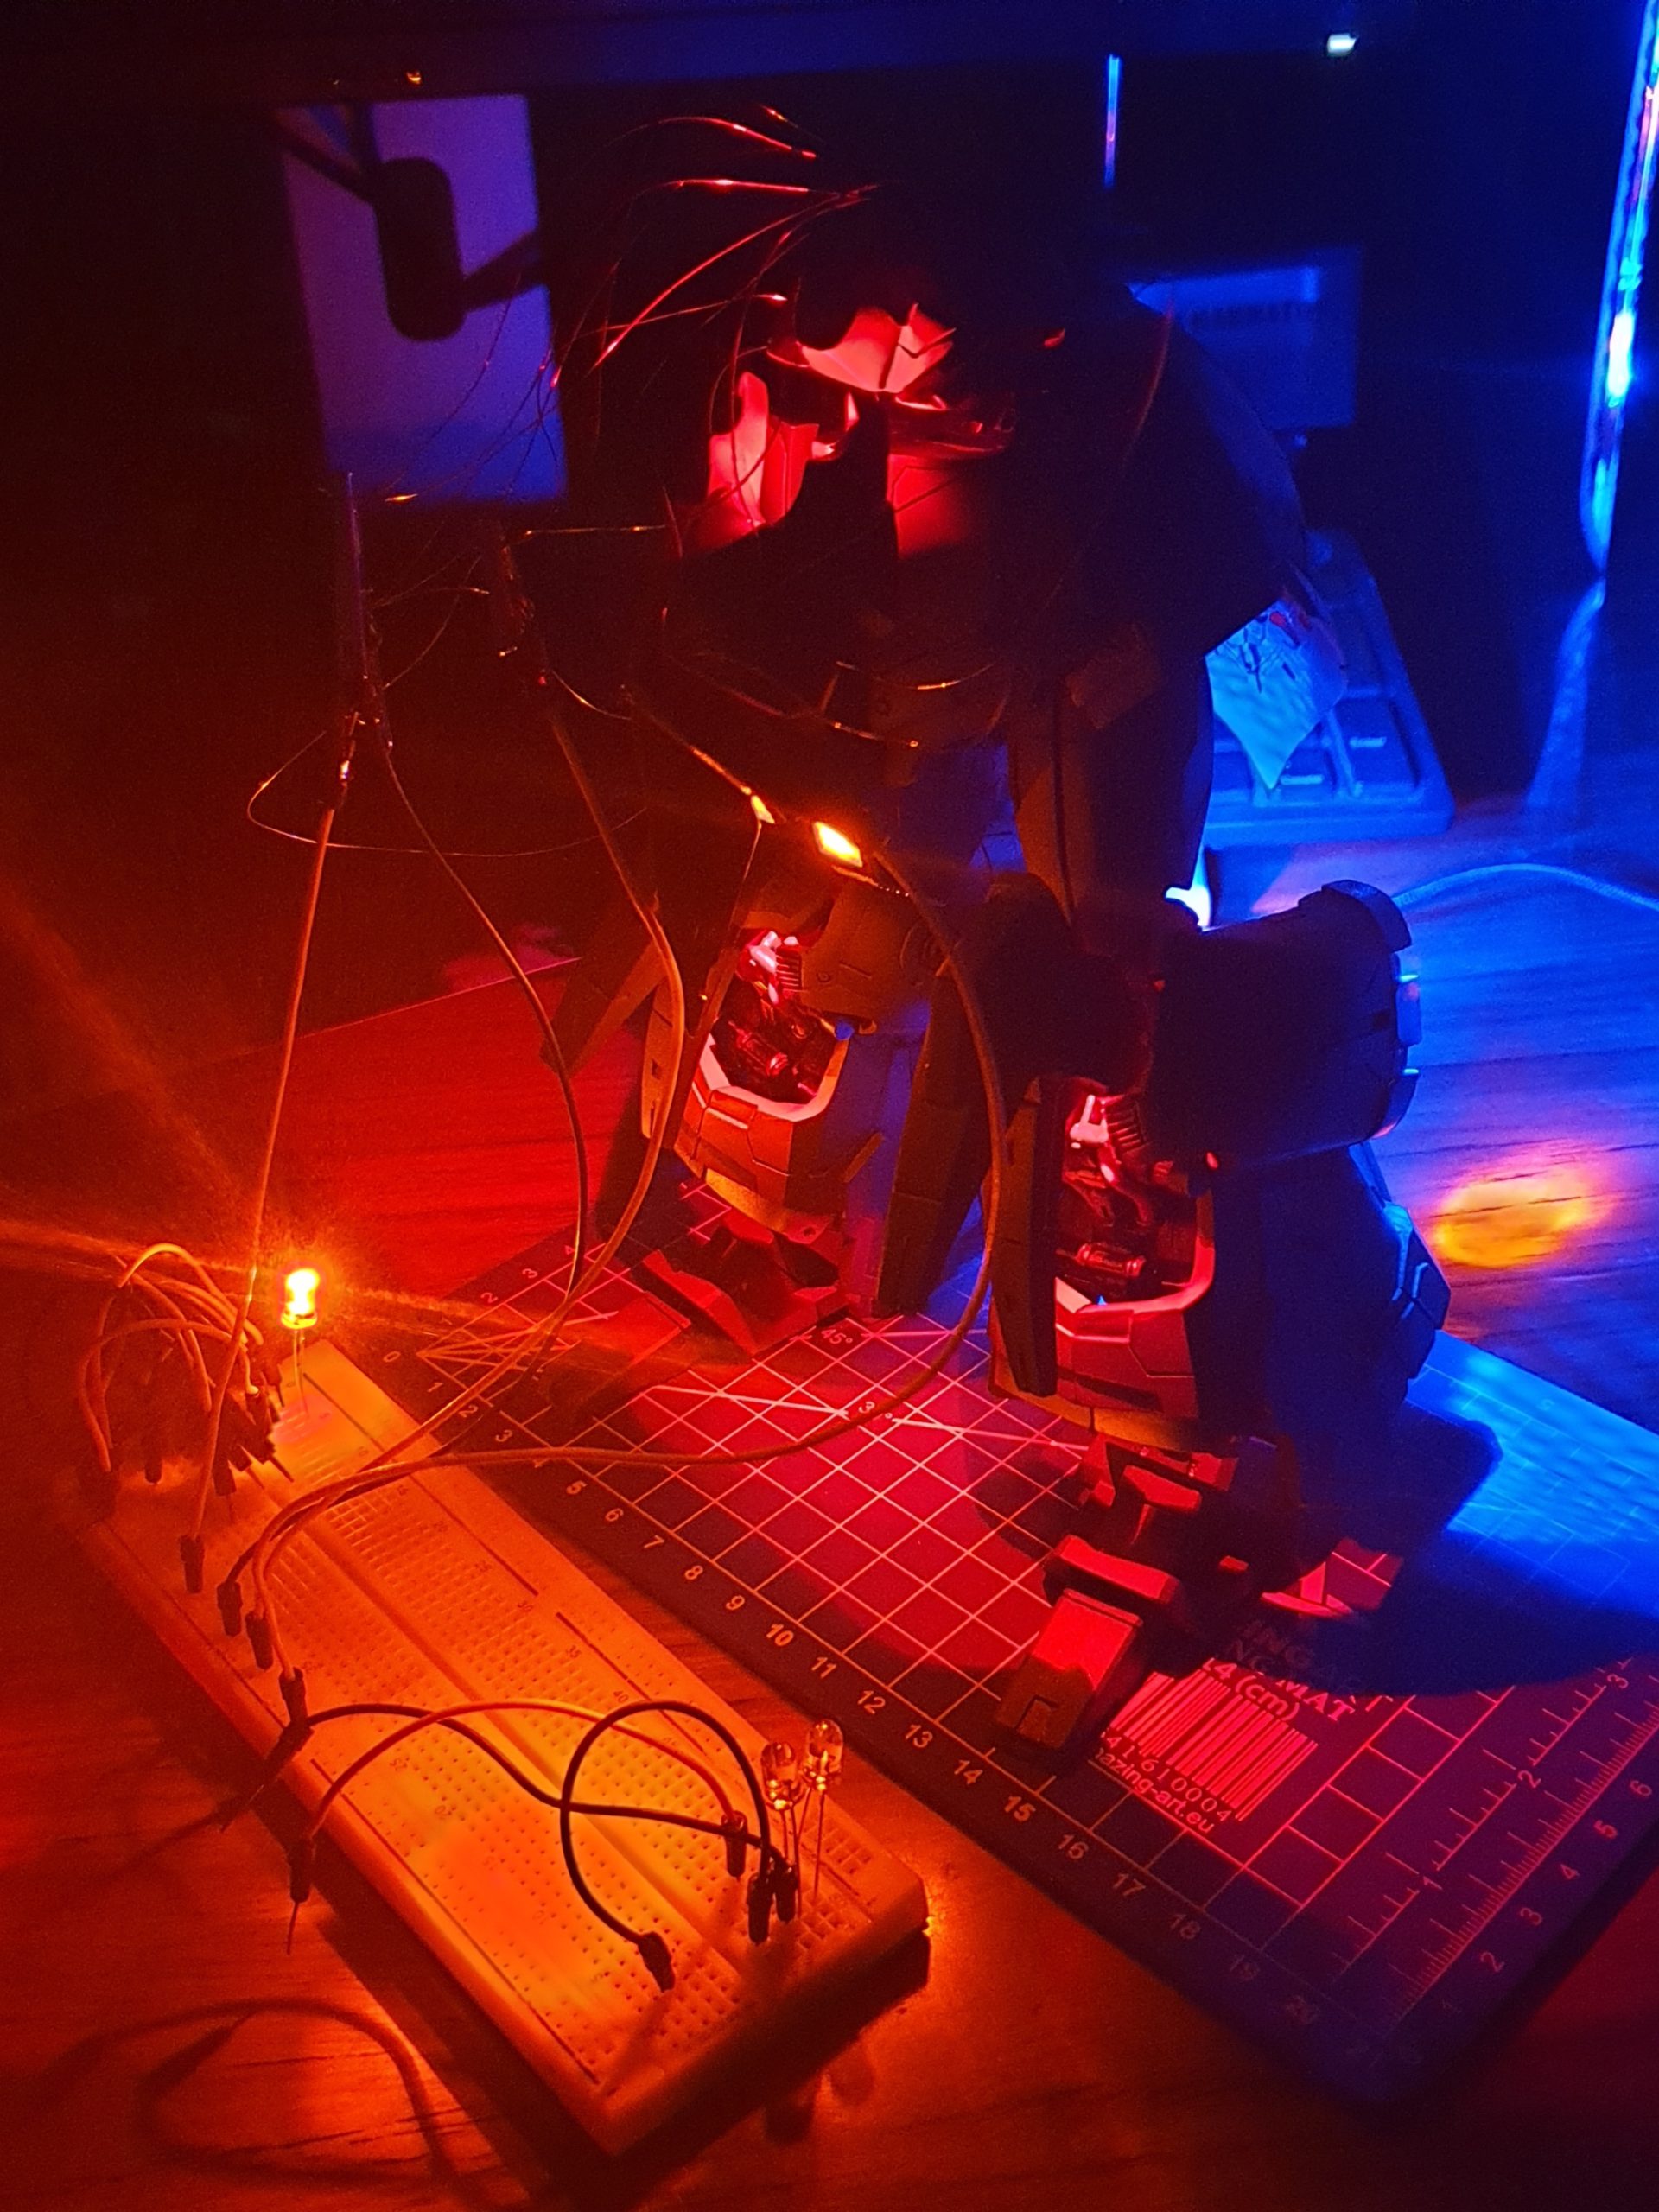
Wiring went fine together with all legs parts combined. A quick way to document circuits 😉 Test power-on! ….sooo many…
Time to put add some colors to leg details Main body colors in place. A BEAST!!!
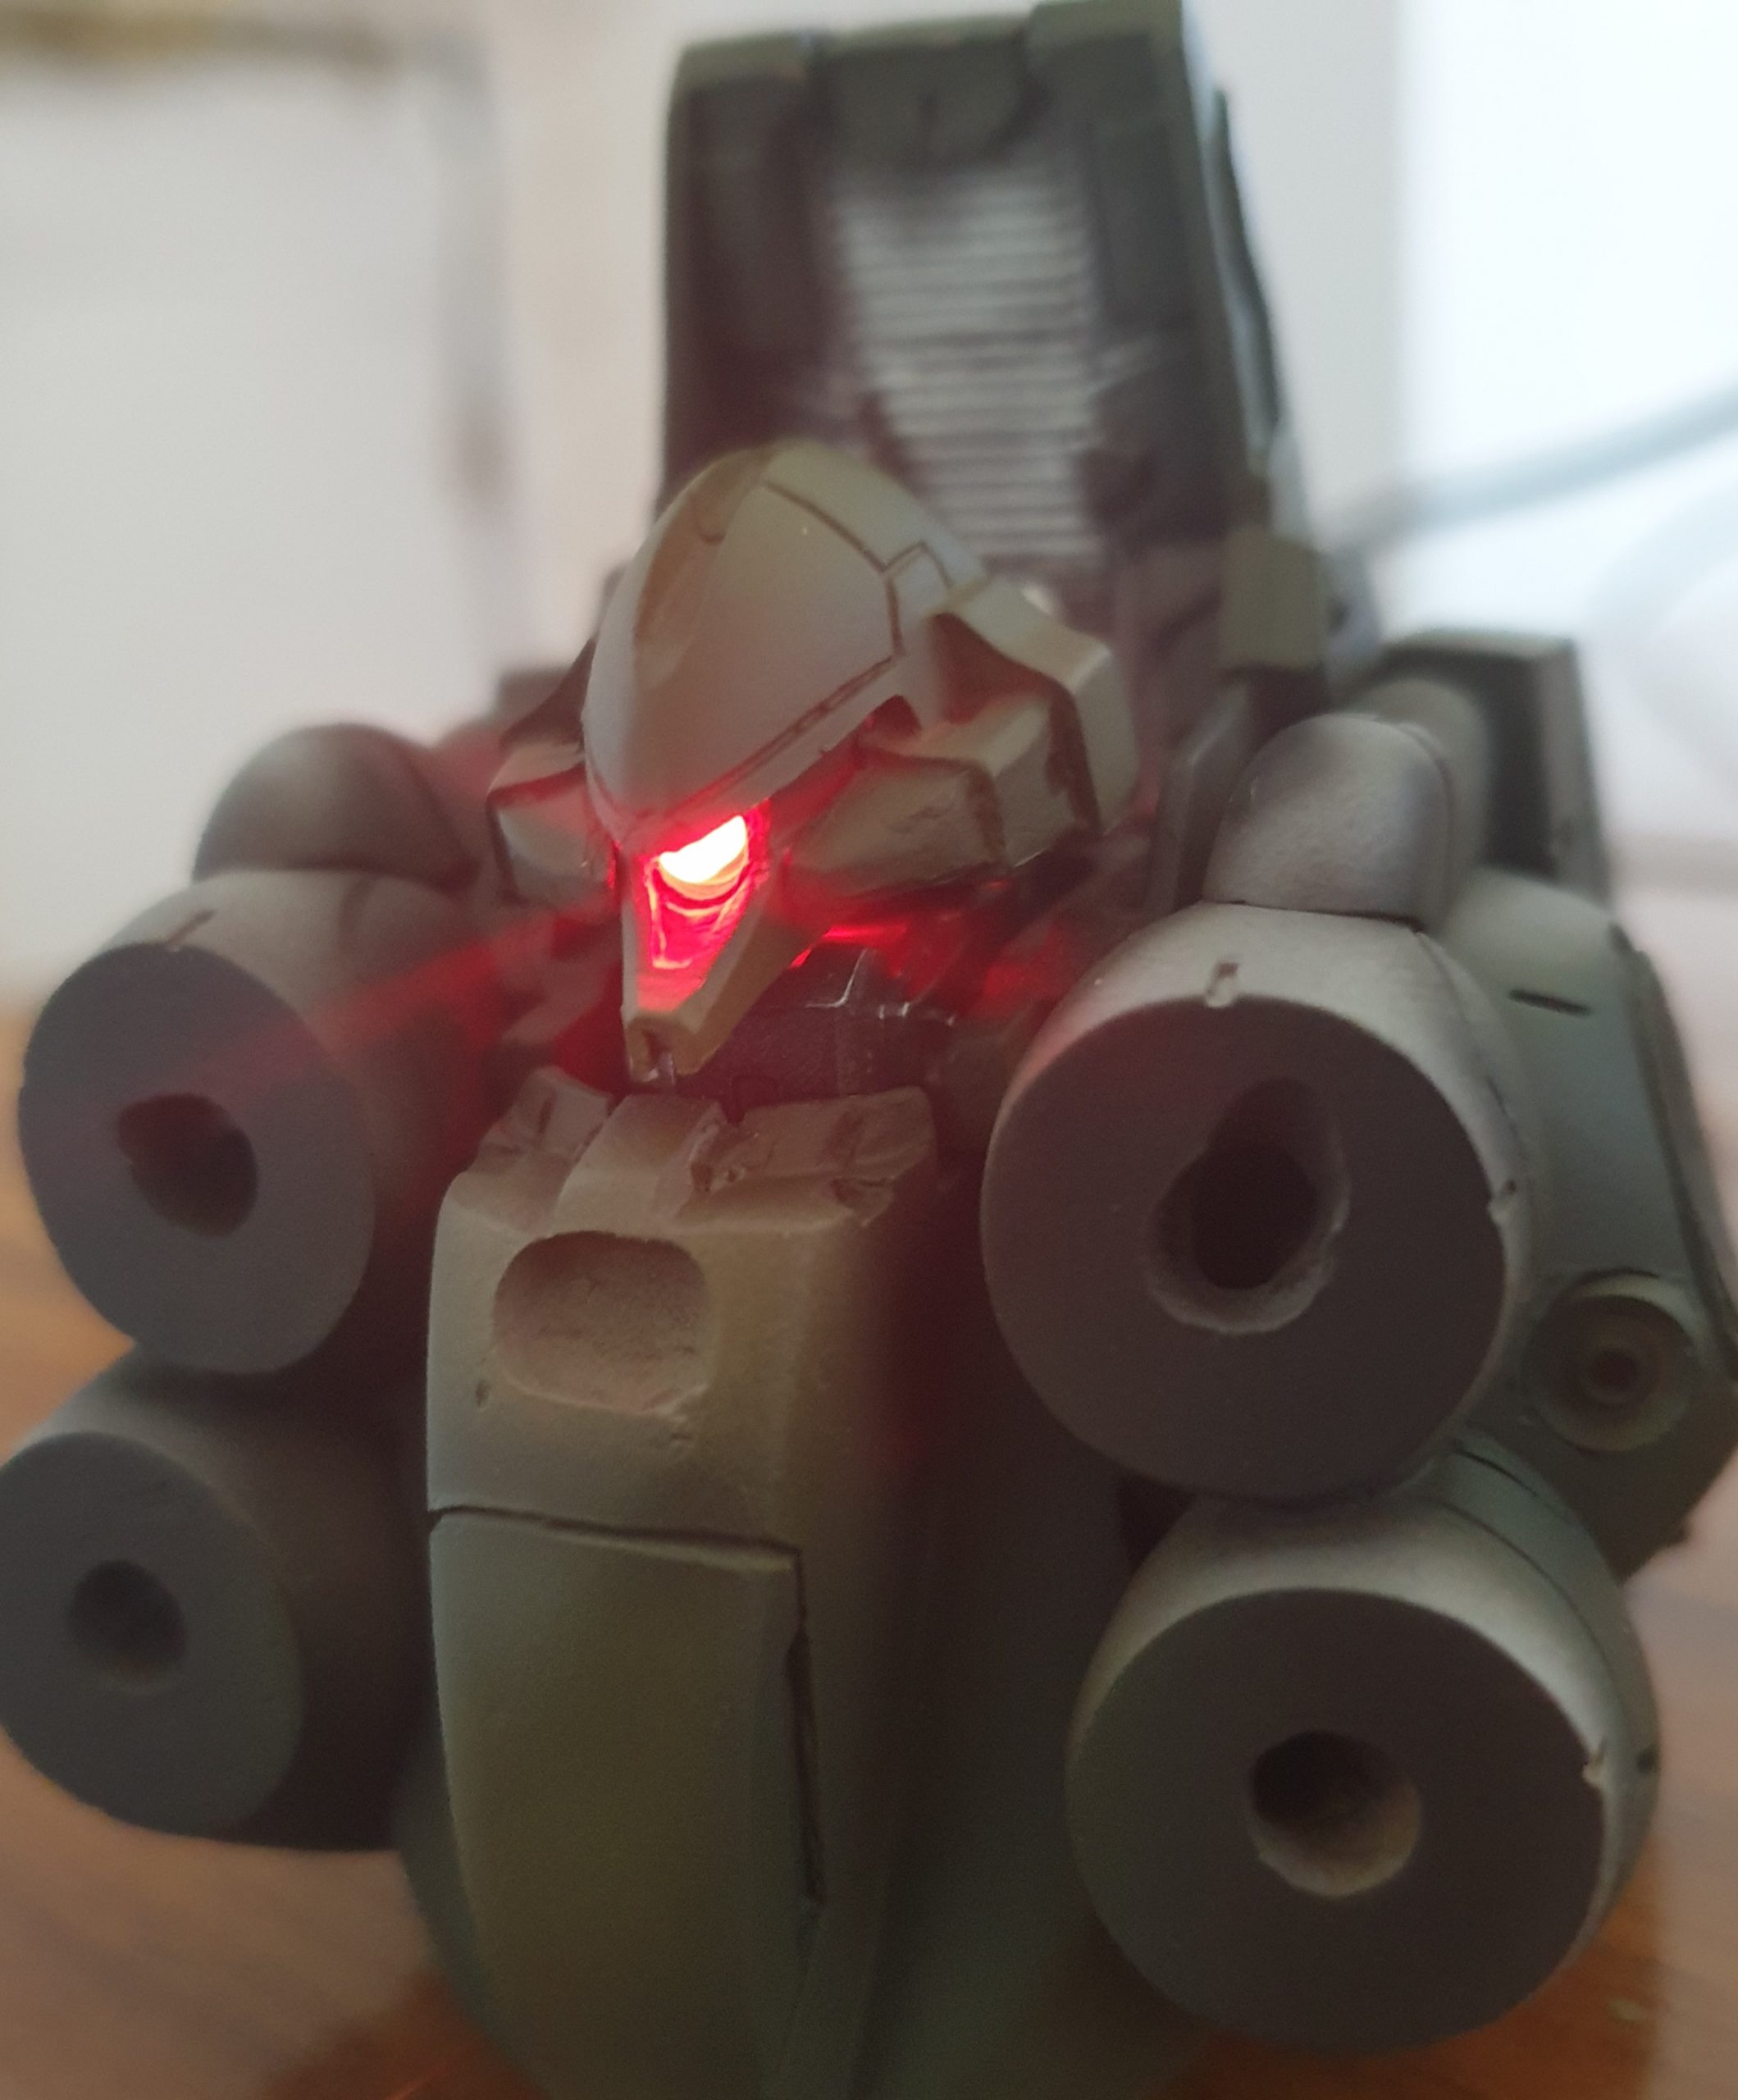
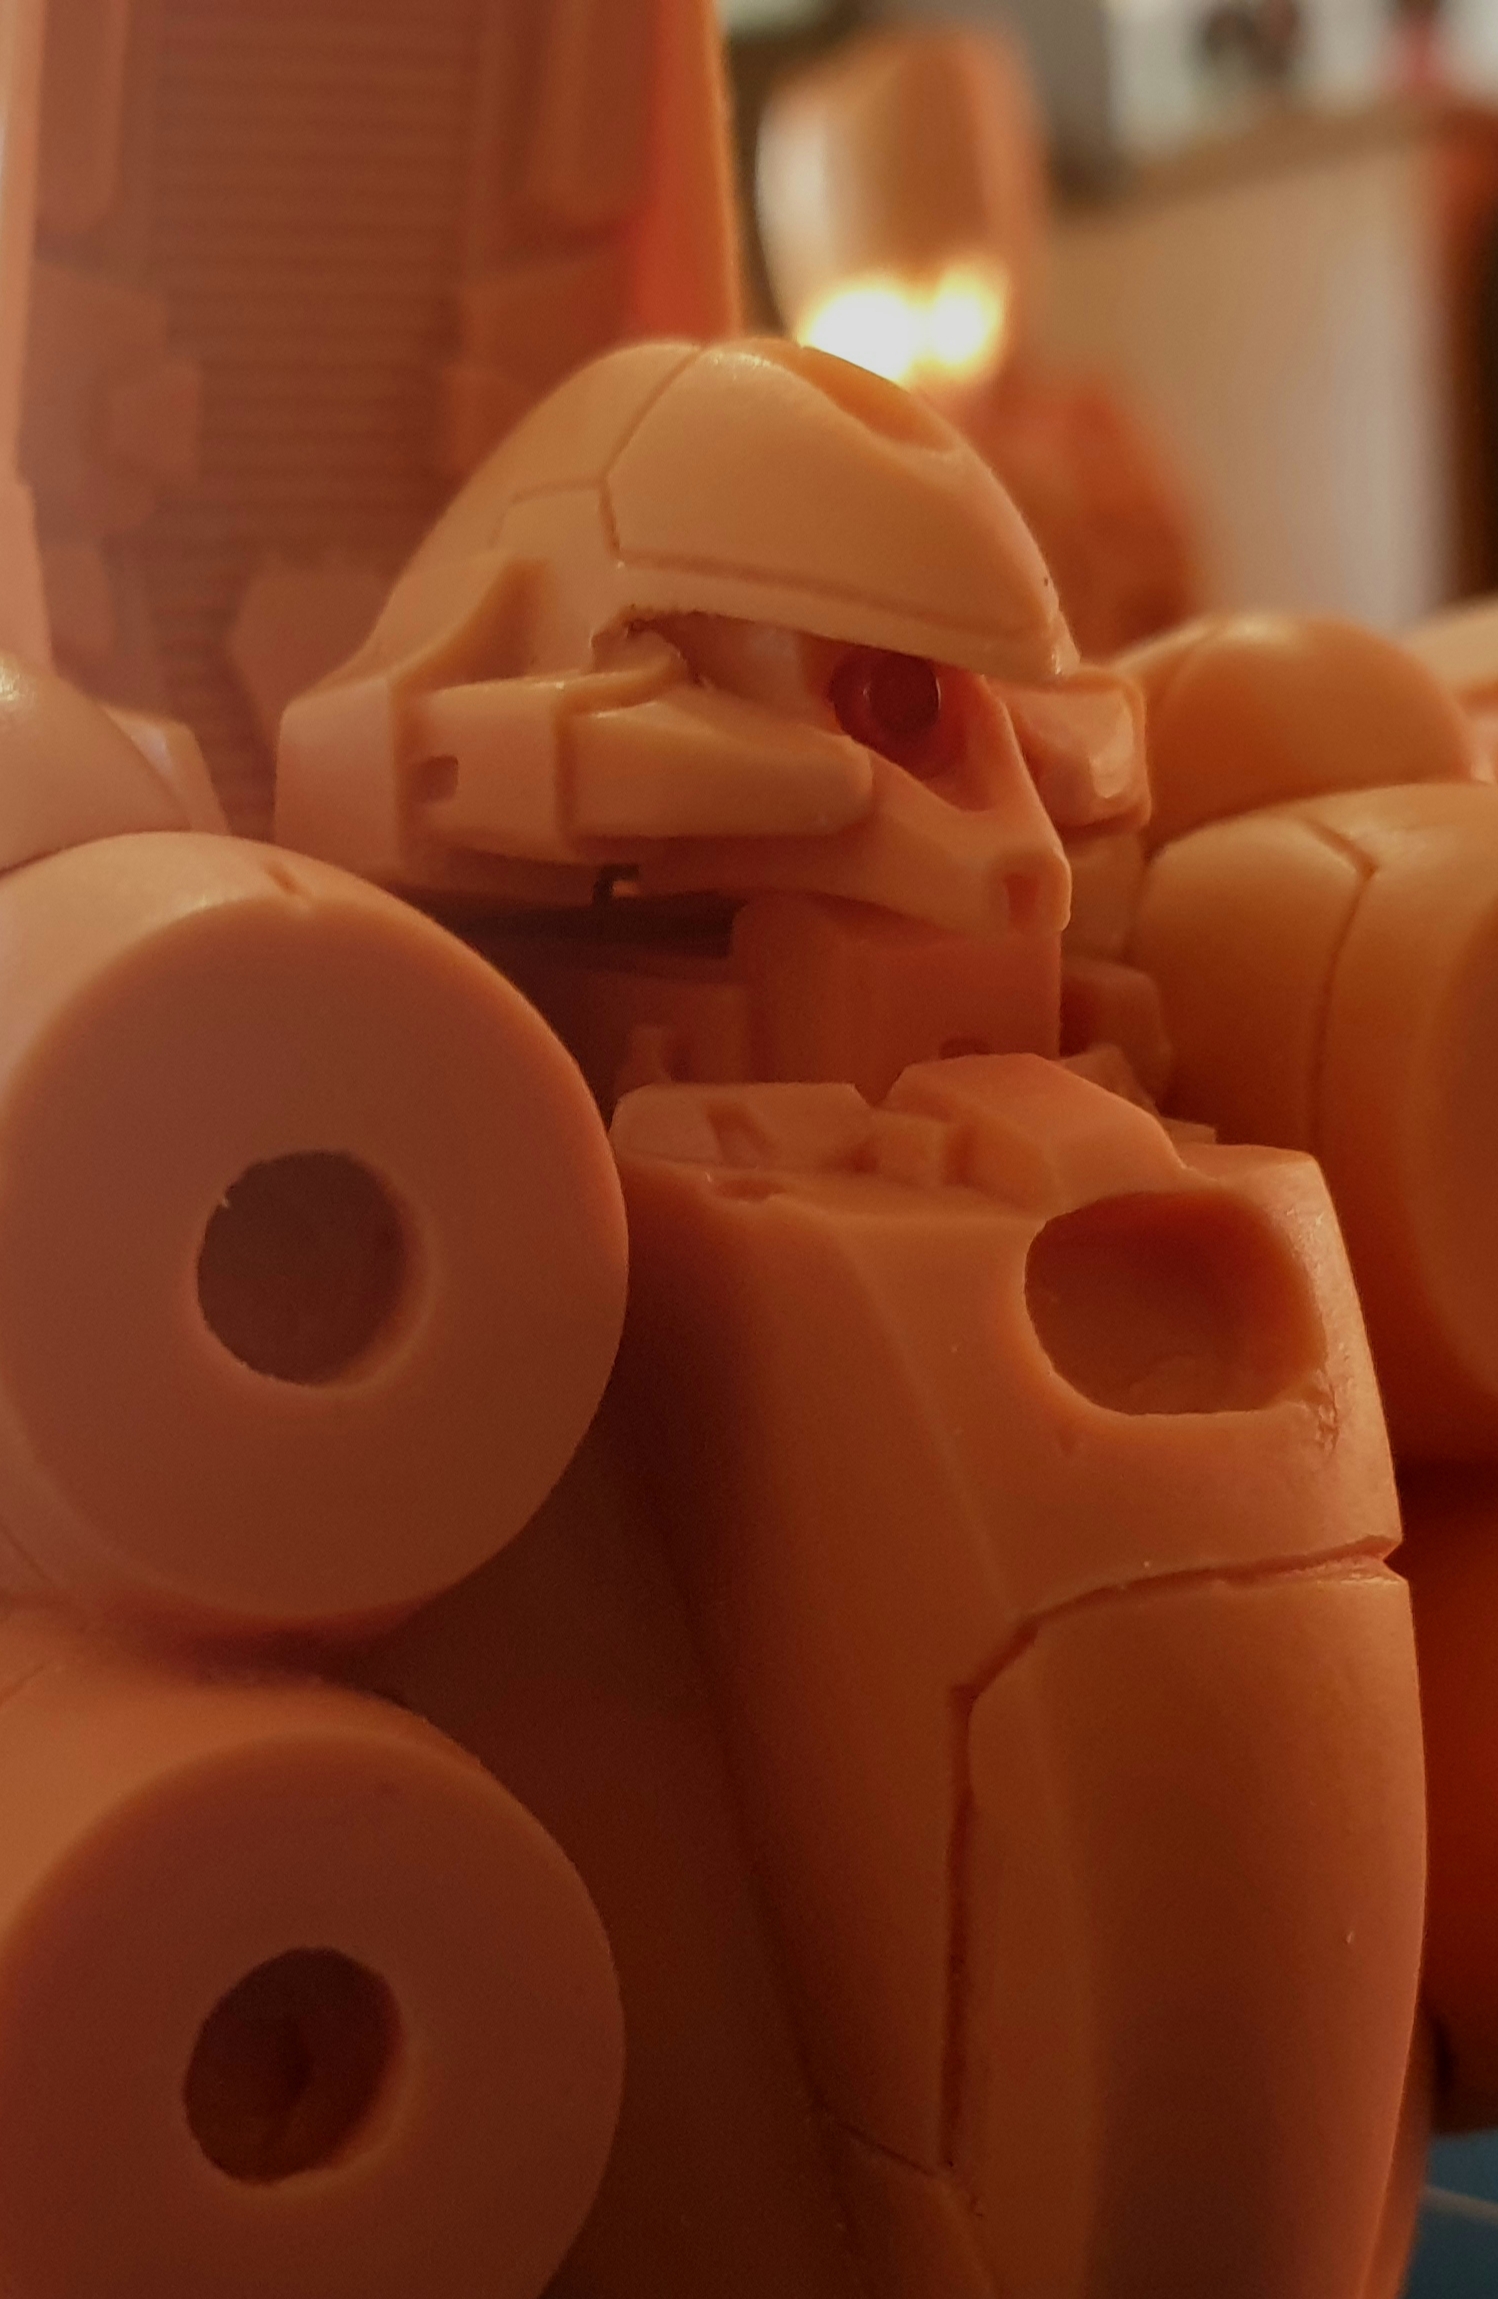
I know that there should be pink eye, but I went with red LED – looks better in my opinion.I…
Planning and thinking how to connect all circuits into body of Kshatriya took me a while, then some not so…
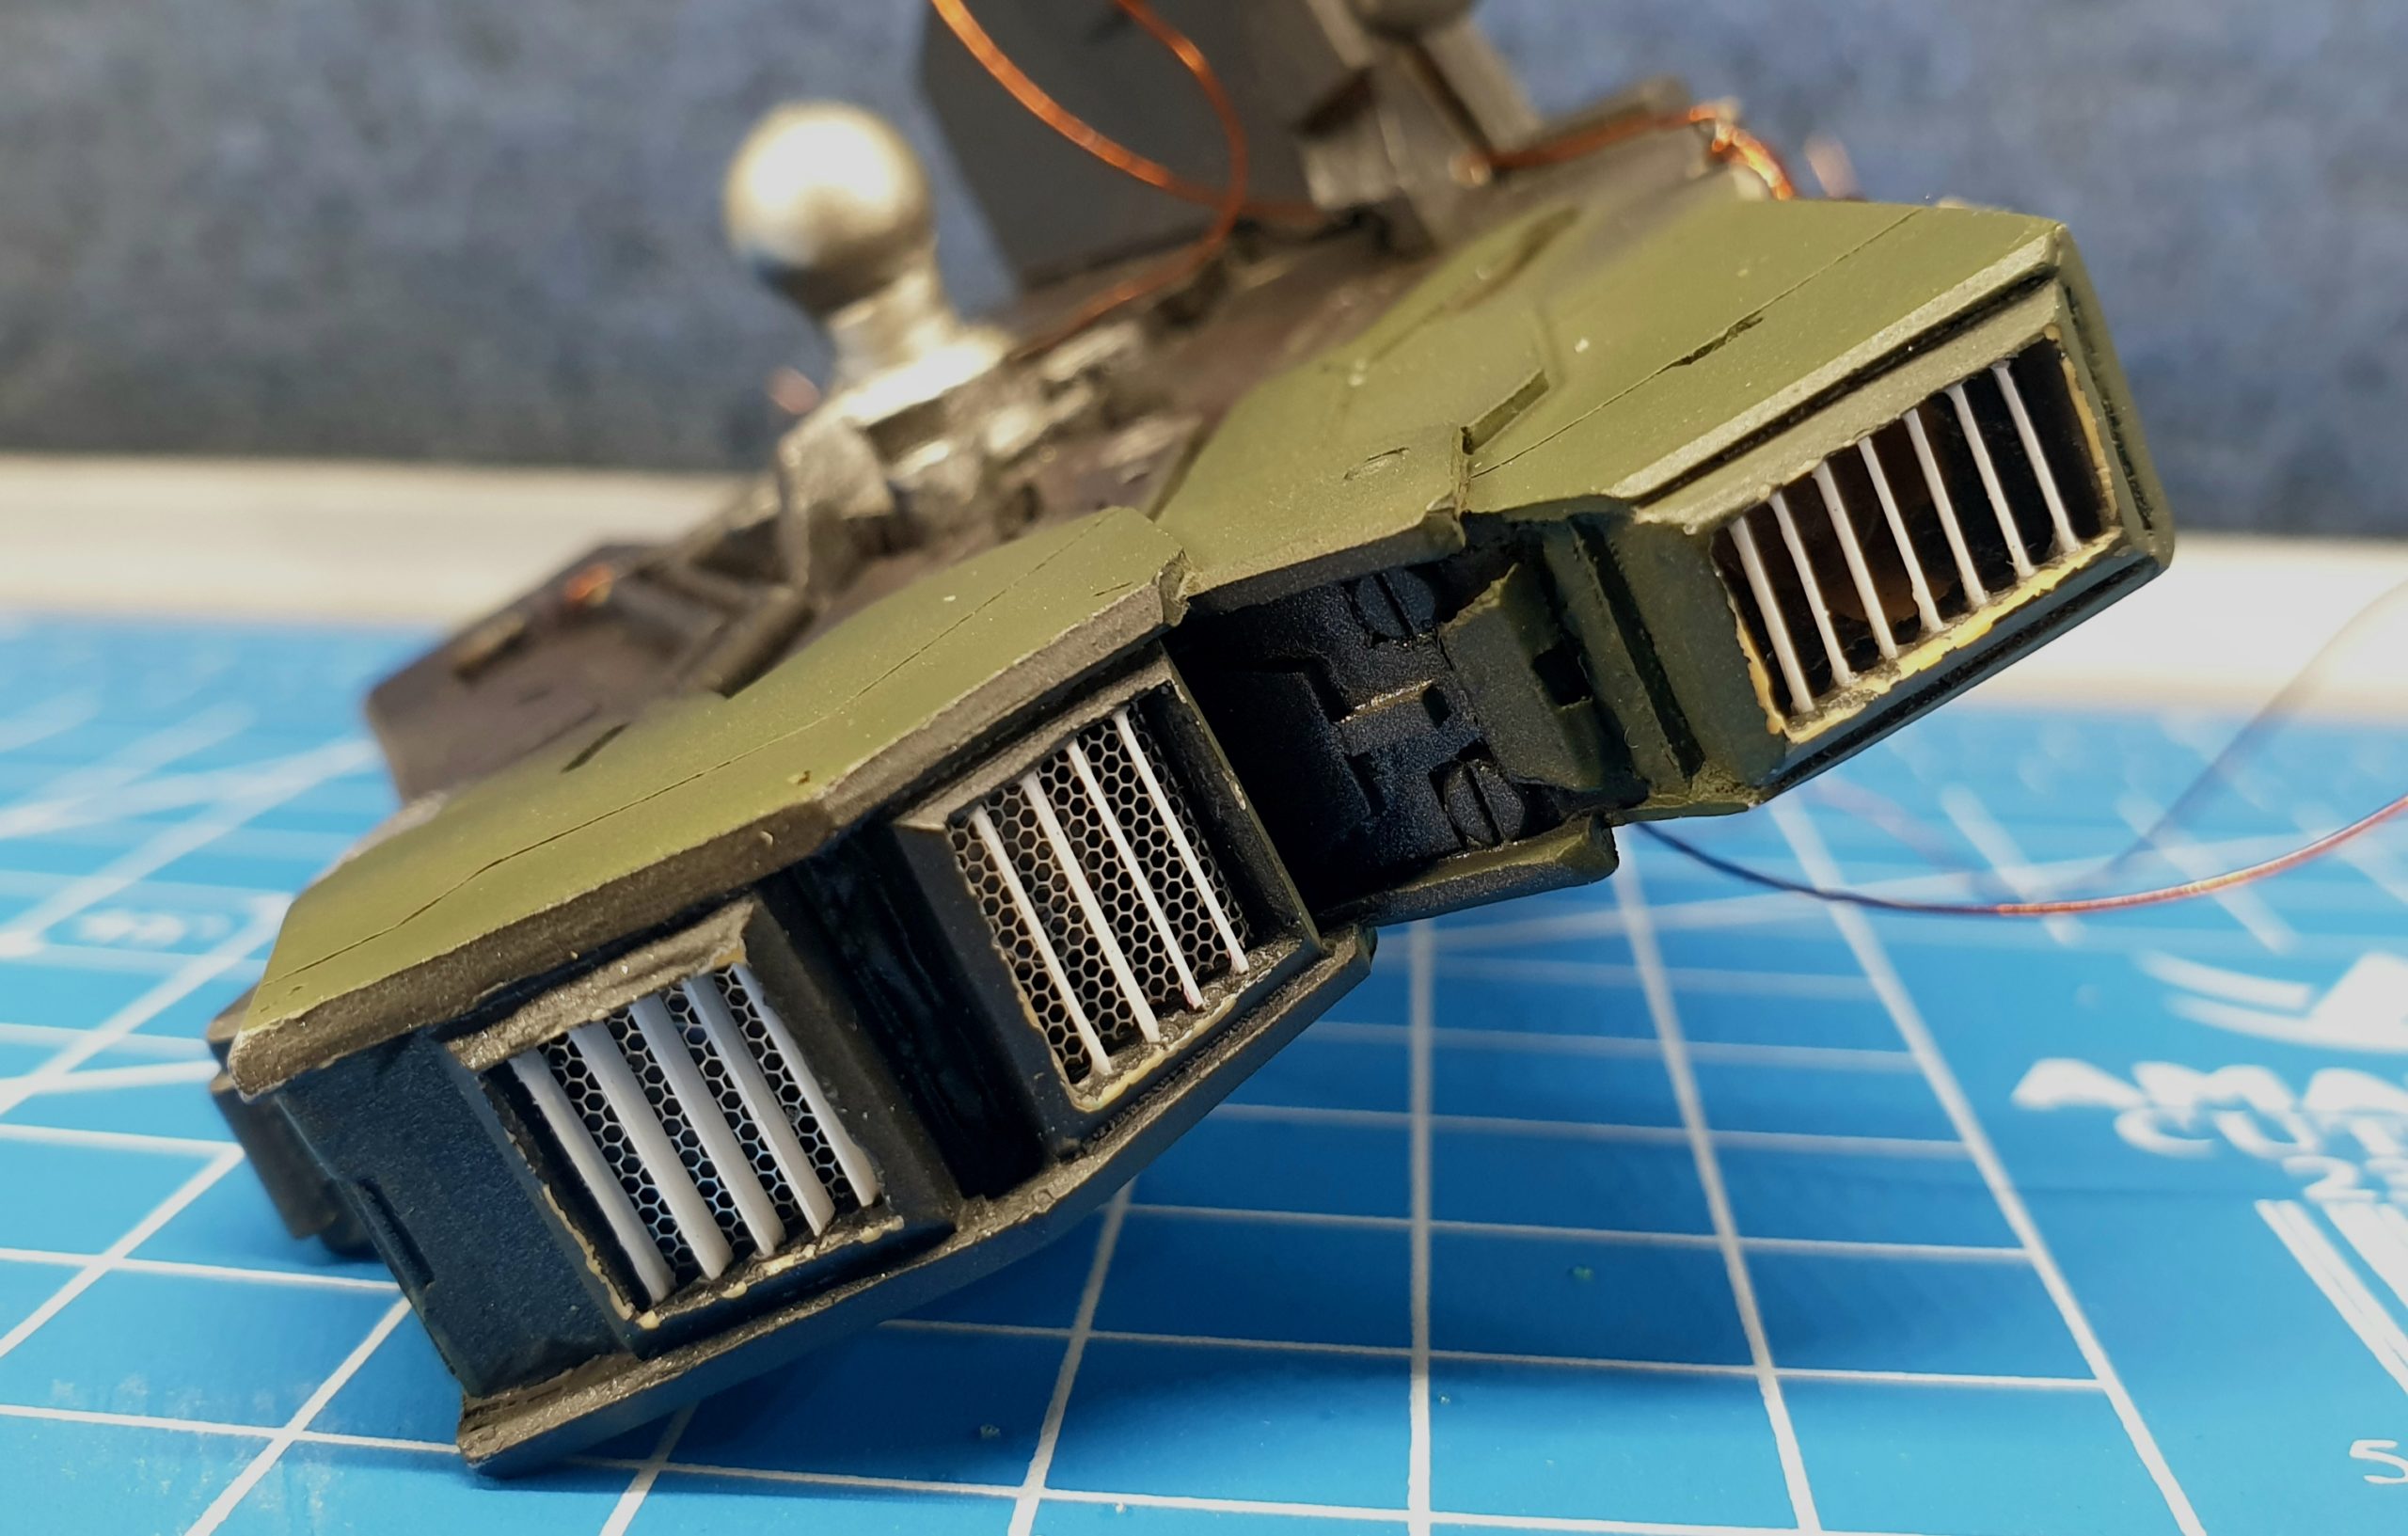
To rebuild the grills I used 0,3mm pla plates from GreenStuffWorld and some photo-etched mesh. It added extra details and…
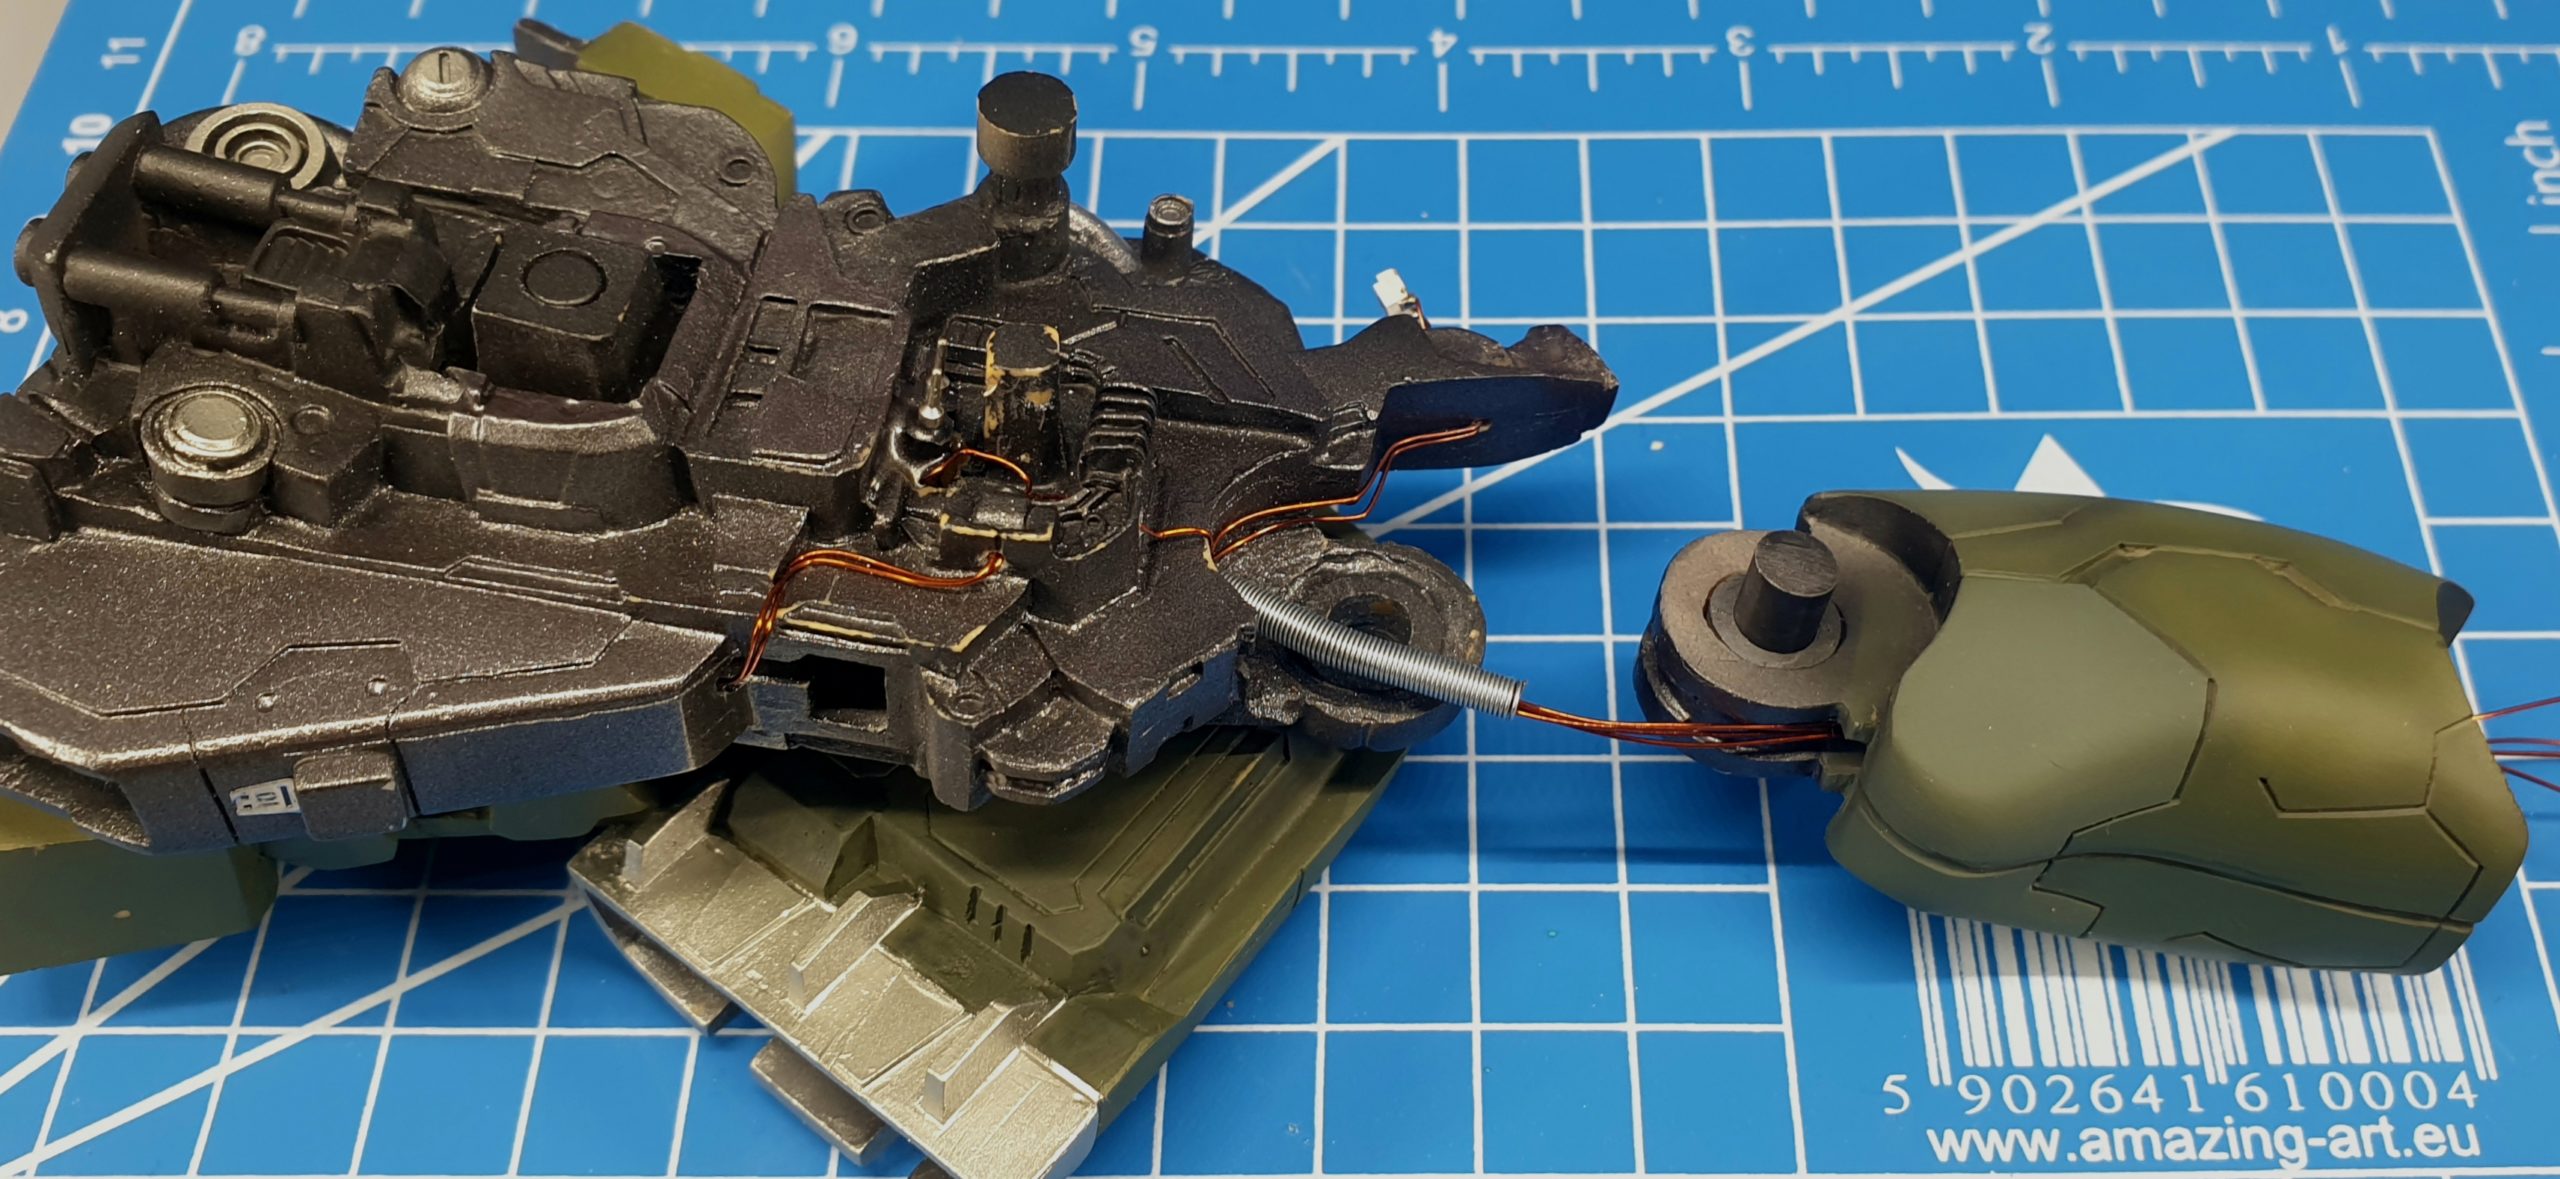
The goal is to drive all cables through the thighs. I used some spare springs from other Zaku model to…
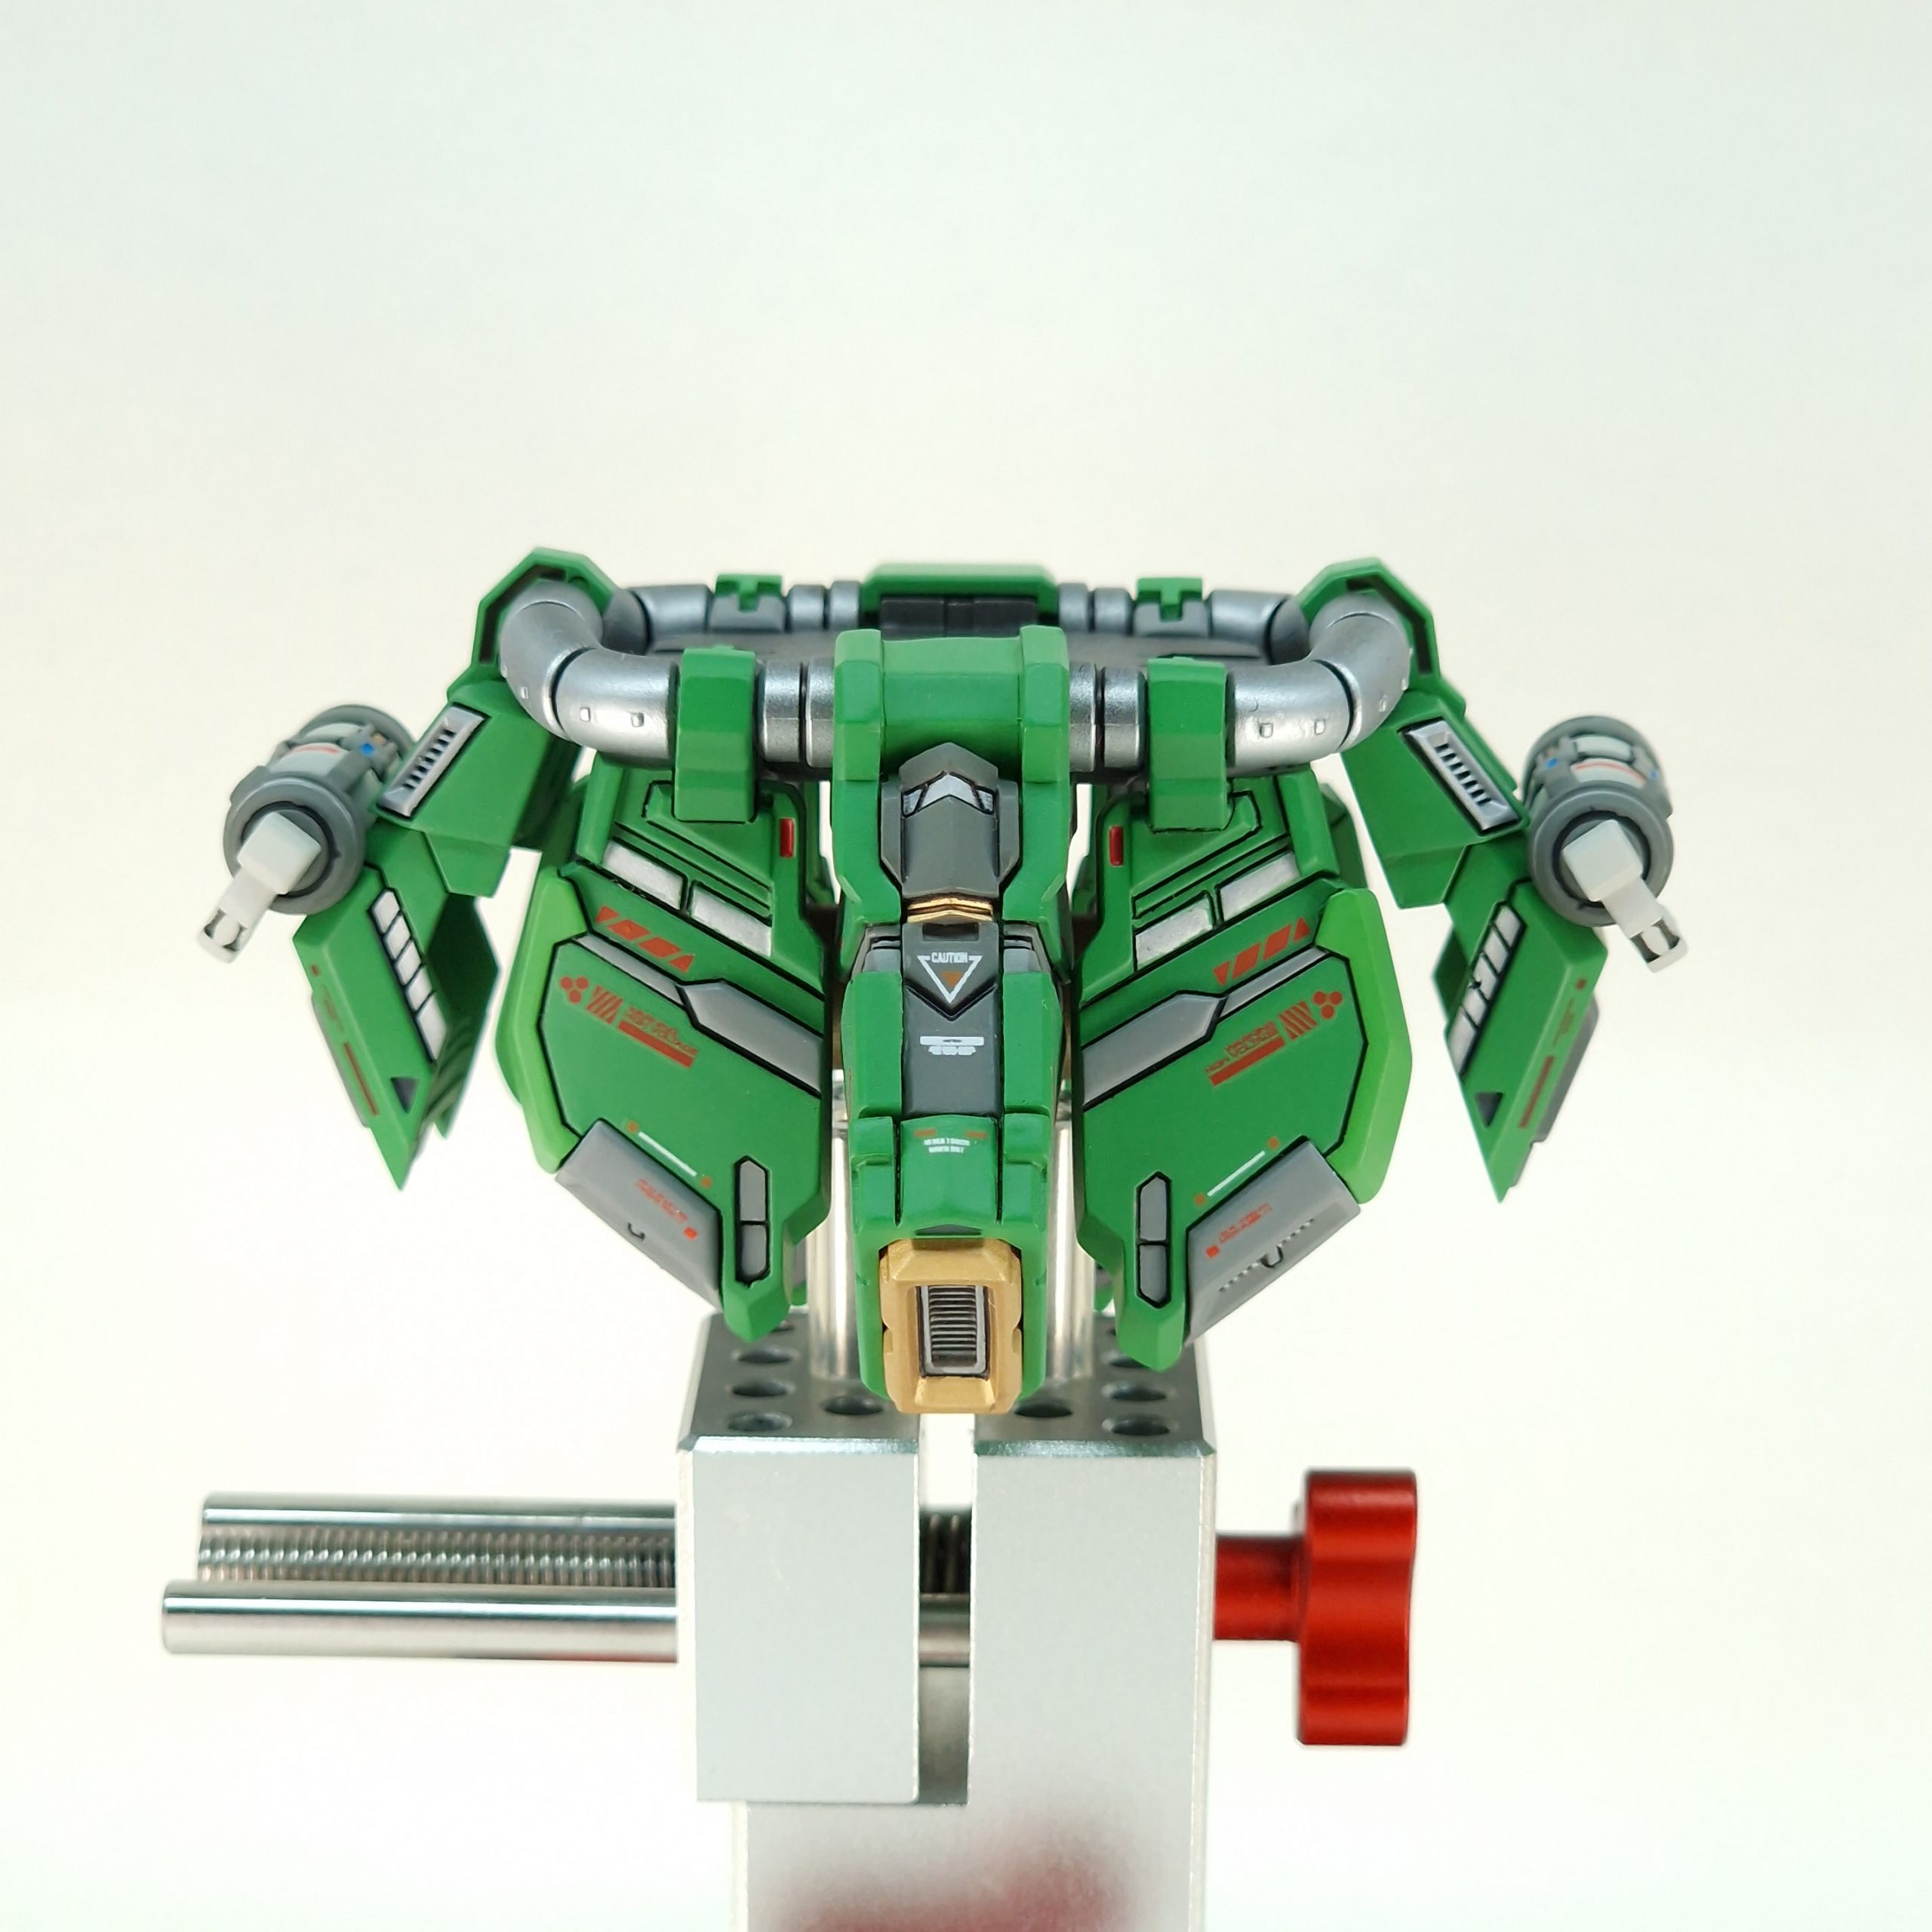
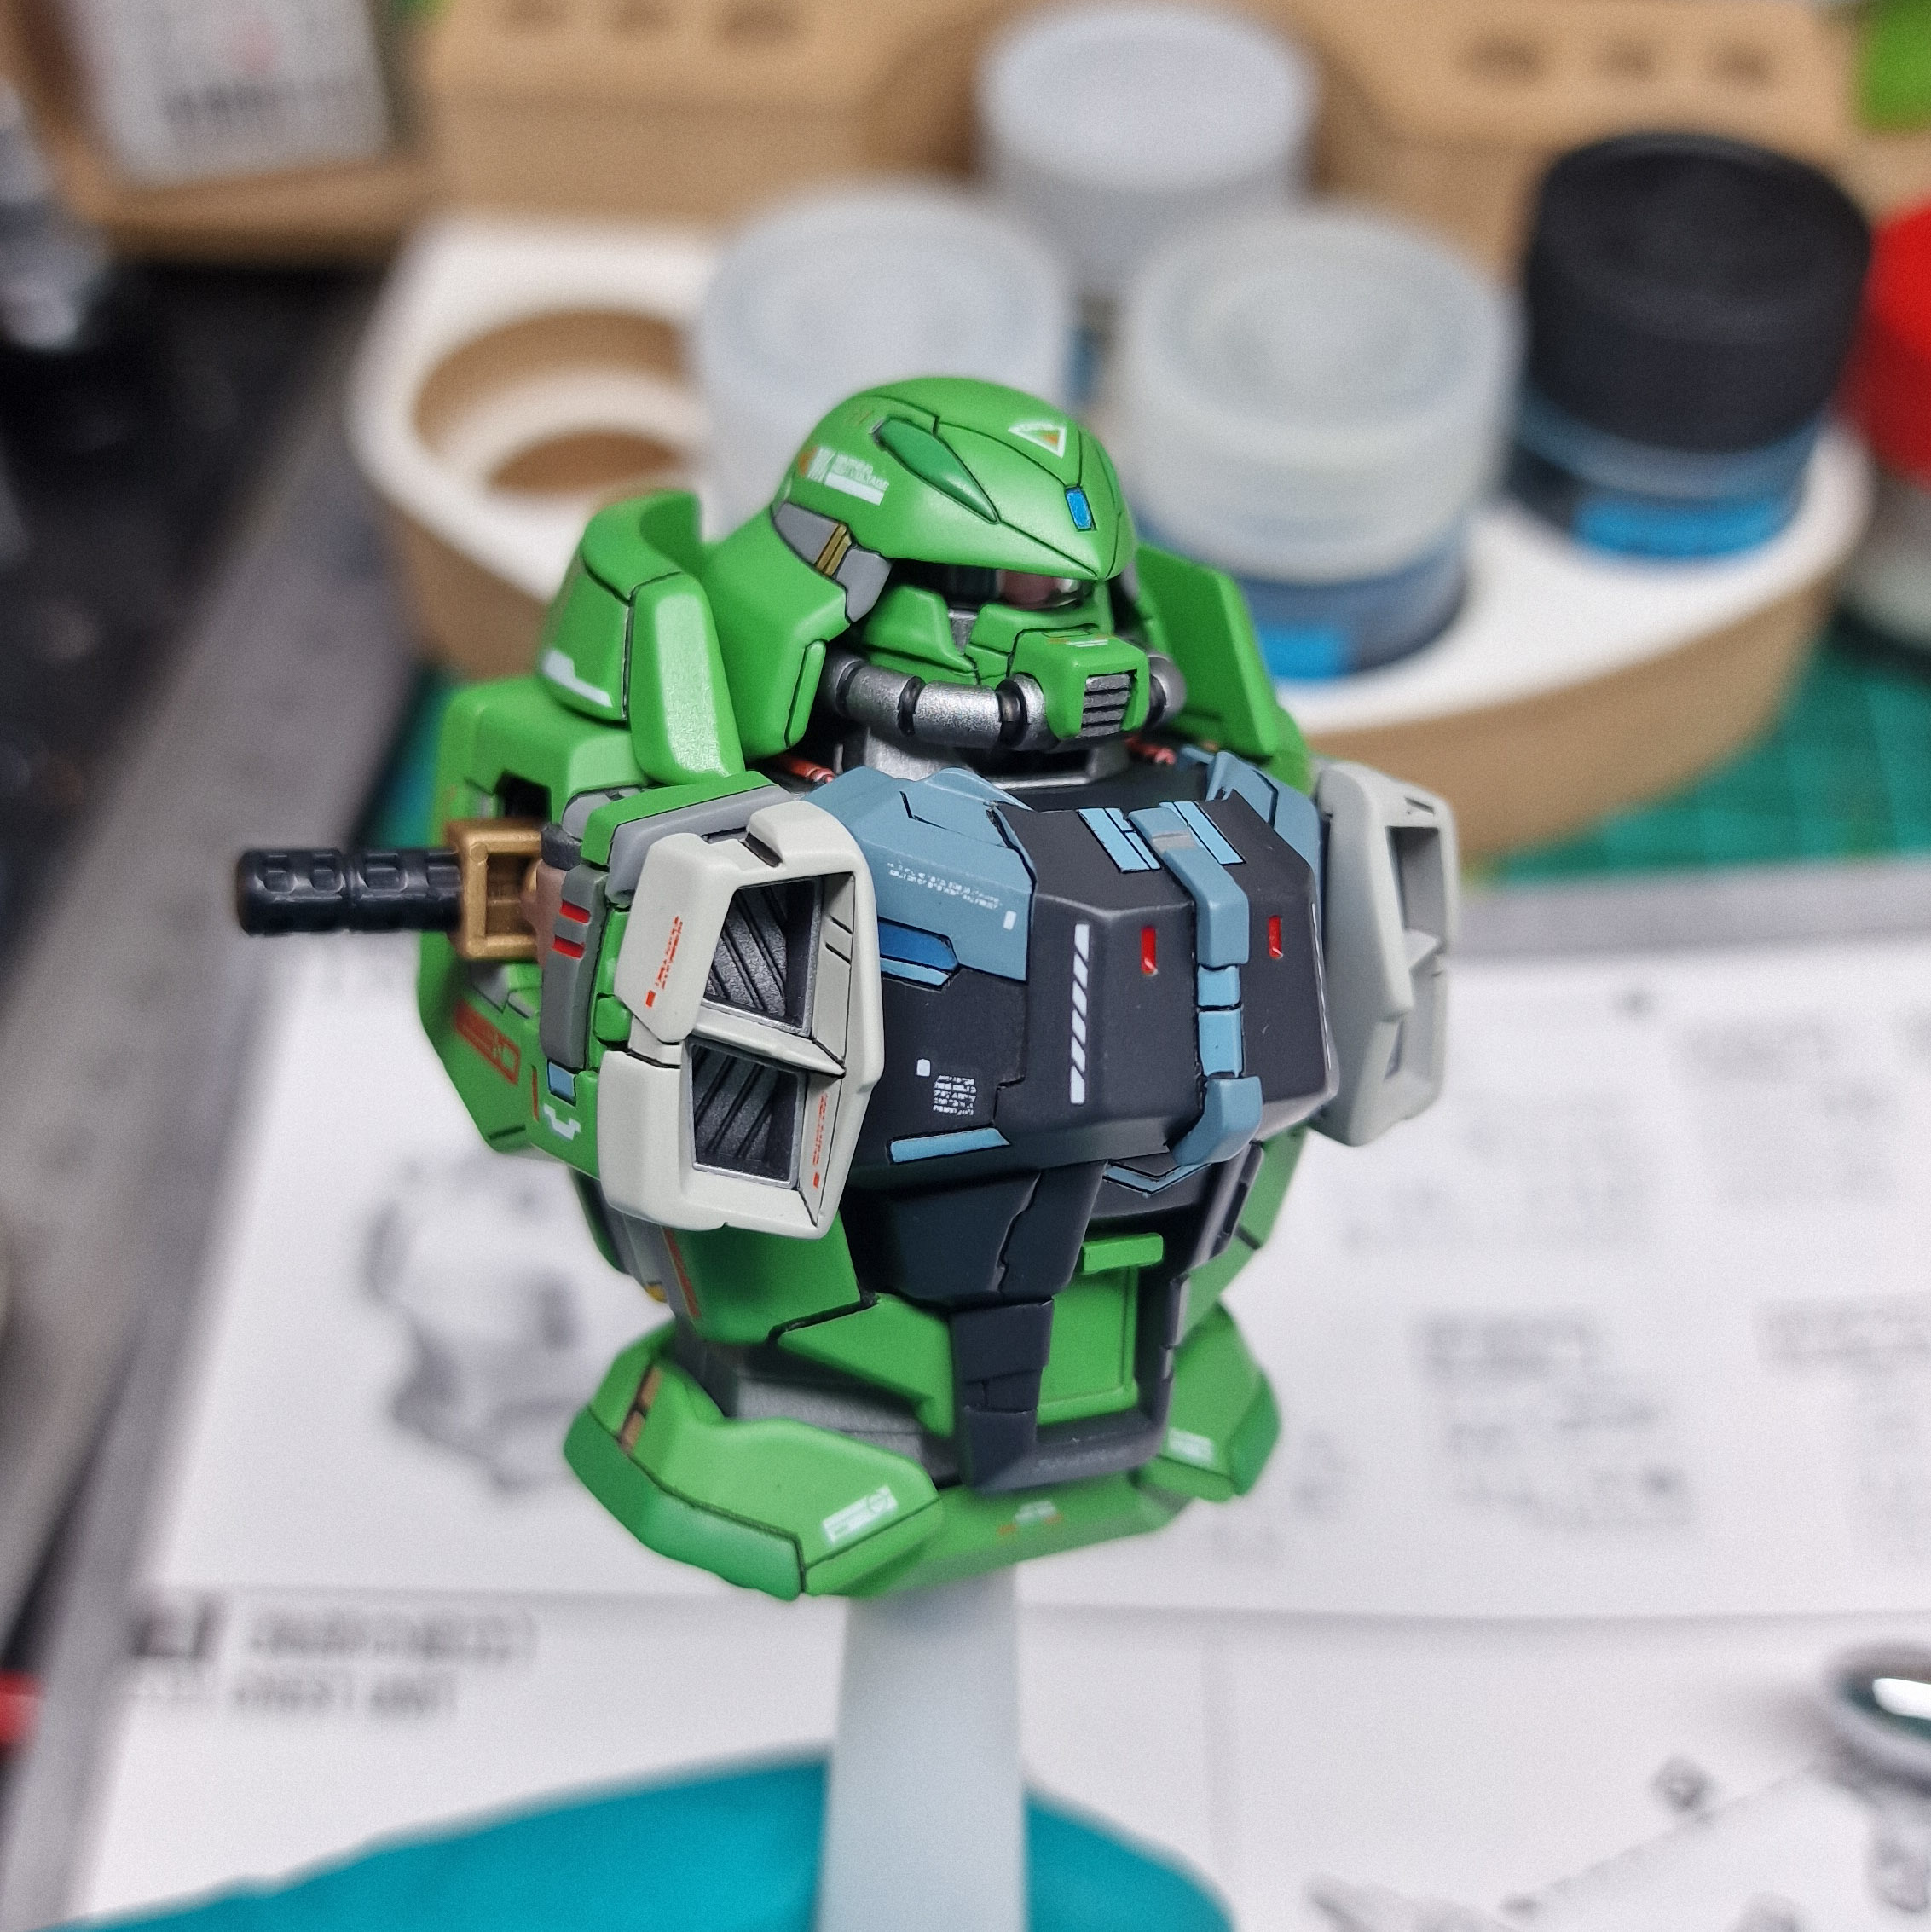
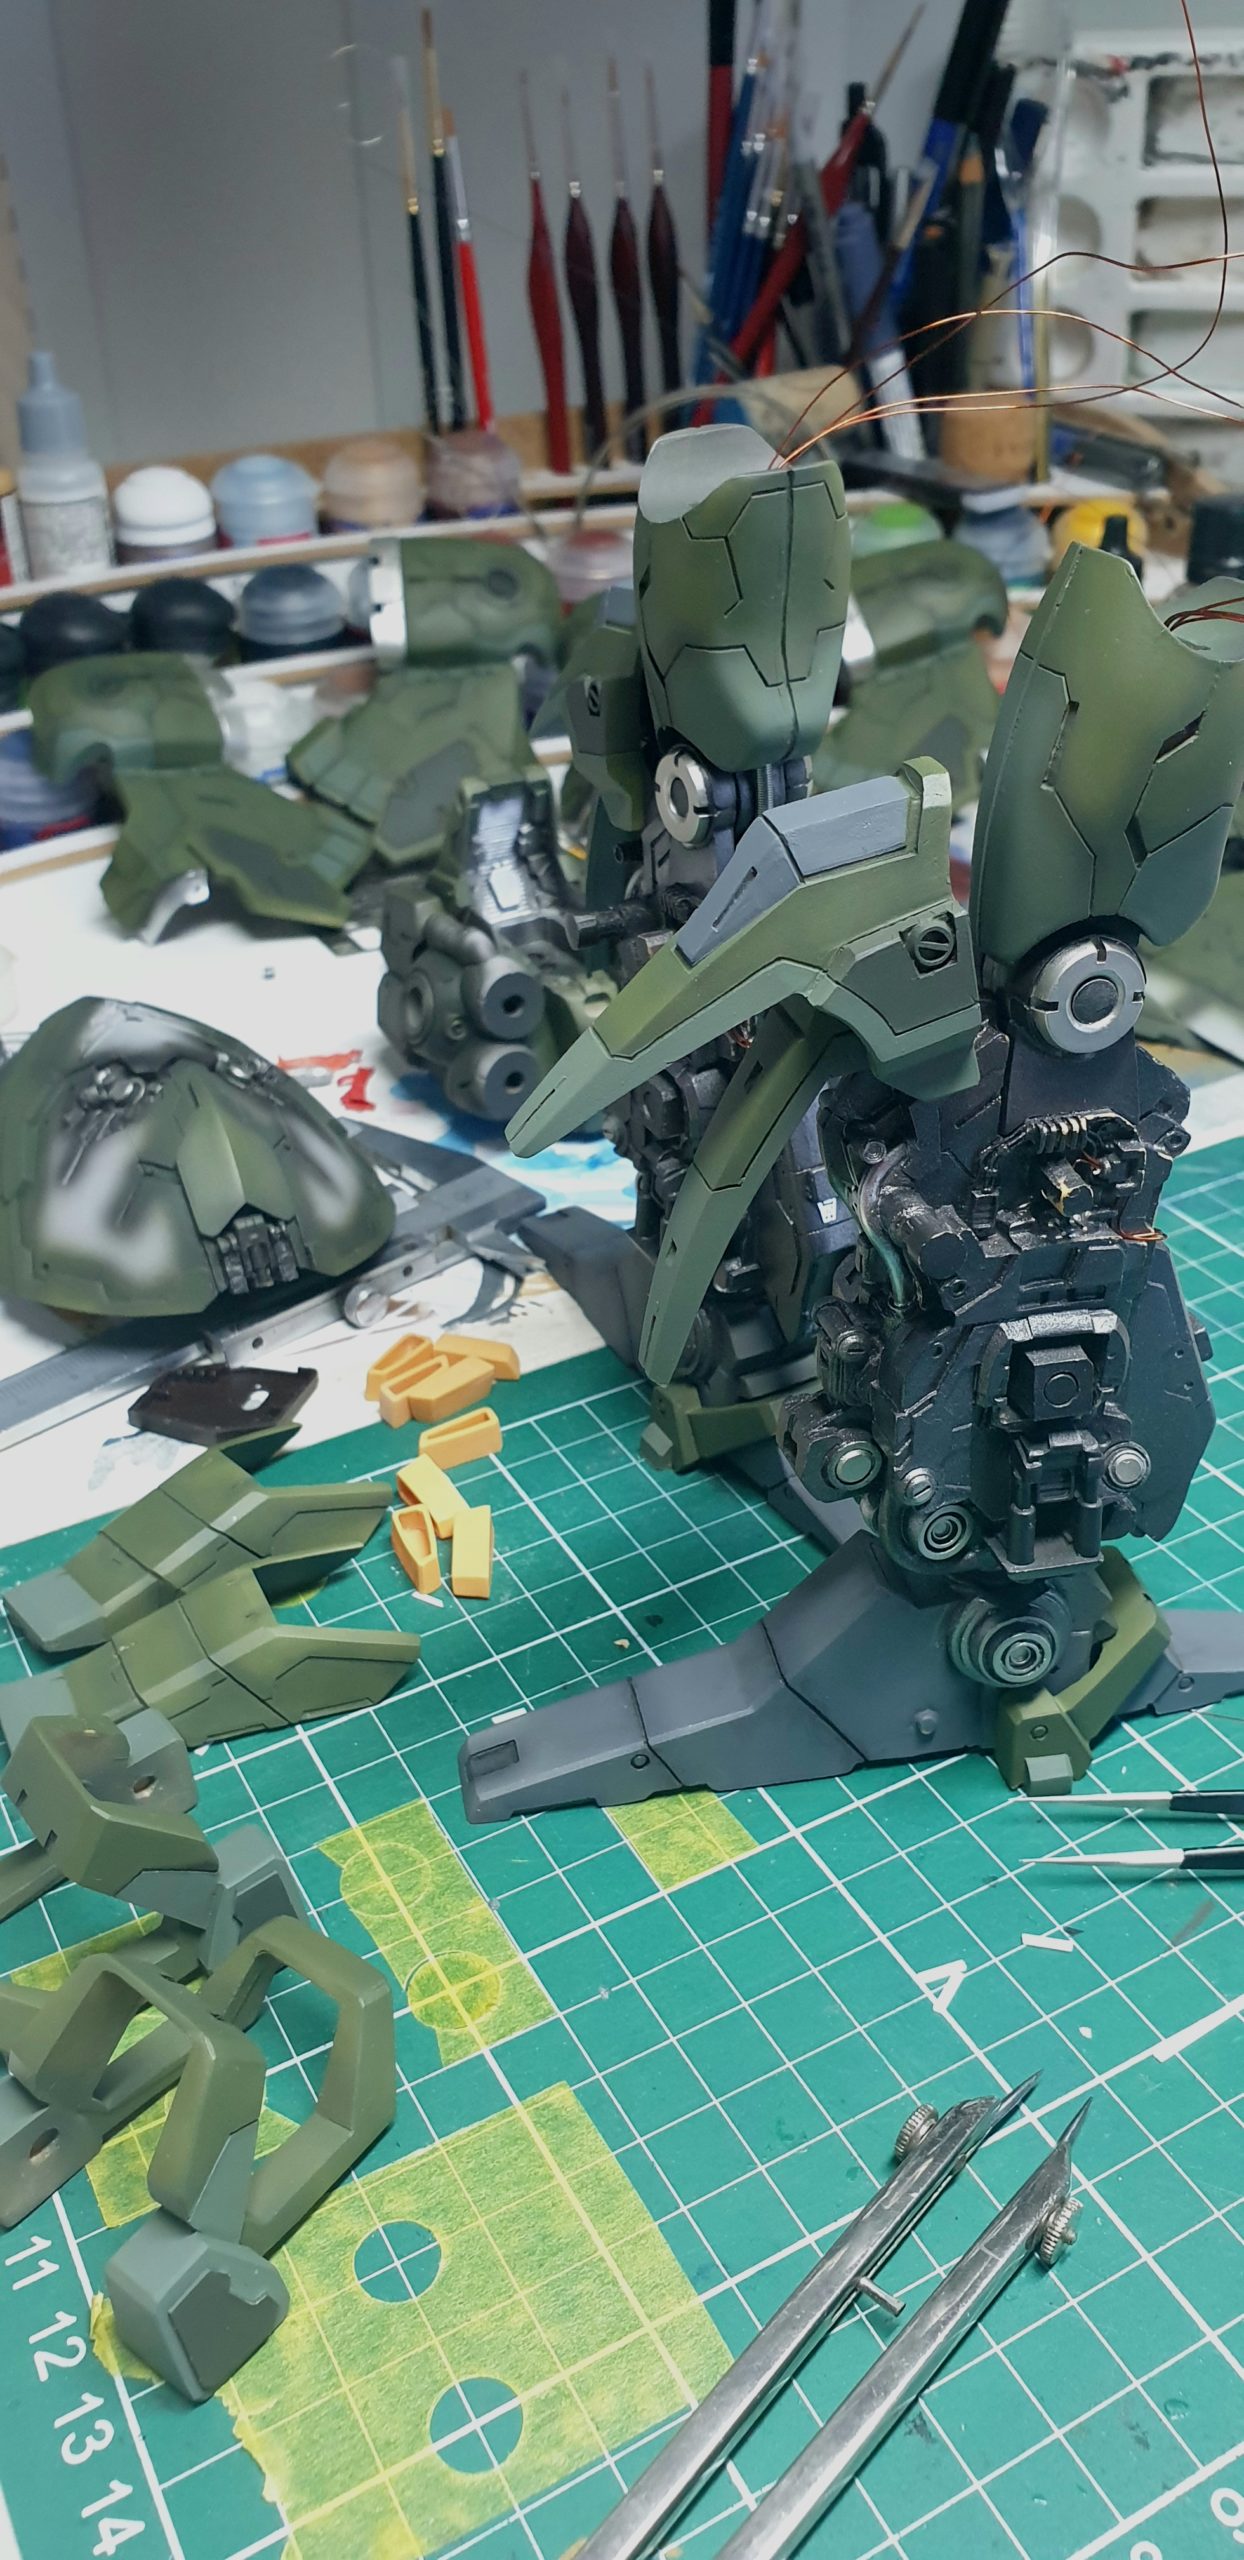
Another layers of paints applied – this time is green-black and some metalic details. Somehow the designers have omitted machine…
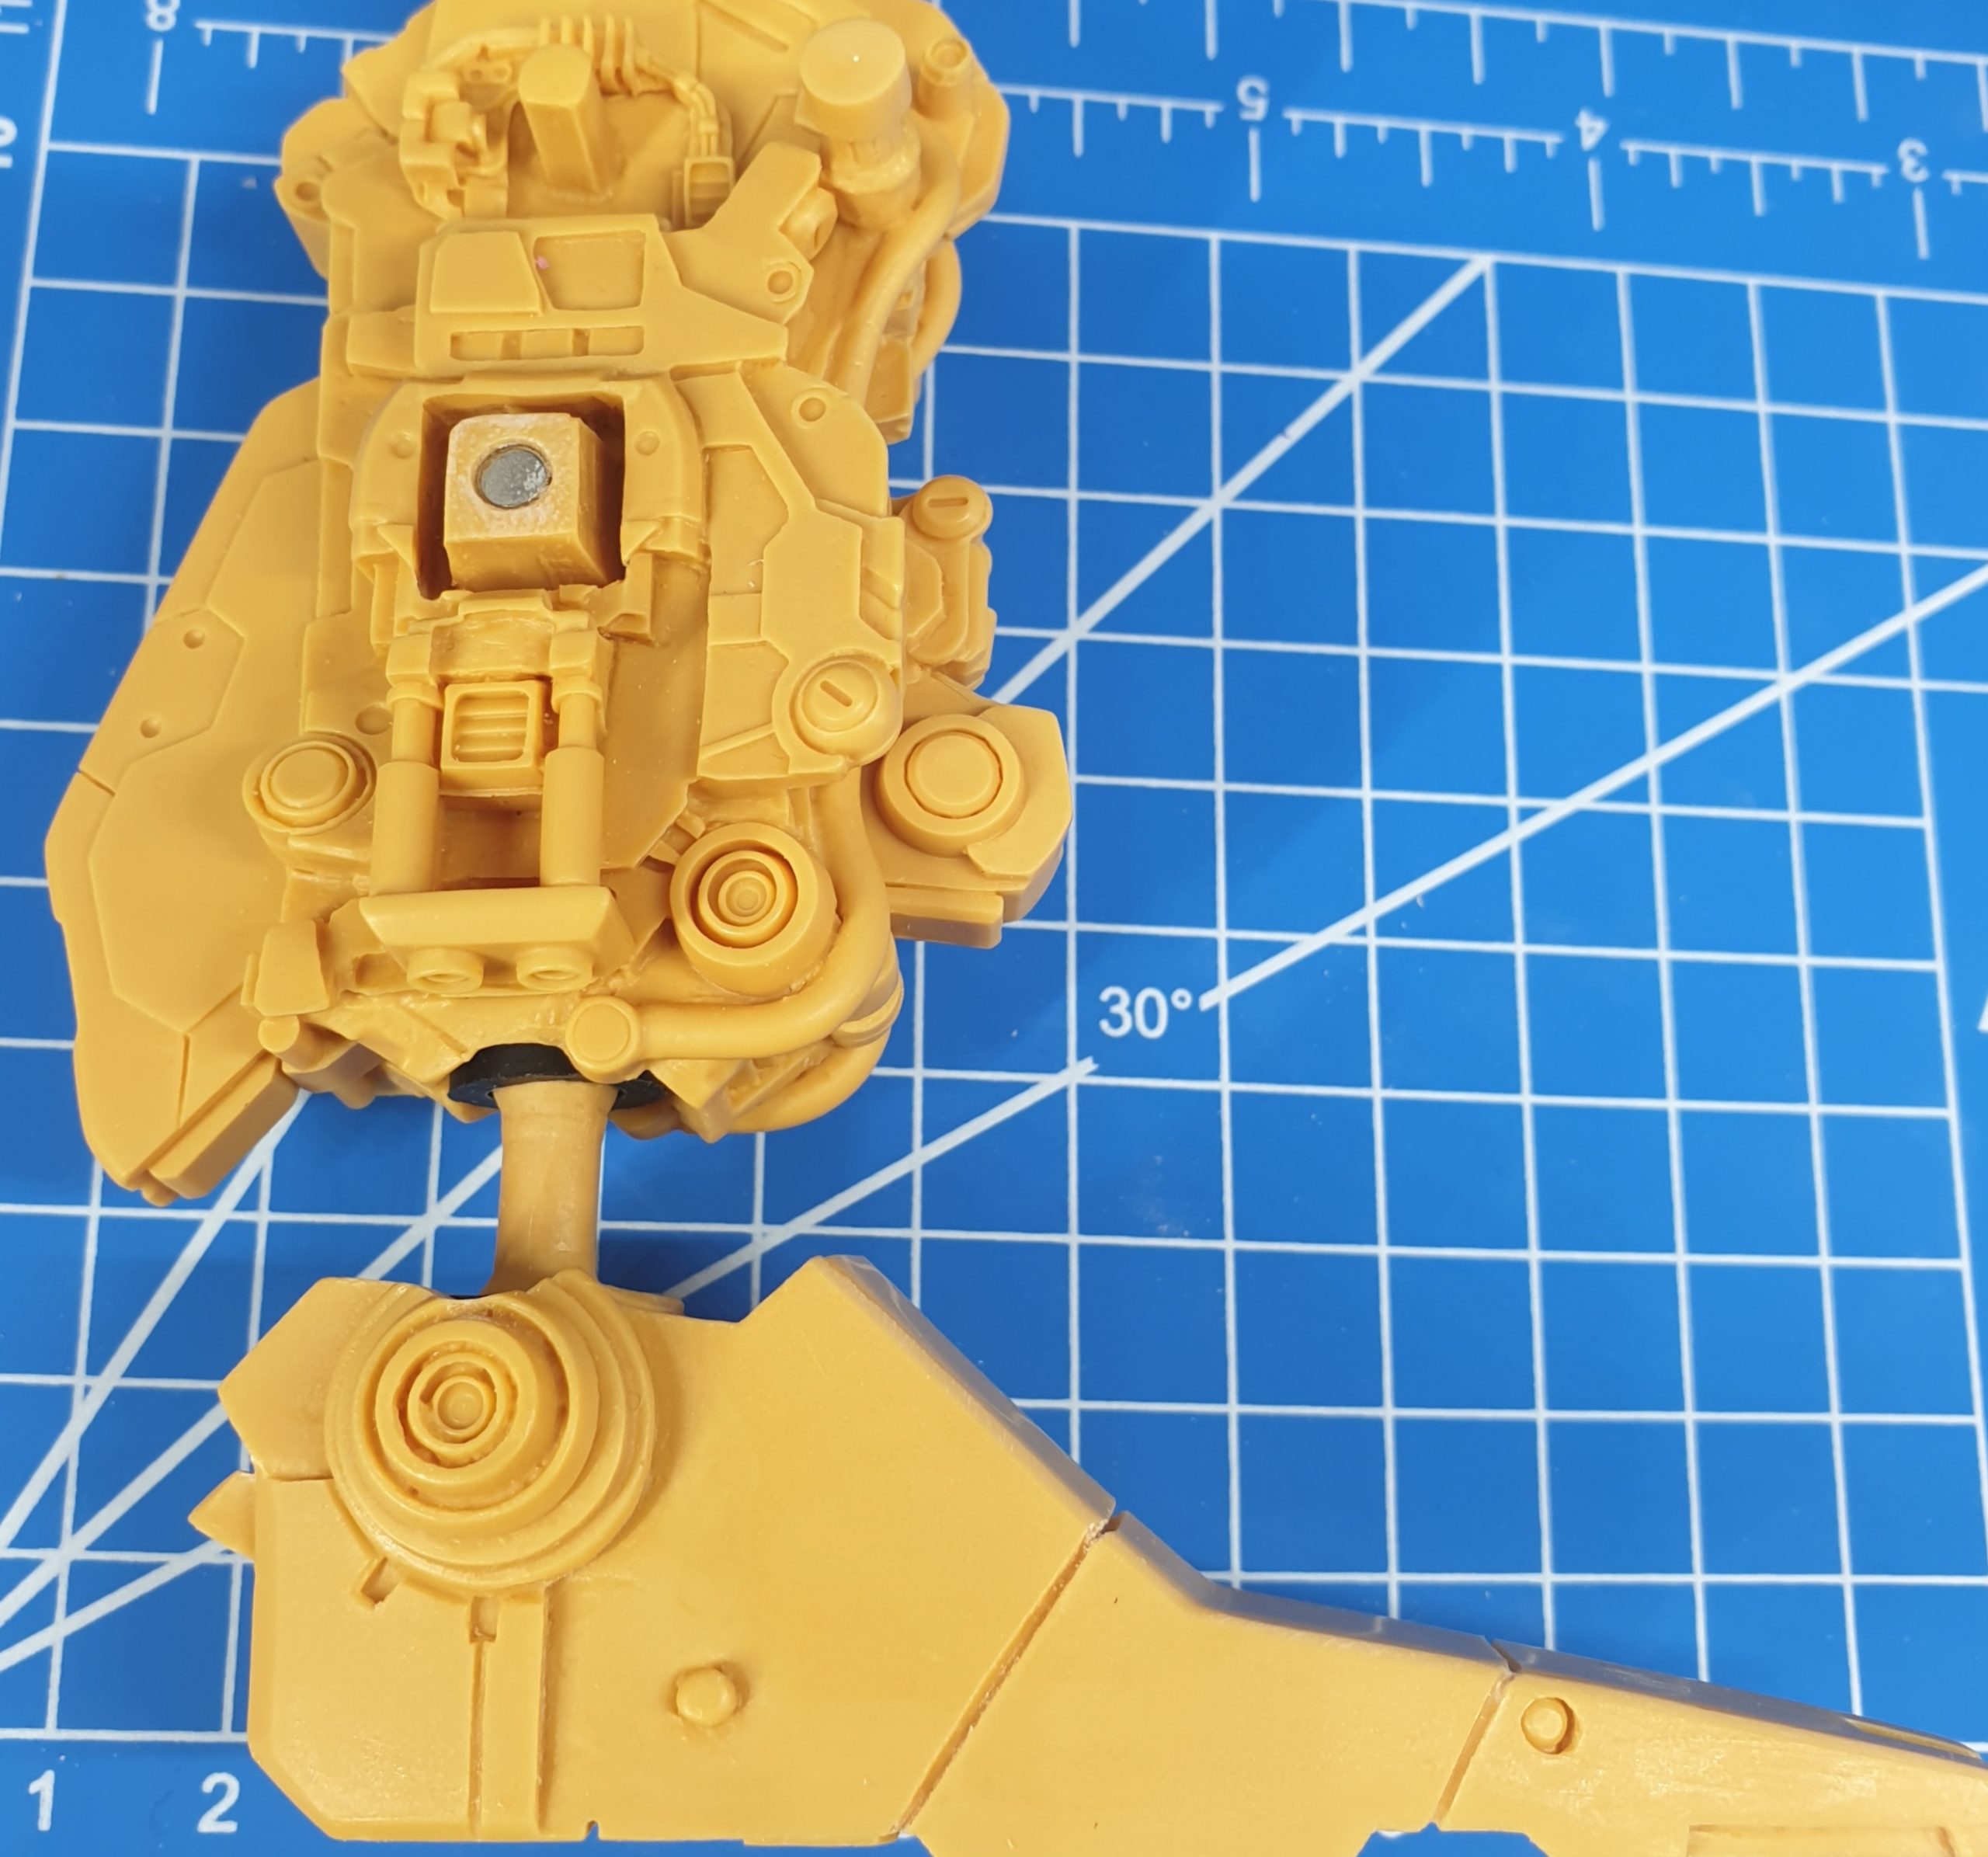
Additional magnets added to secure rear armor and LEDs with wiring. Bottom three orange leds (in each exhaust) and red…
As I was planning to make side leg armor removable, I figured out how to connect leg thrusters and made…
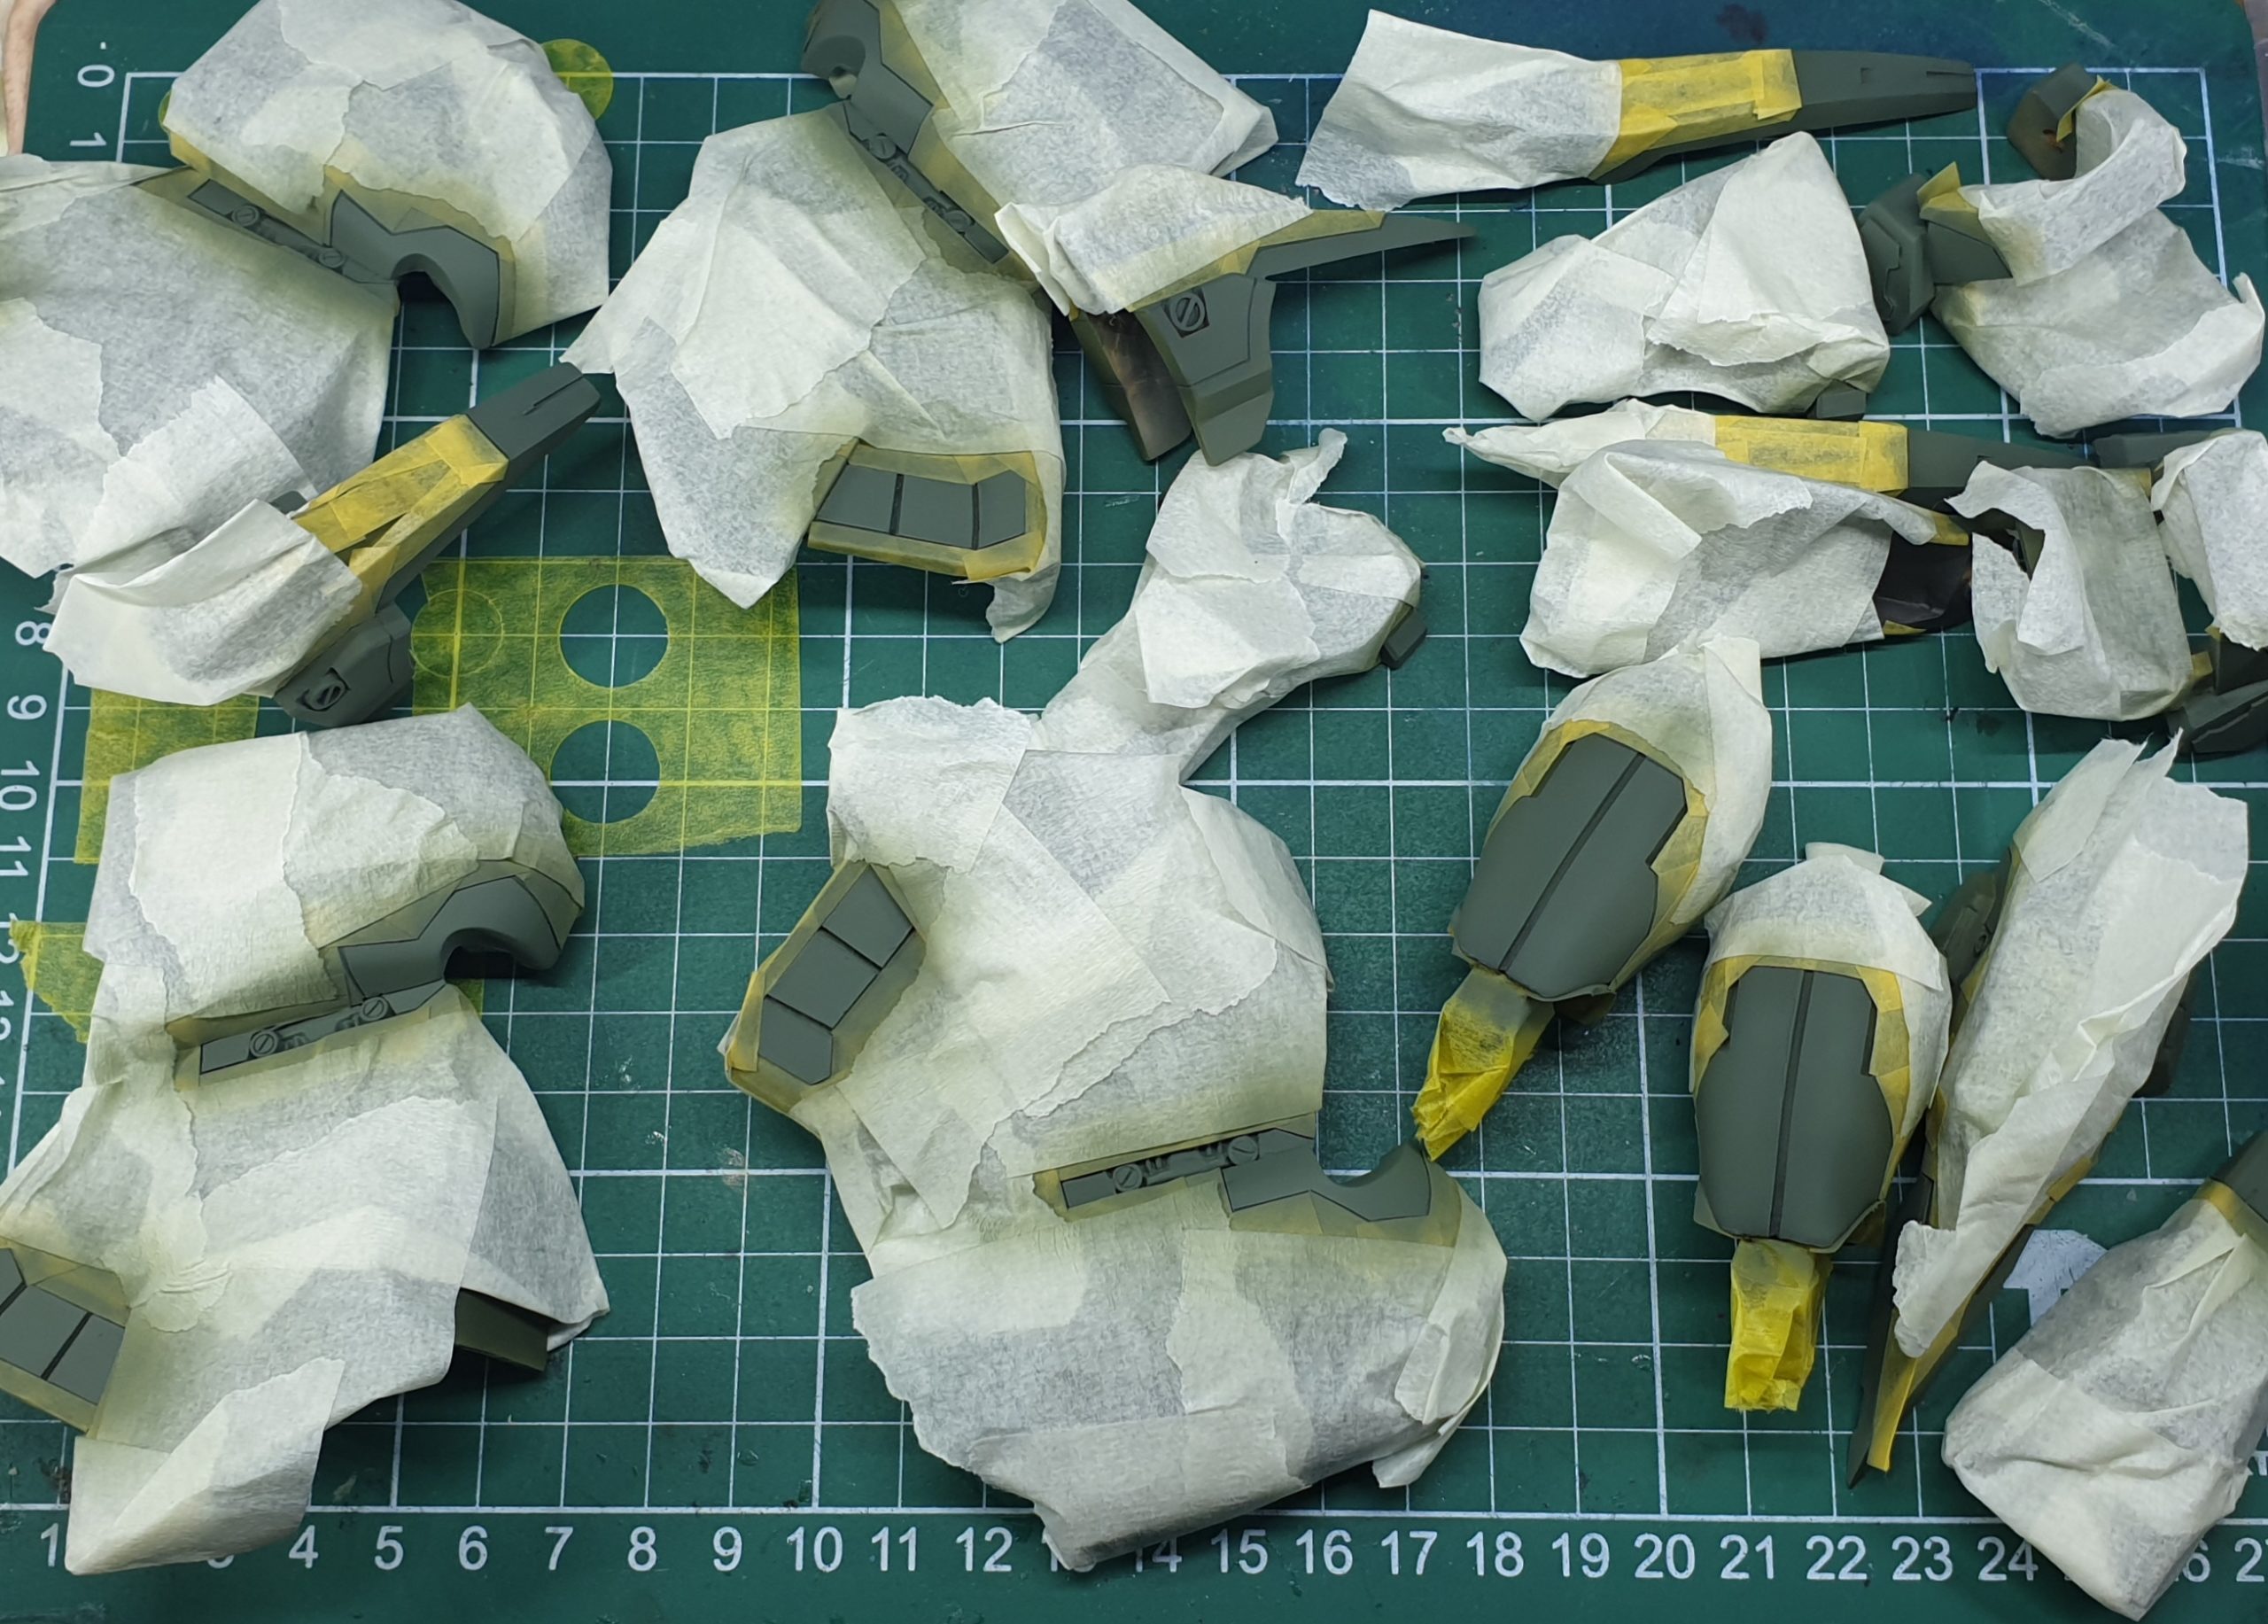
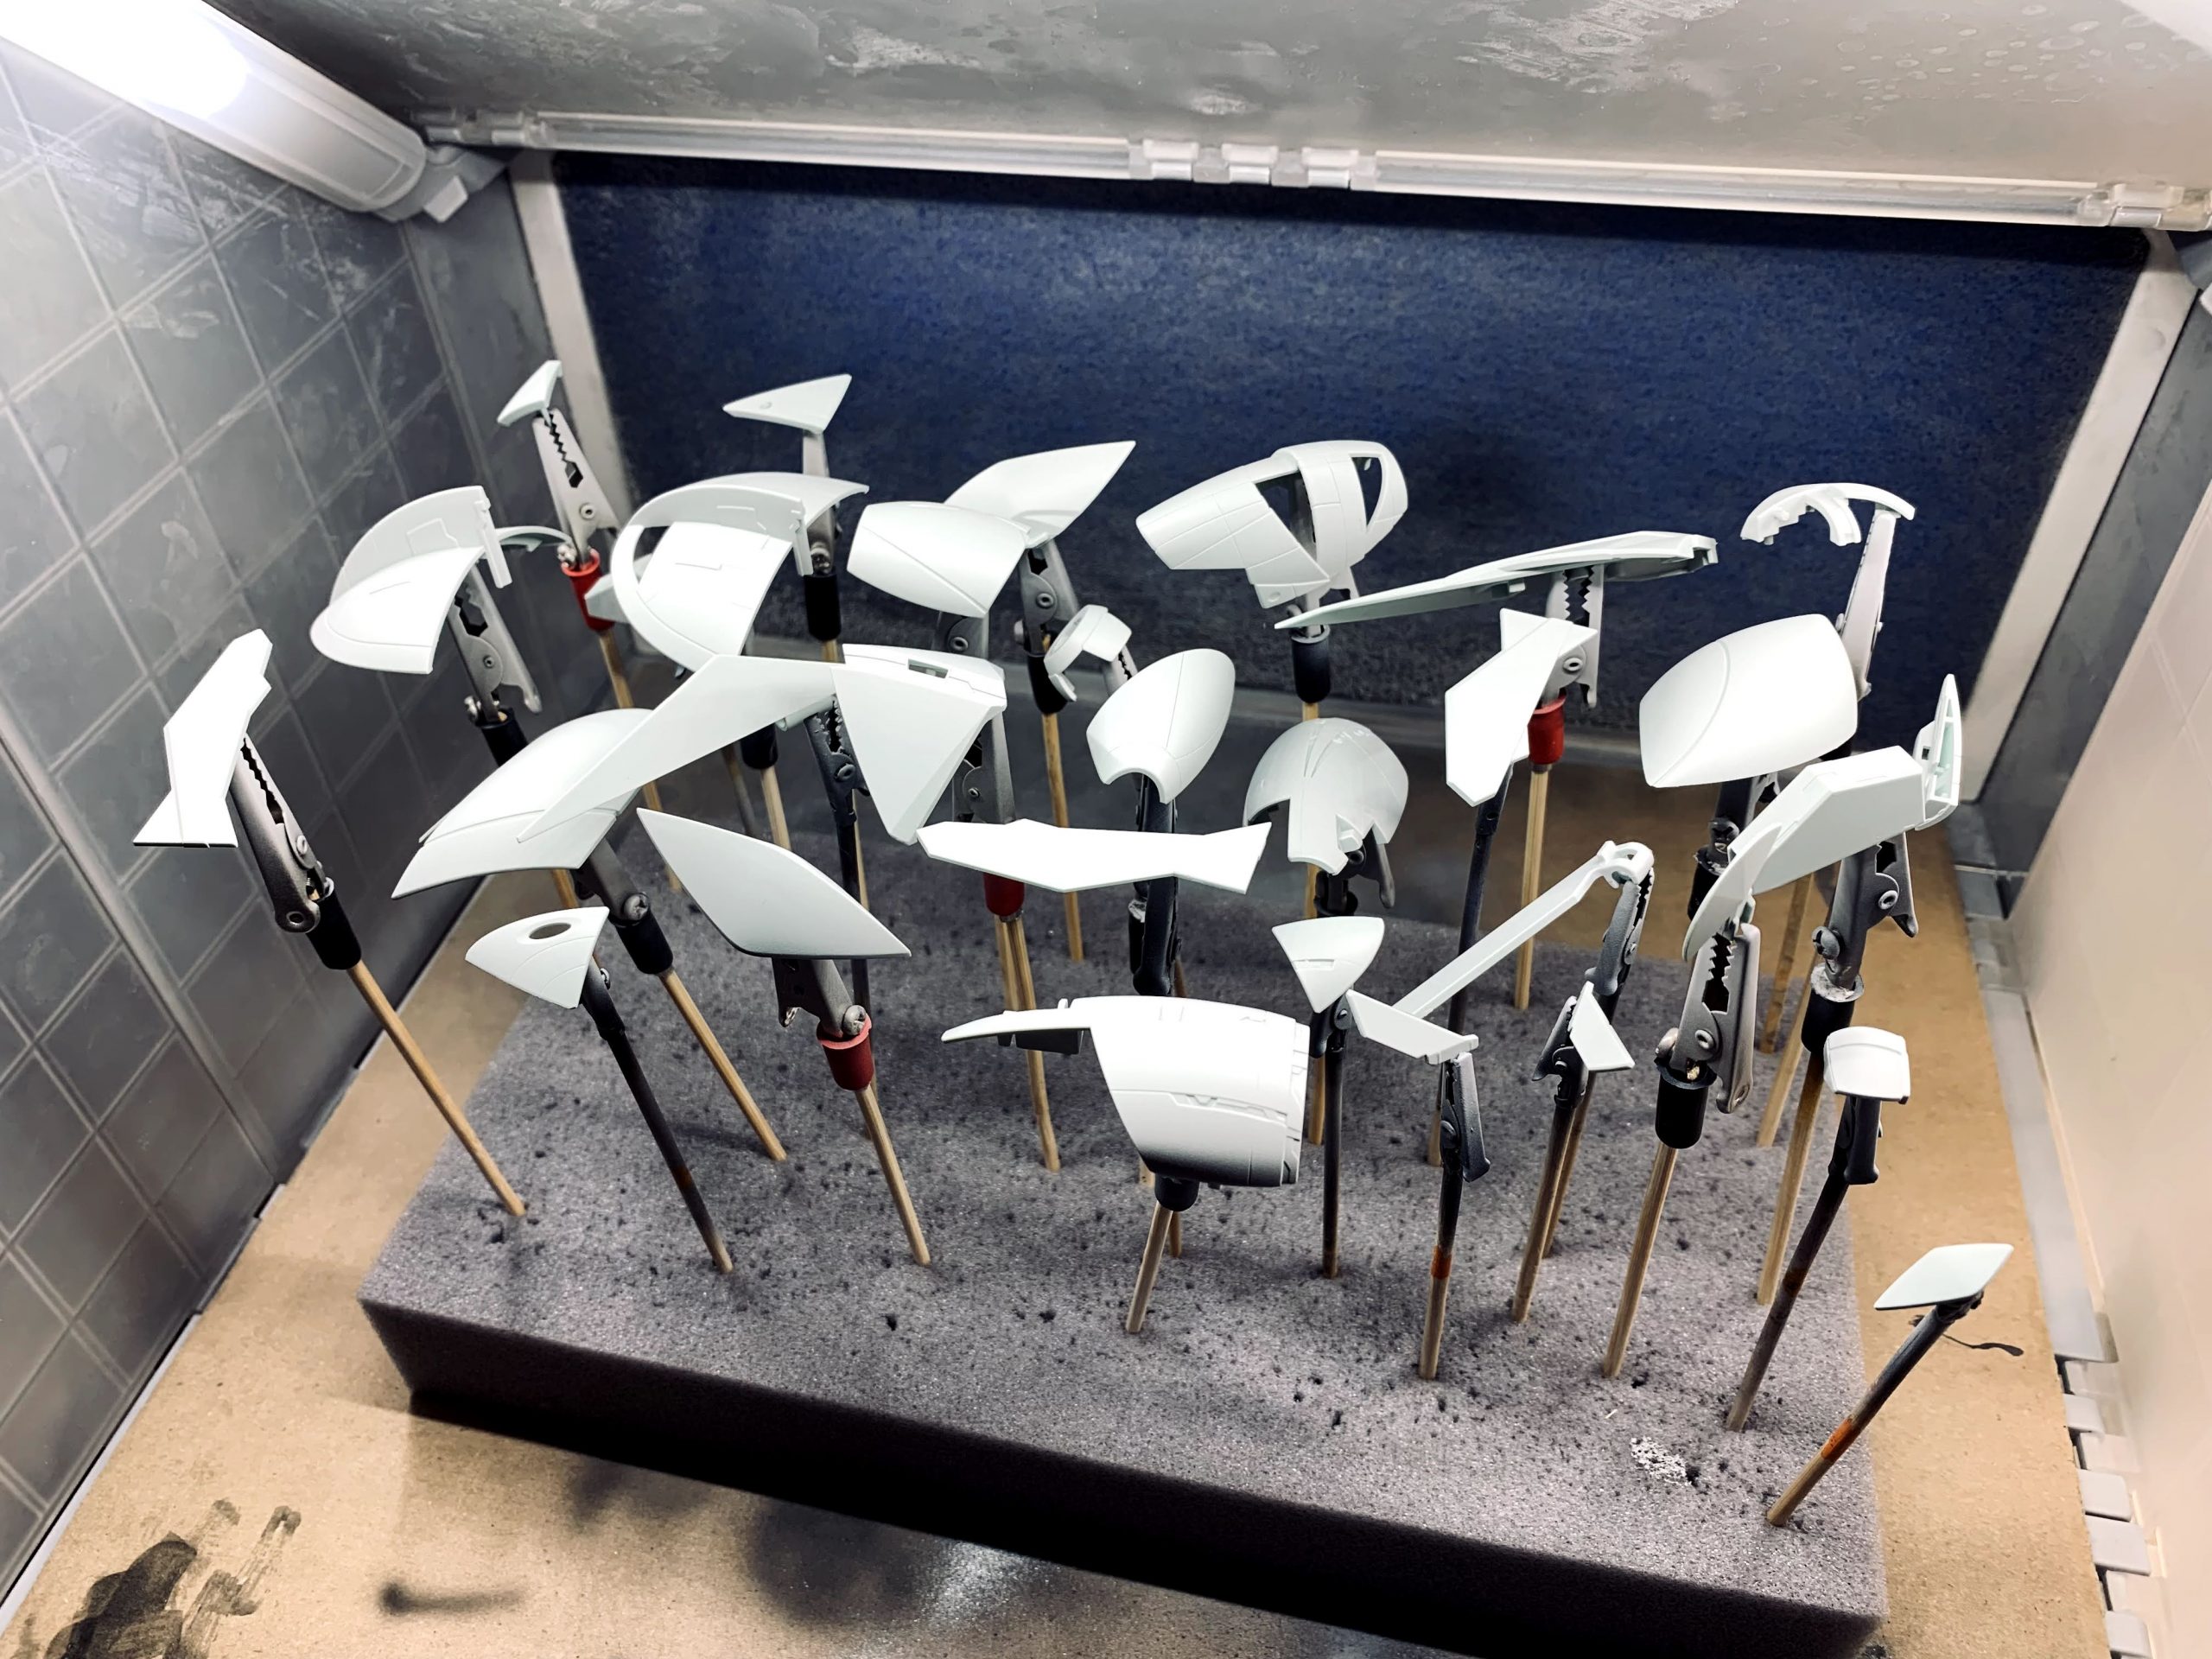
1h of masking and 15 minutes of painting… A bit lighter shade of green applied together with some gray for…
First shade of green applied – its from Tamiya LP range – I mixed some green colors to get base…

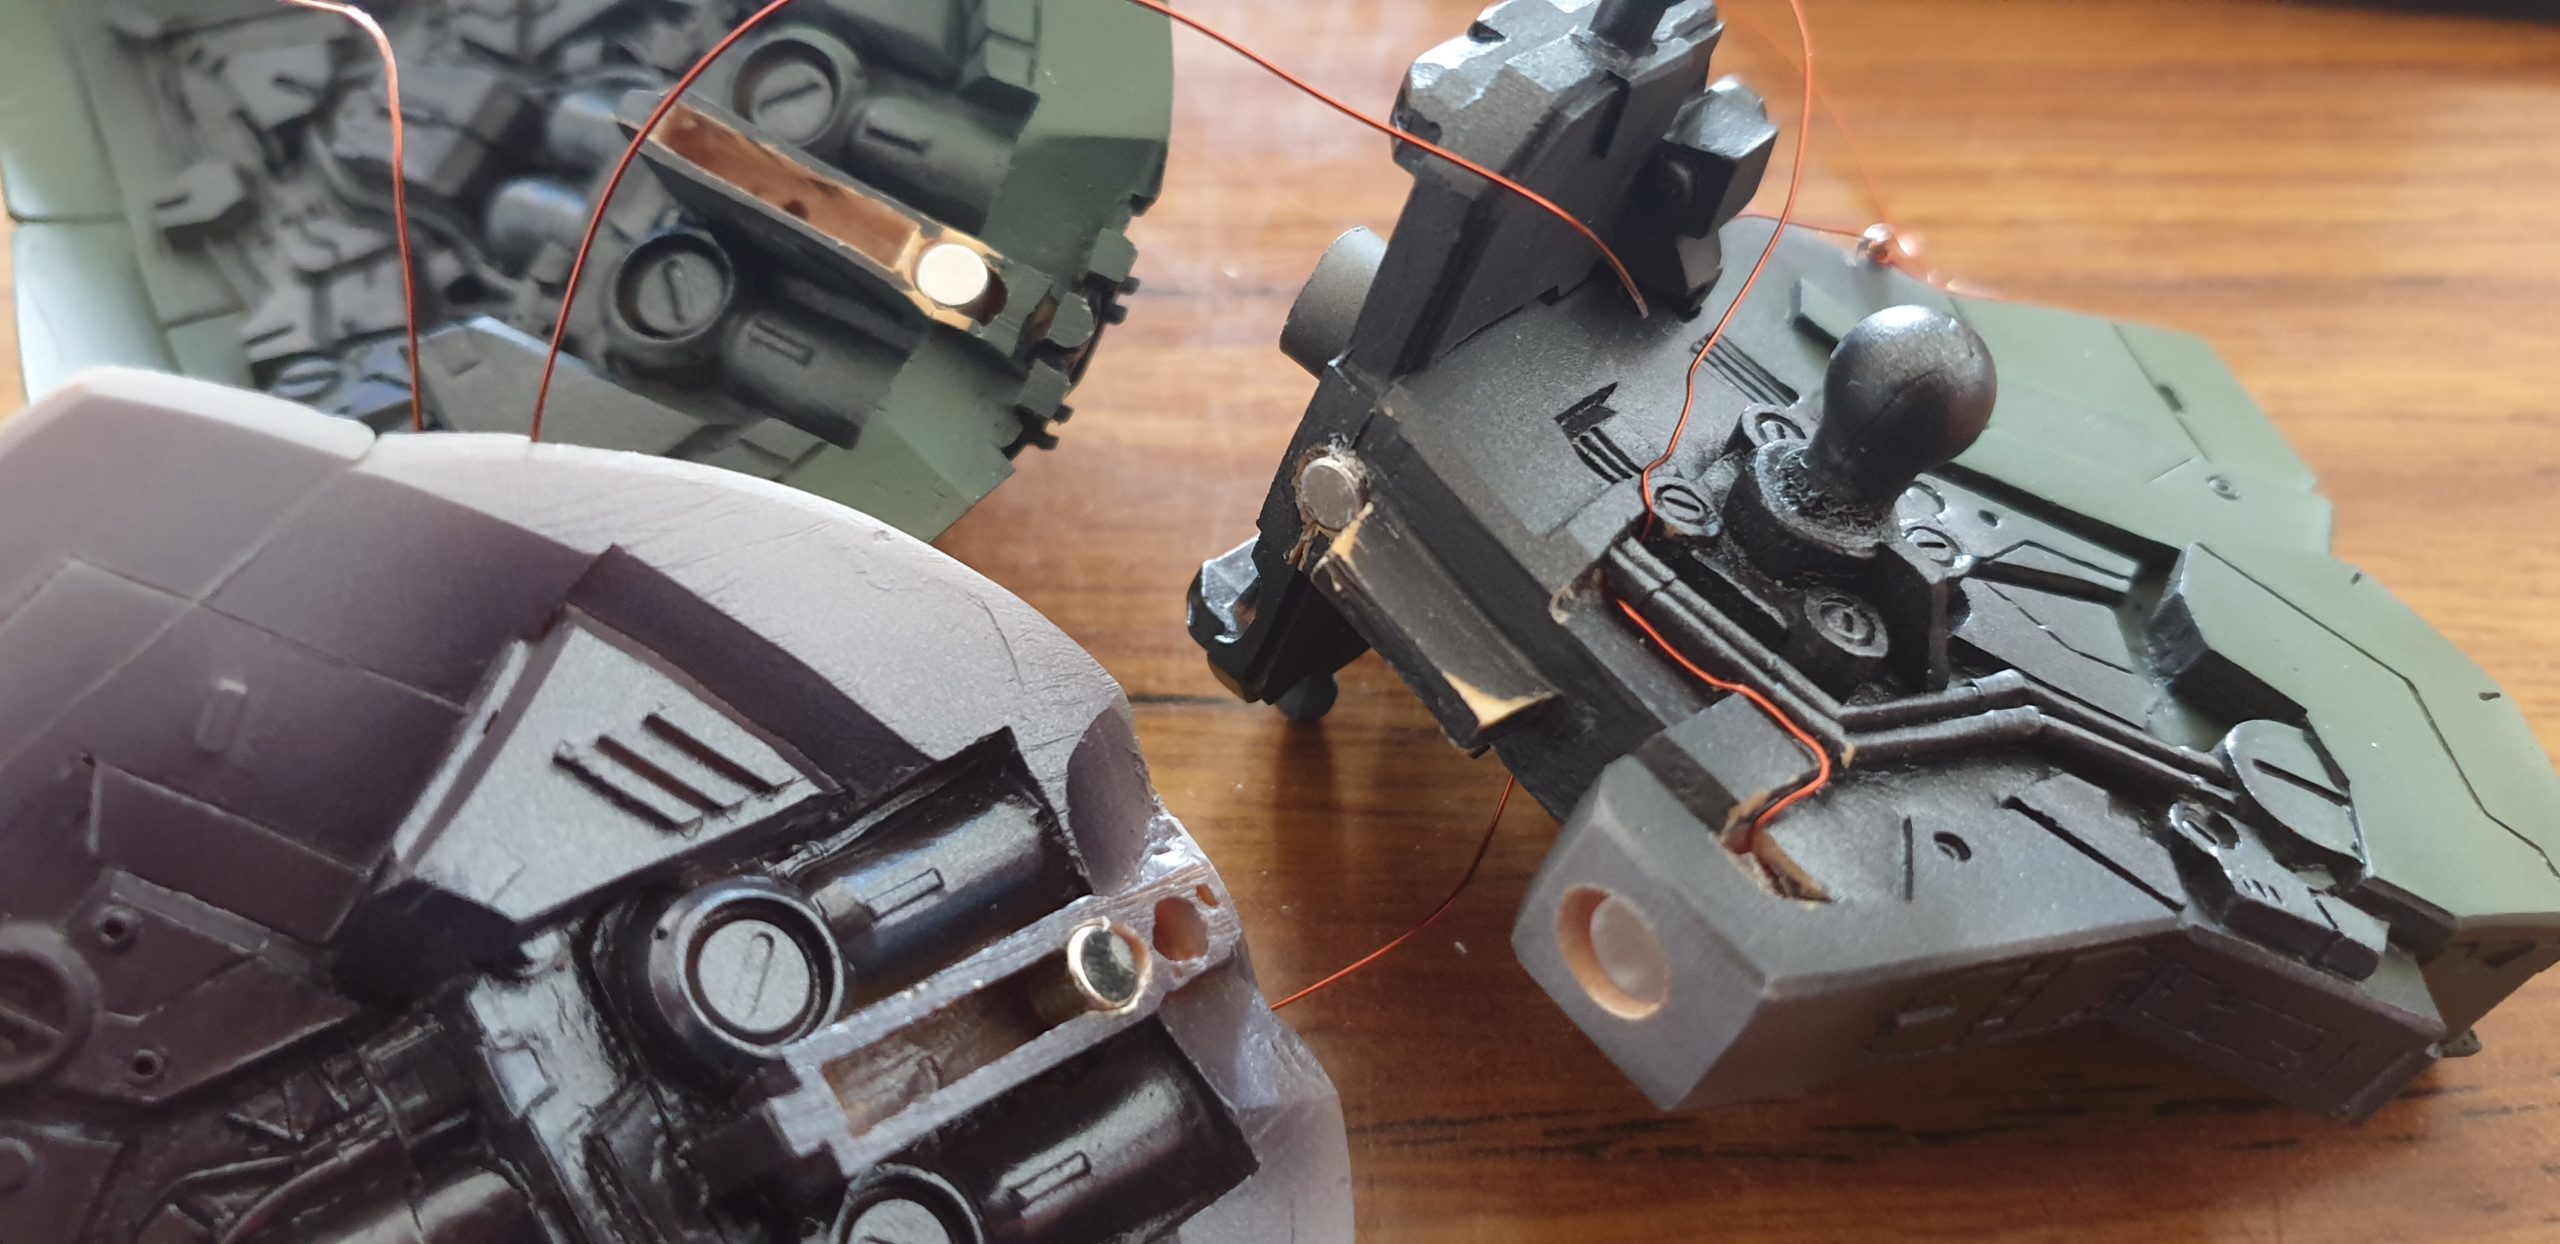
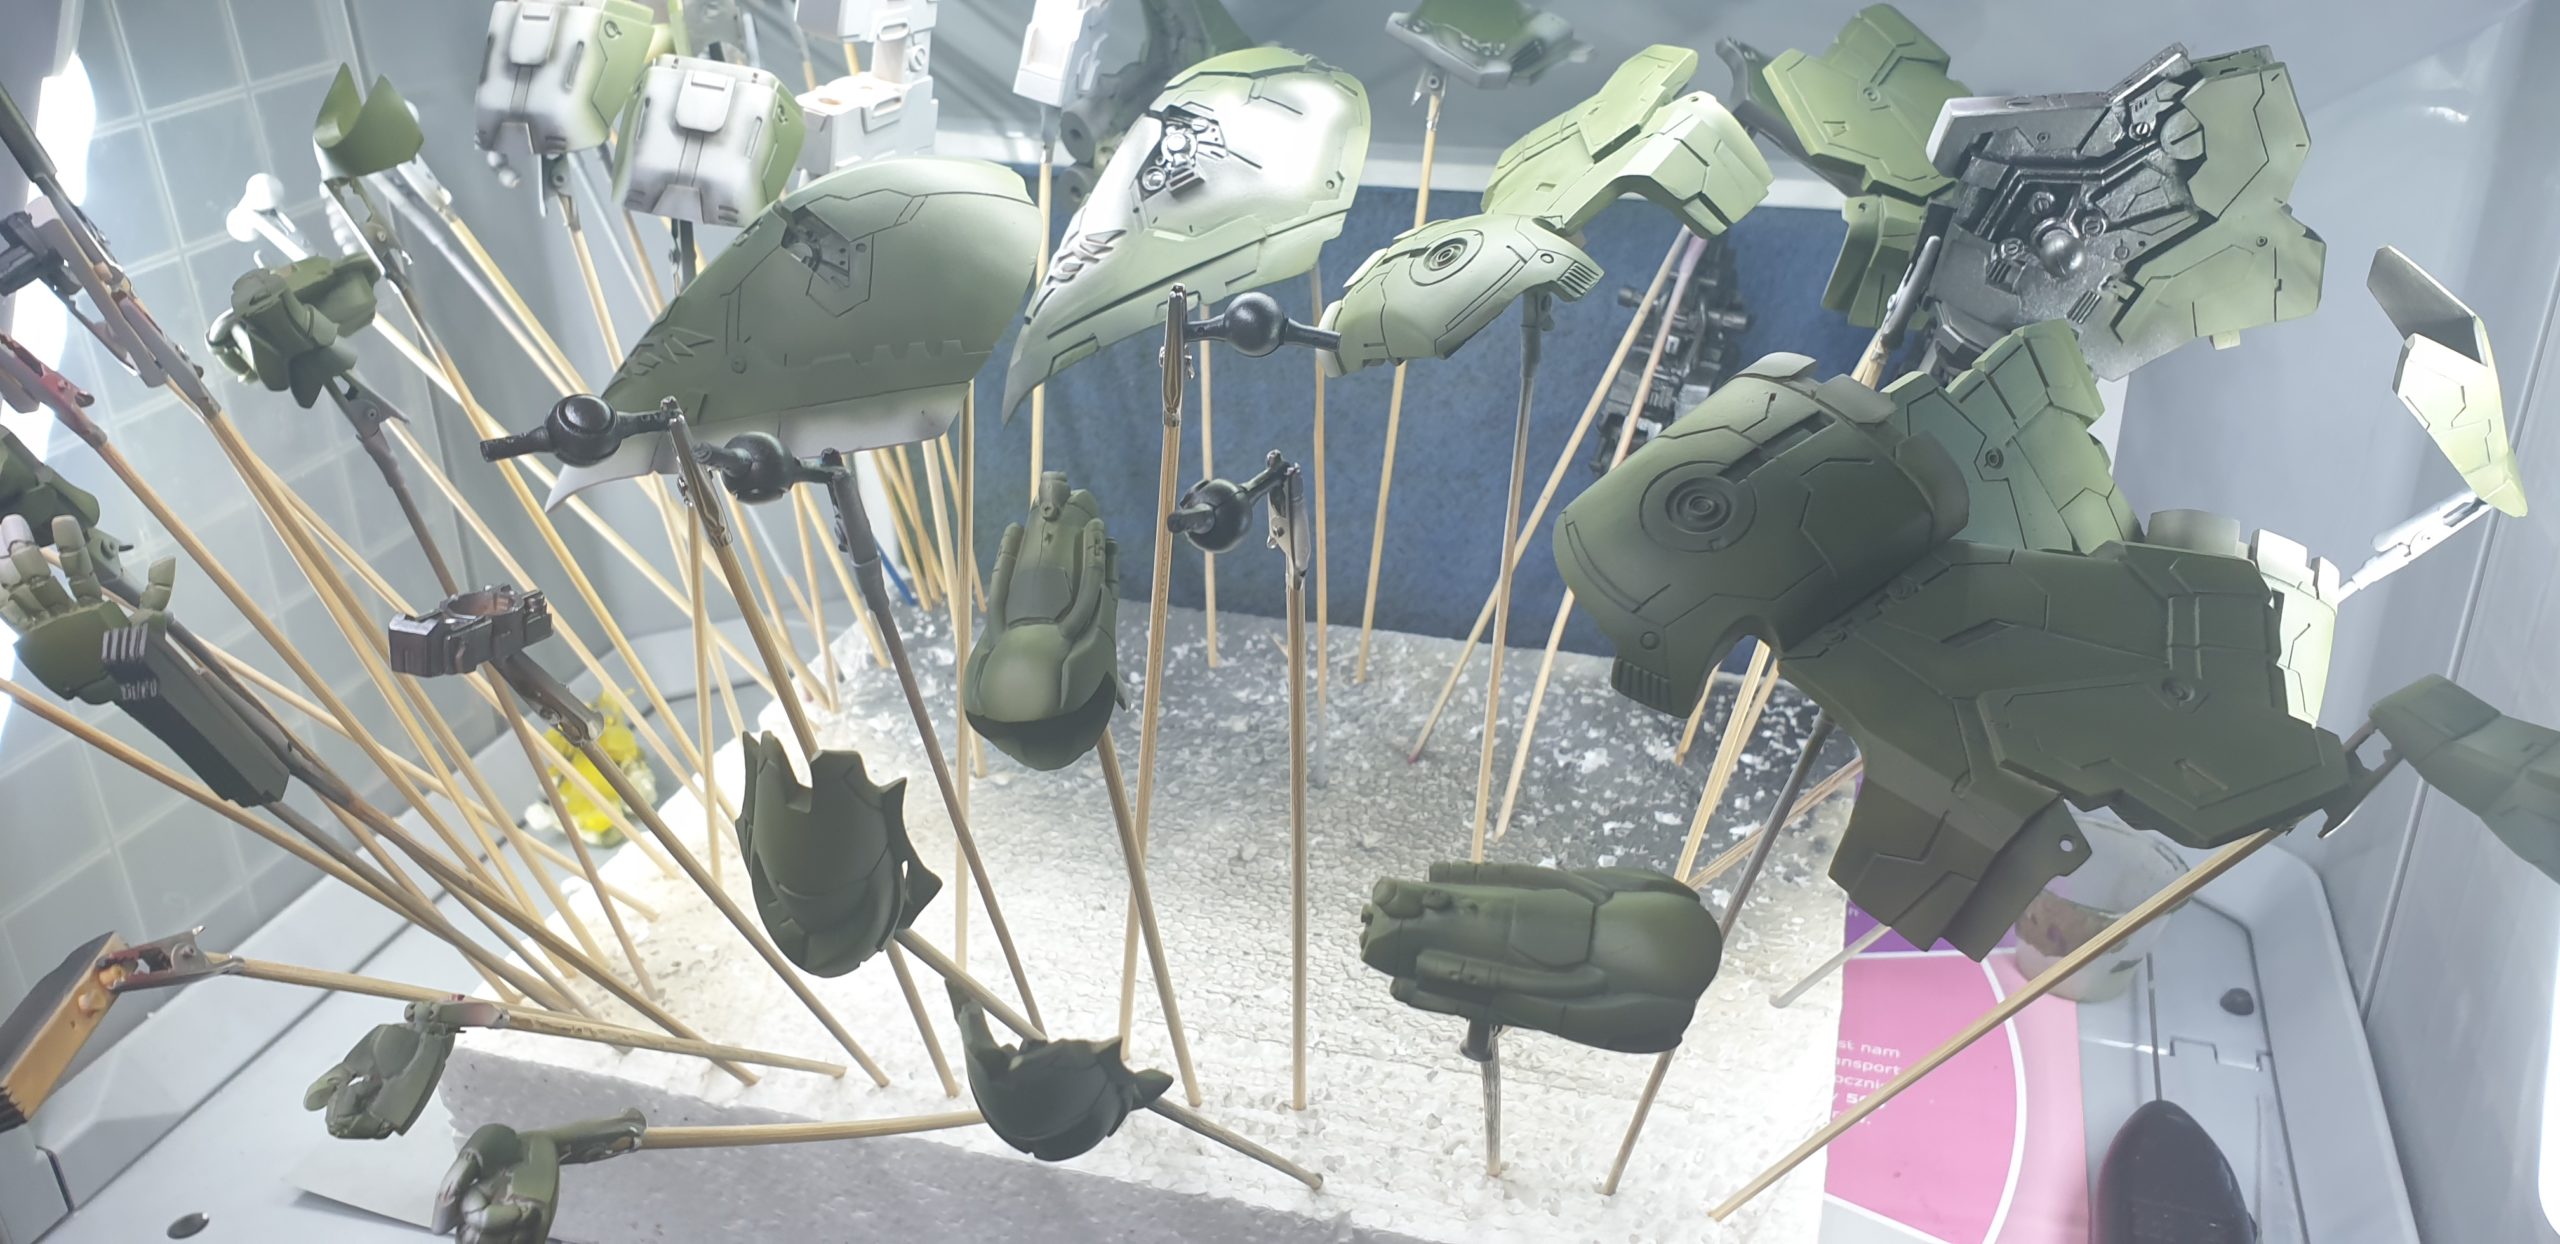
As my Kshatriya will be painted in many shades of military green, I did quite heavy preshade this time with…
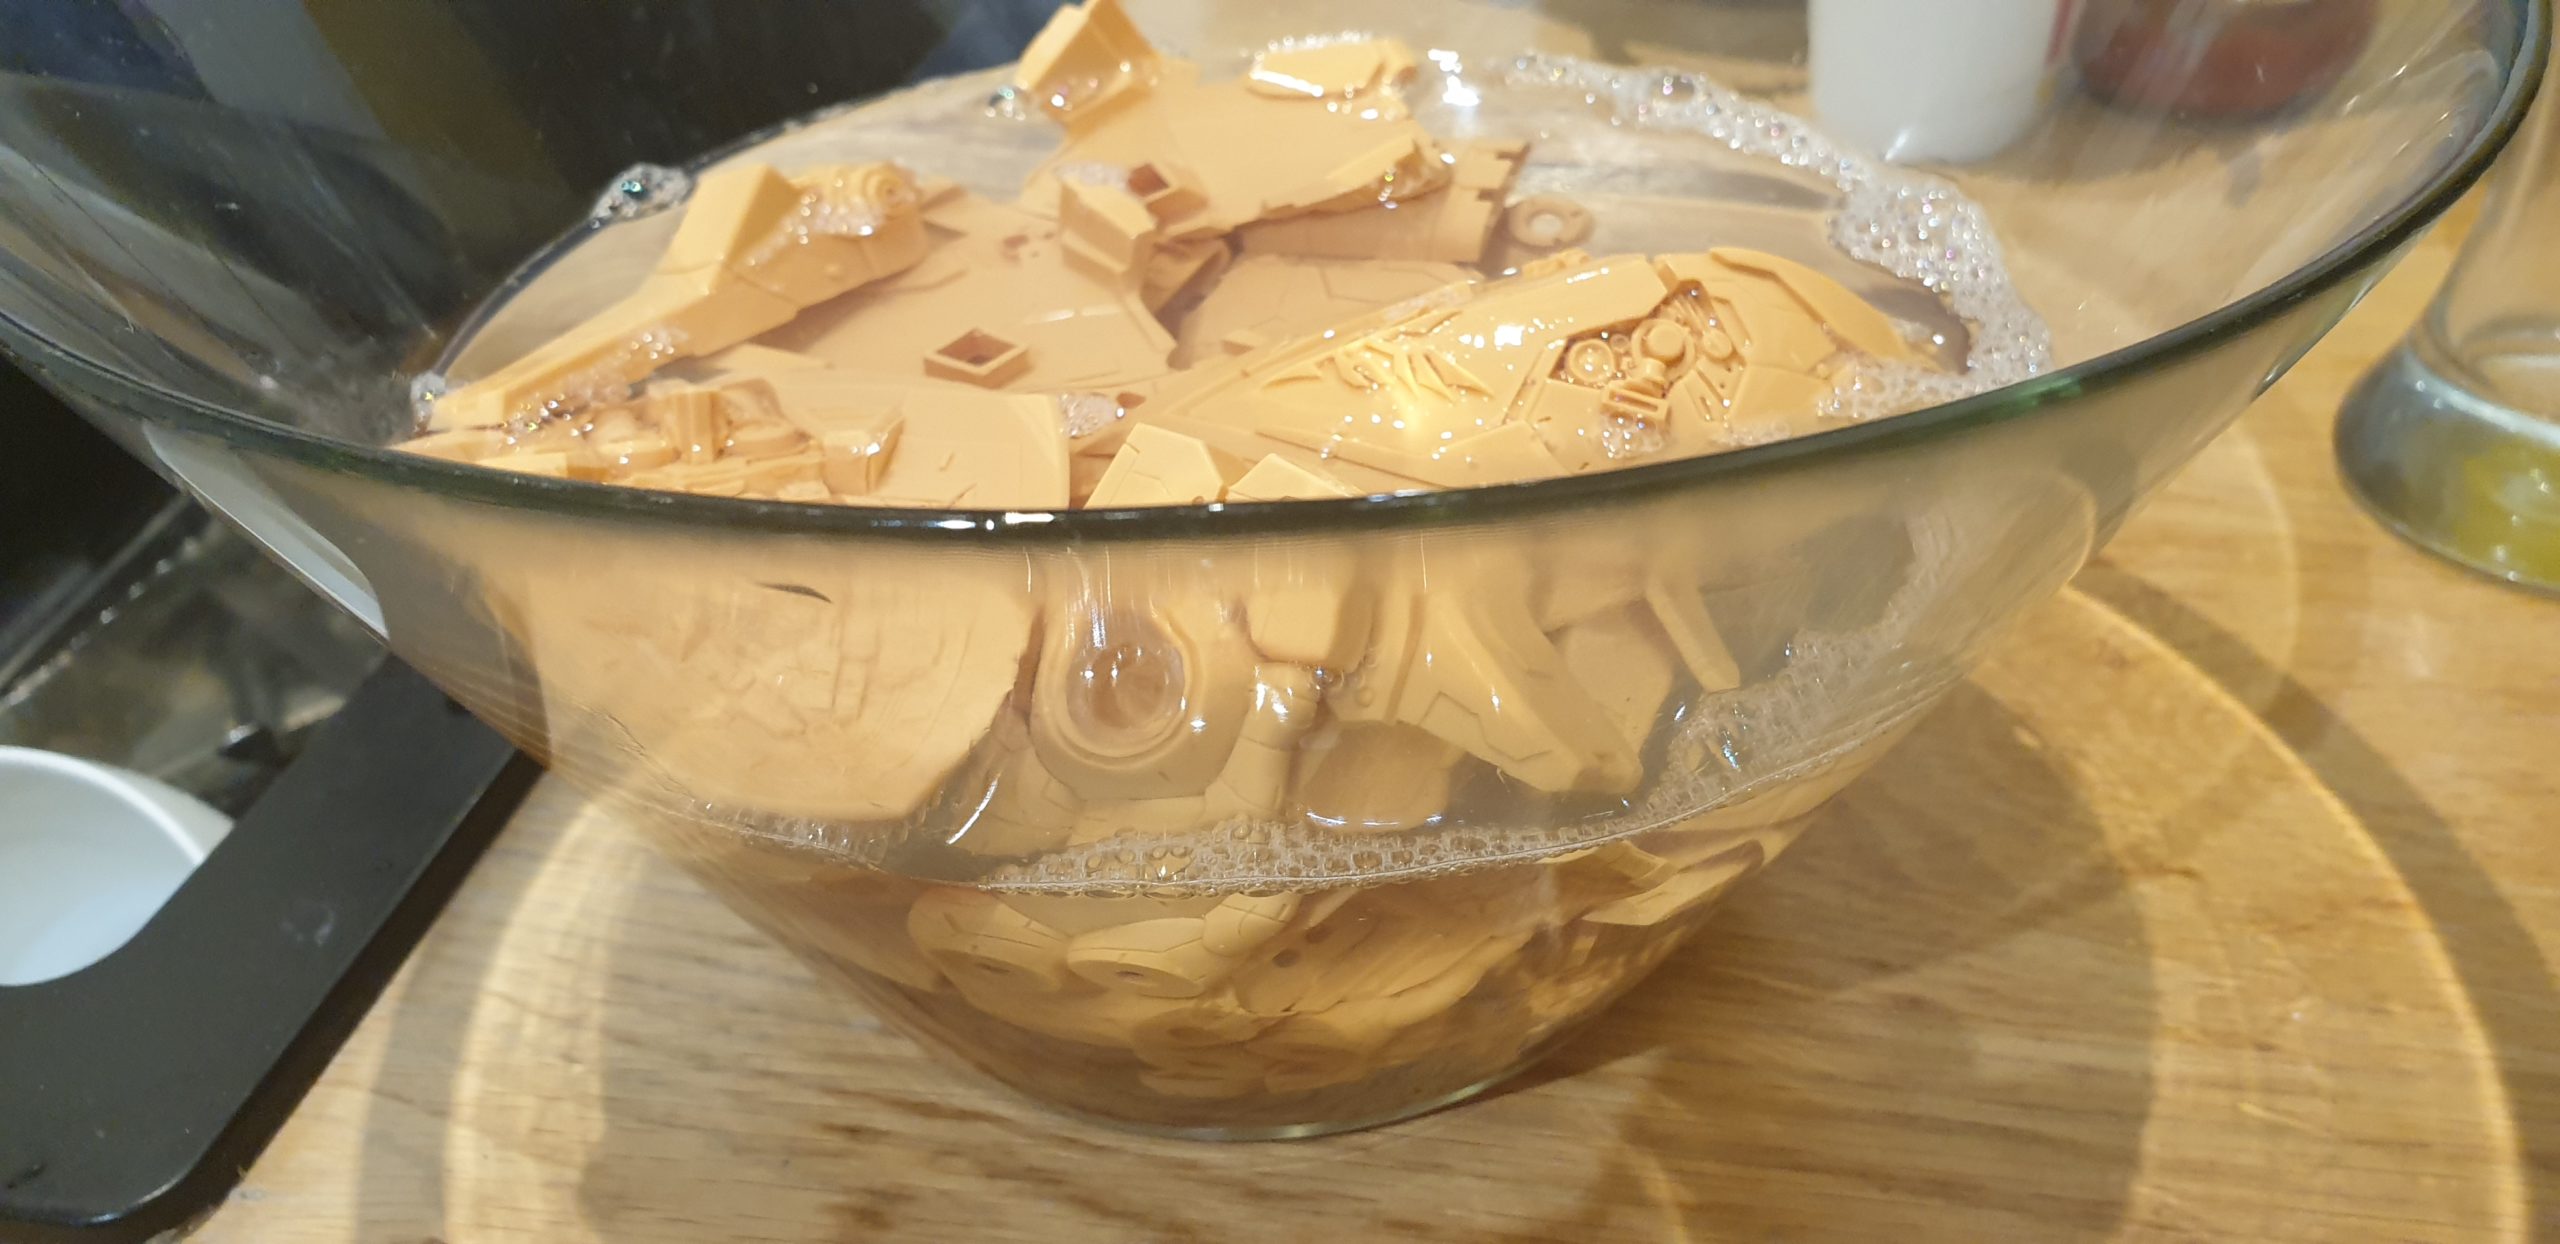
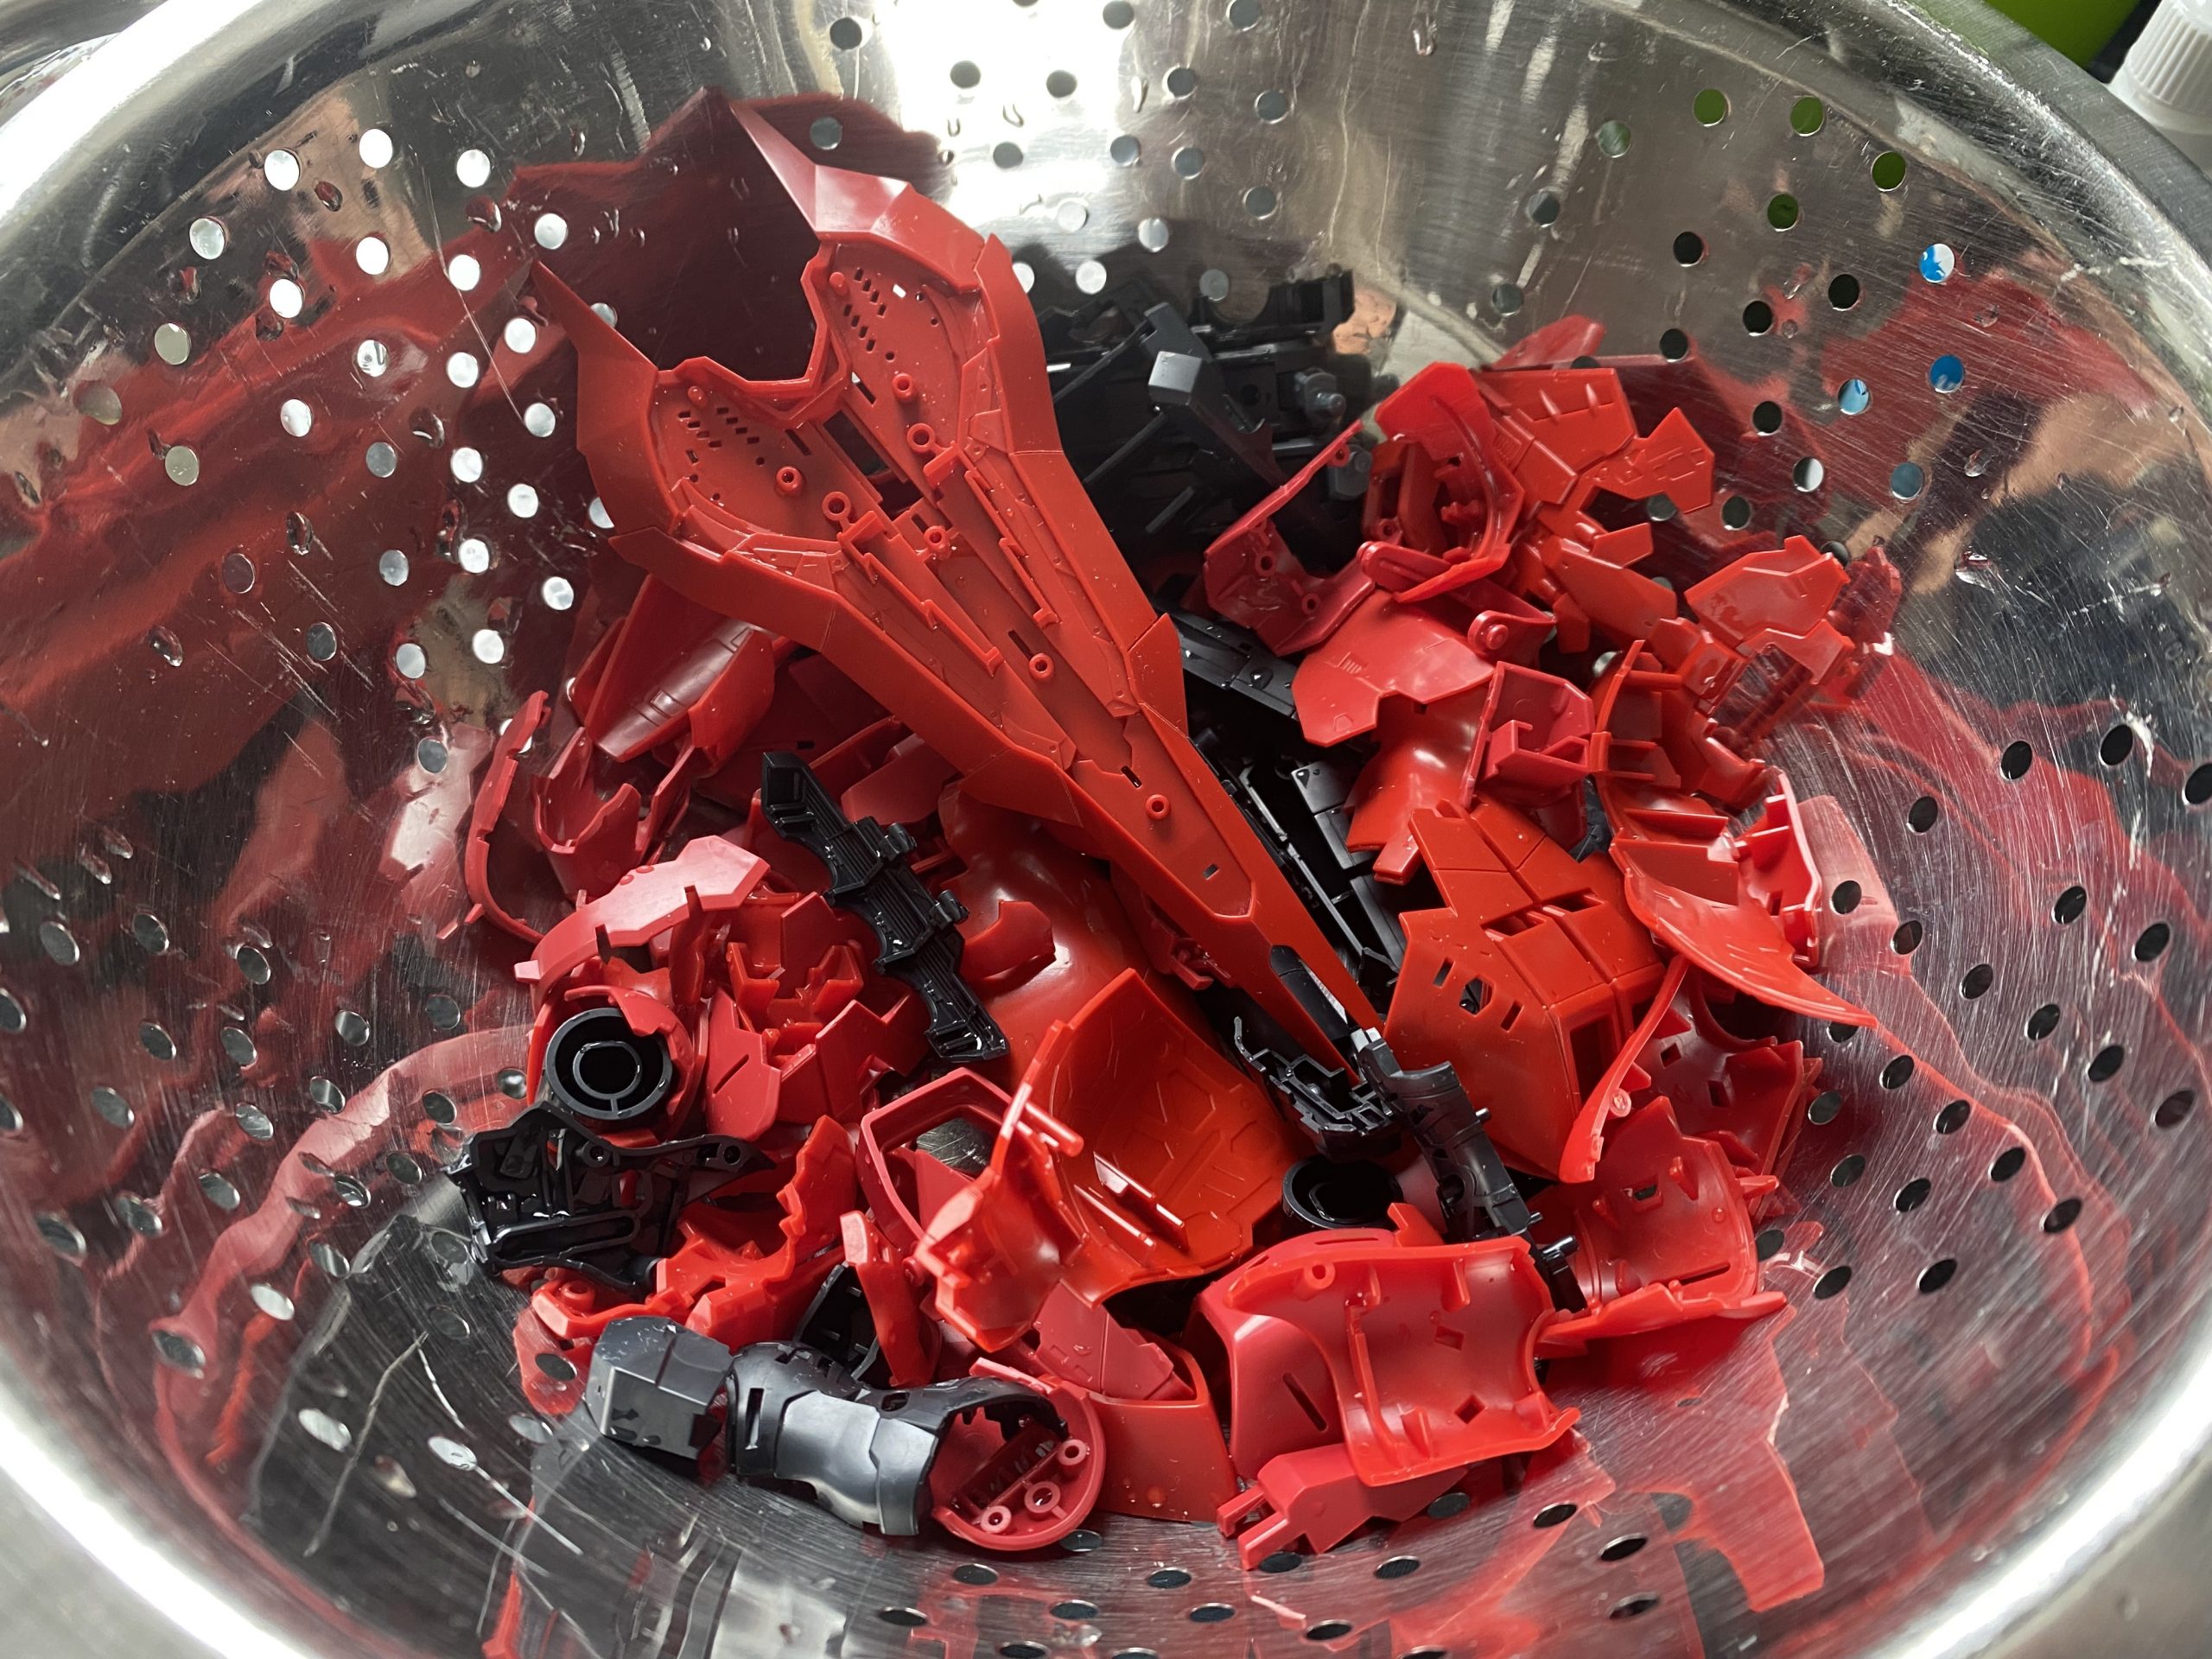
All parts were cleared with warm water mixed with dishwasher, then I left it for overnight drying. As you can…
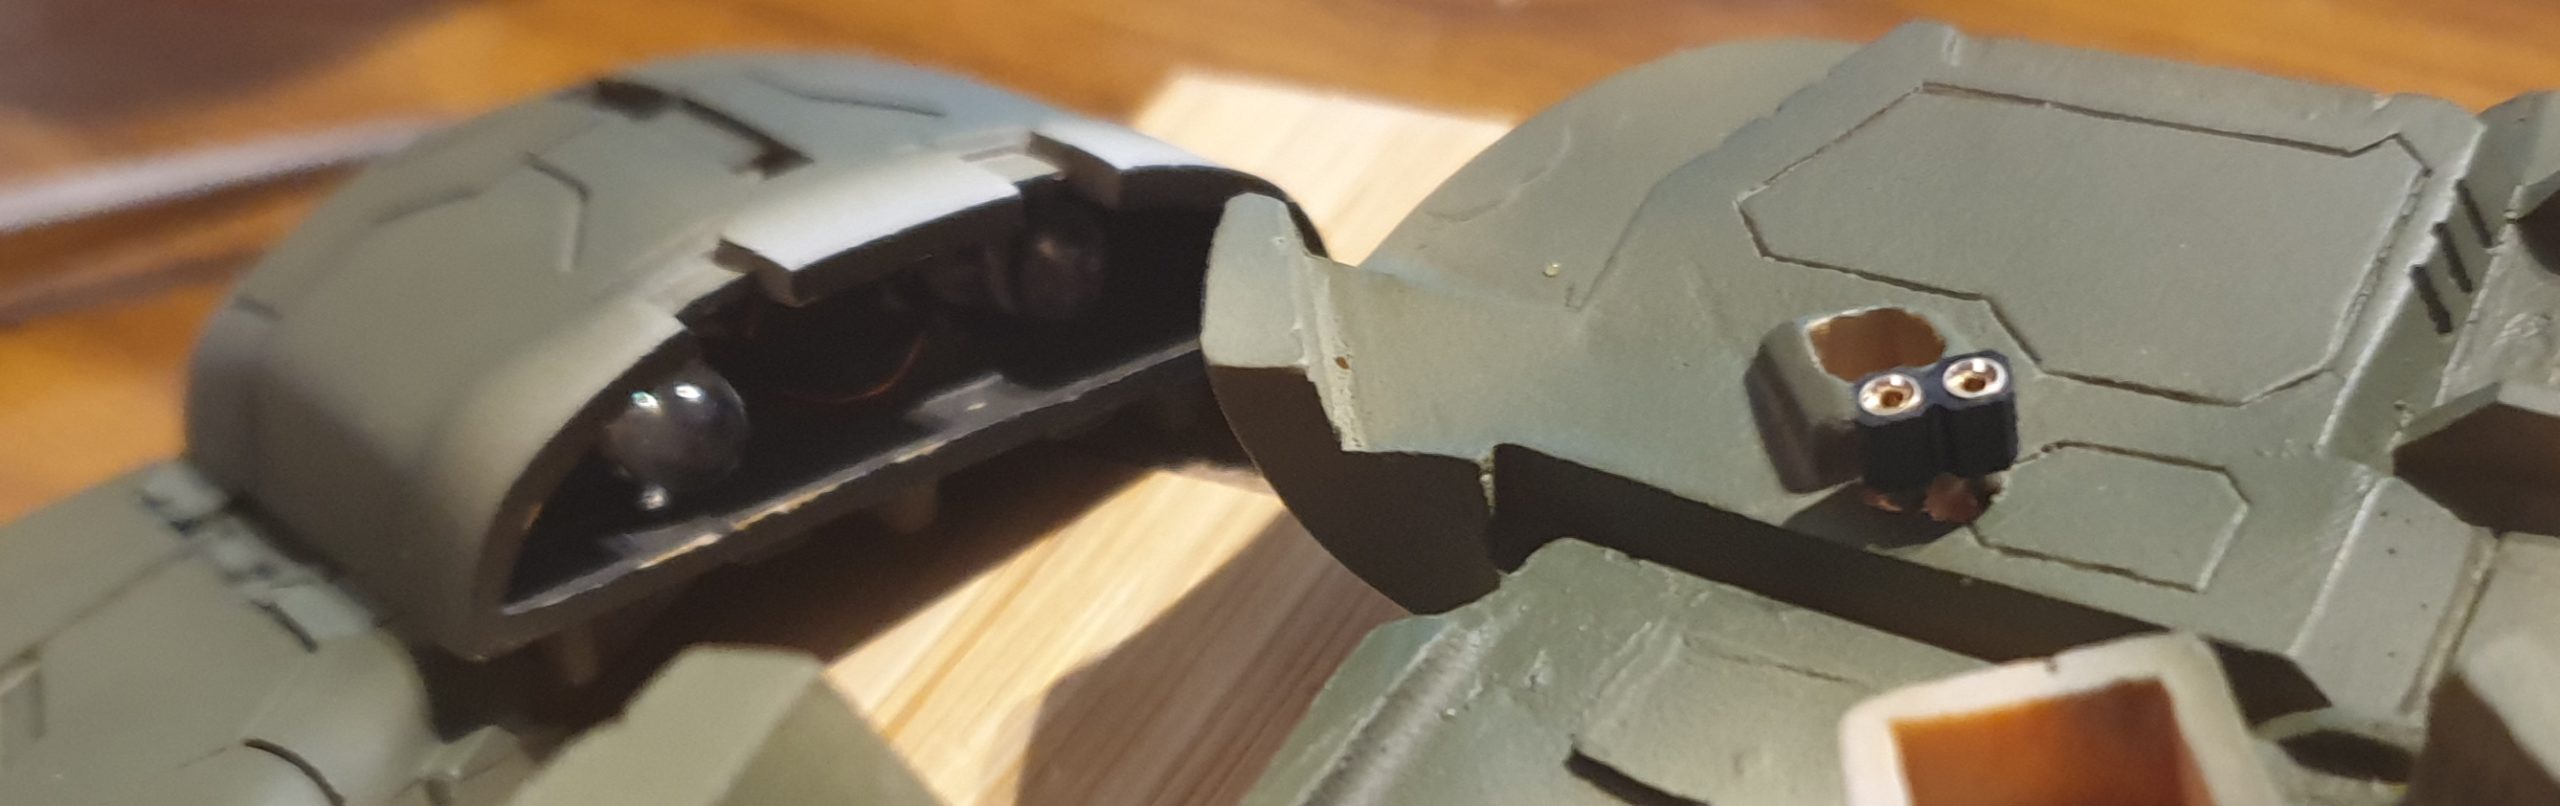
MonoEye, mega particle cannons was quite easy to drill in.Other parts requires more attention and a lot of patience to…
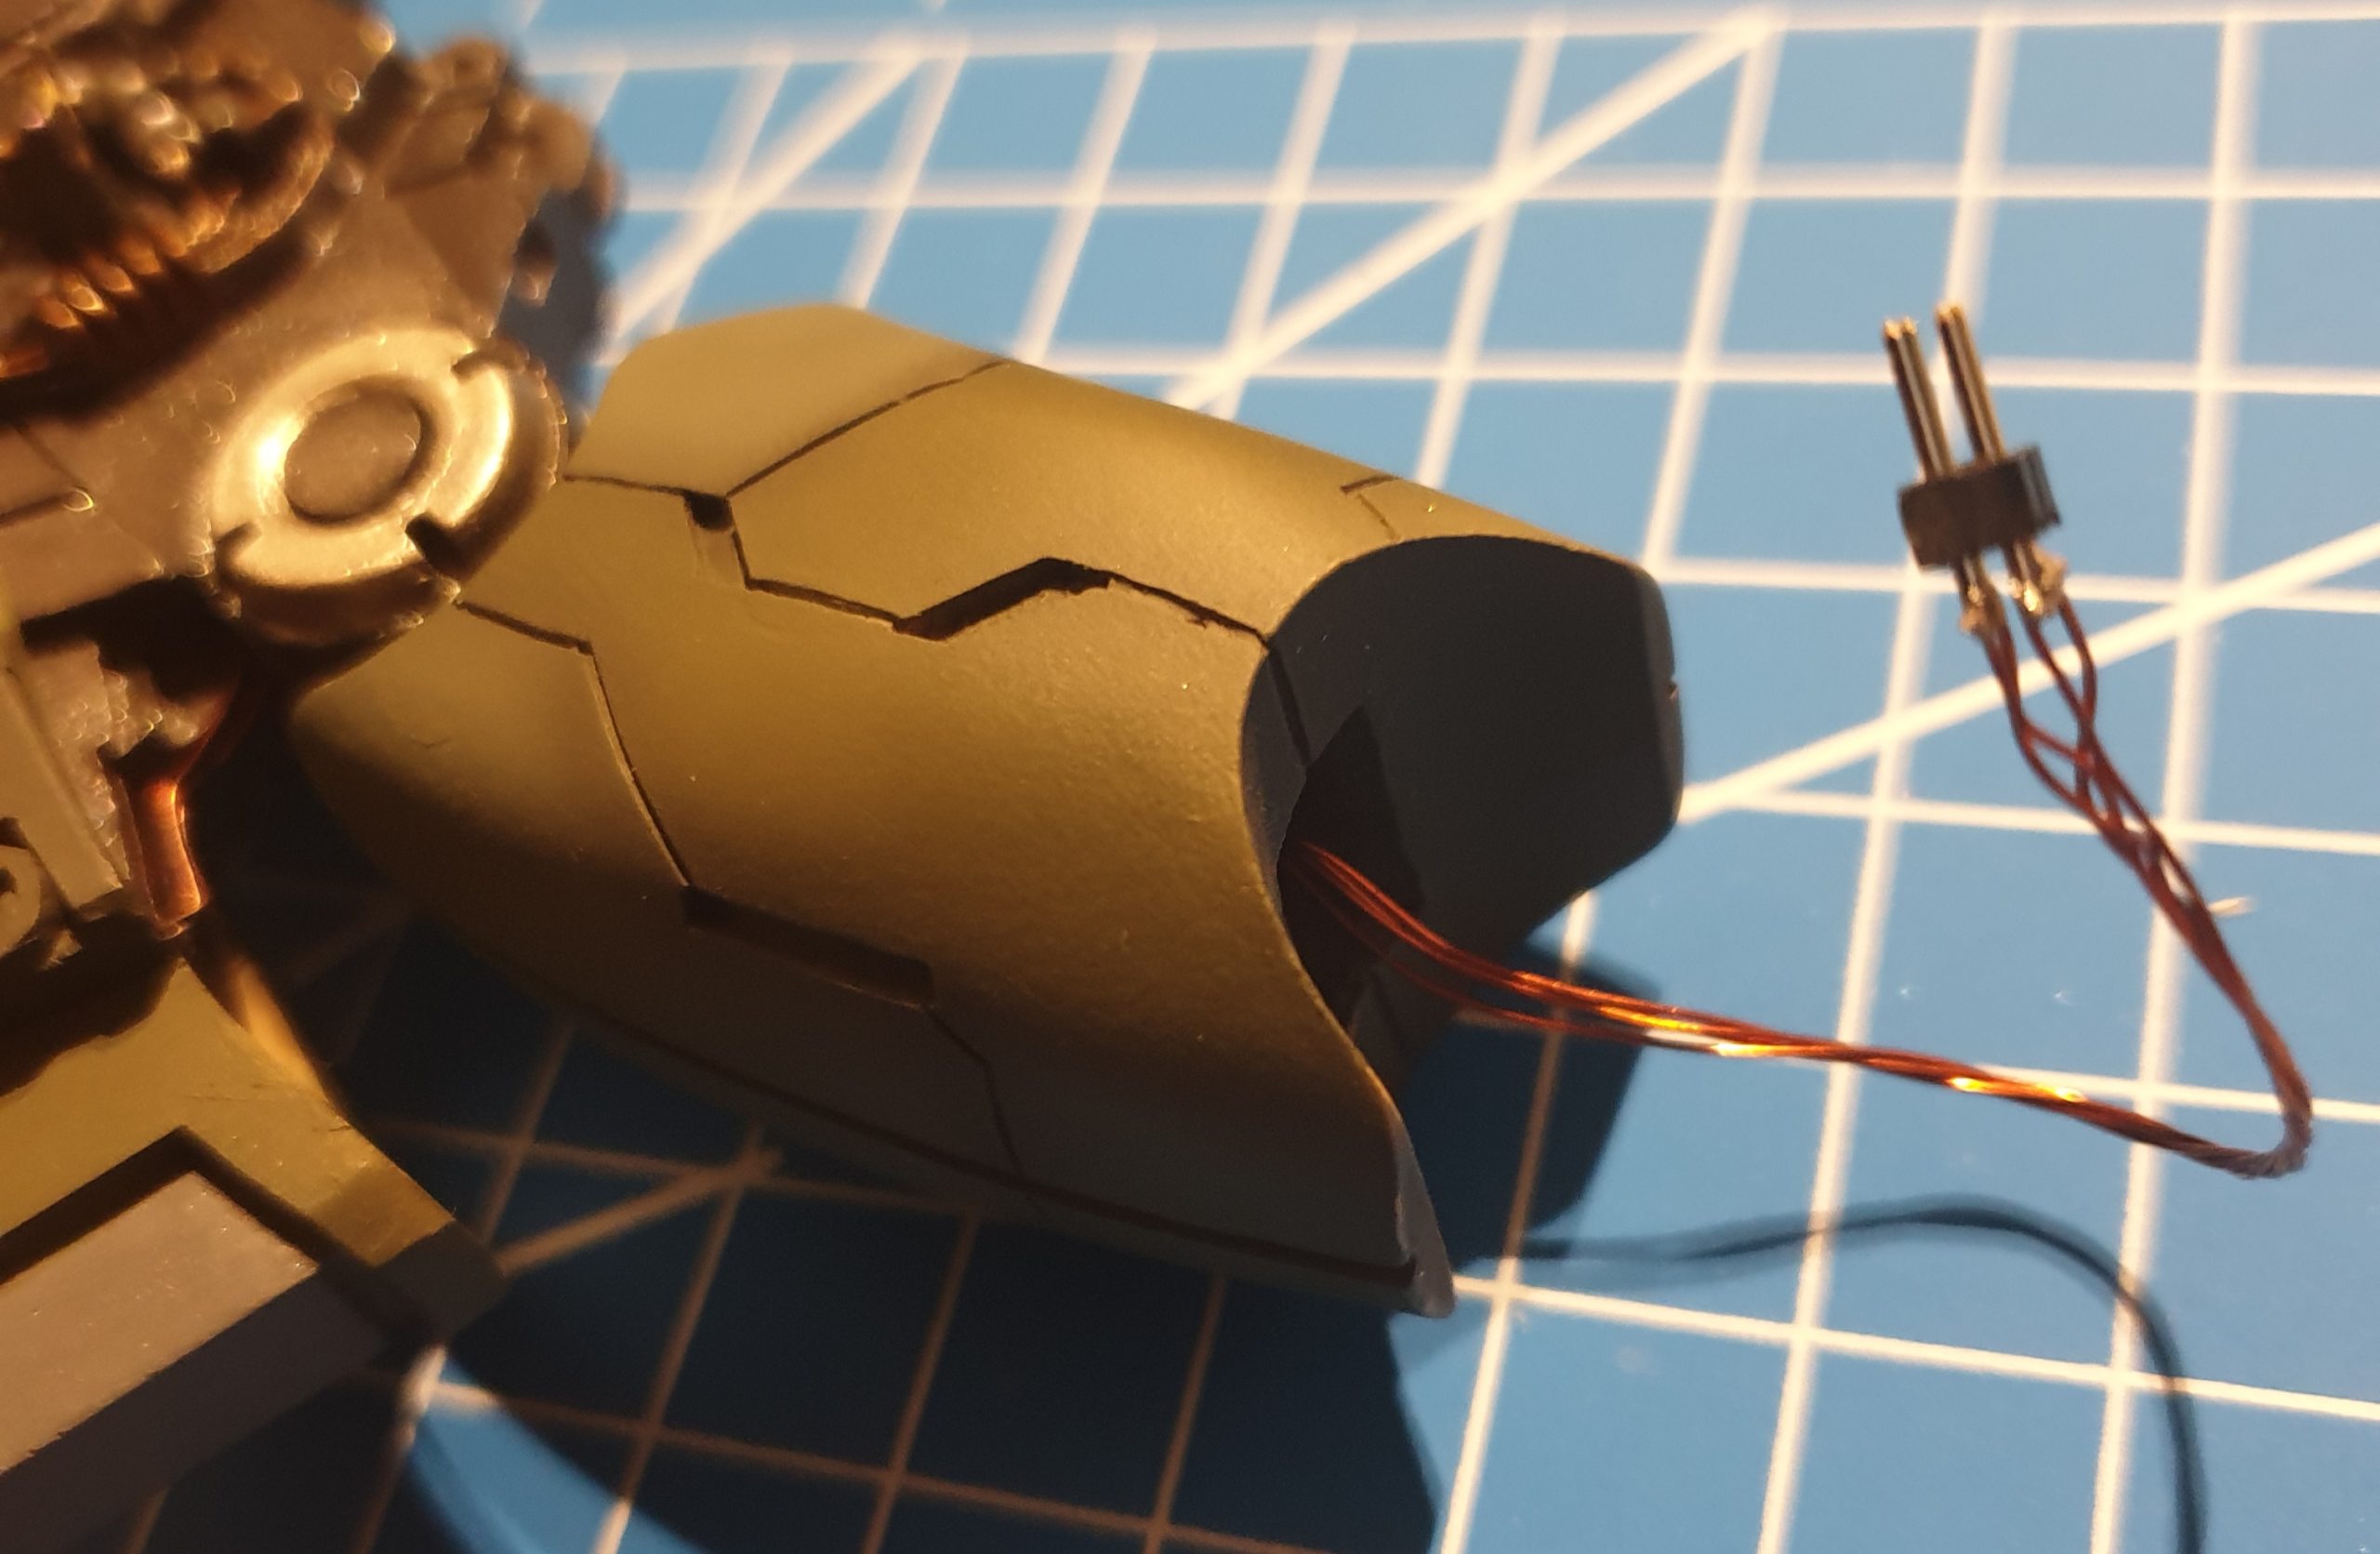
The project is getting more and more complicated… I was thinking over night about adding some light to the model…I…
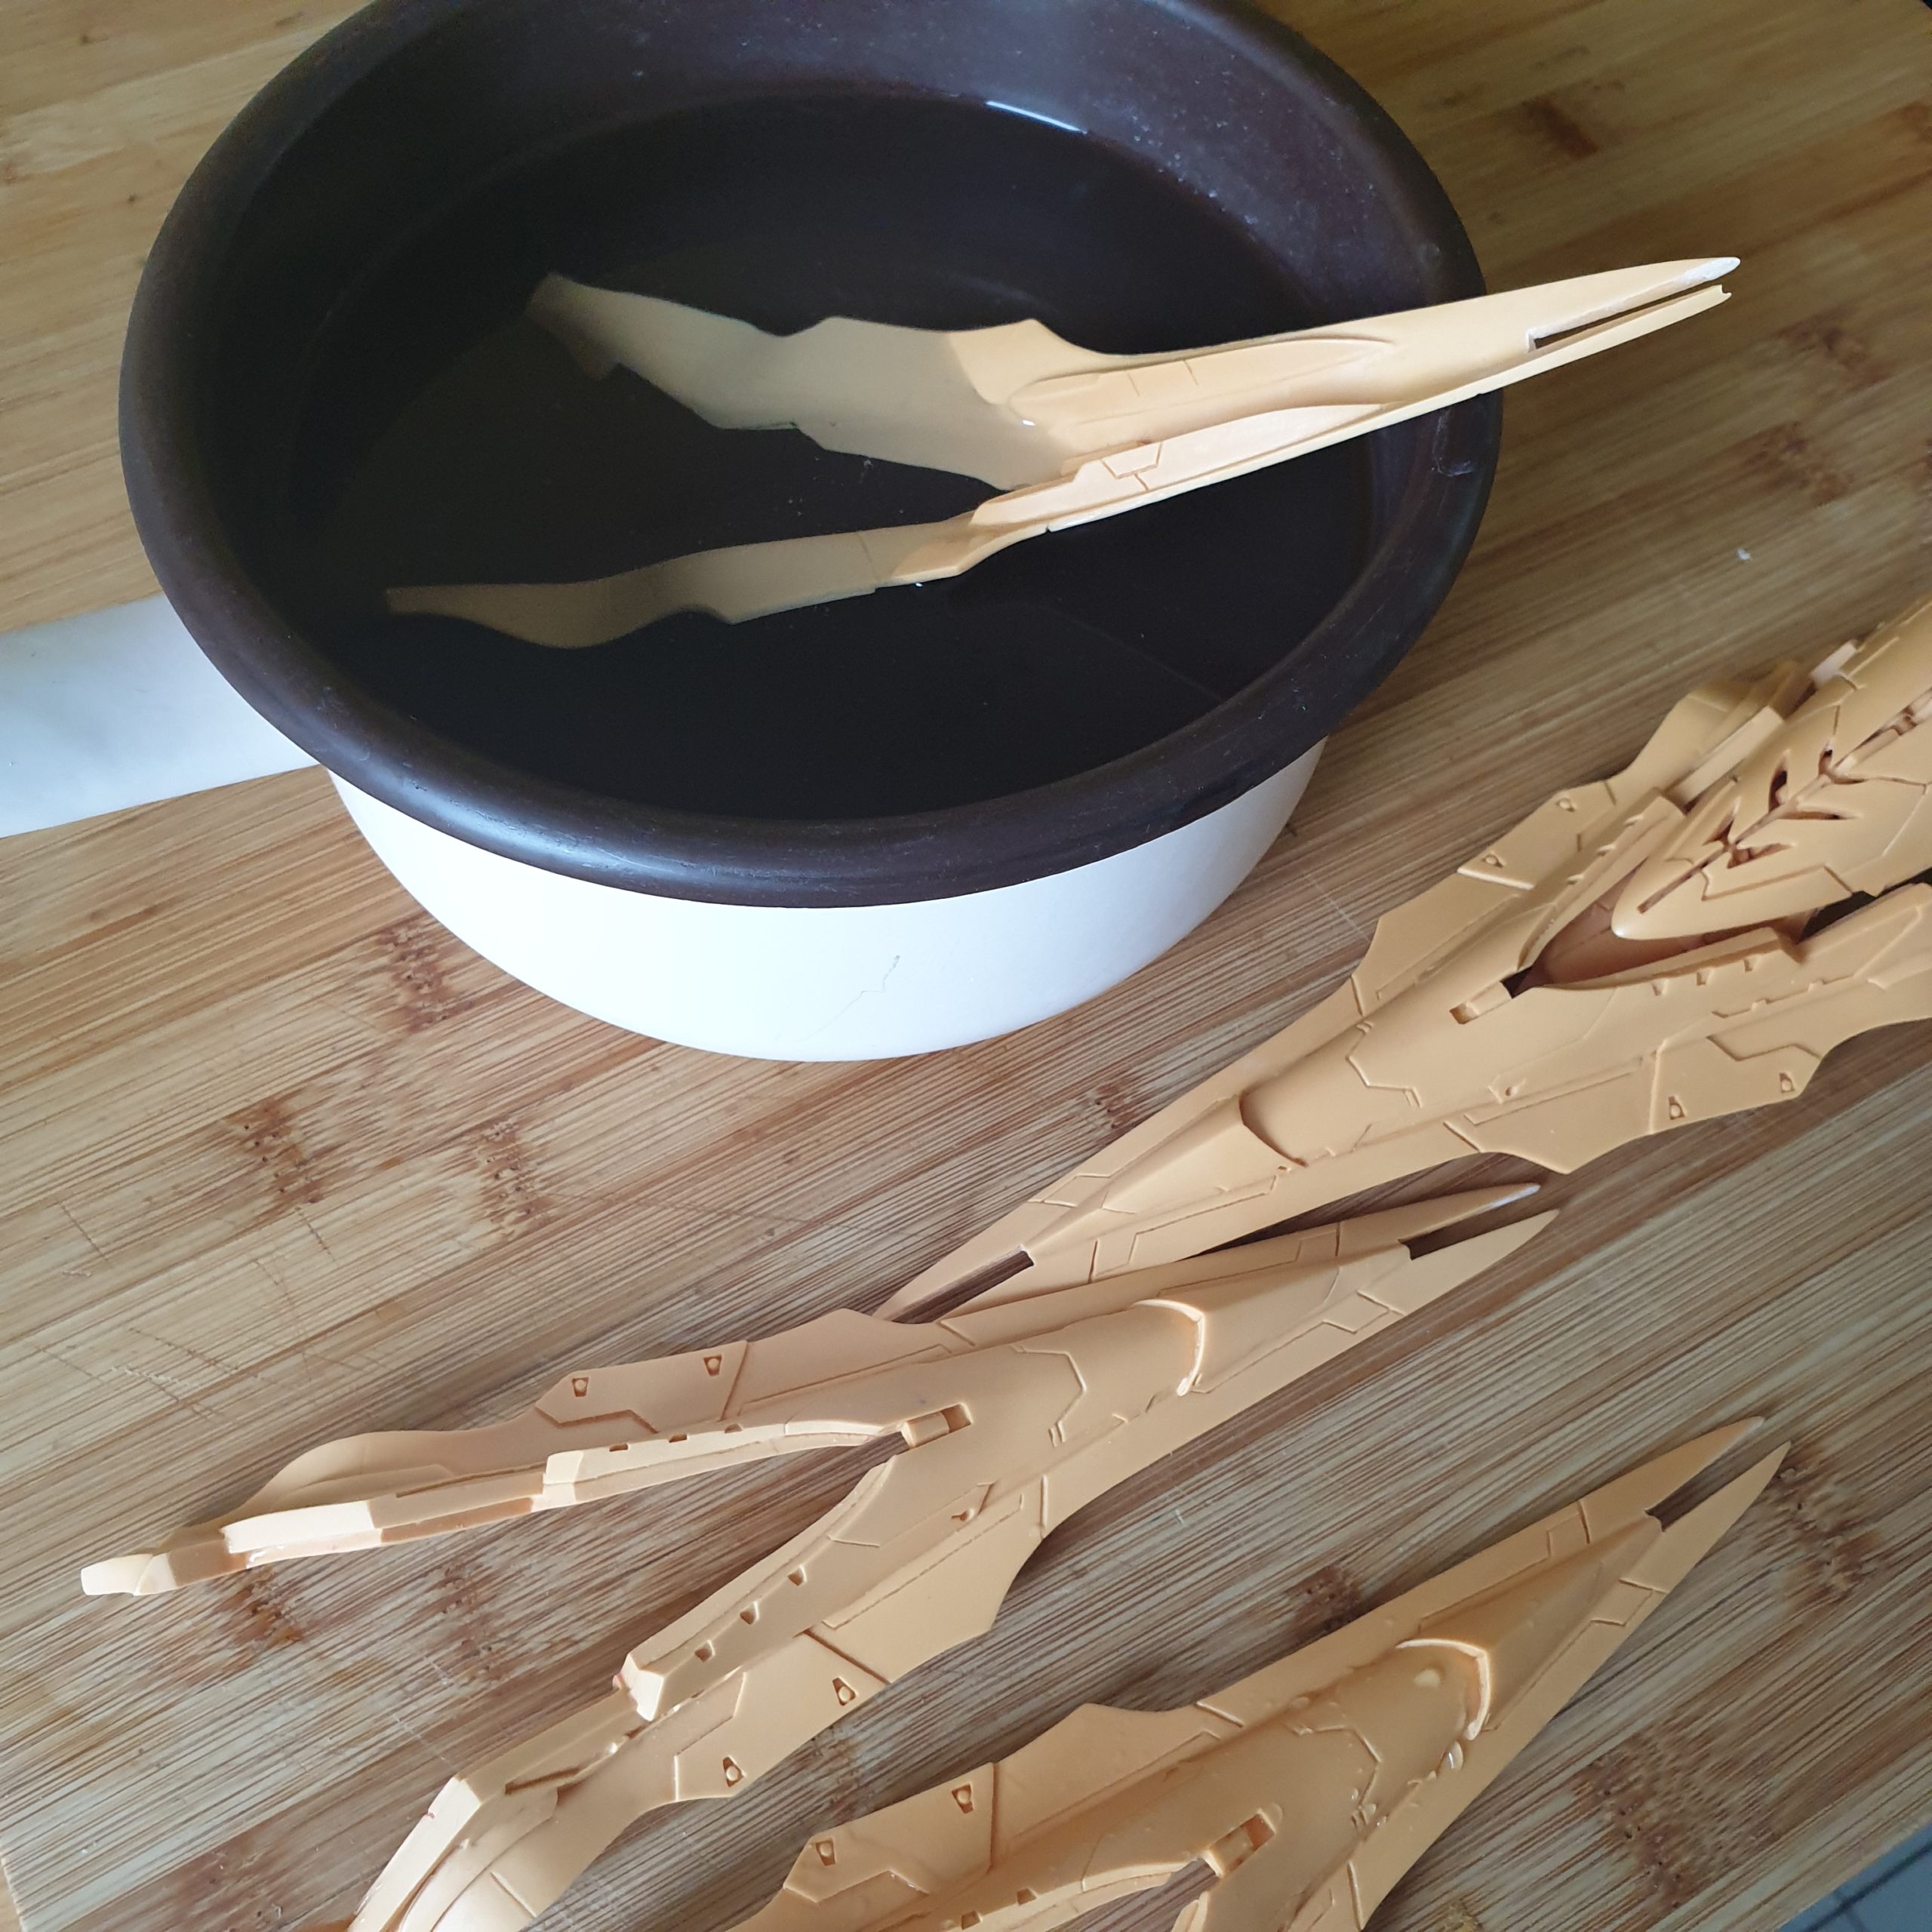
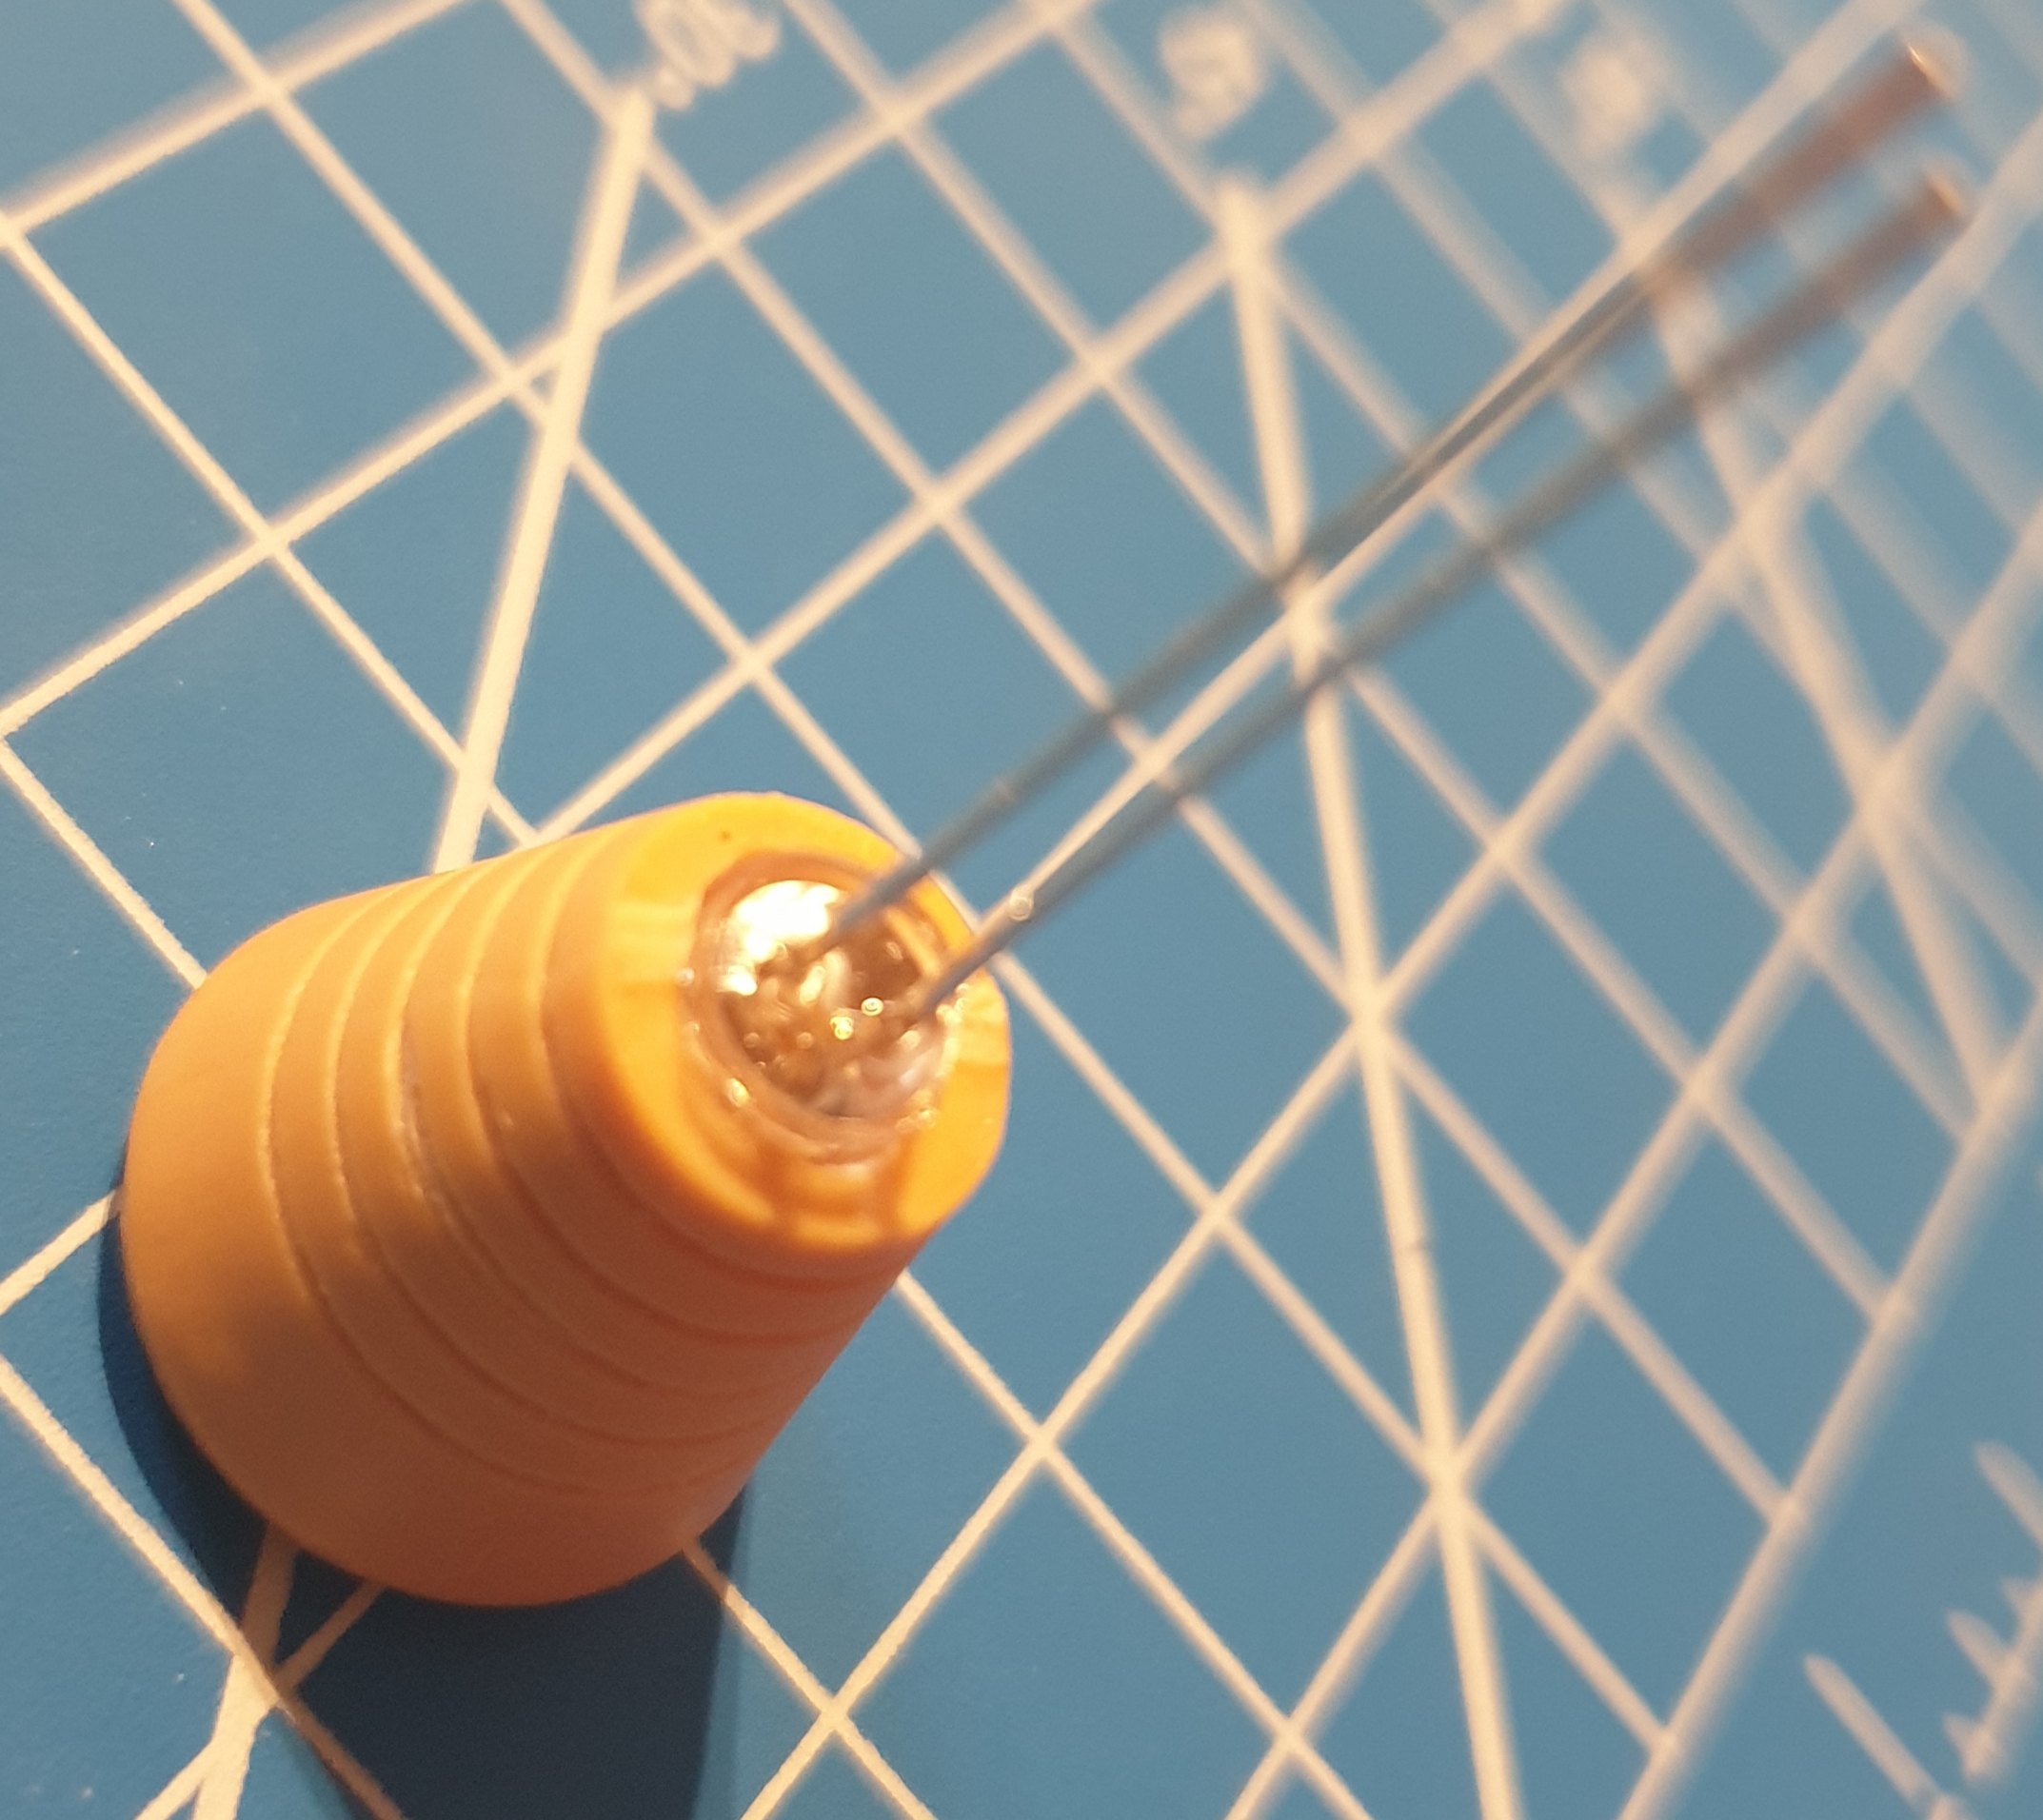
Allright – the time has come to deal with the biggest challange so far. Hot and really (almost boiling) hot…
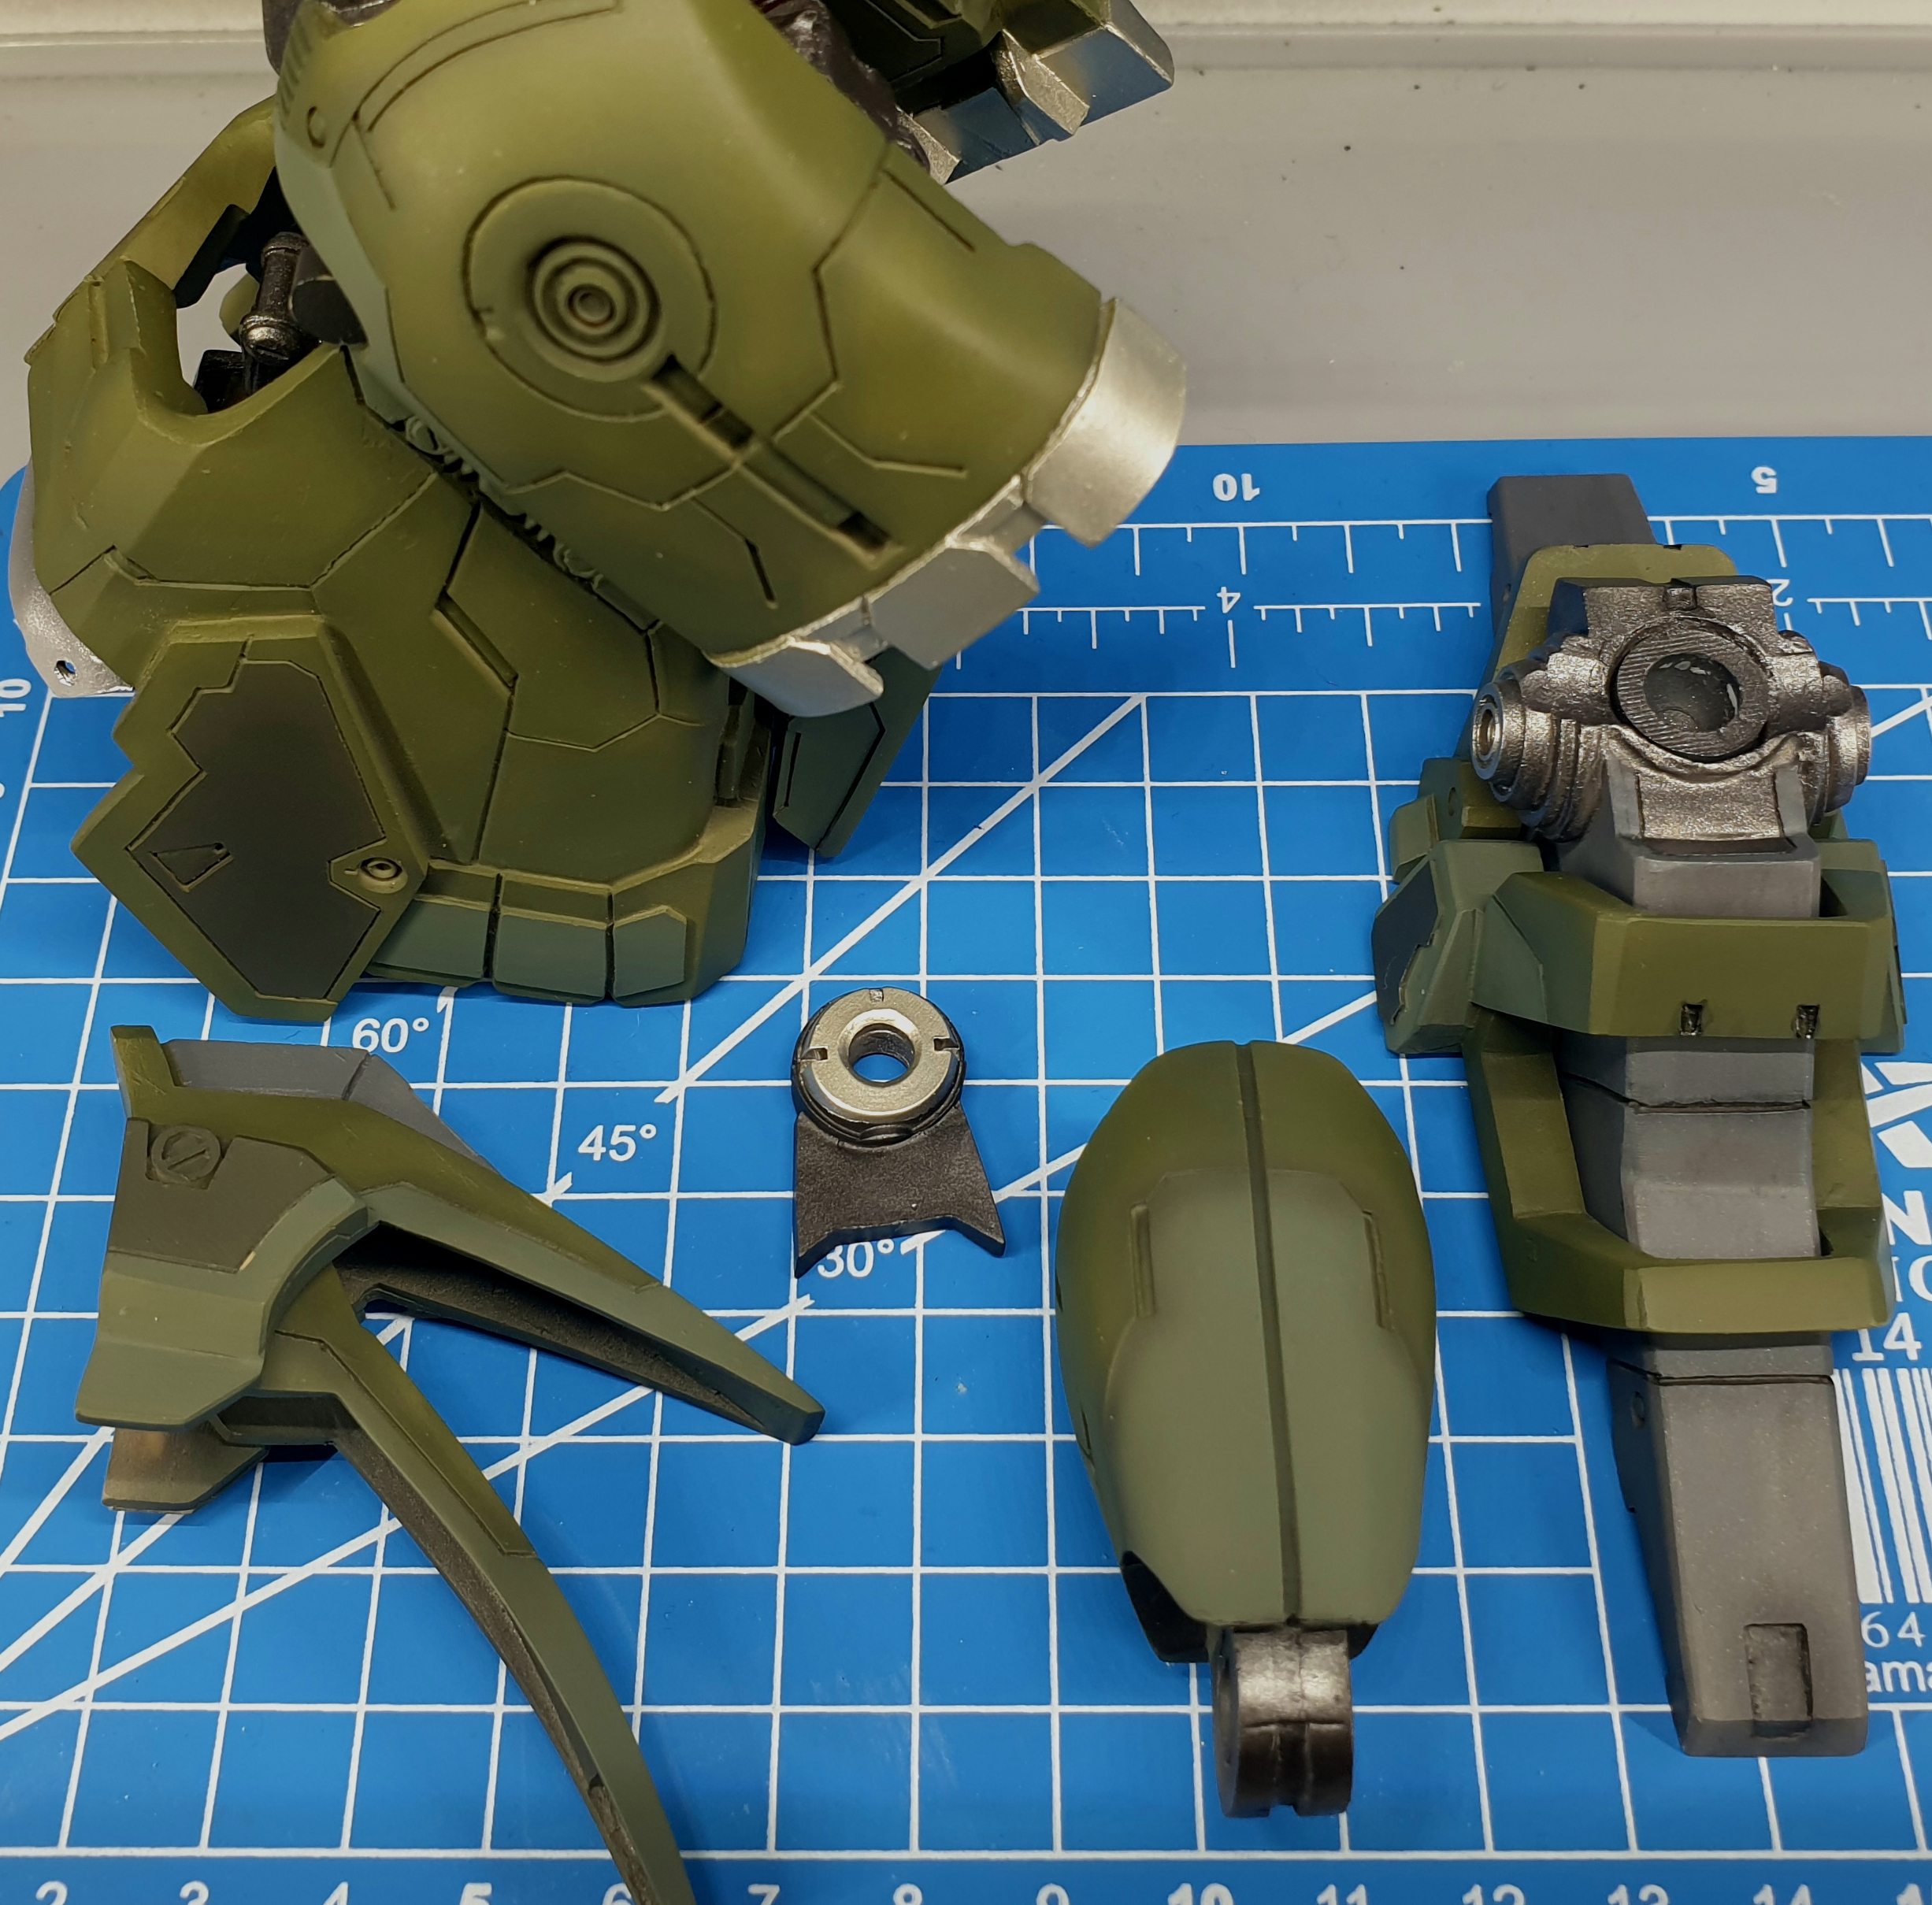
The model is designed with really long peg joints that secures each foot – I was always wondering when looking…
The details within legs internal structure are just bagging for show. I started to think how to fix leg armor…

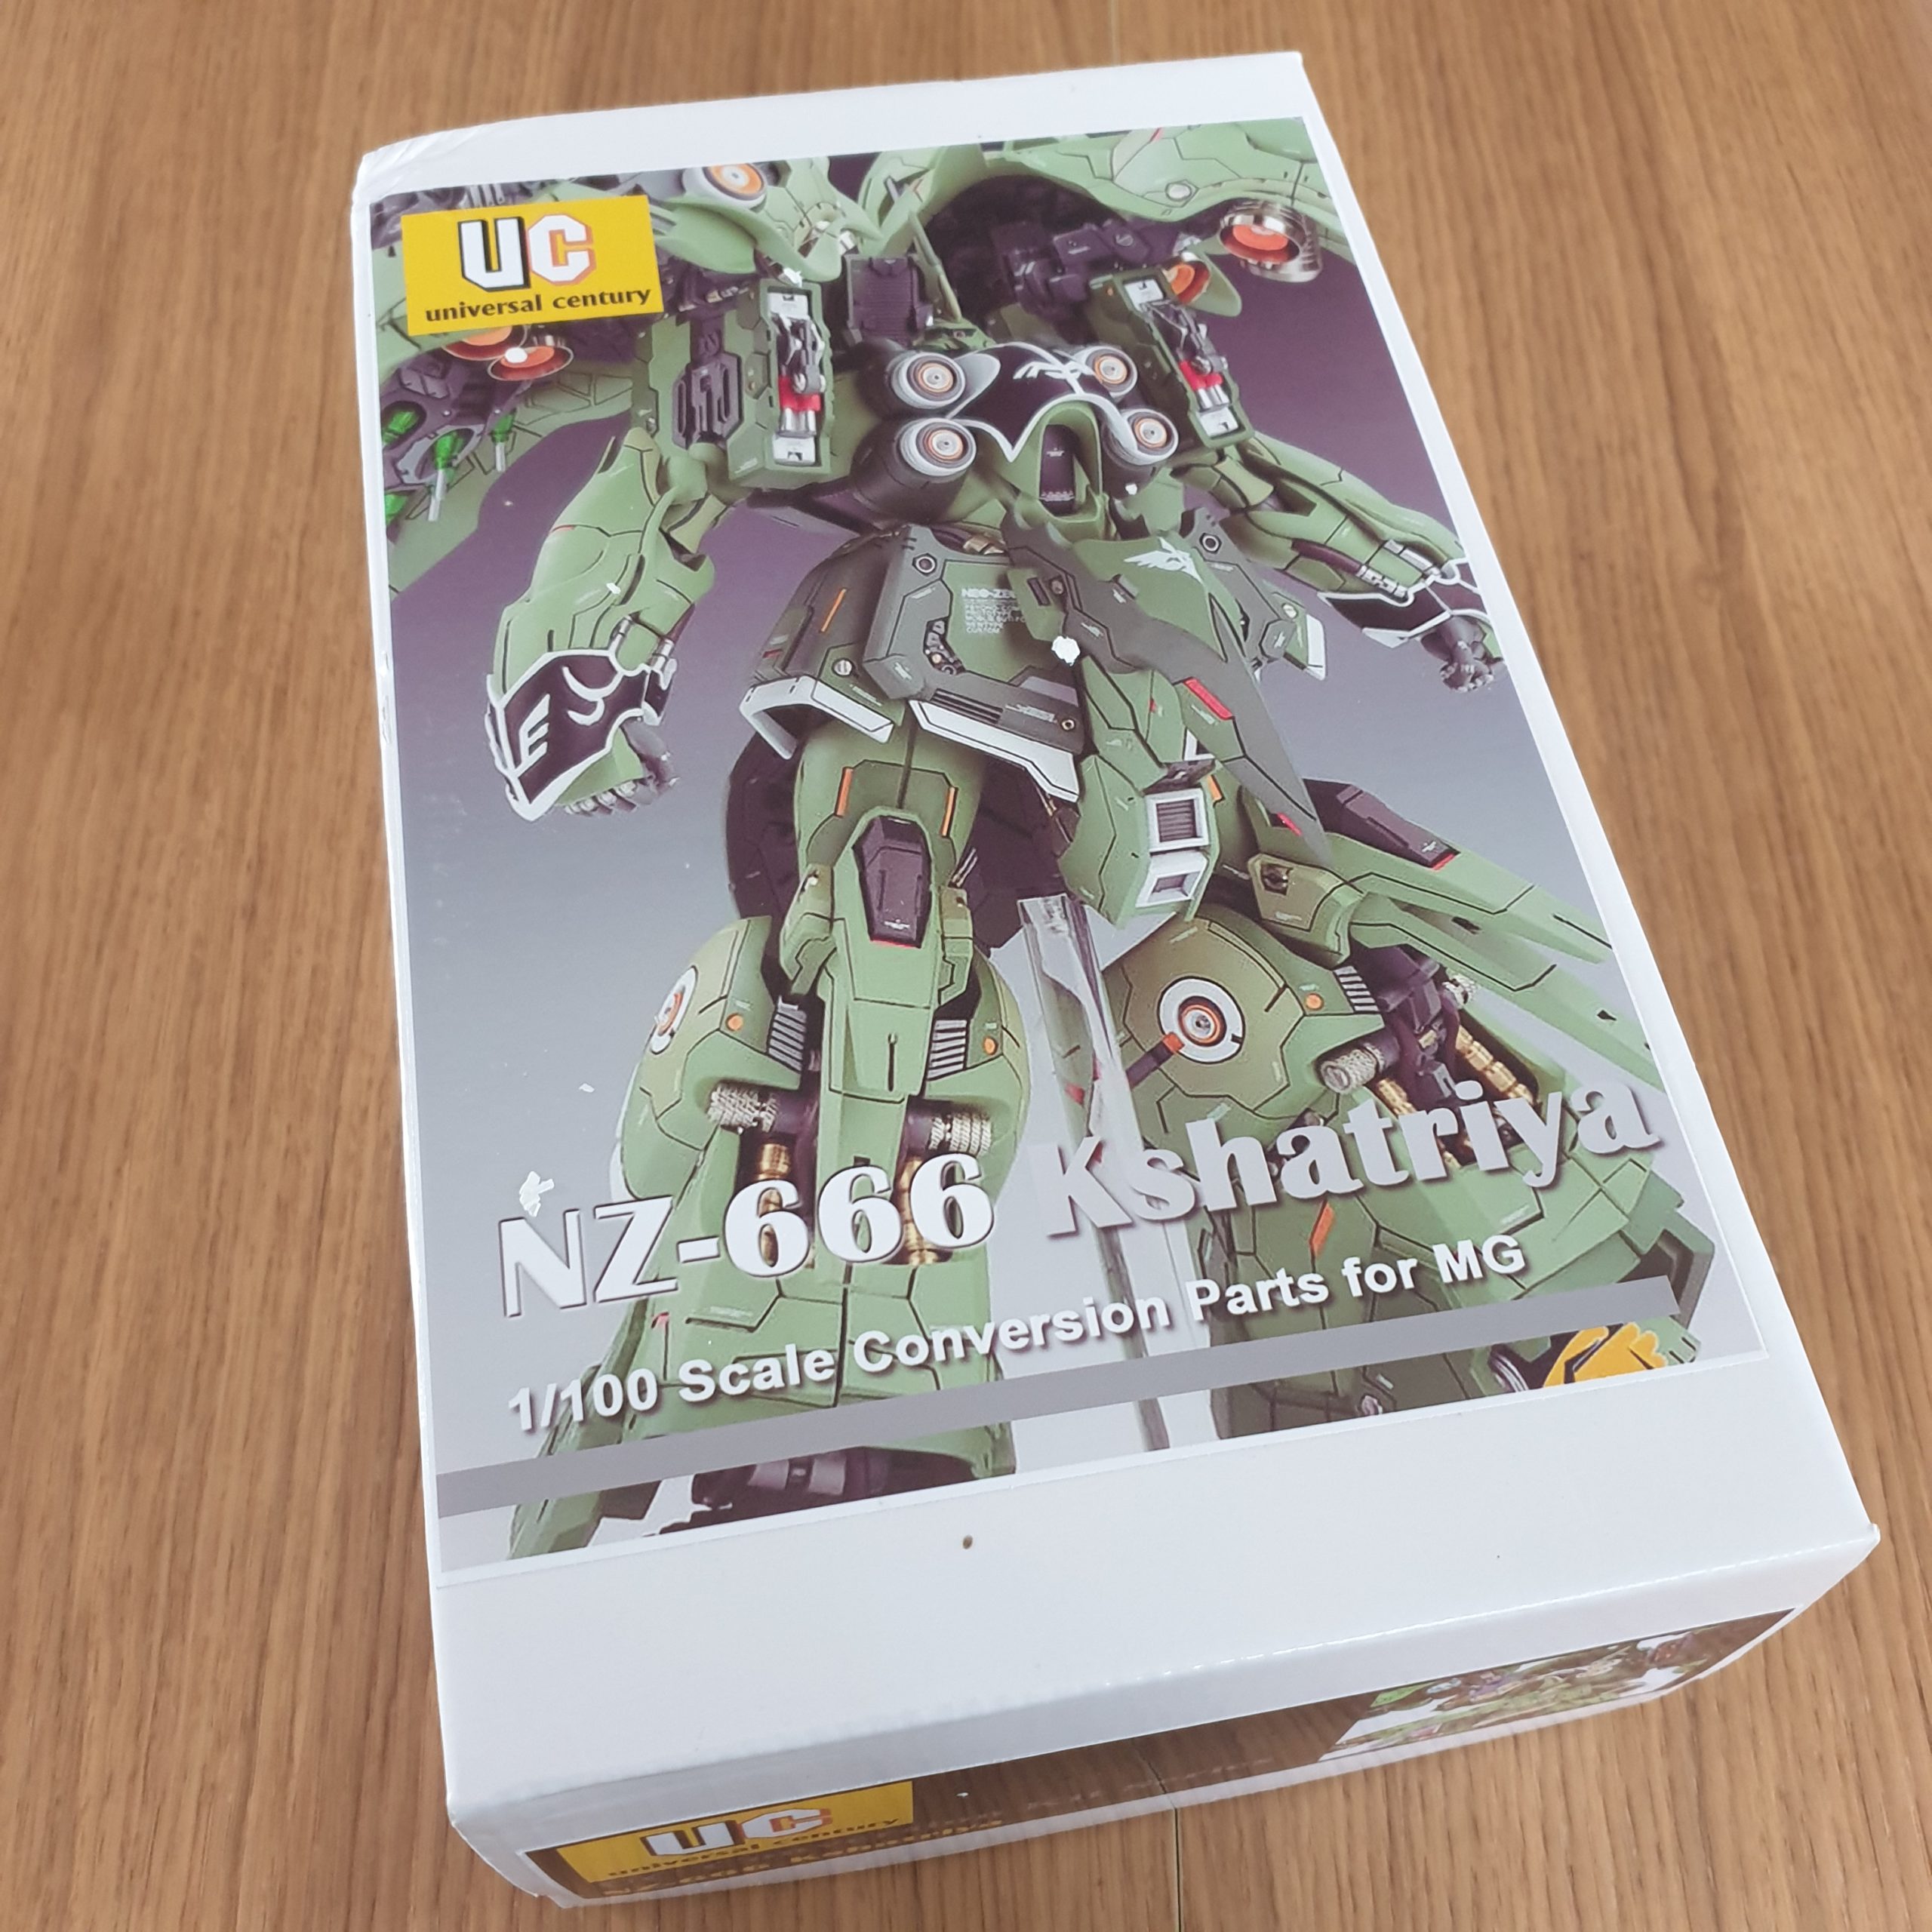
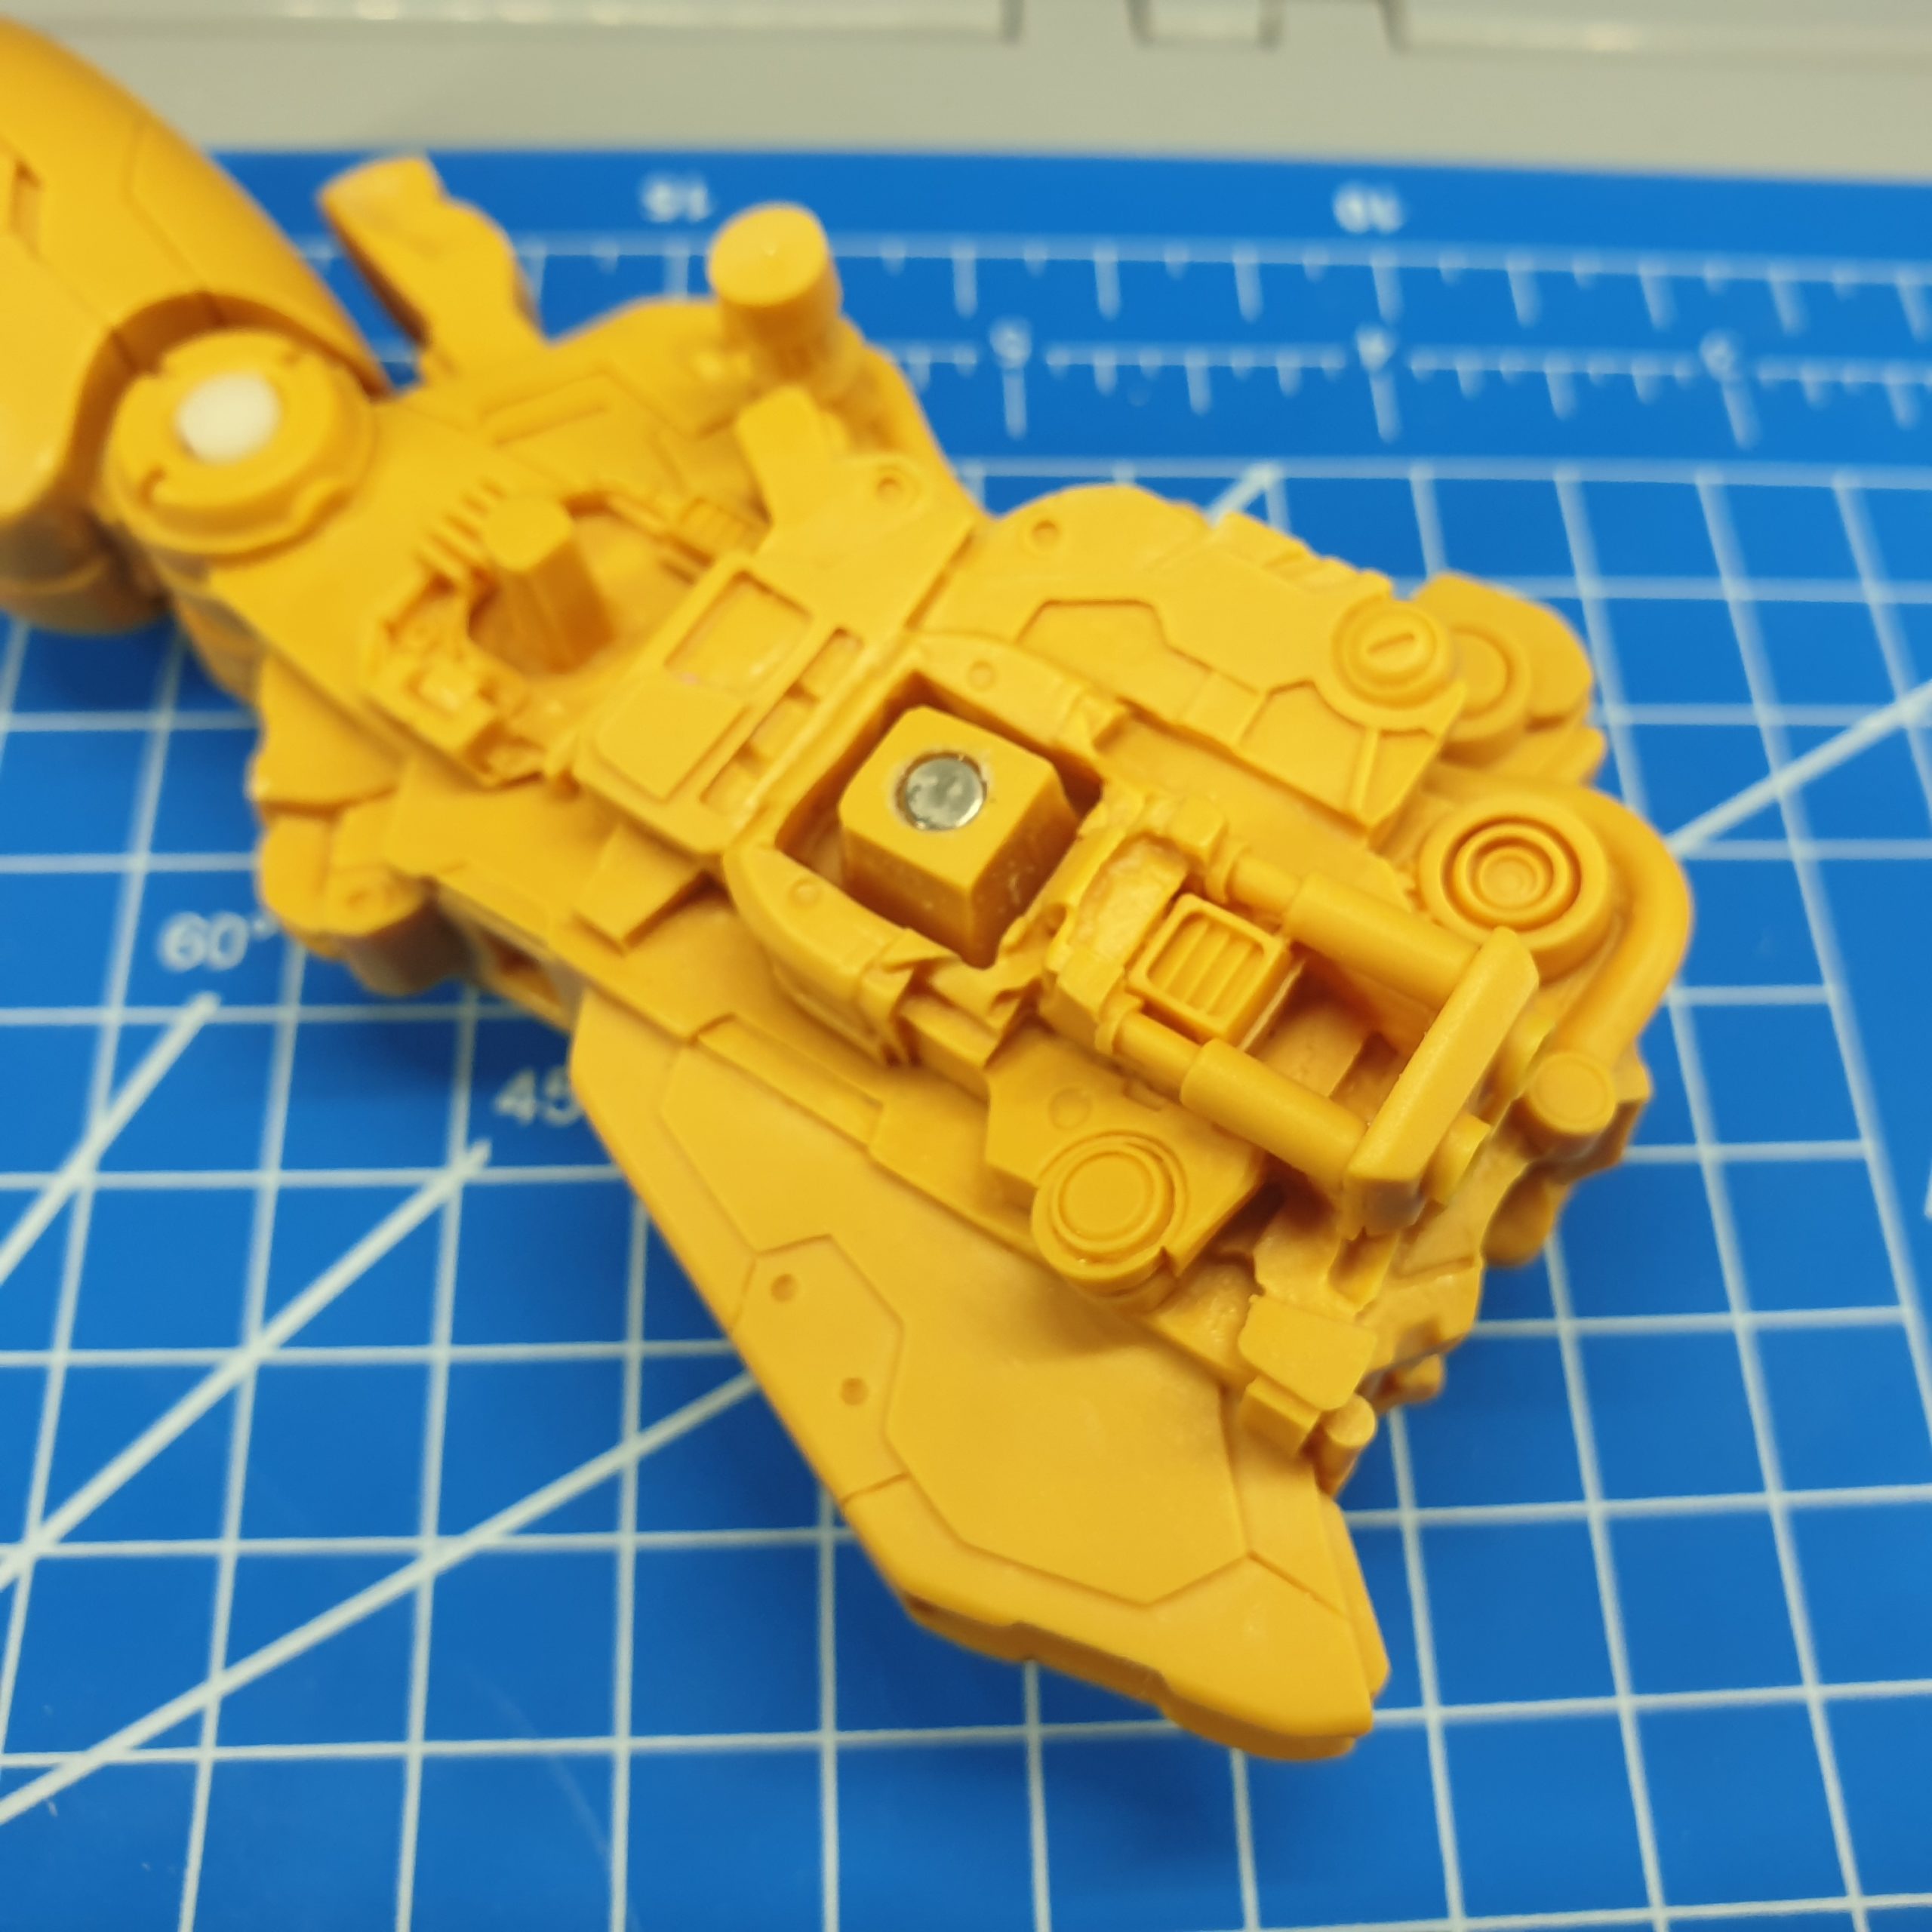
Allright! Let’s start big project – one of the most charismatic mobile suits – Neo Zeon NZ-666 Kshatriya from Gundam…
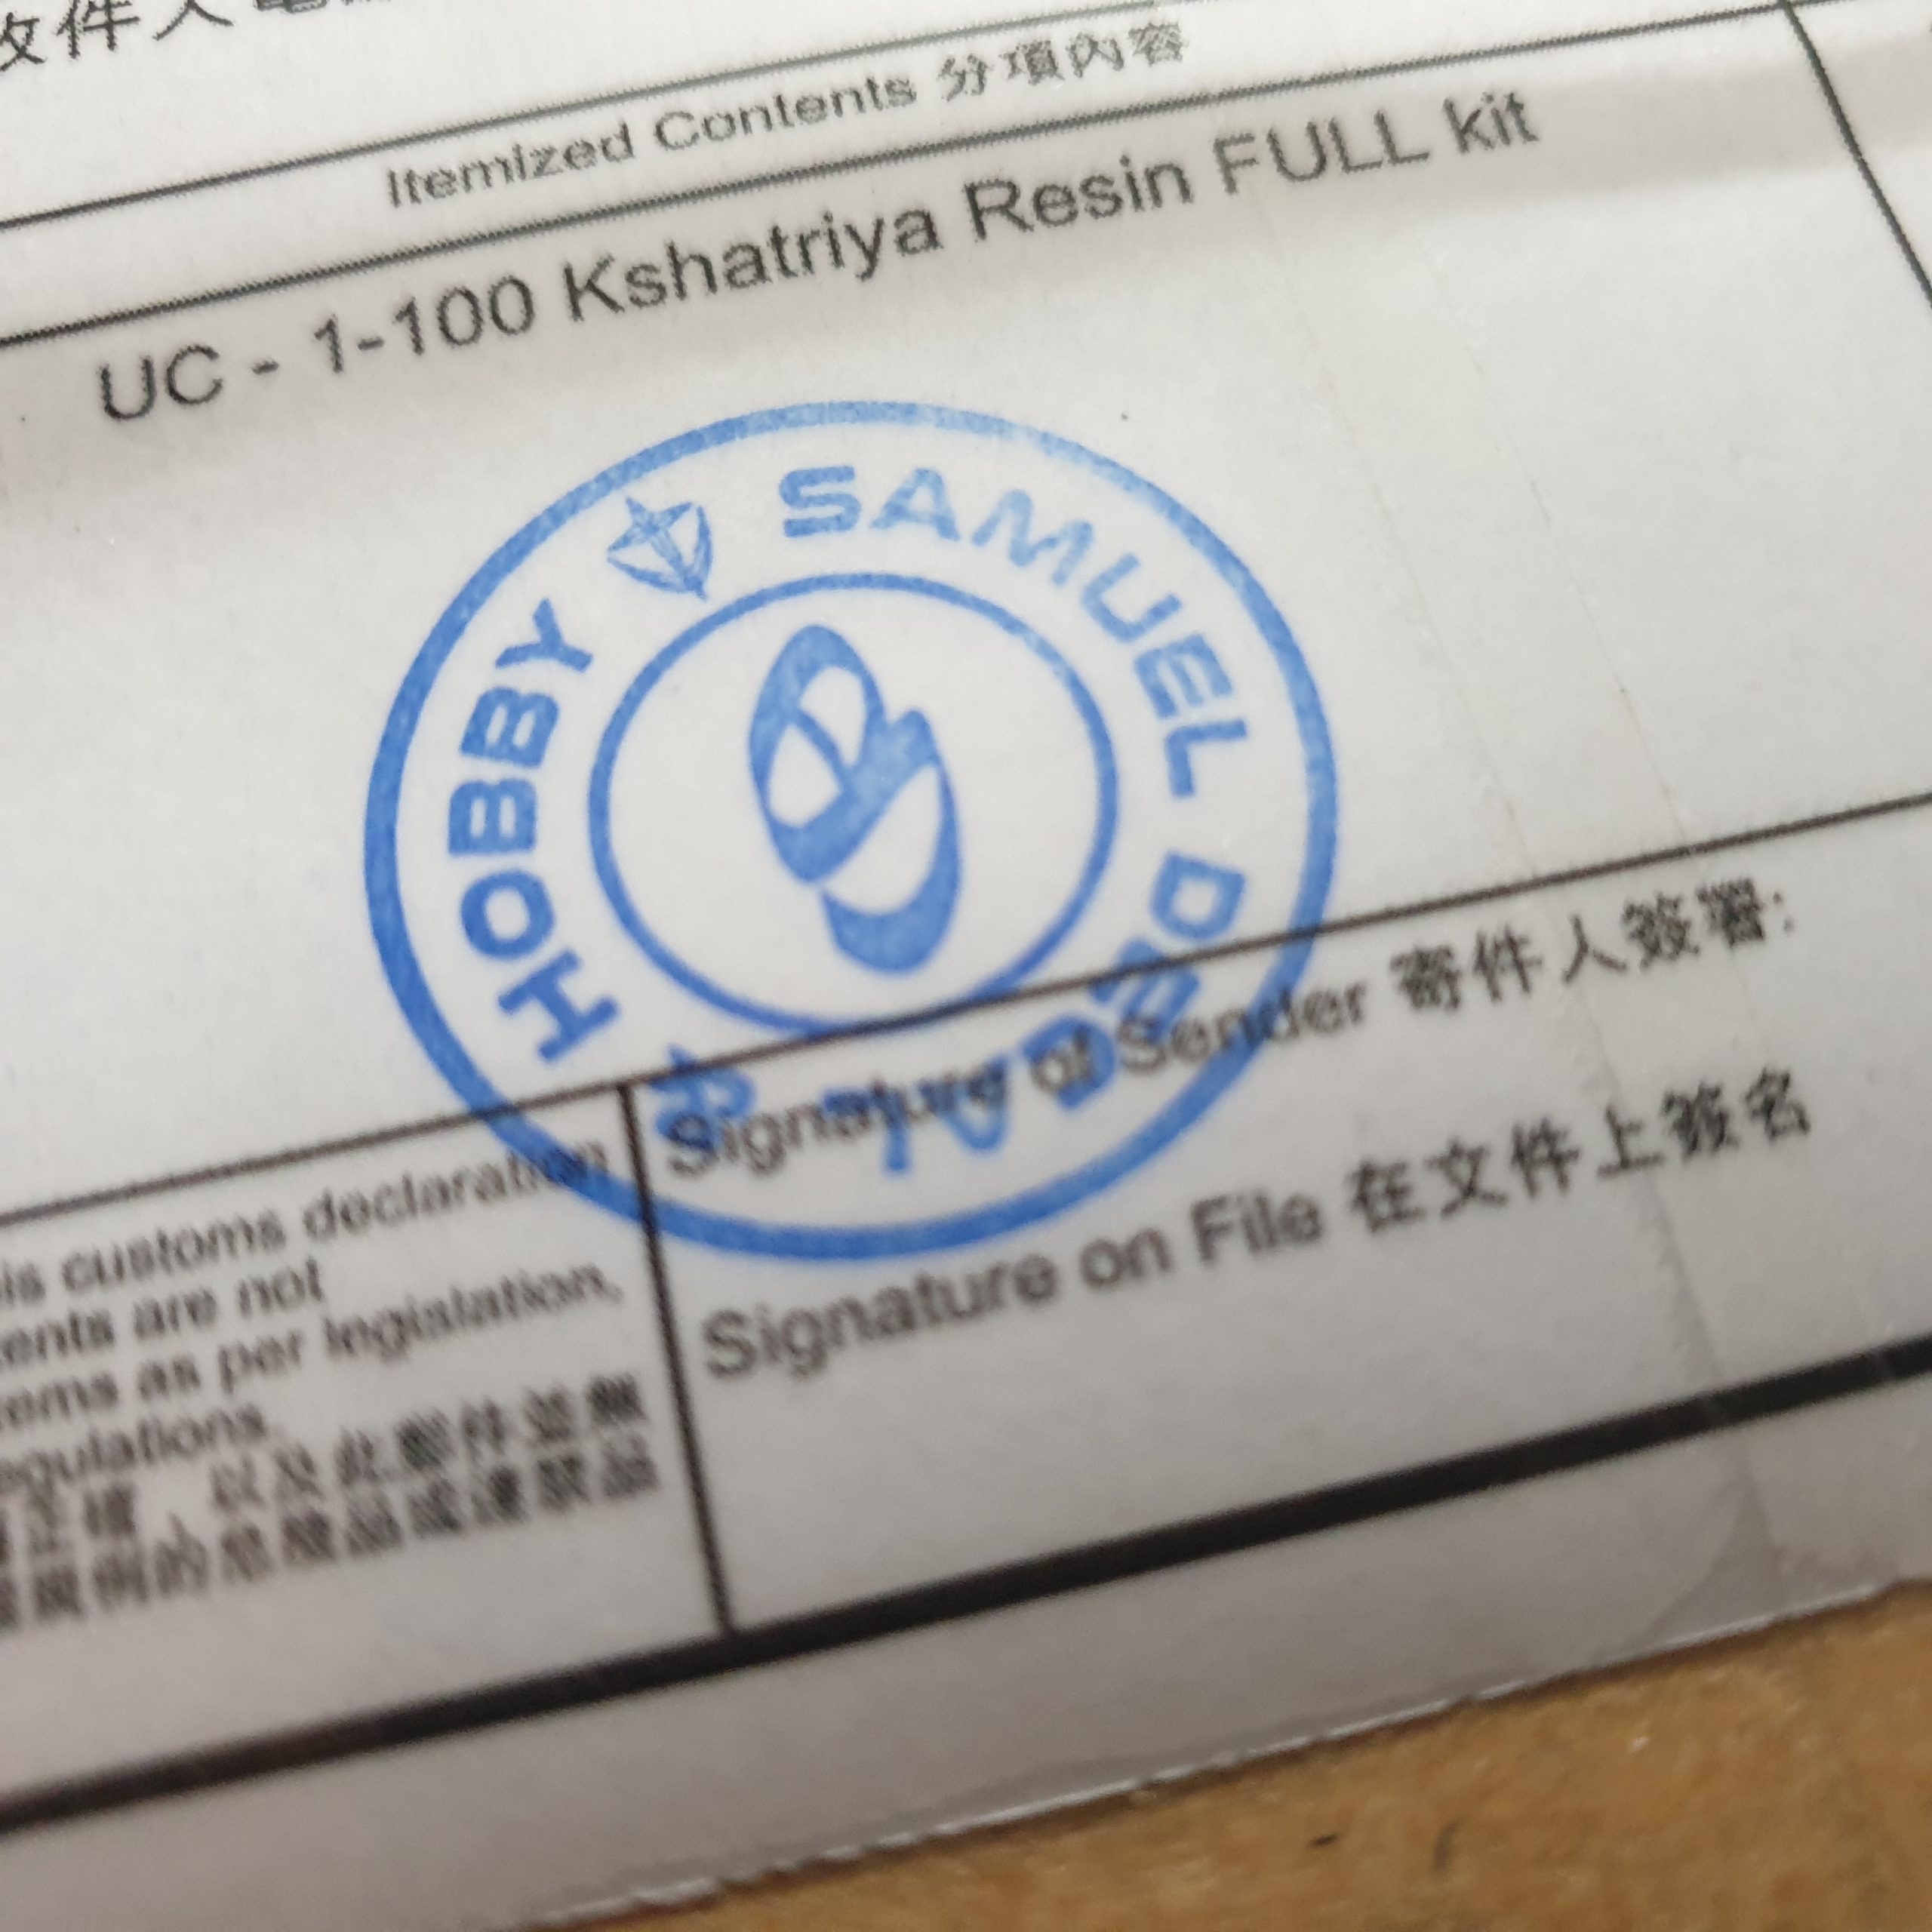
Today is my birthday – I just receive a box from Samuel Decal with first big resin fullkit – NZ-666…
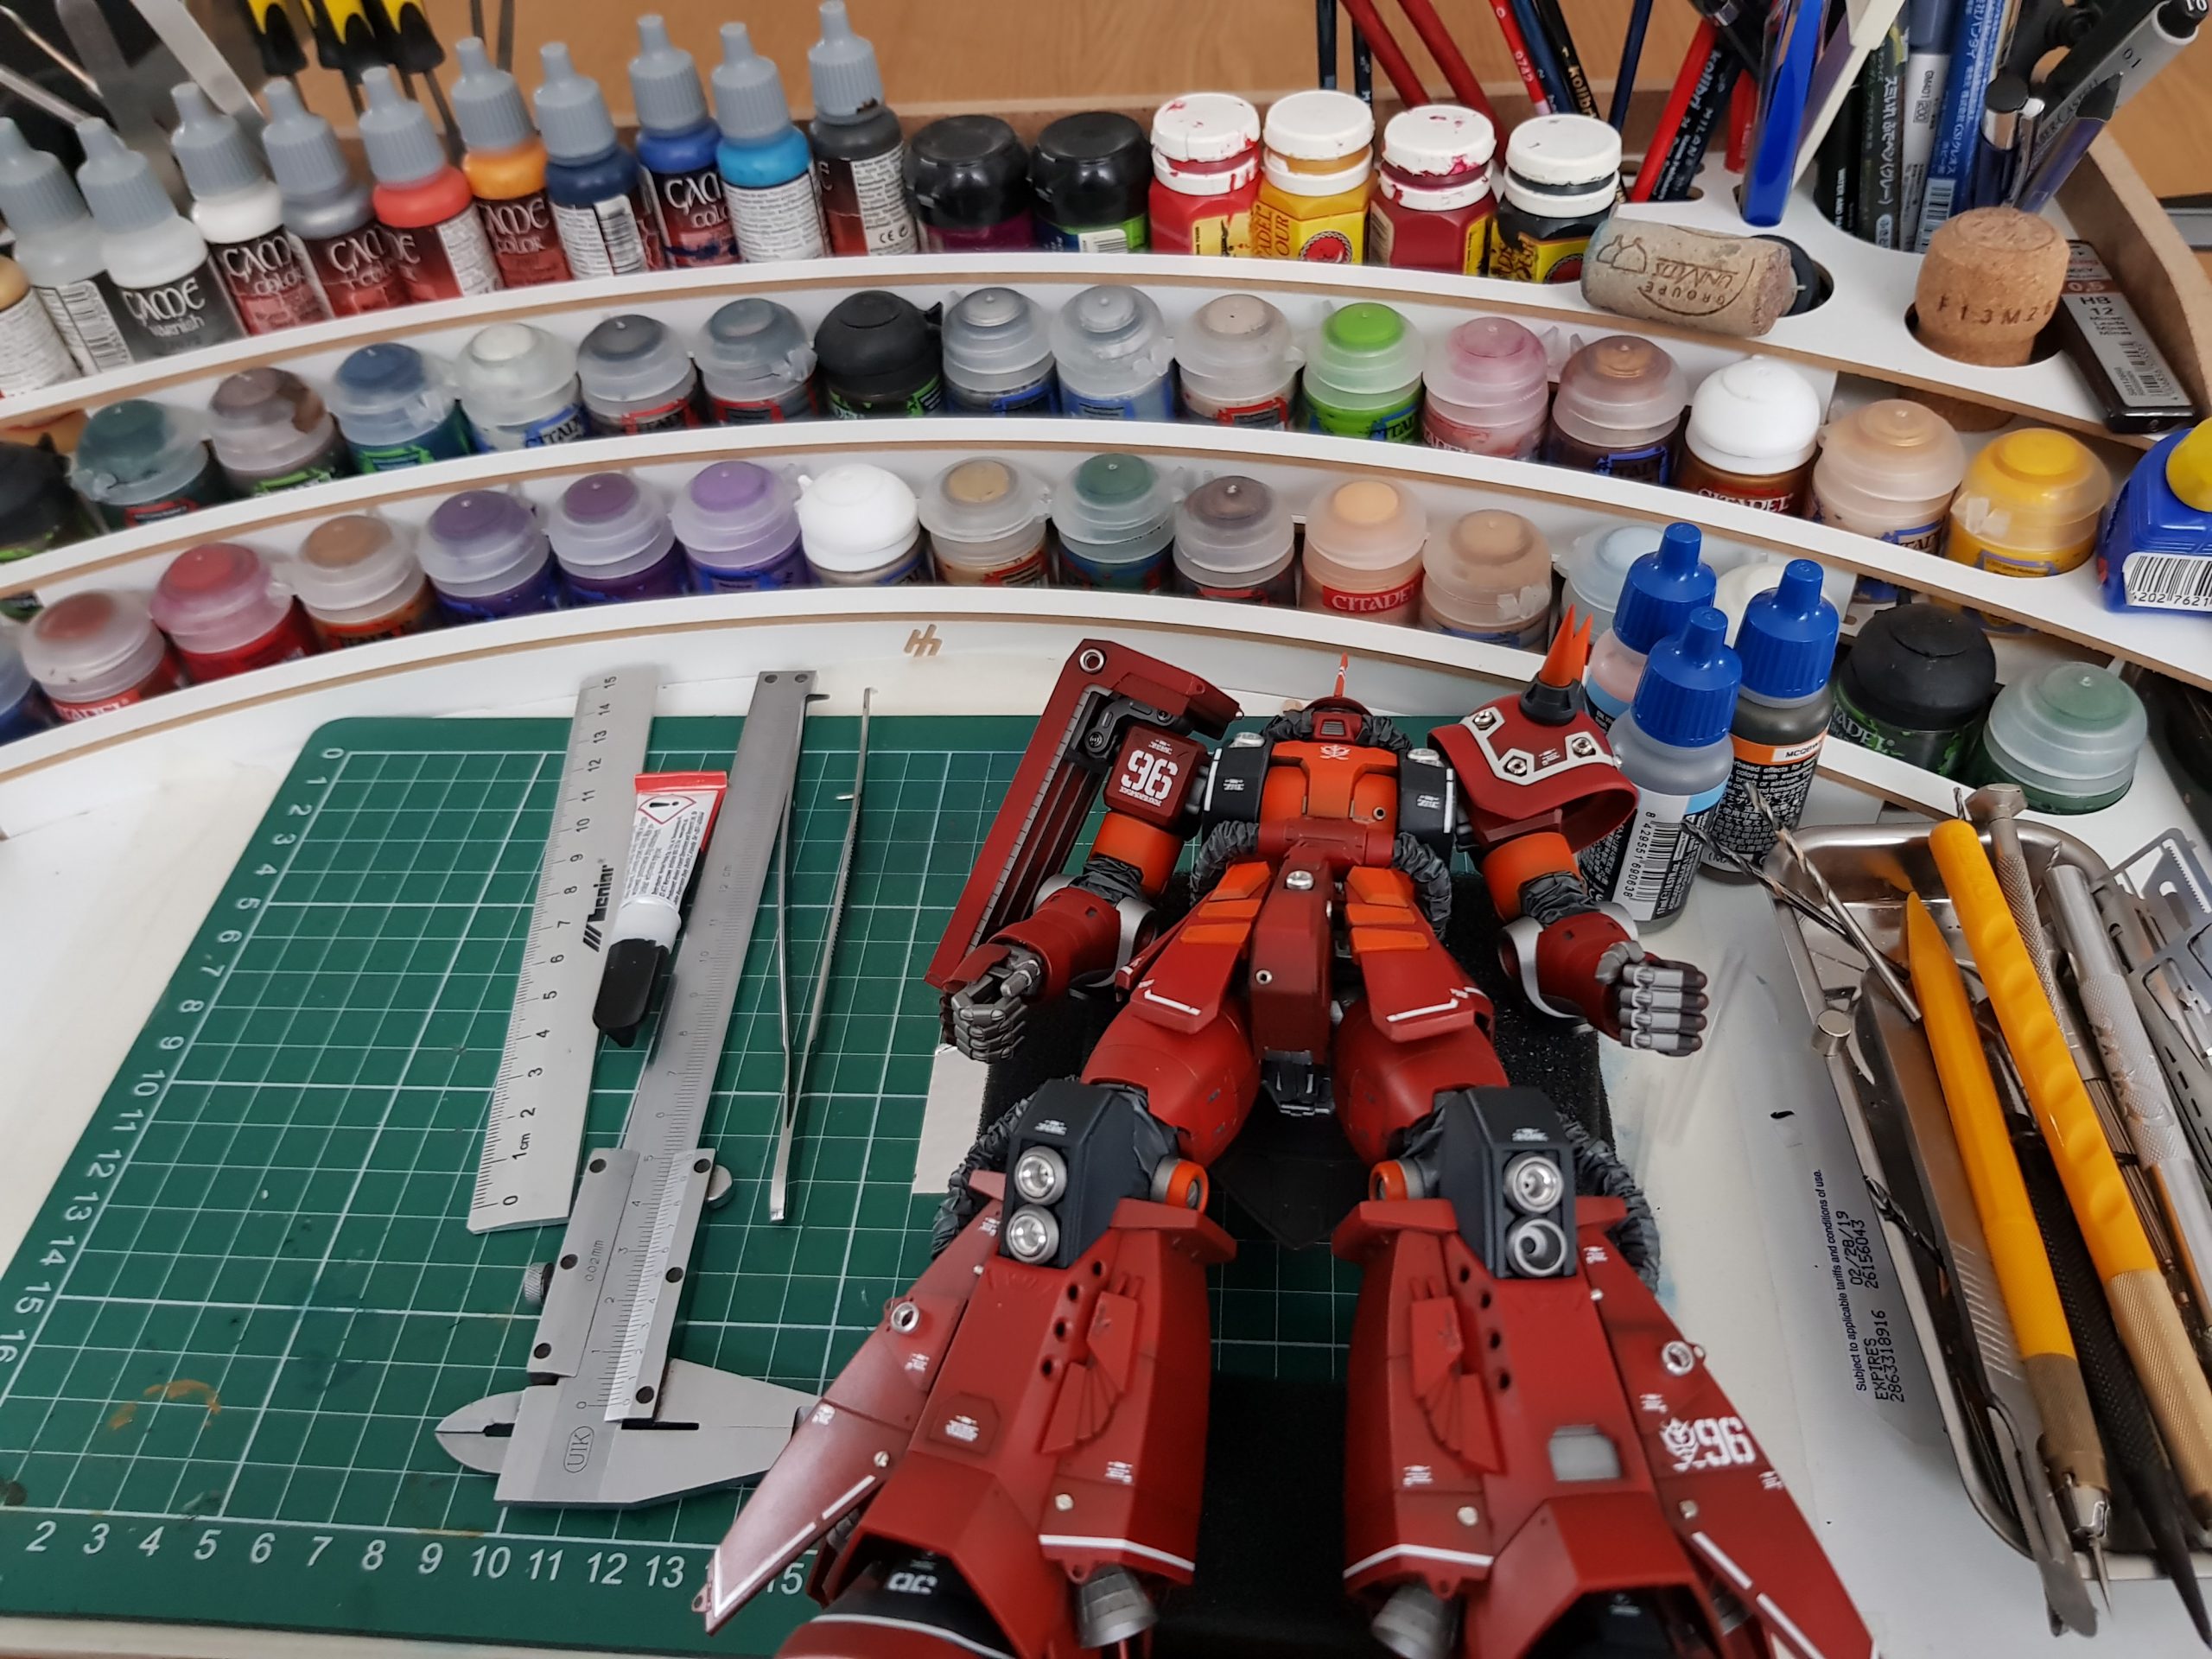
Weathering and details – I love this part – its time consuming but its very satysfying as those small things…
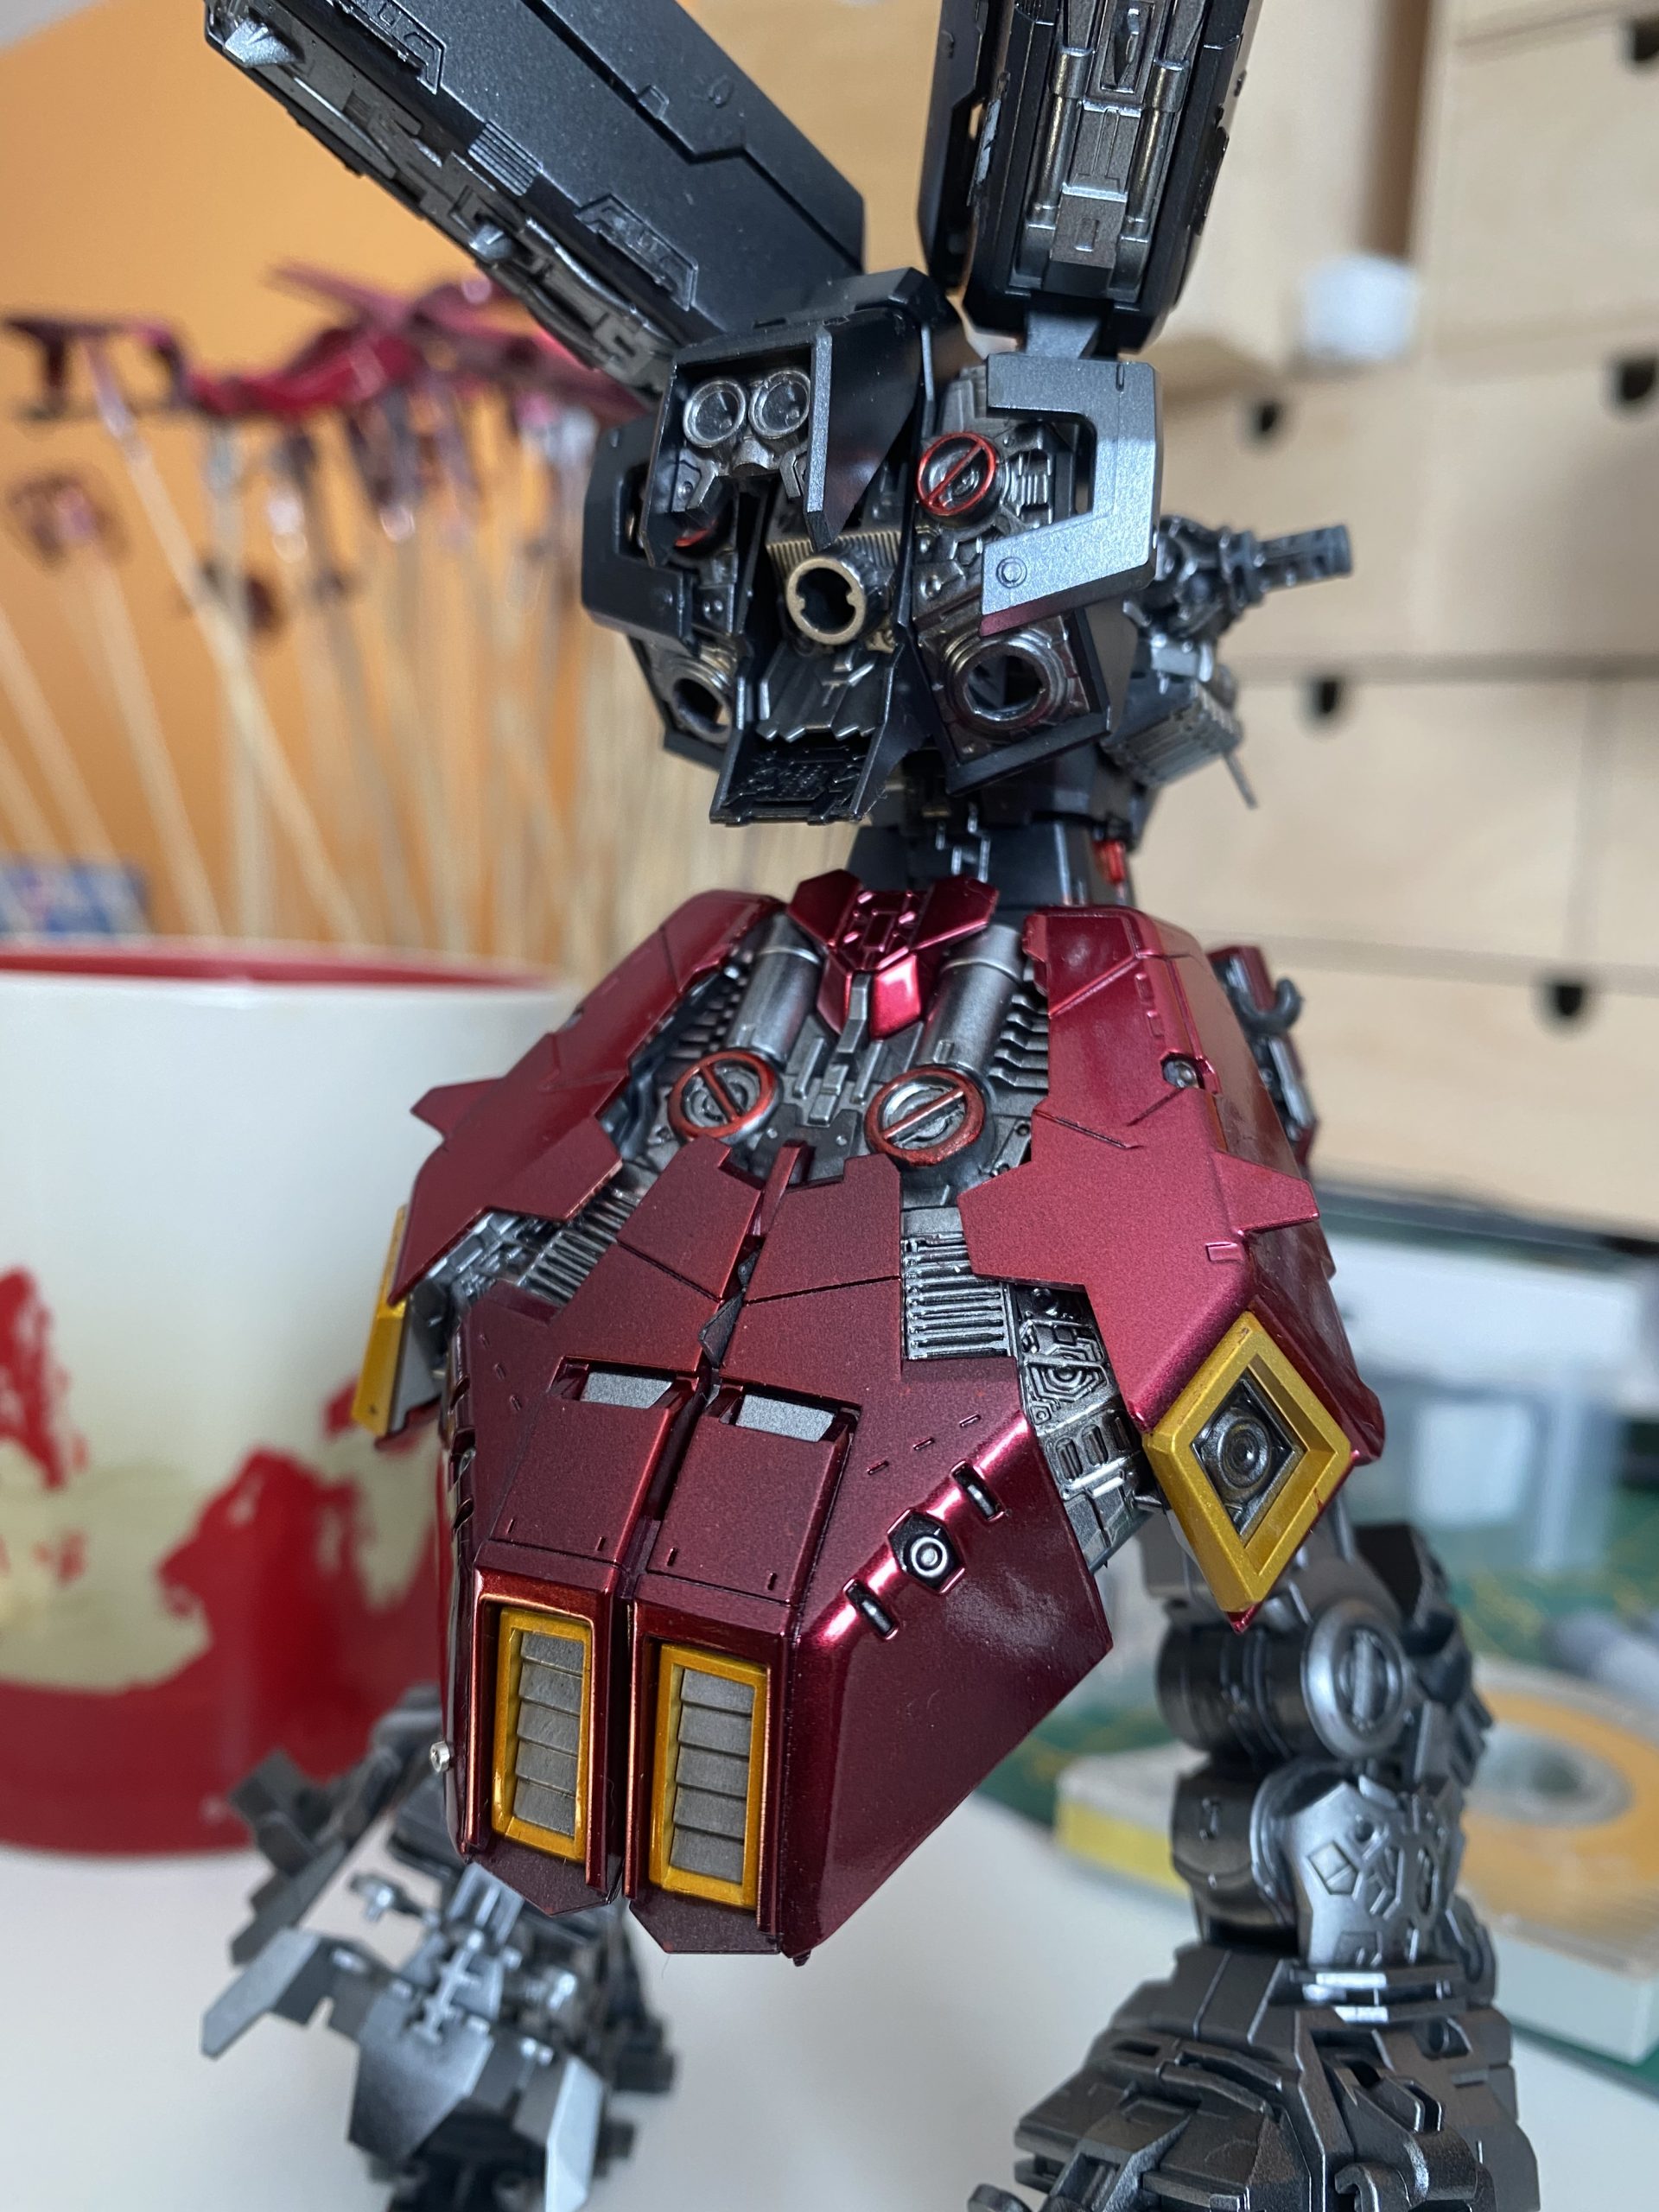
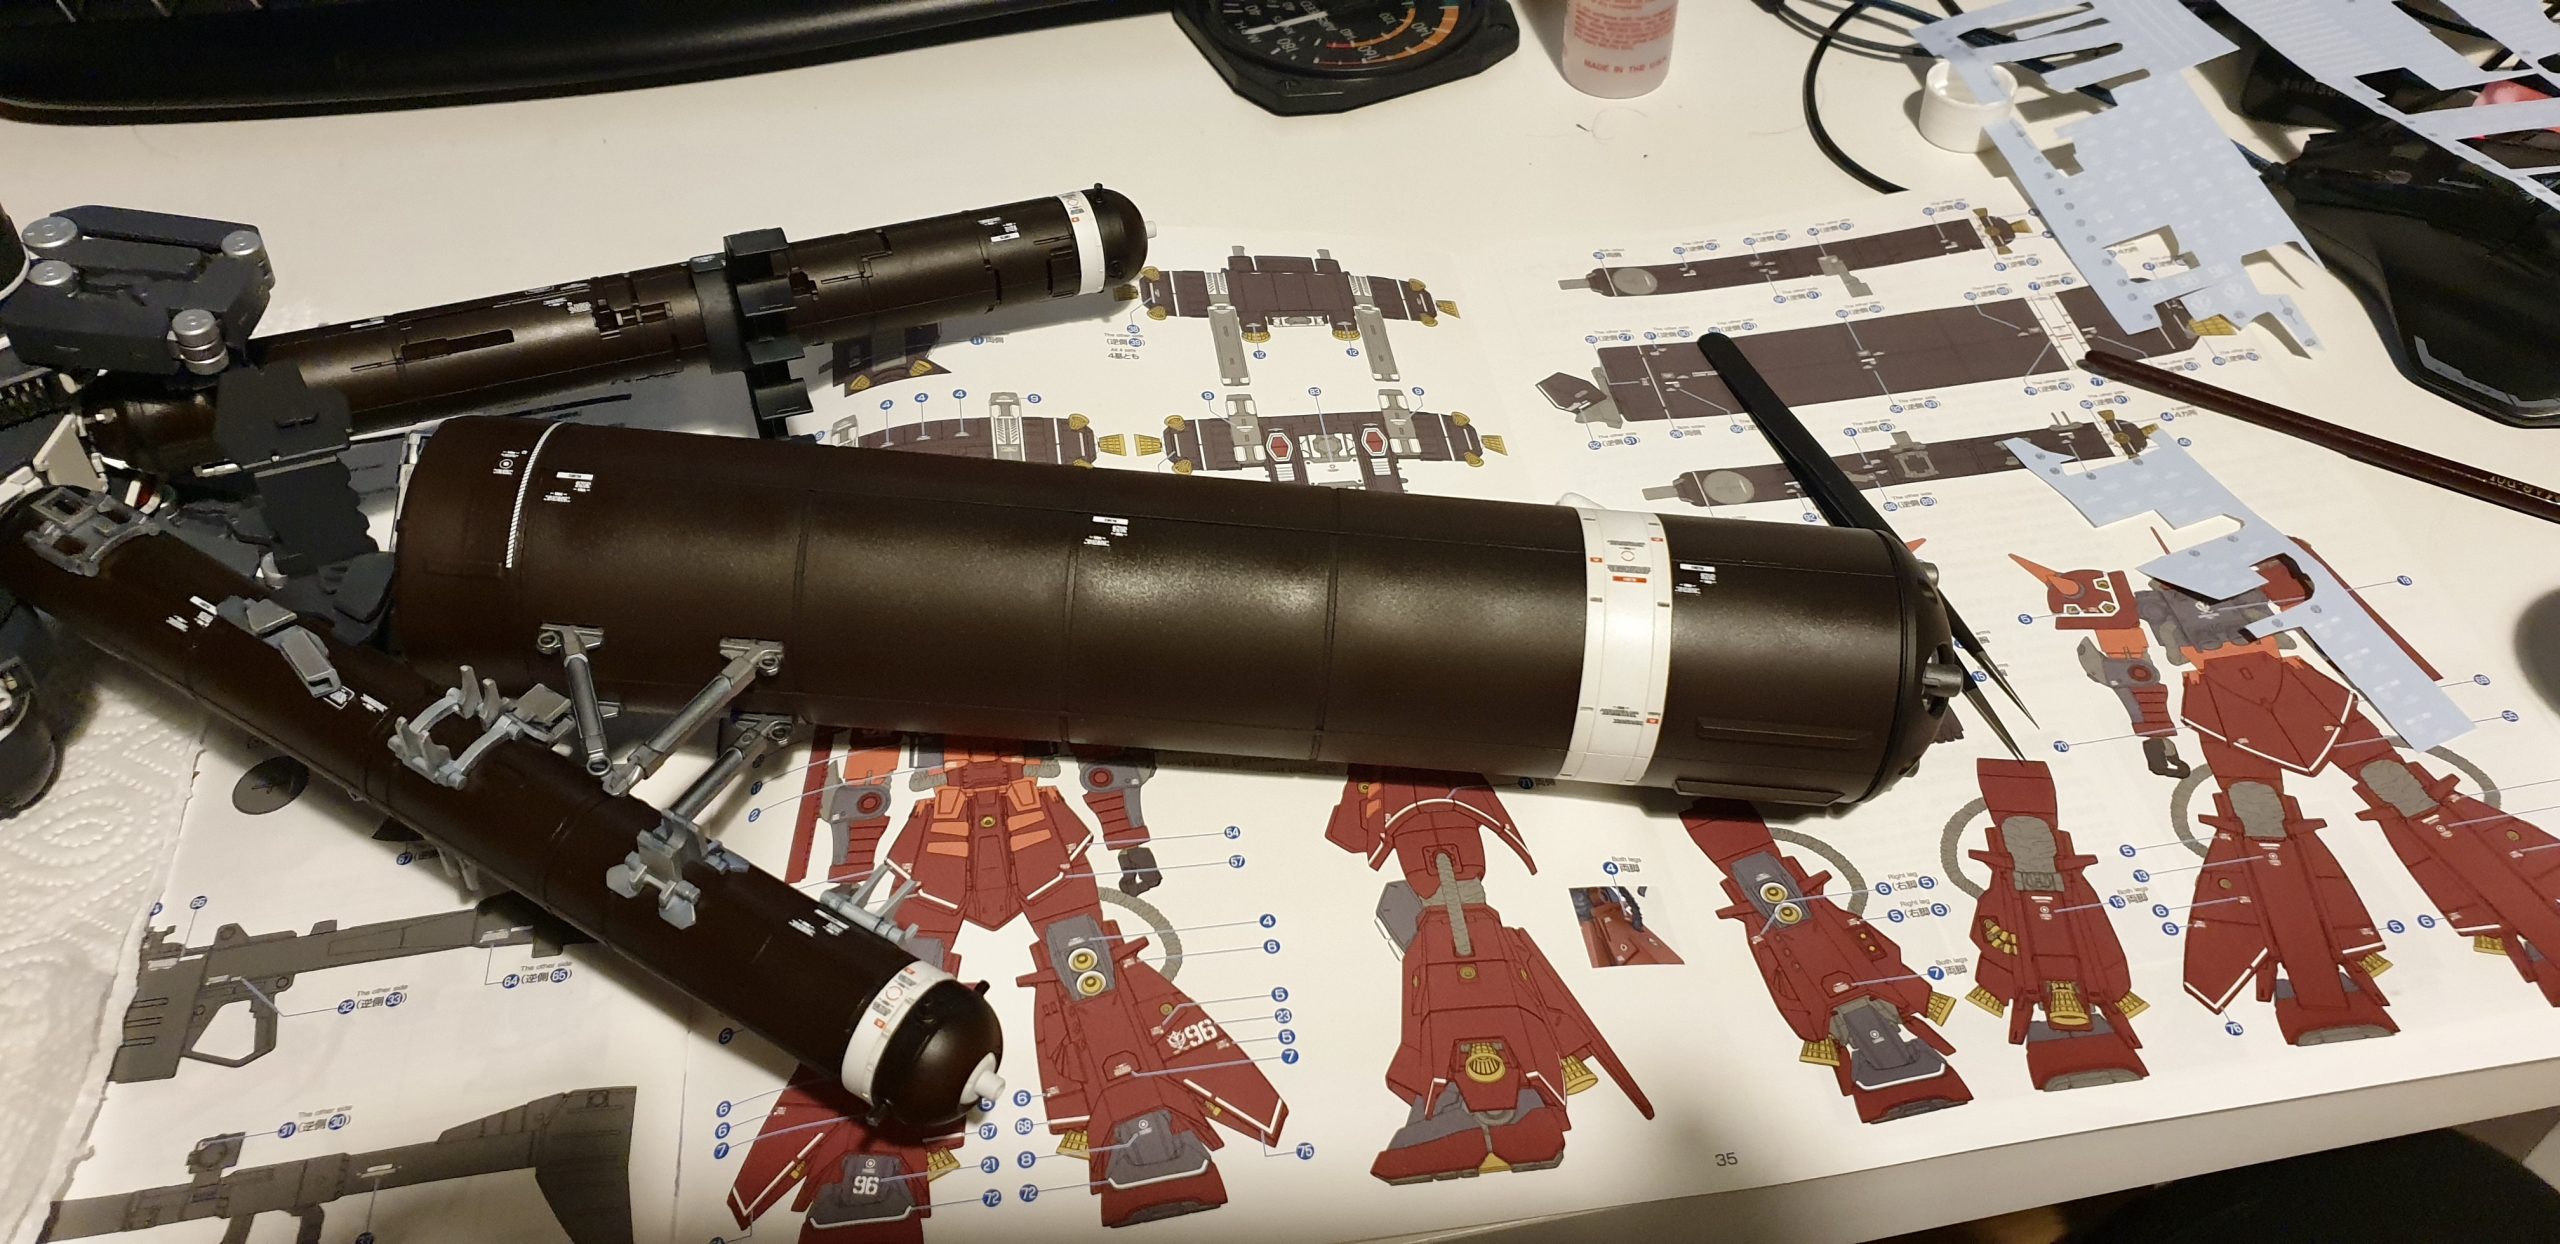
To get more of huge PsychoZaku’s bazooka – I decided to add few more details. Sensor device got new optics…
Slowely but fairly – handpainted details to depict signs of use of mobile suit – at this stage its hard…
For top coat I used VallejoMecha Matt Varnish – Long story short: model was disassembled… and matte varnish applied 🙂
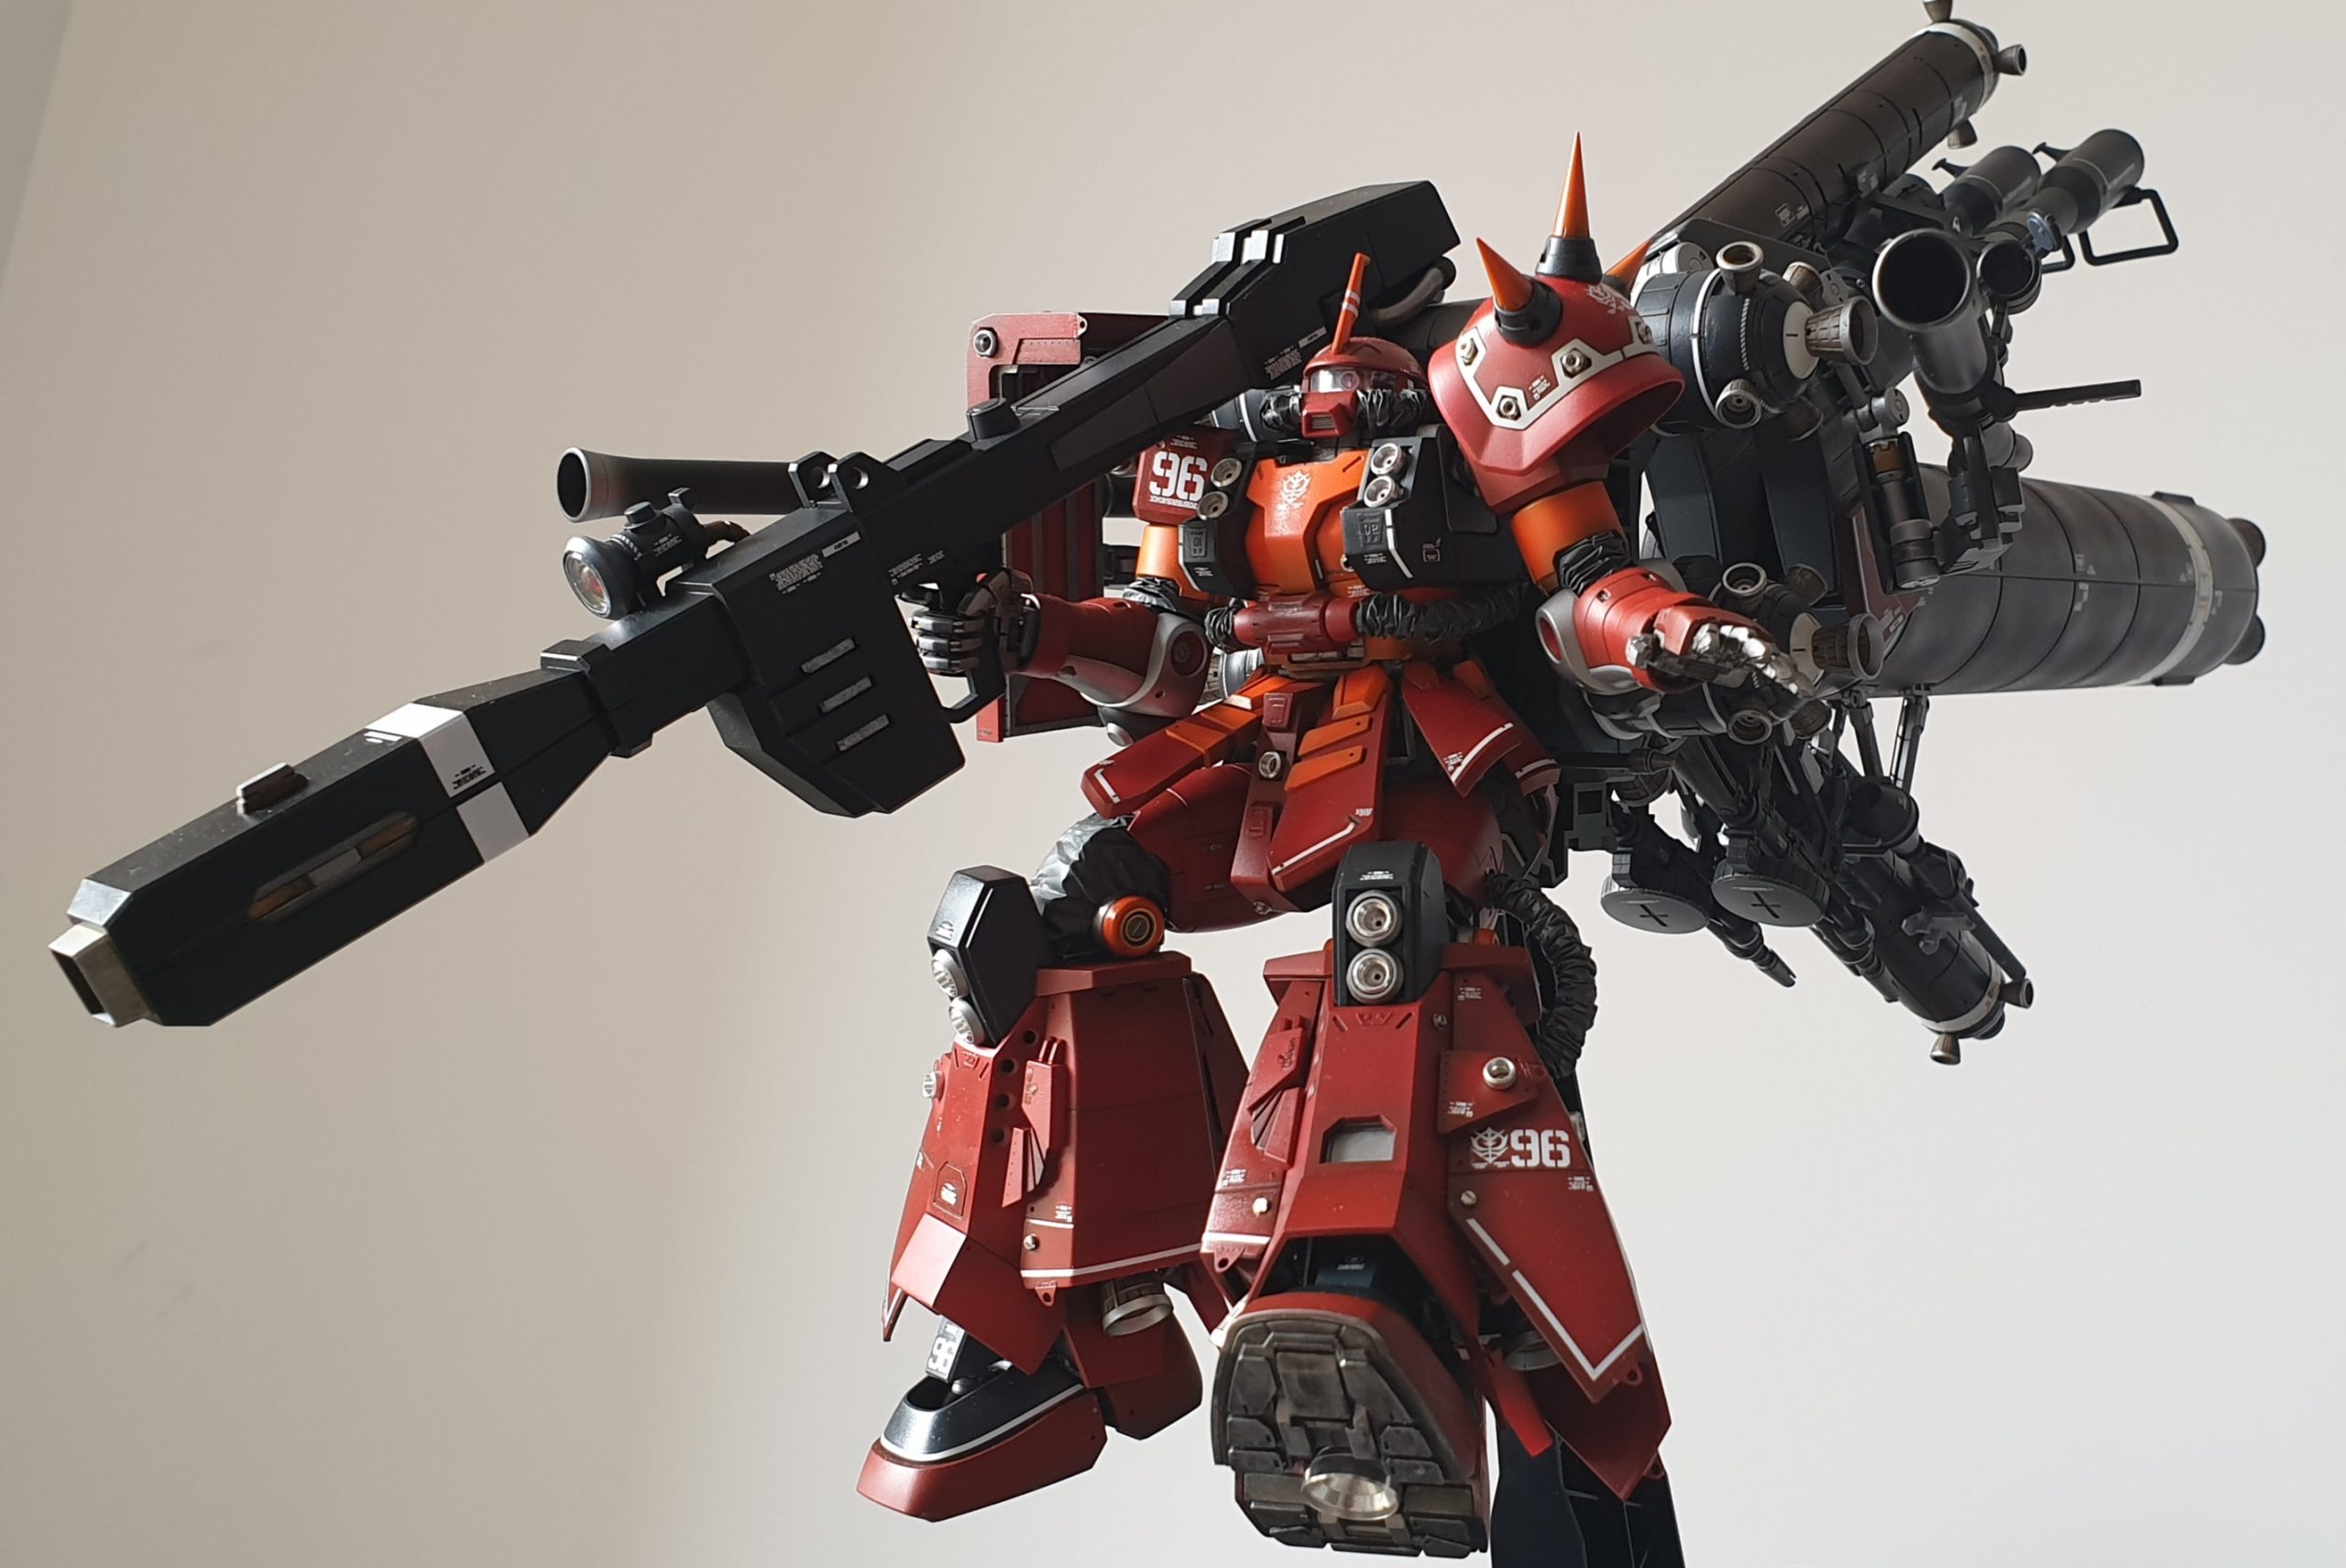
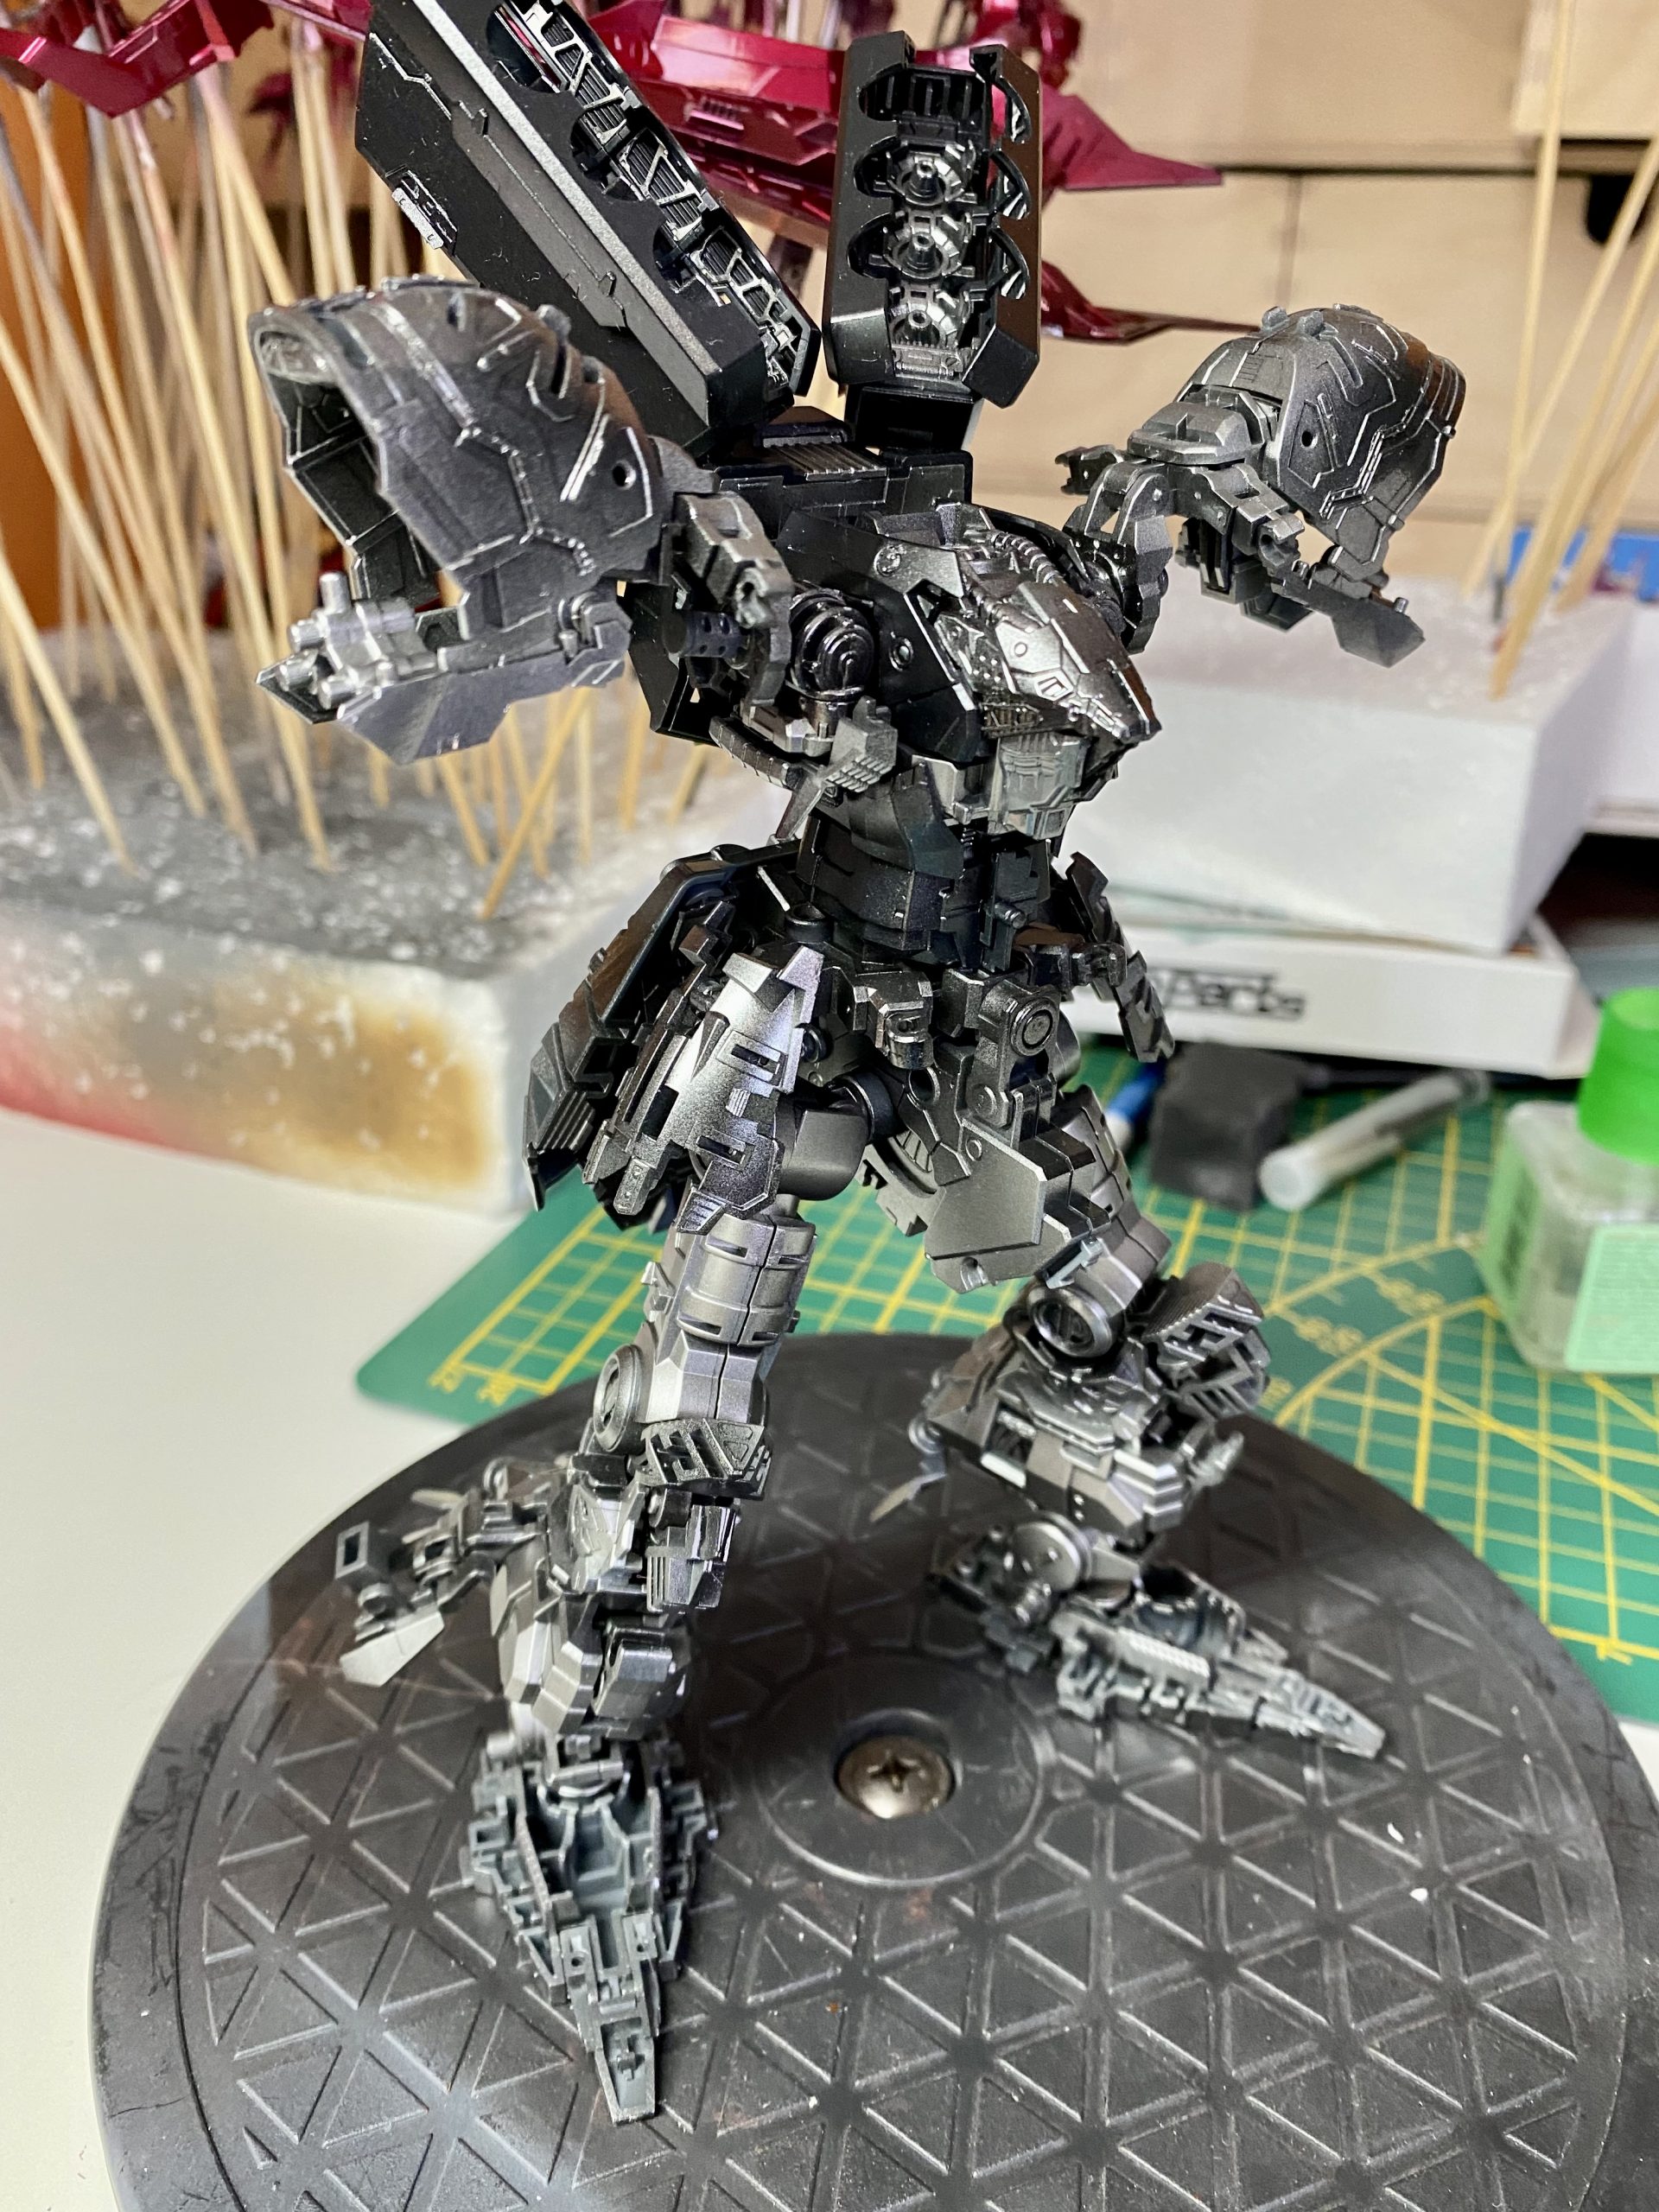
It looks like all parts are in place! This piece is so impressive – I already love it!
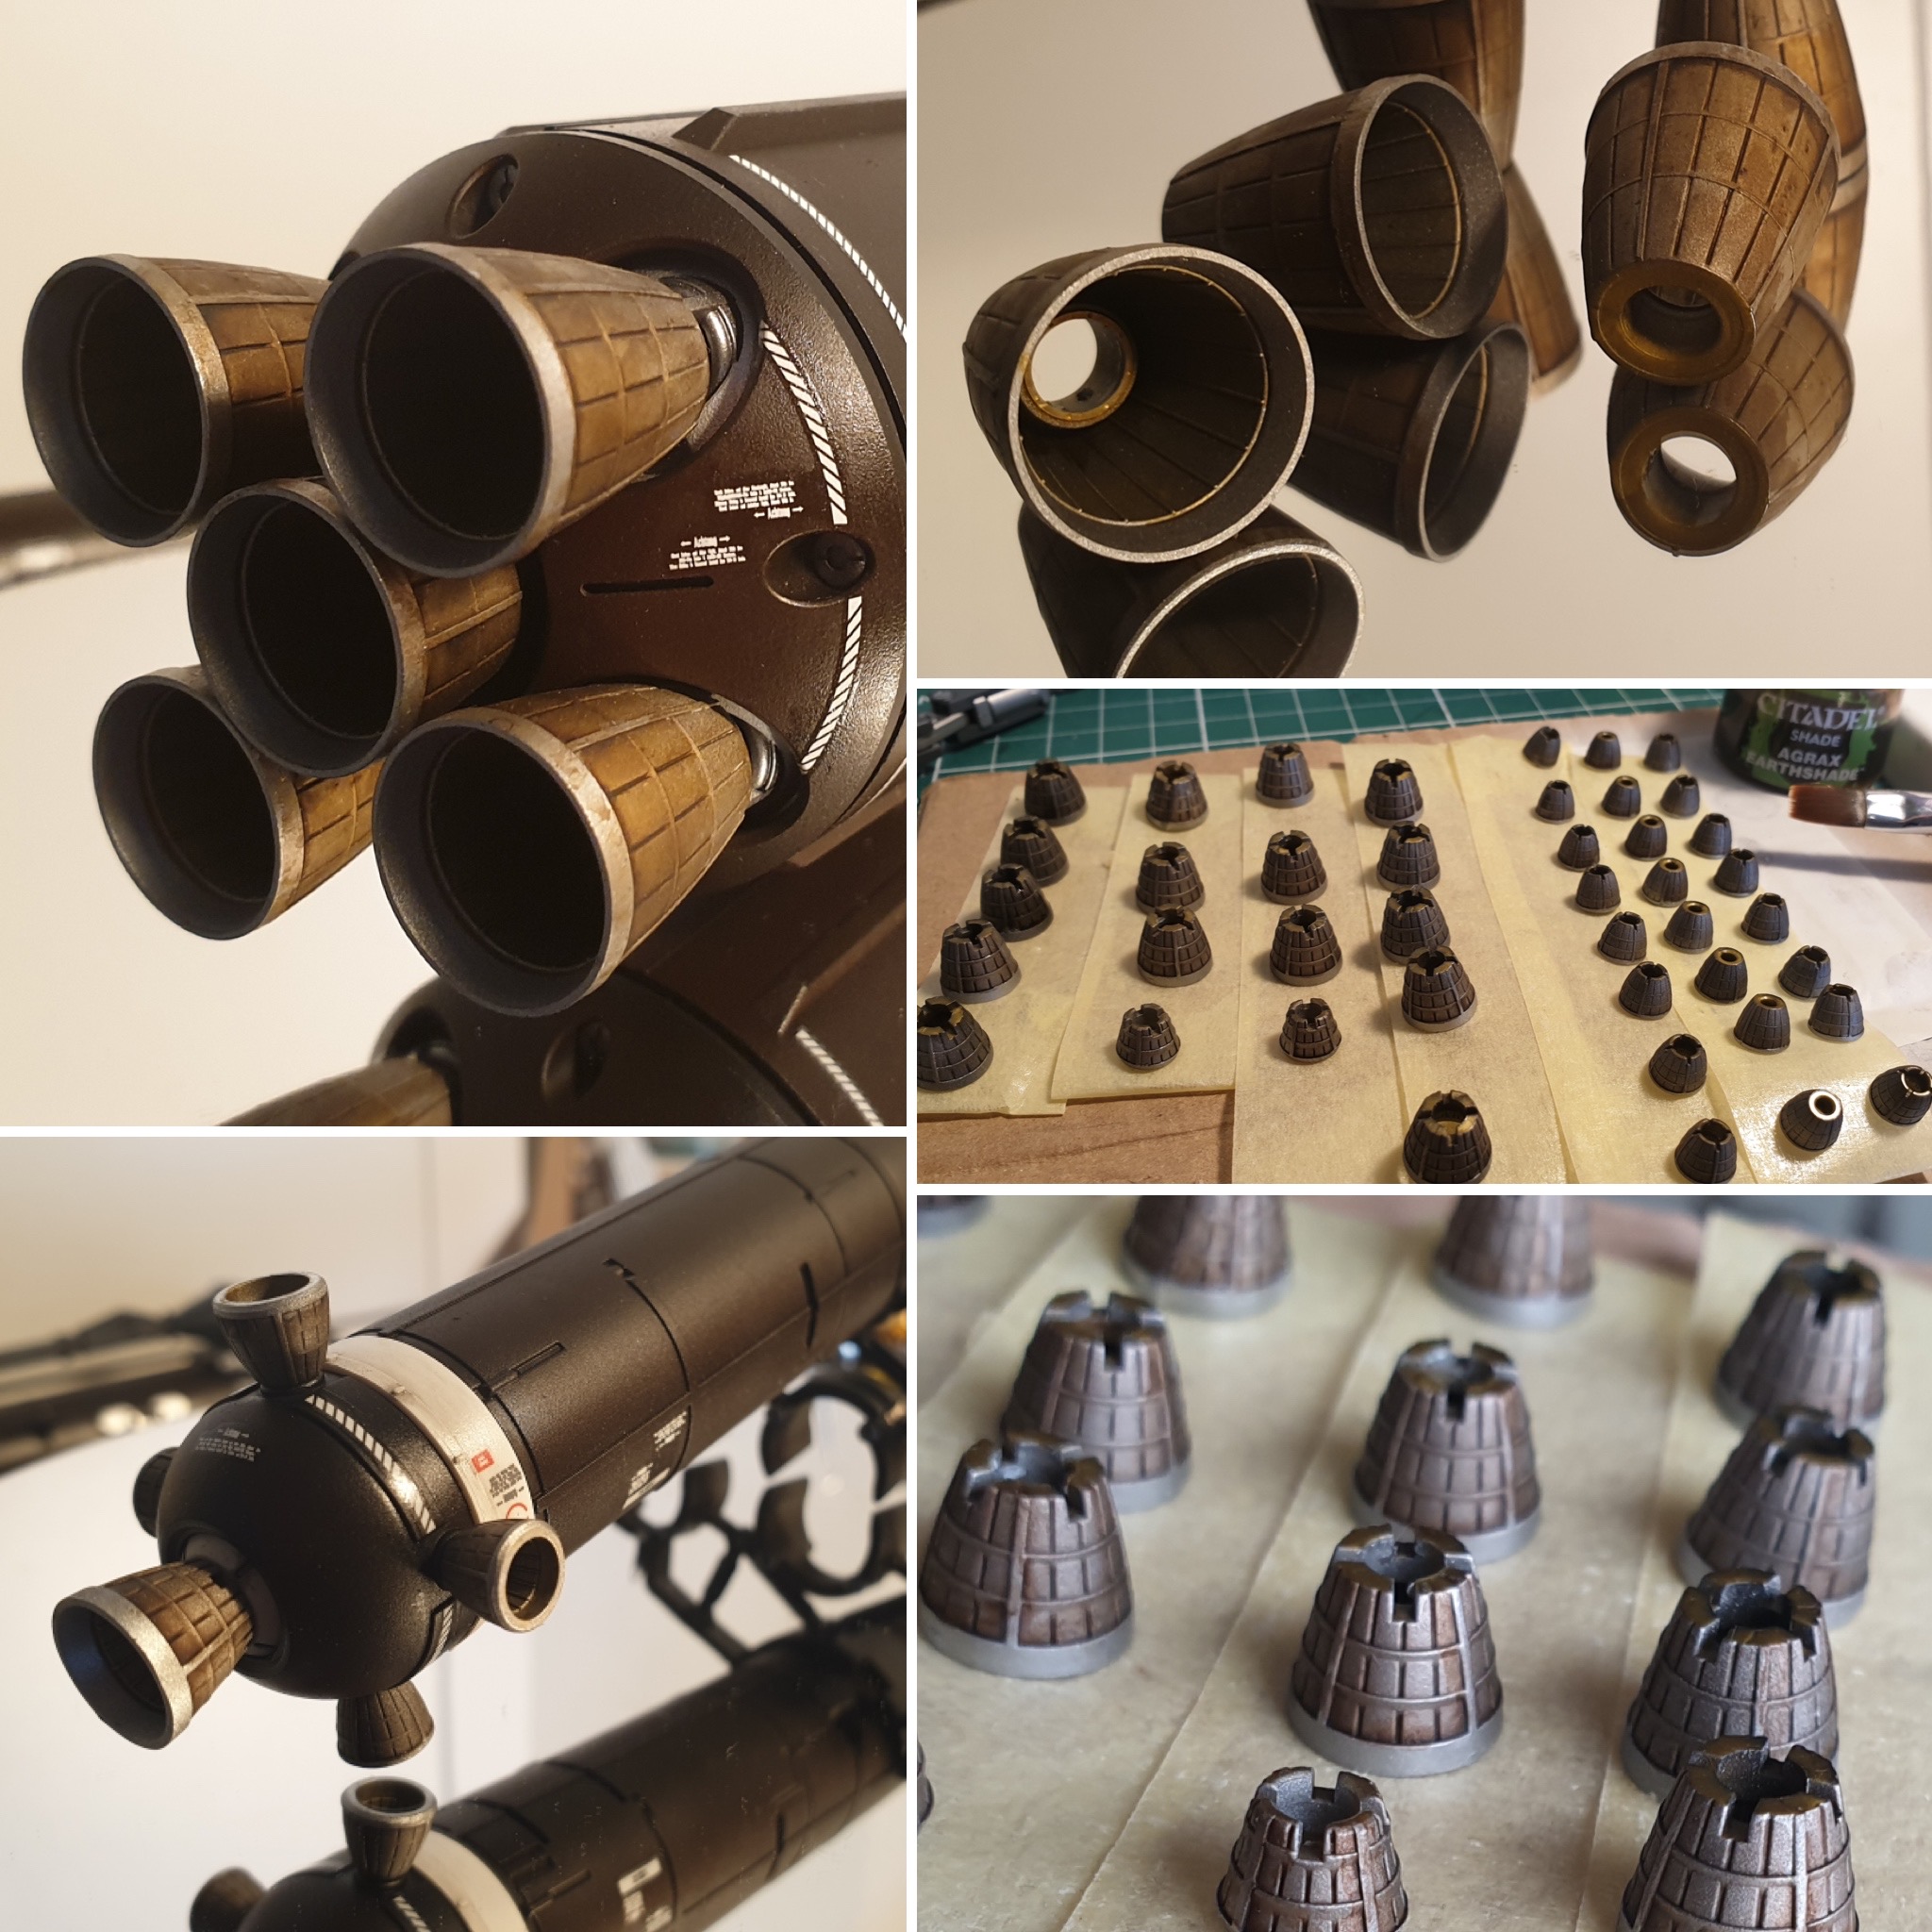
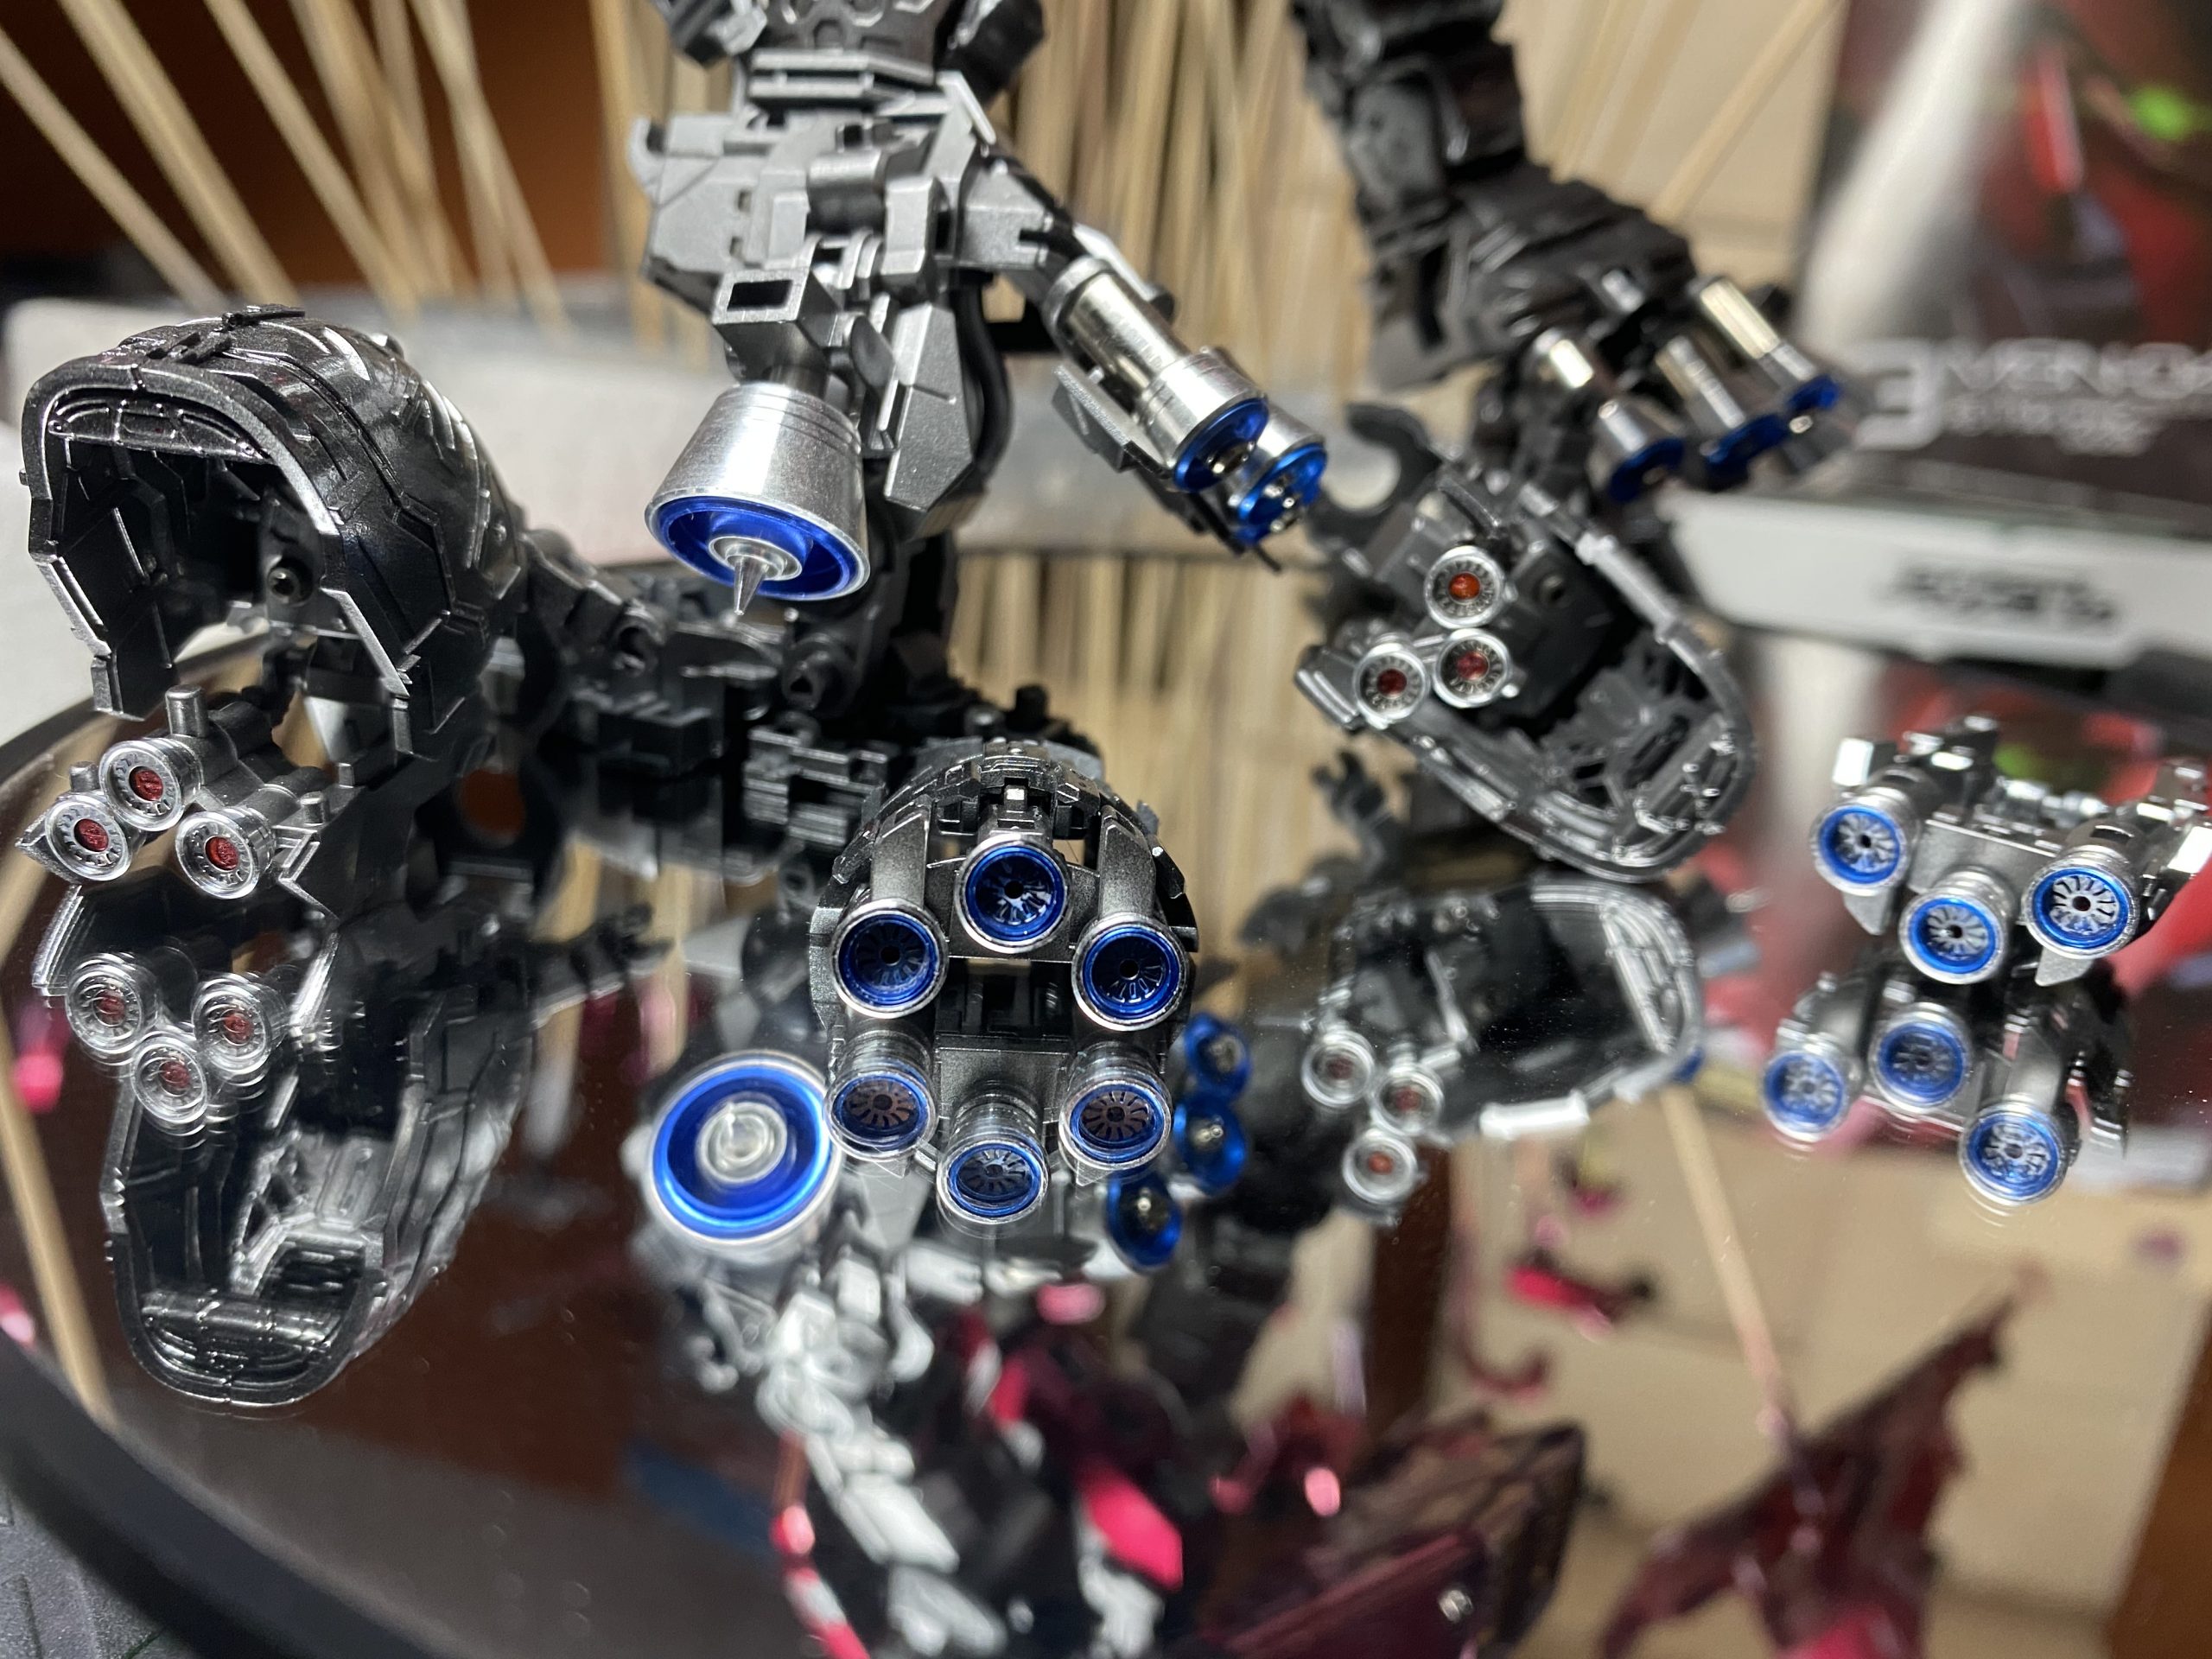
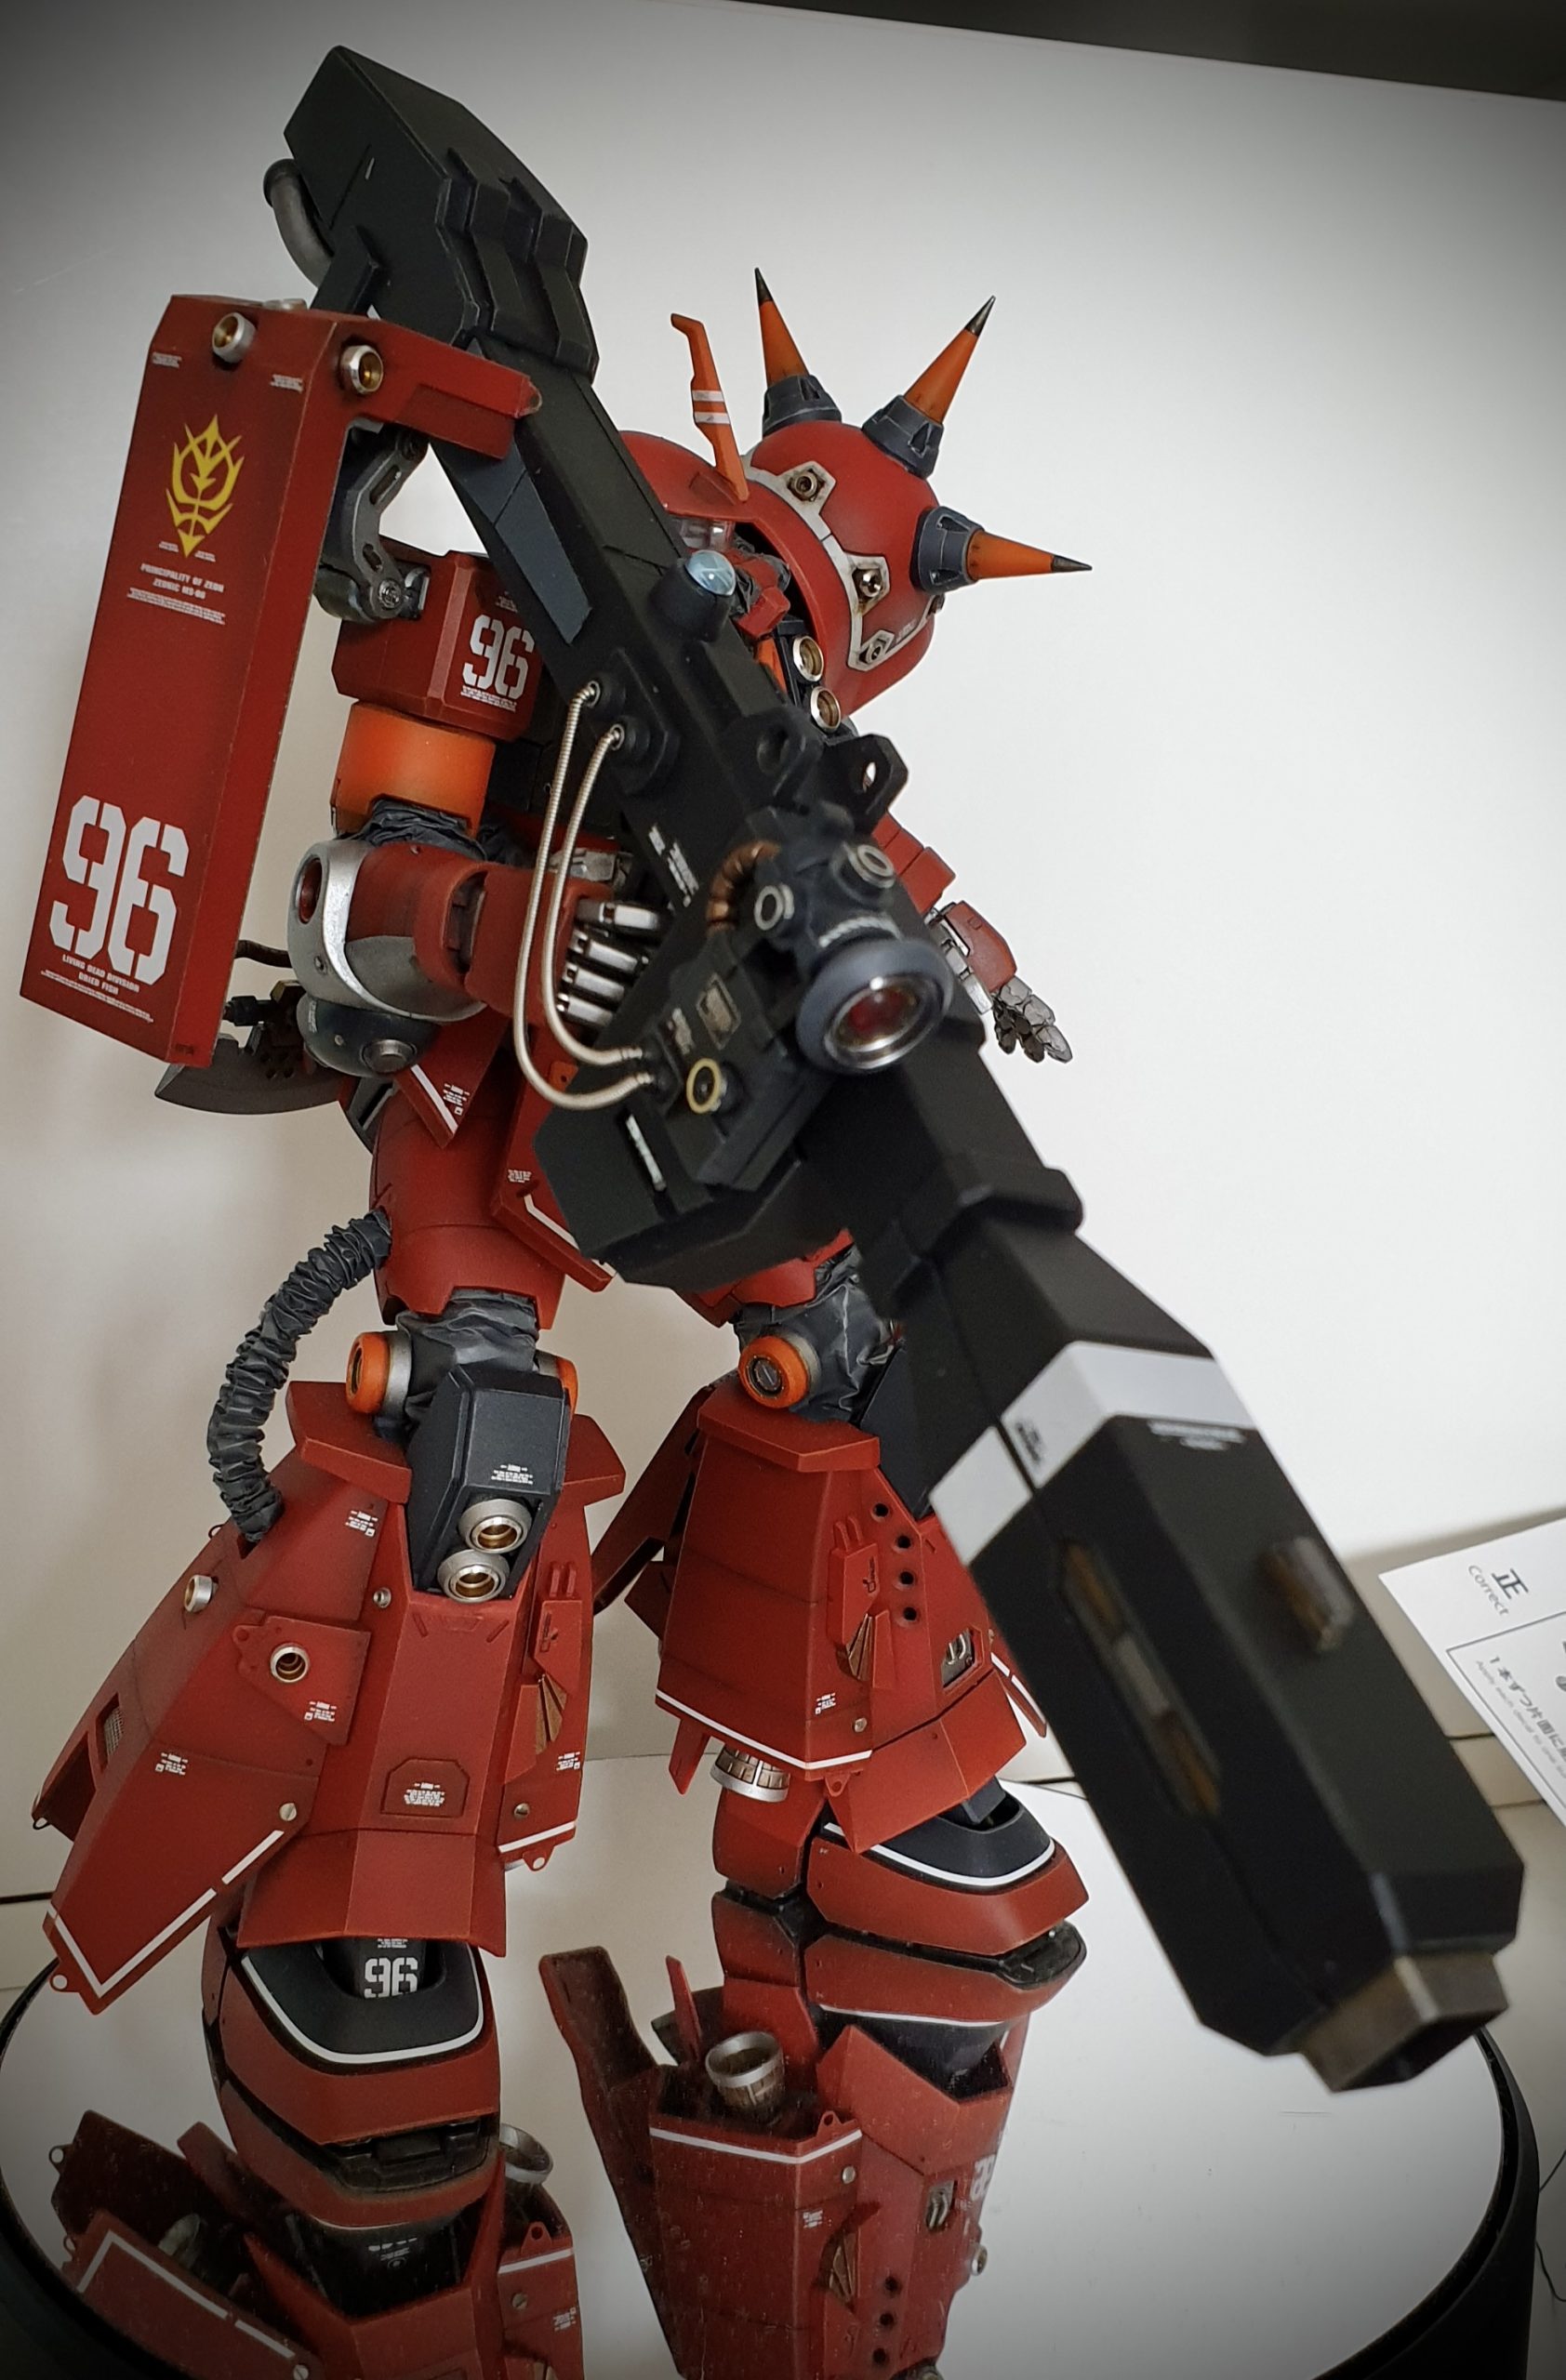
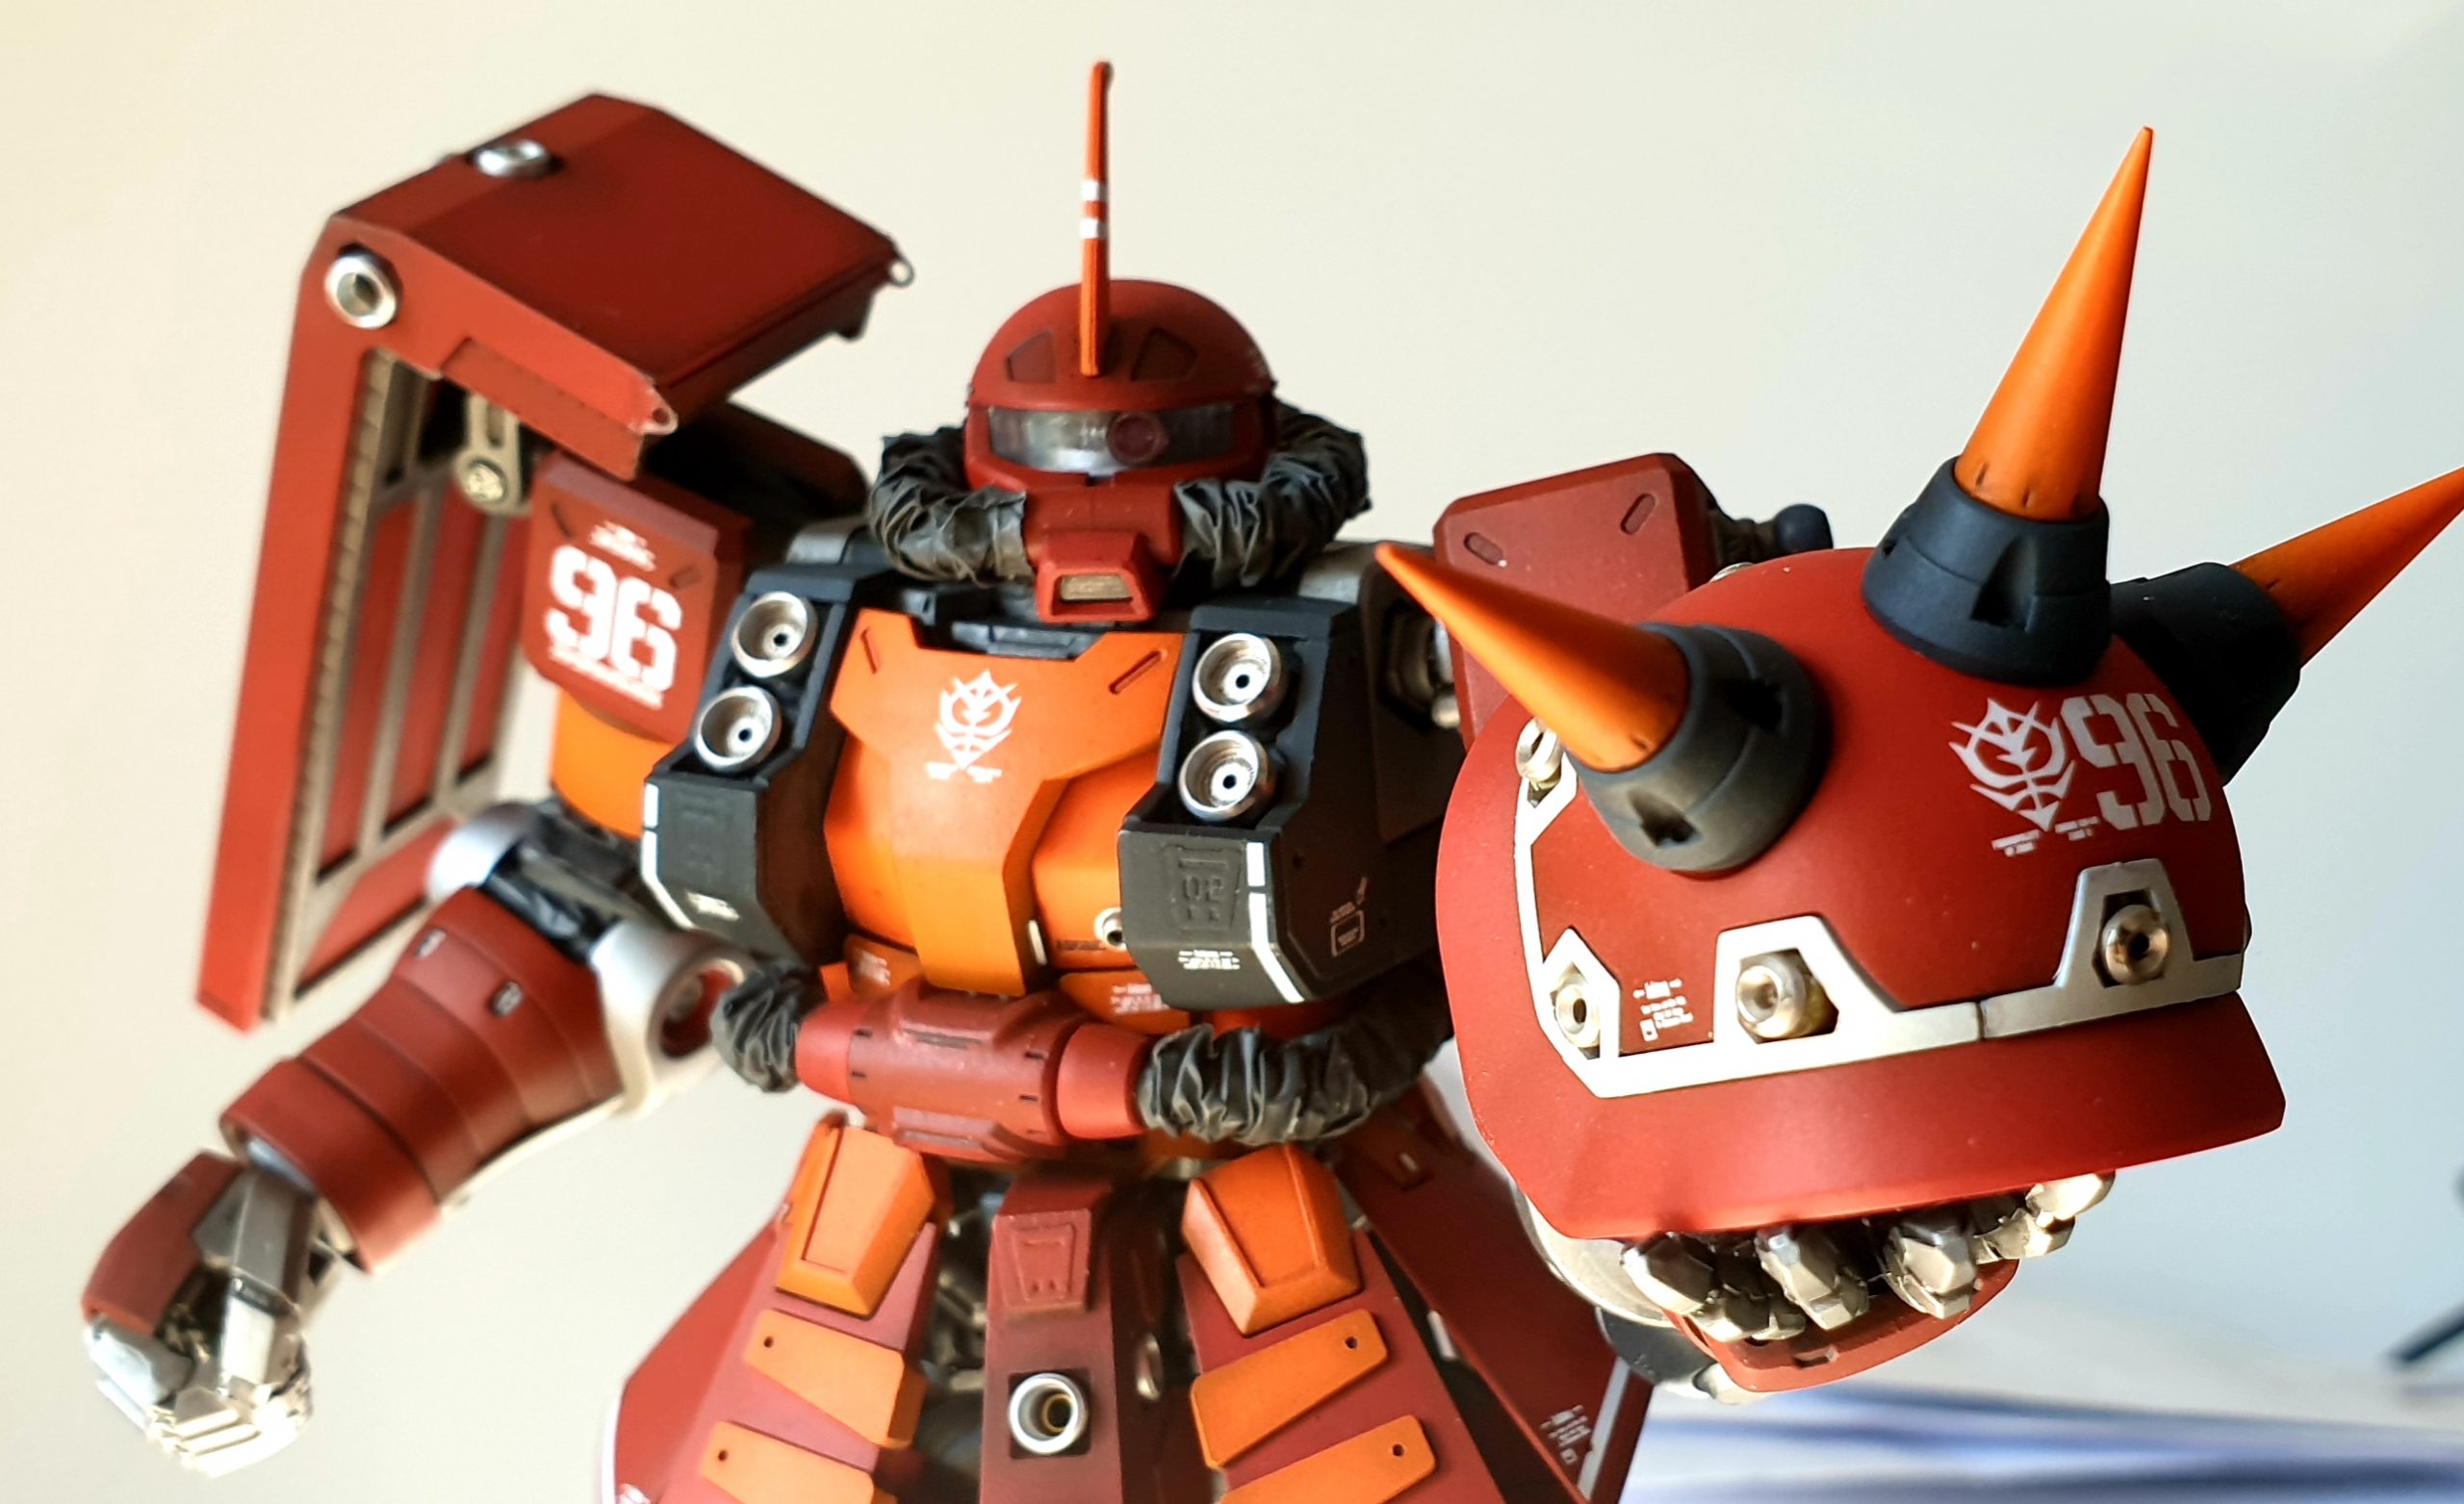
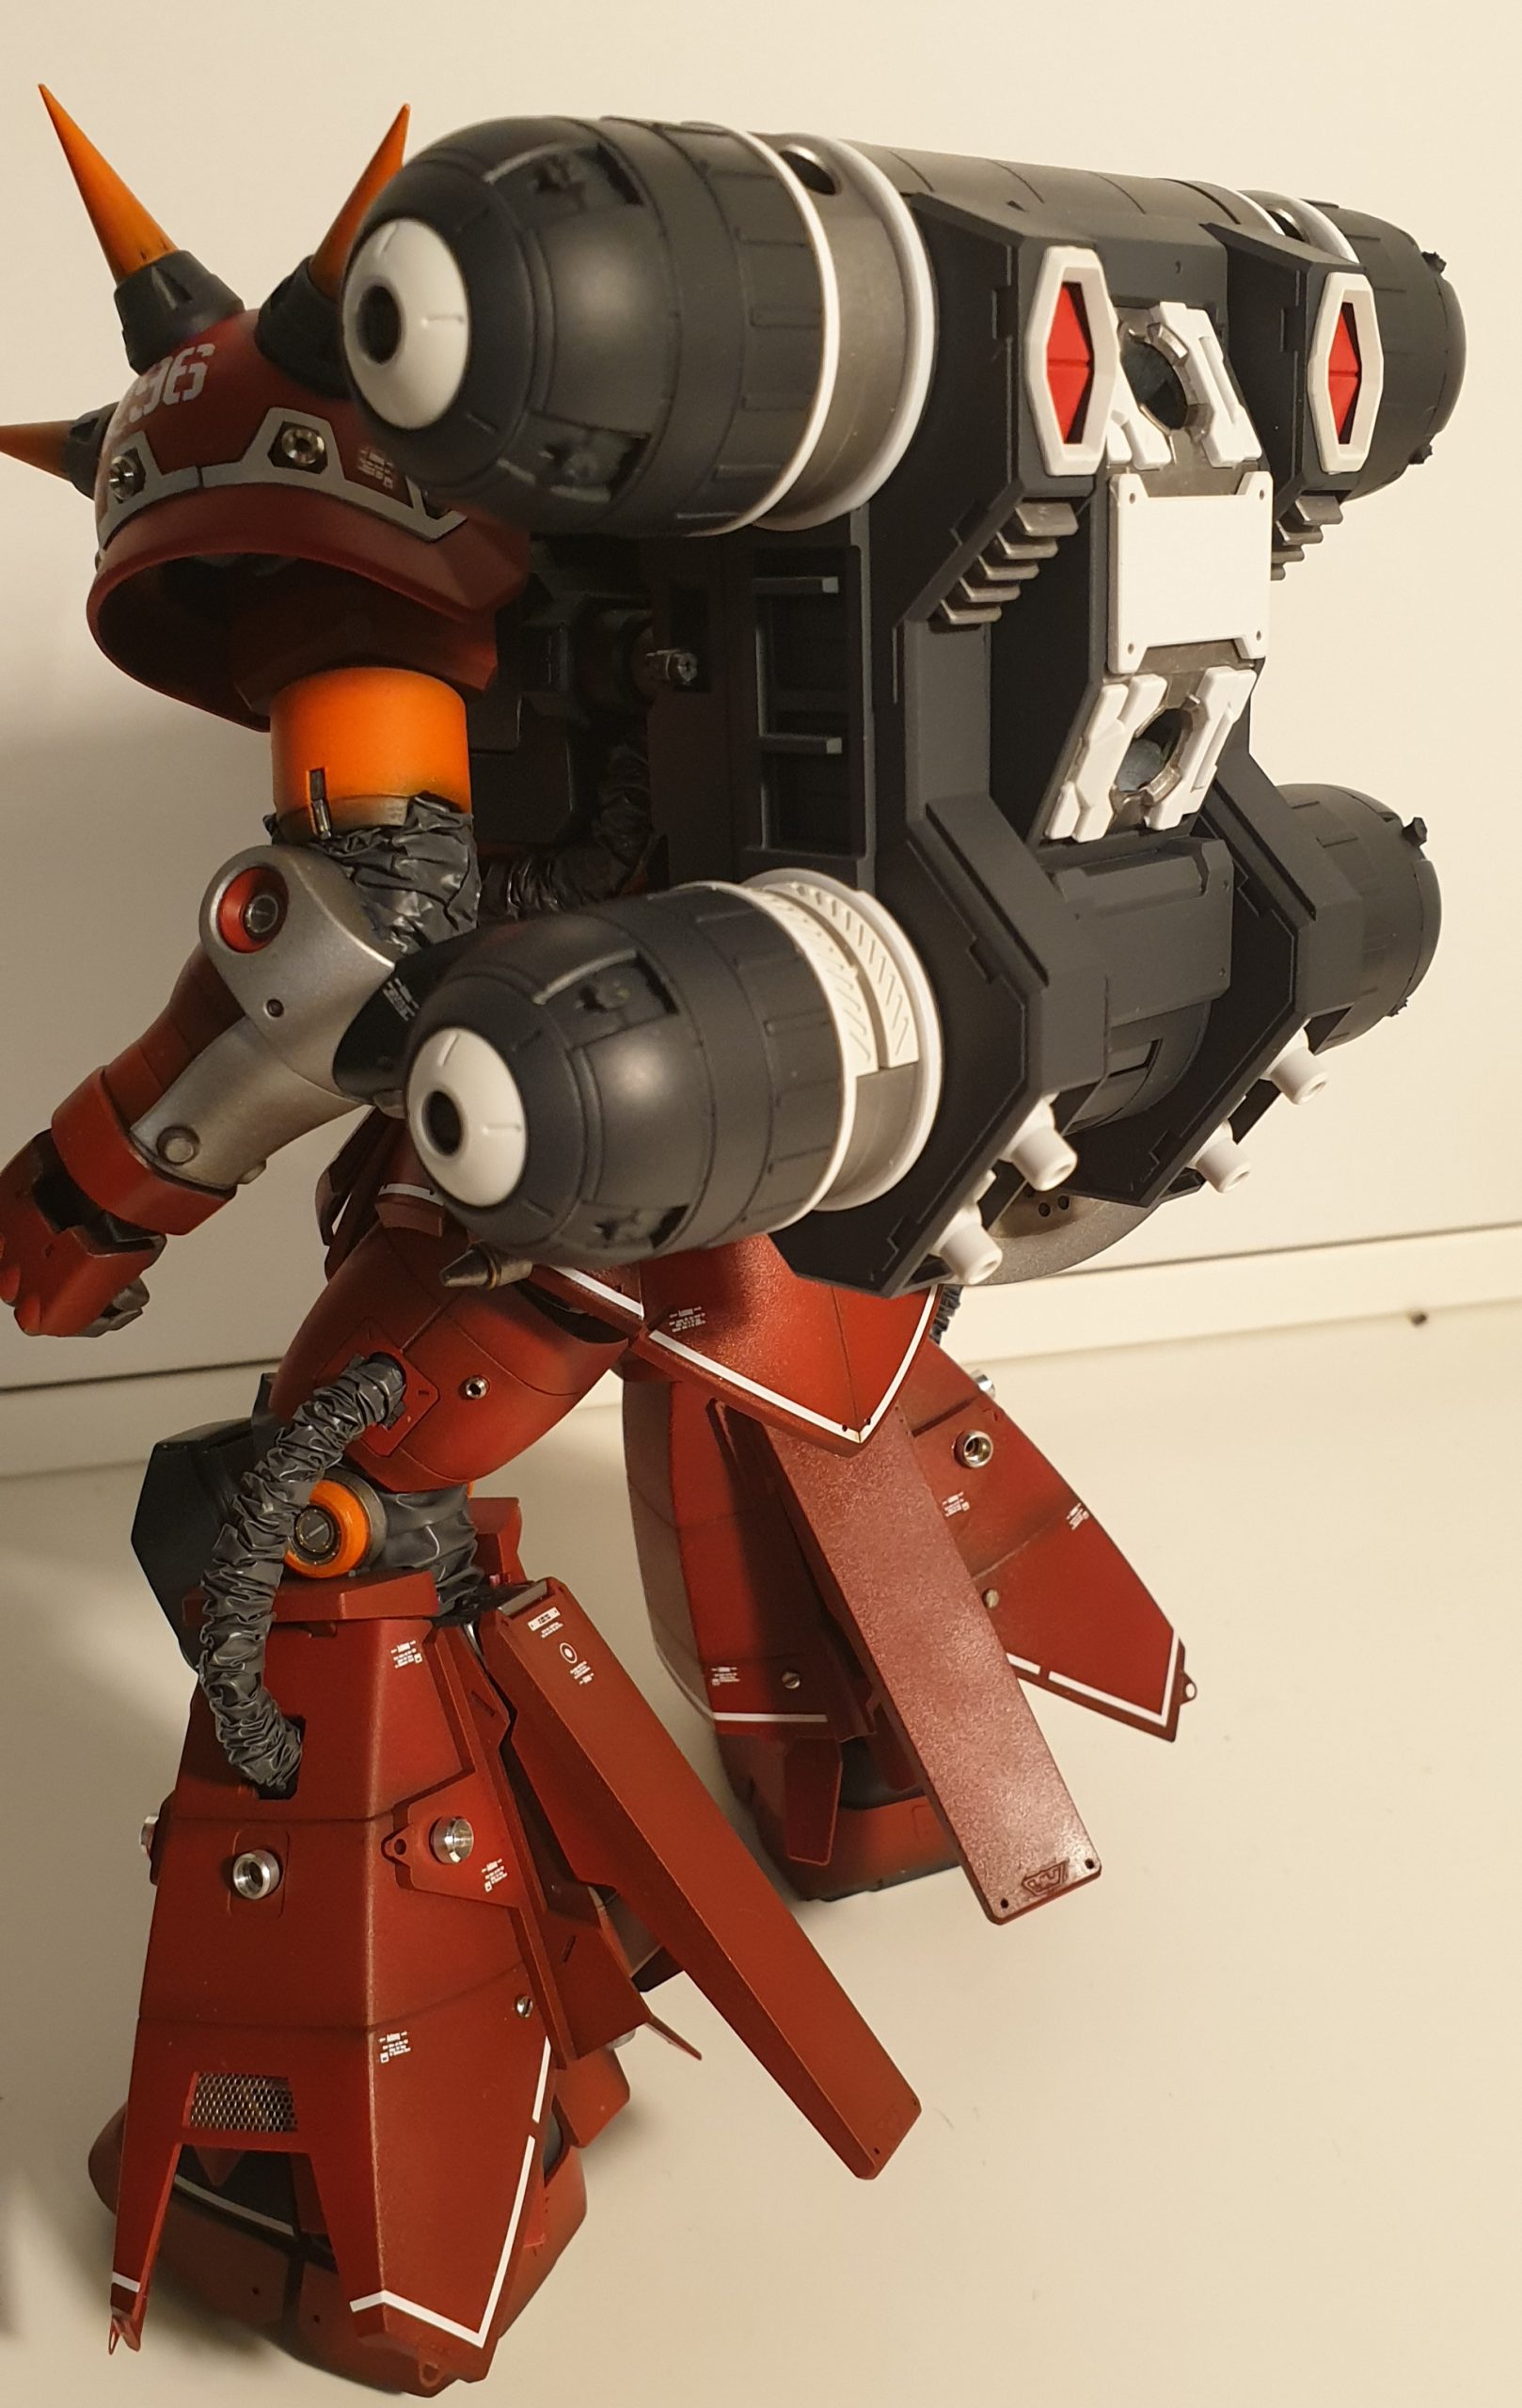
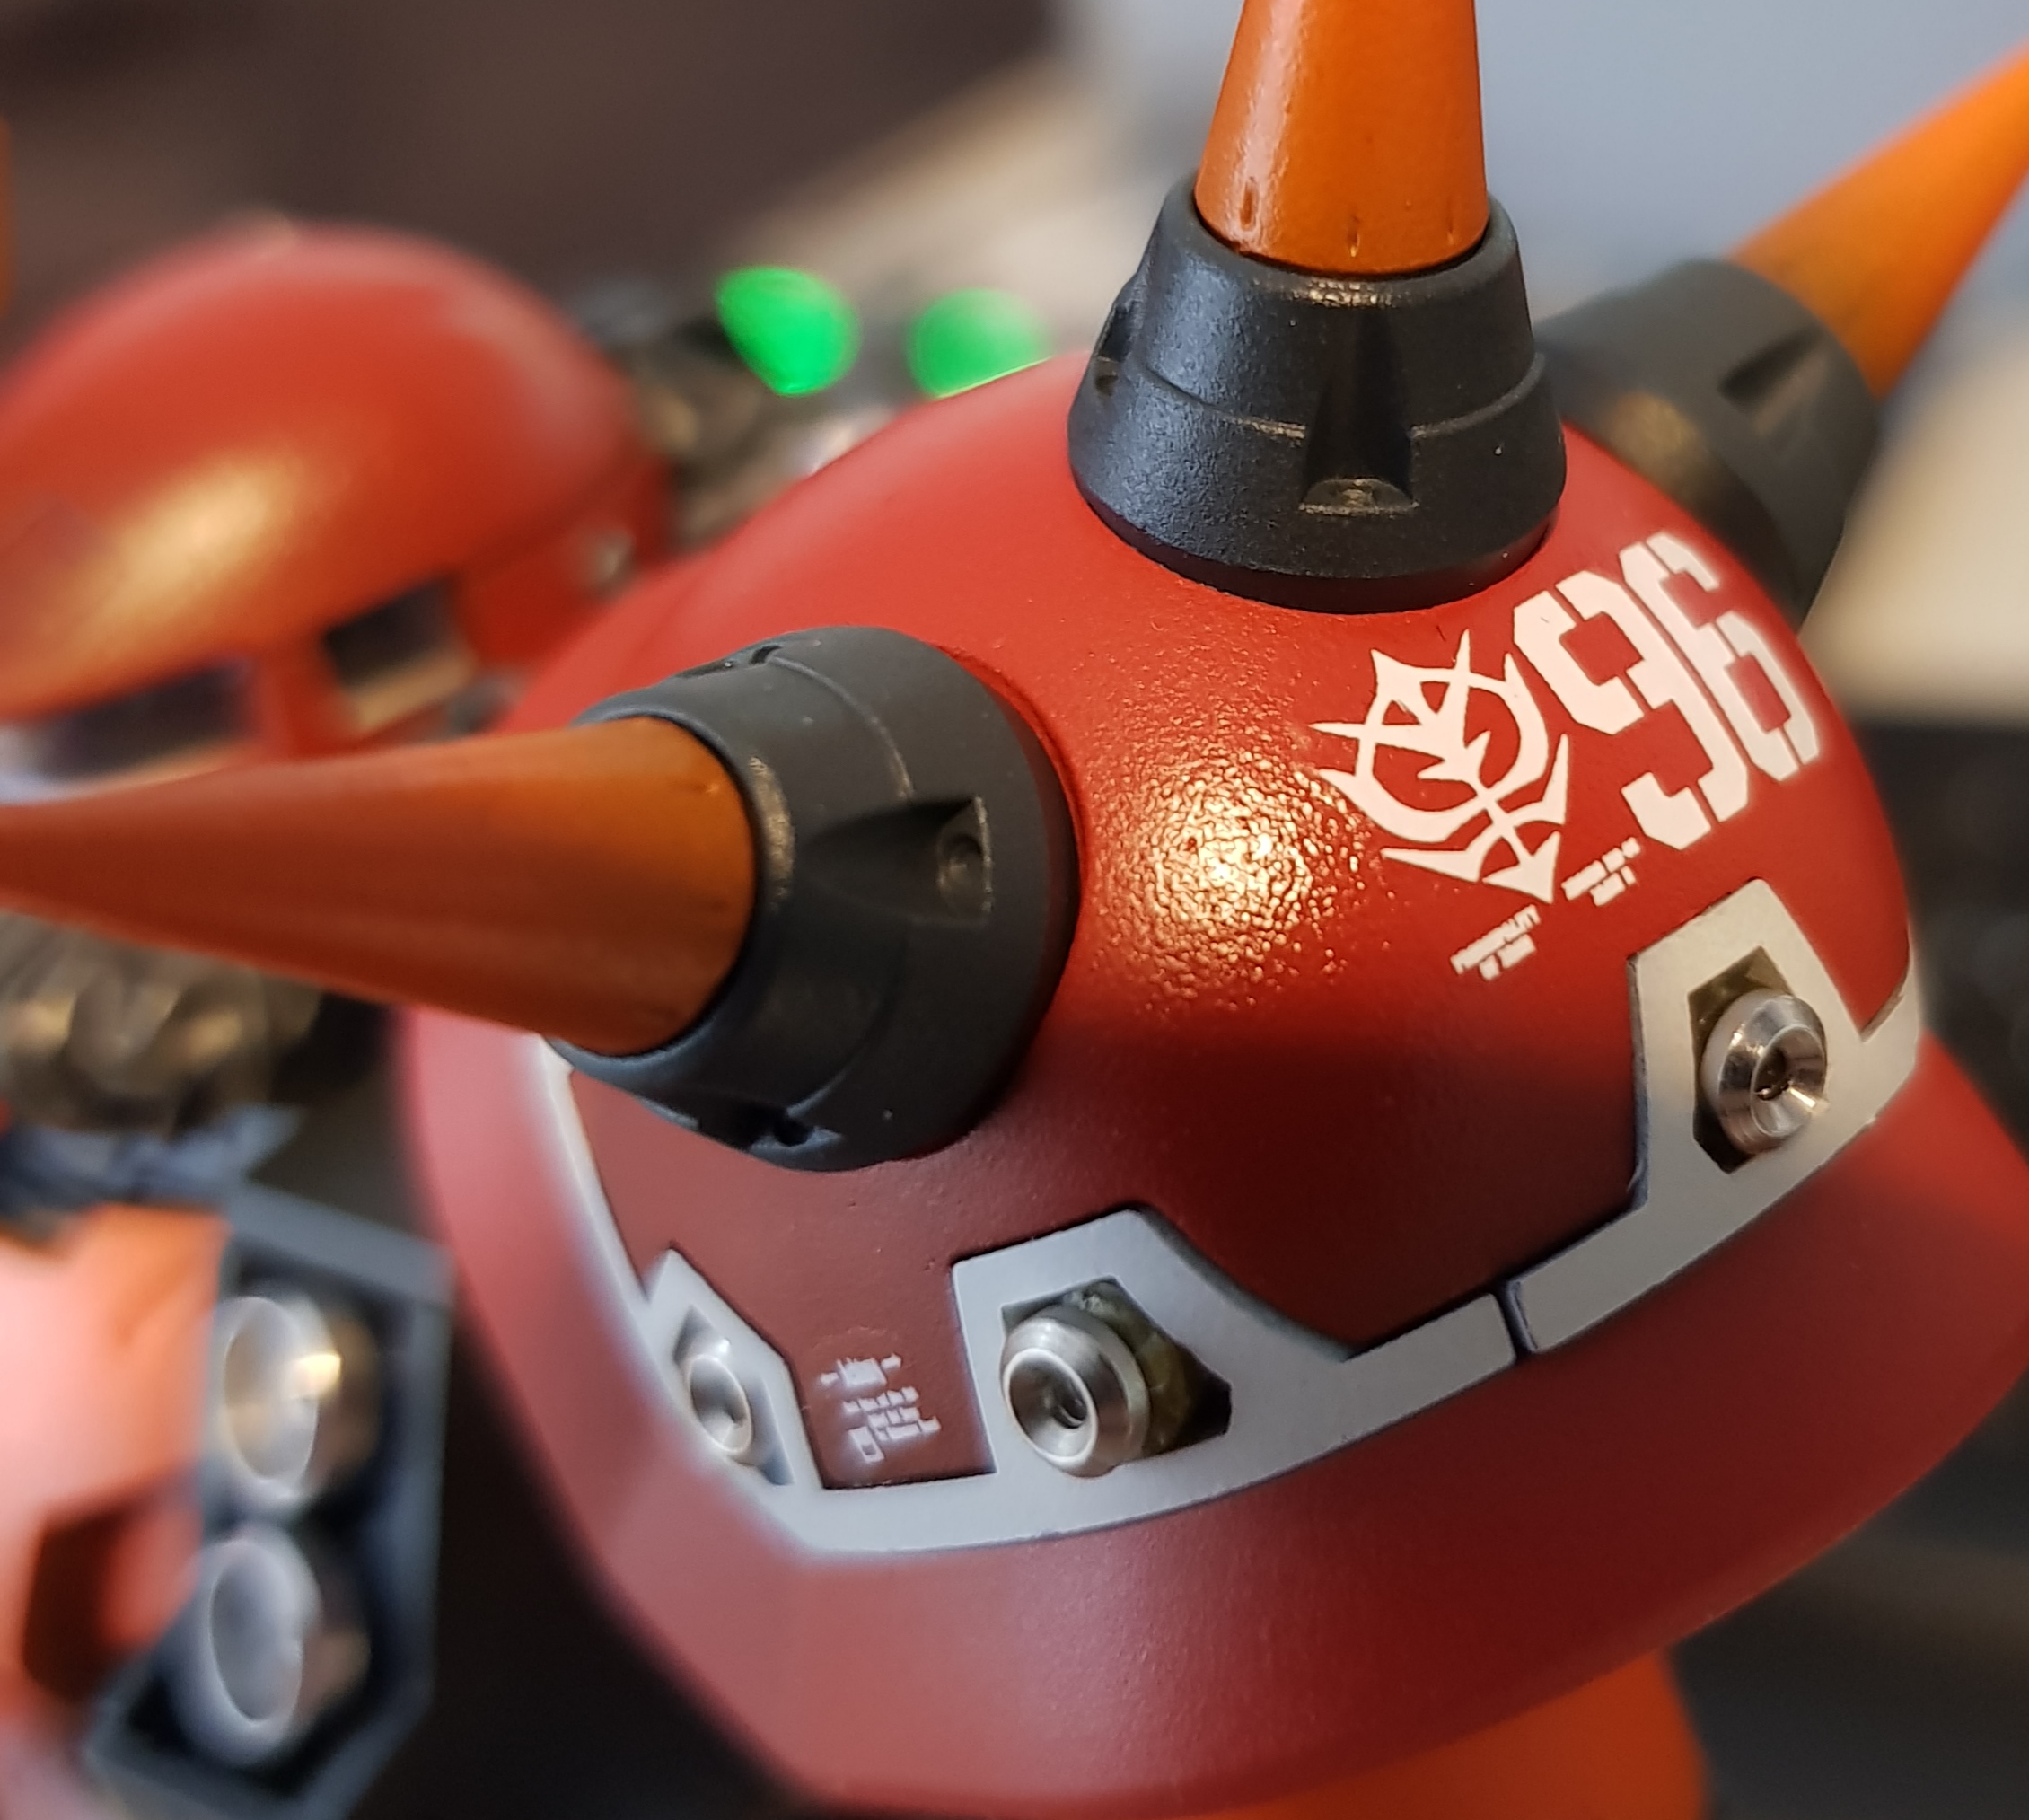
Wow – Psycho Zaku is on top in many topics – one of is number of thrusters – MS itself,…
Small things matters – technical arms are fine mechanical parts of PsychoZaku design – fully articulated and adjustable – of…
In my eyes, weakest part of PsychoZaku MG kit are hands – palms in fact… Decided to replace them with…
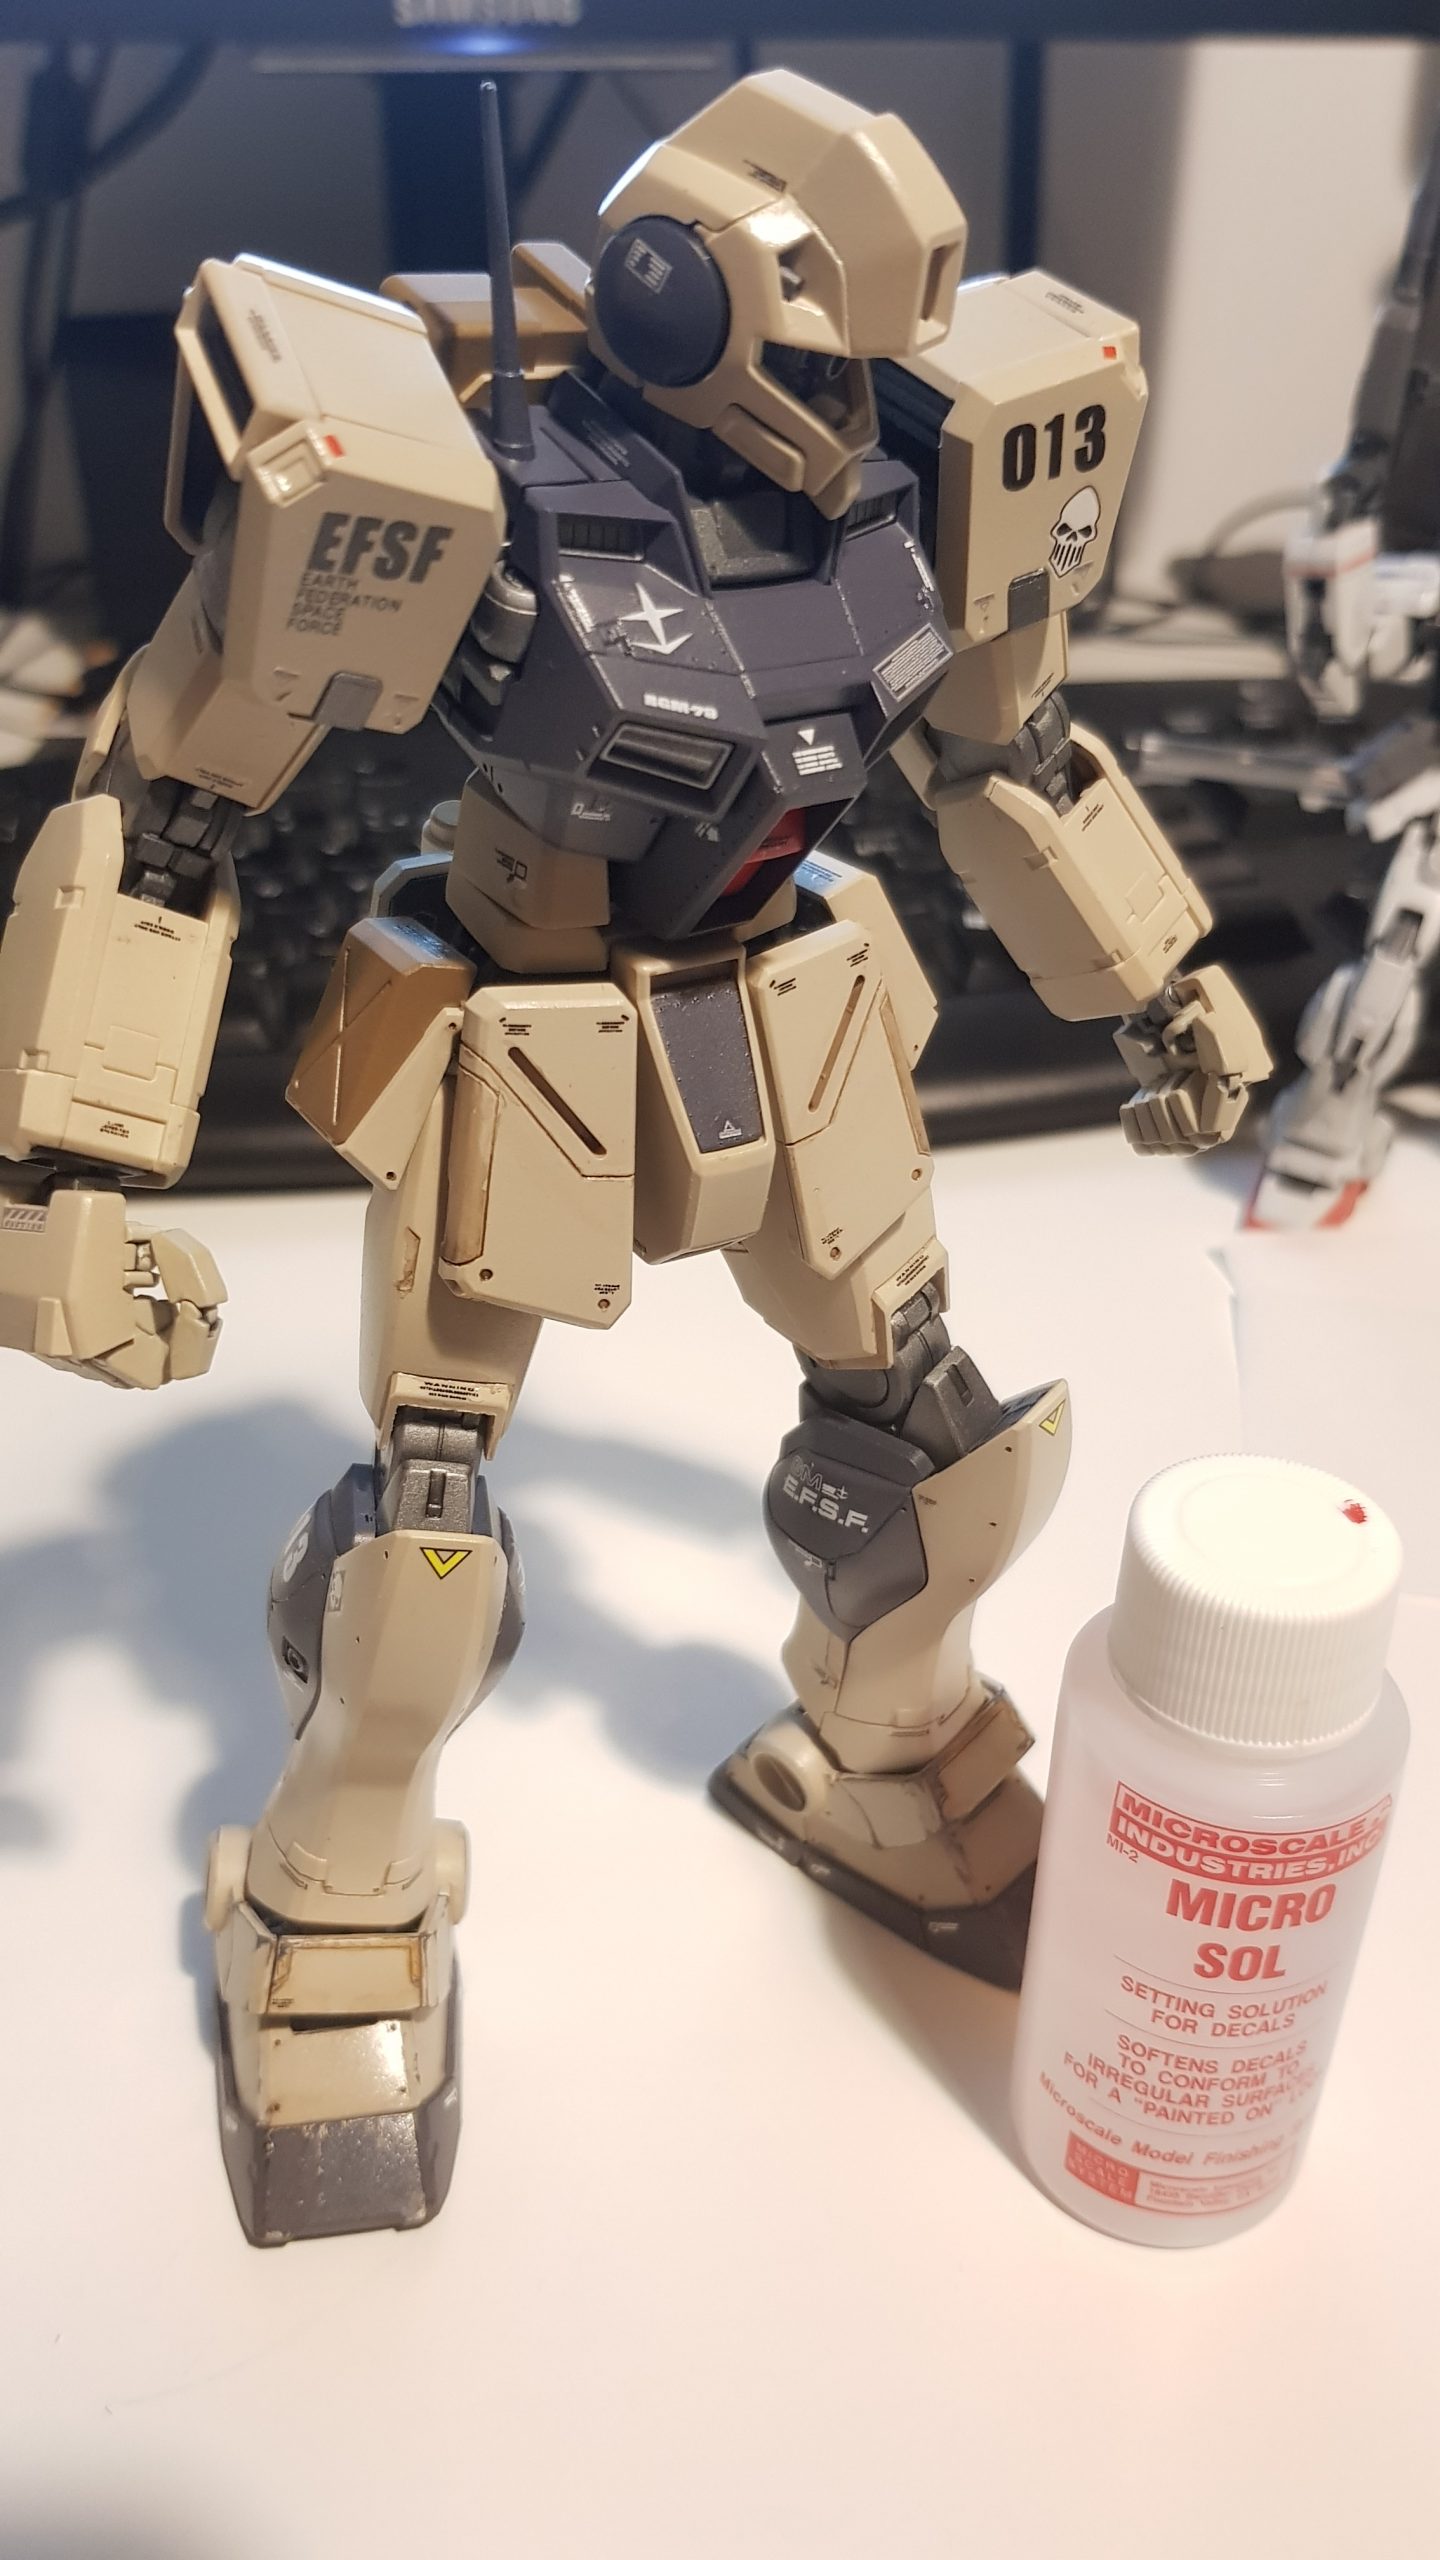
Decals went very well – based on manual, MicroSol and Bandai decals provides great combo for easy going application. I’m…
Backpack parts were black primed (Vallejo Mecha of course… – I still love those). And base colors were applied –…
Zaku returned to my workshop for more photo-etched/metal details application.
OOB assembly went fine, personally I hate multiplication of same parts and constructing them – for sure I can’t work…
24h curing time is enough for assembling parts together. A bit of superglue and all metal parts are in place…

Small details – I love small details! Added photo etched ring to an eye – looks perfect!
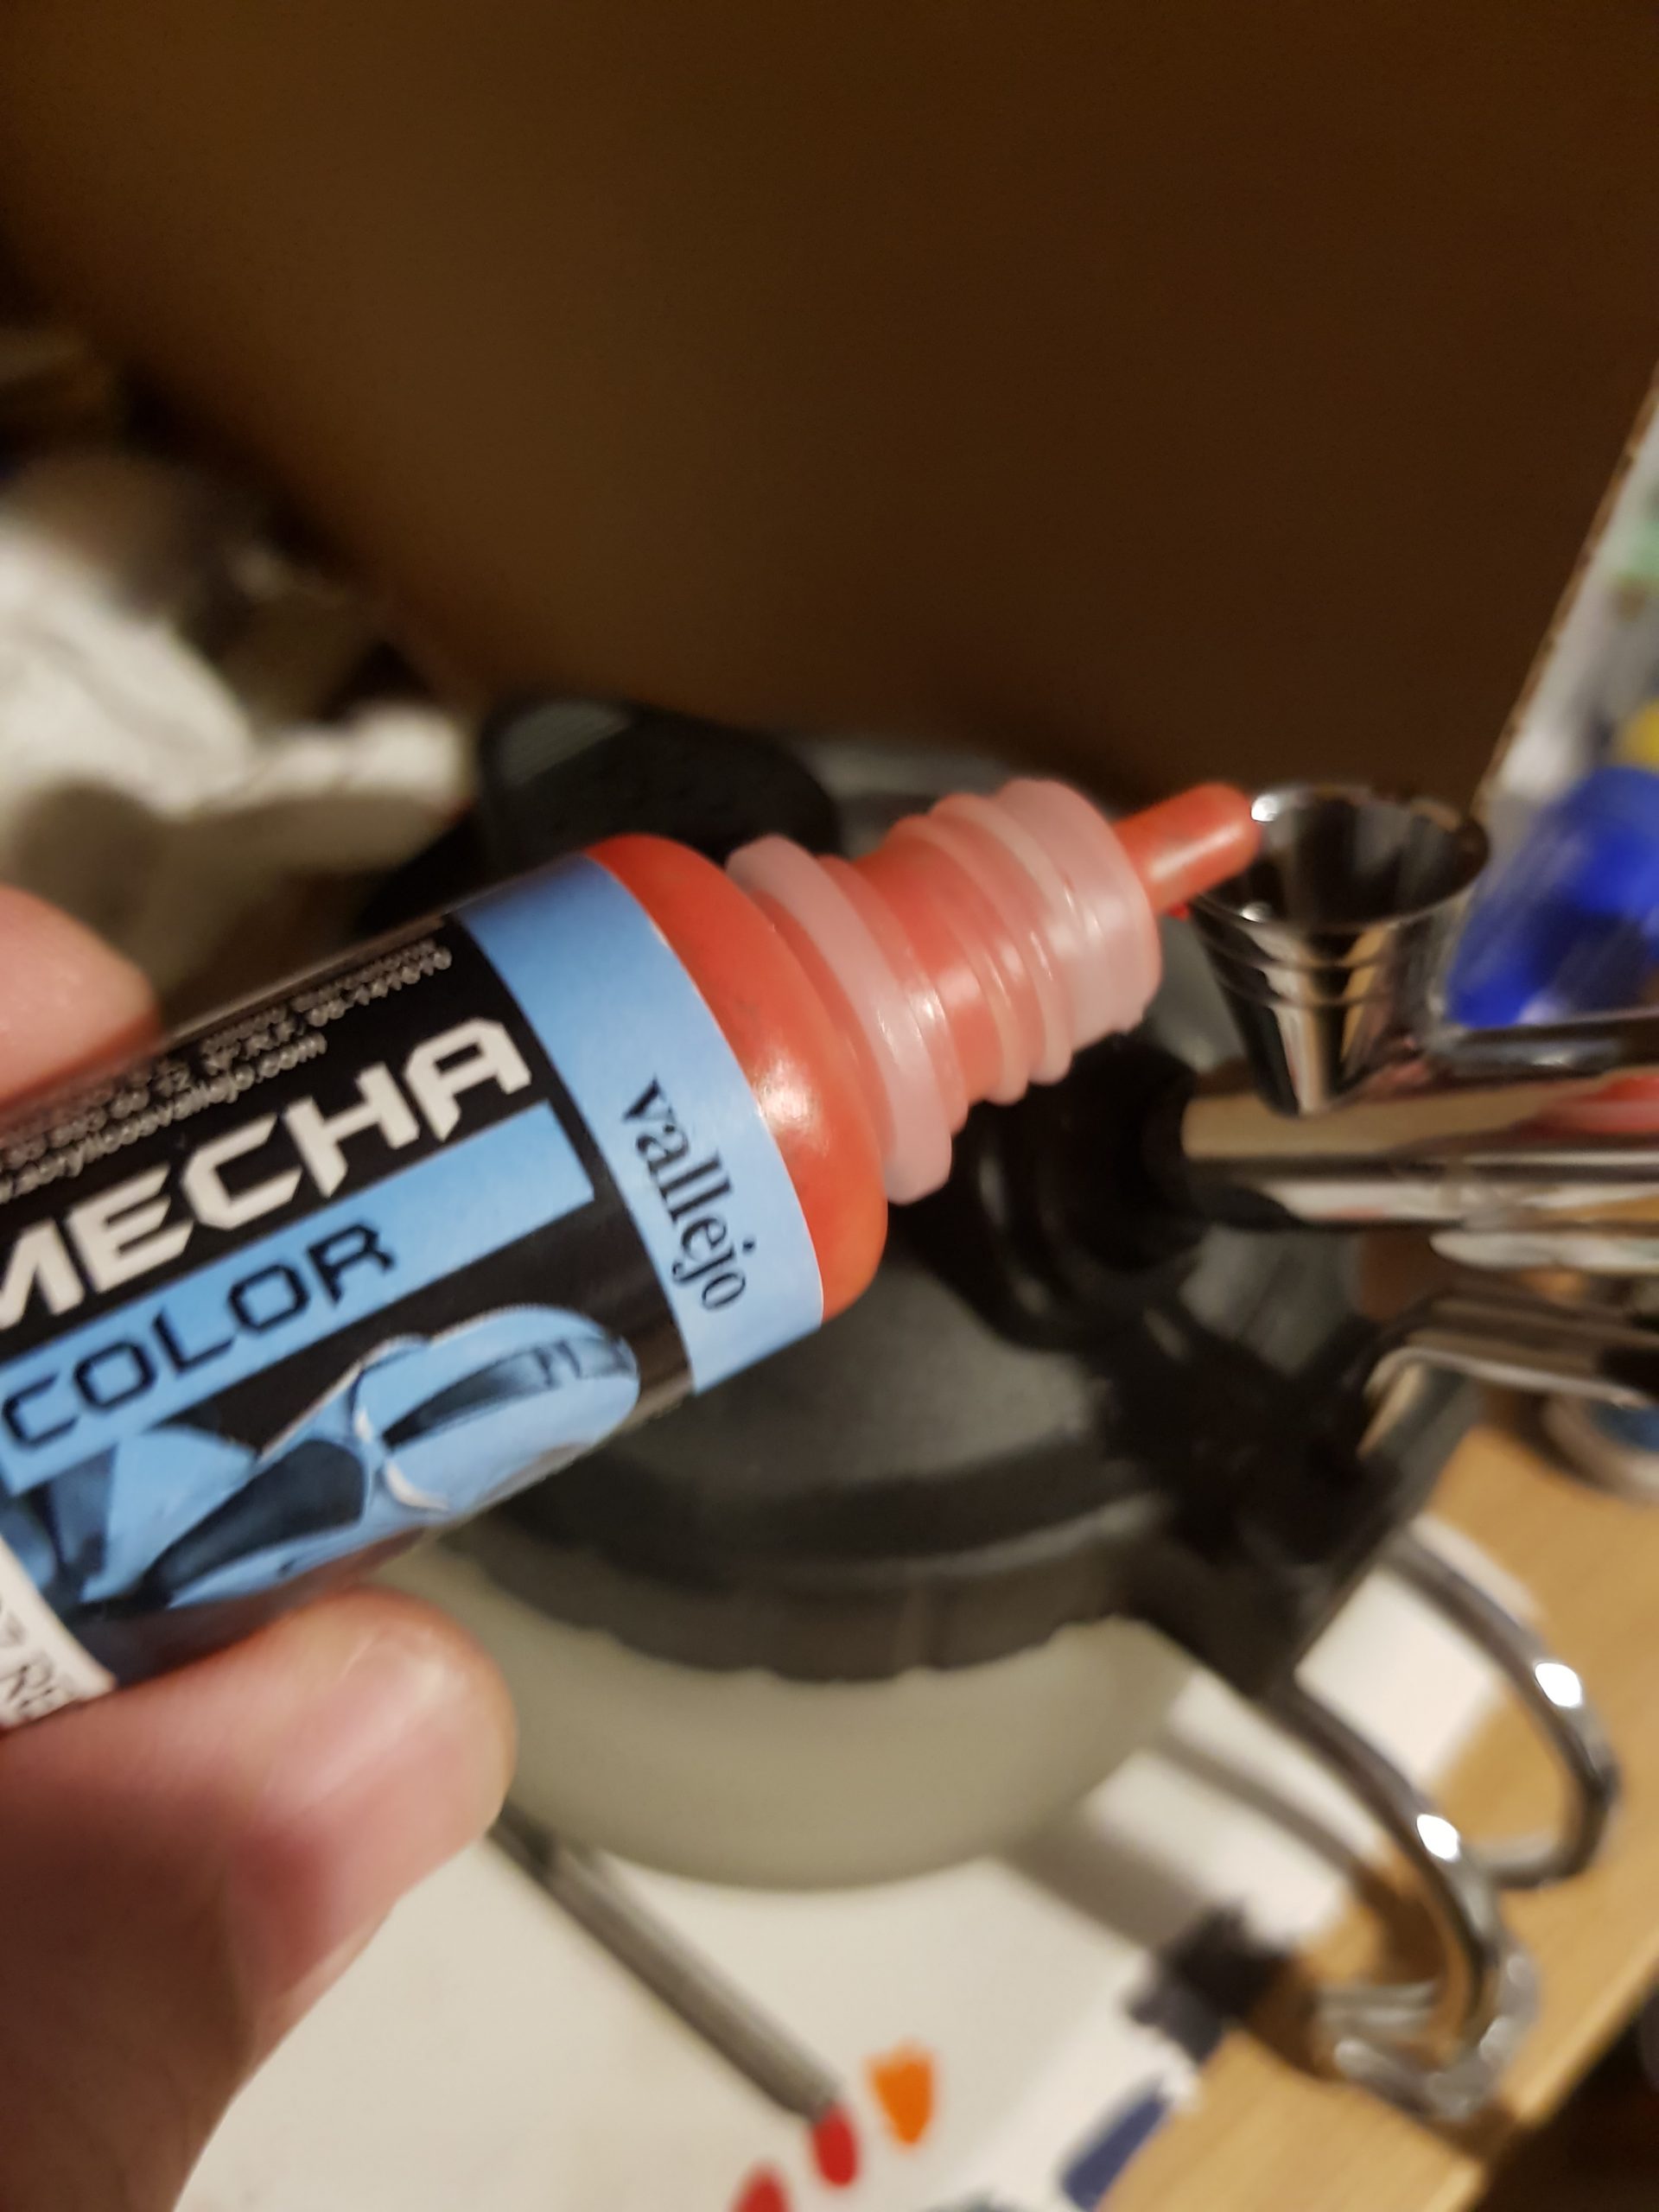
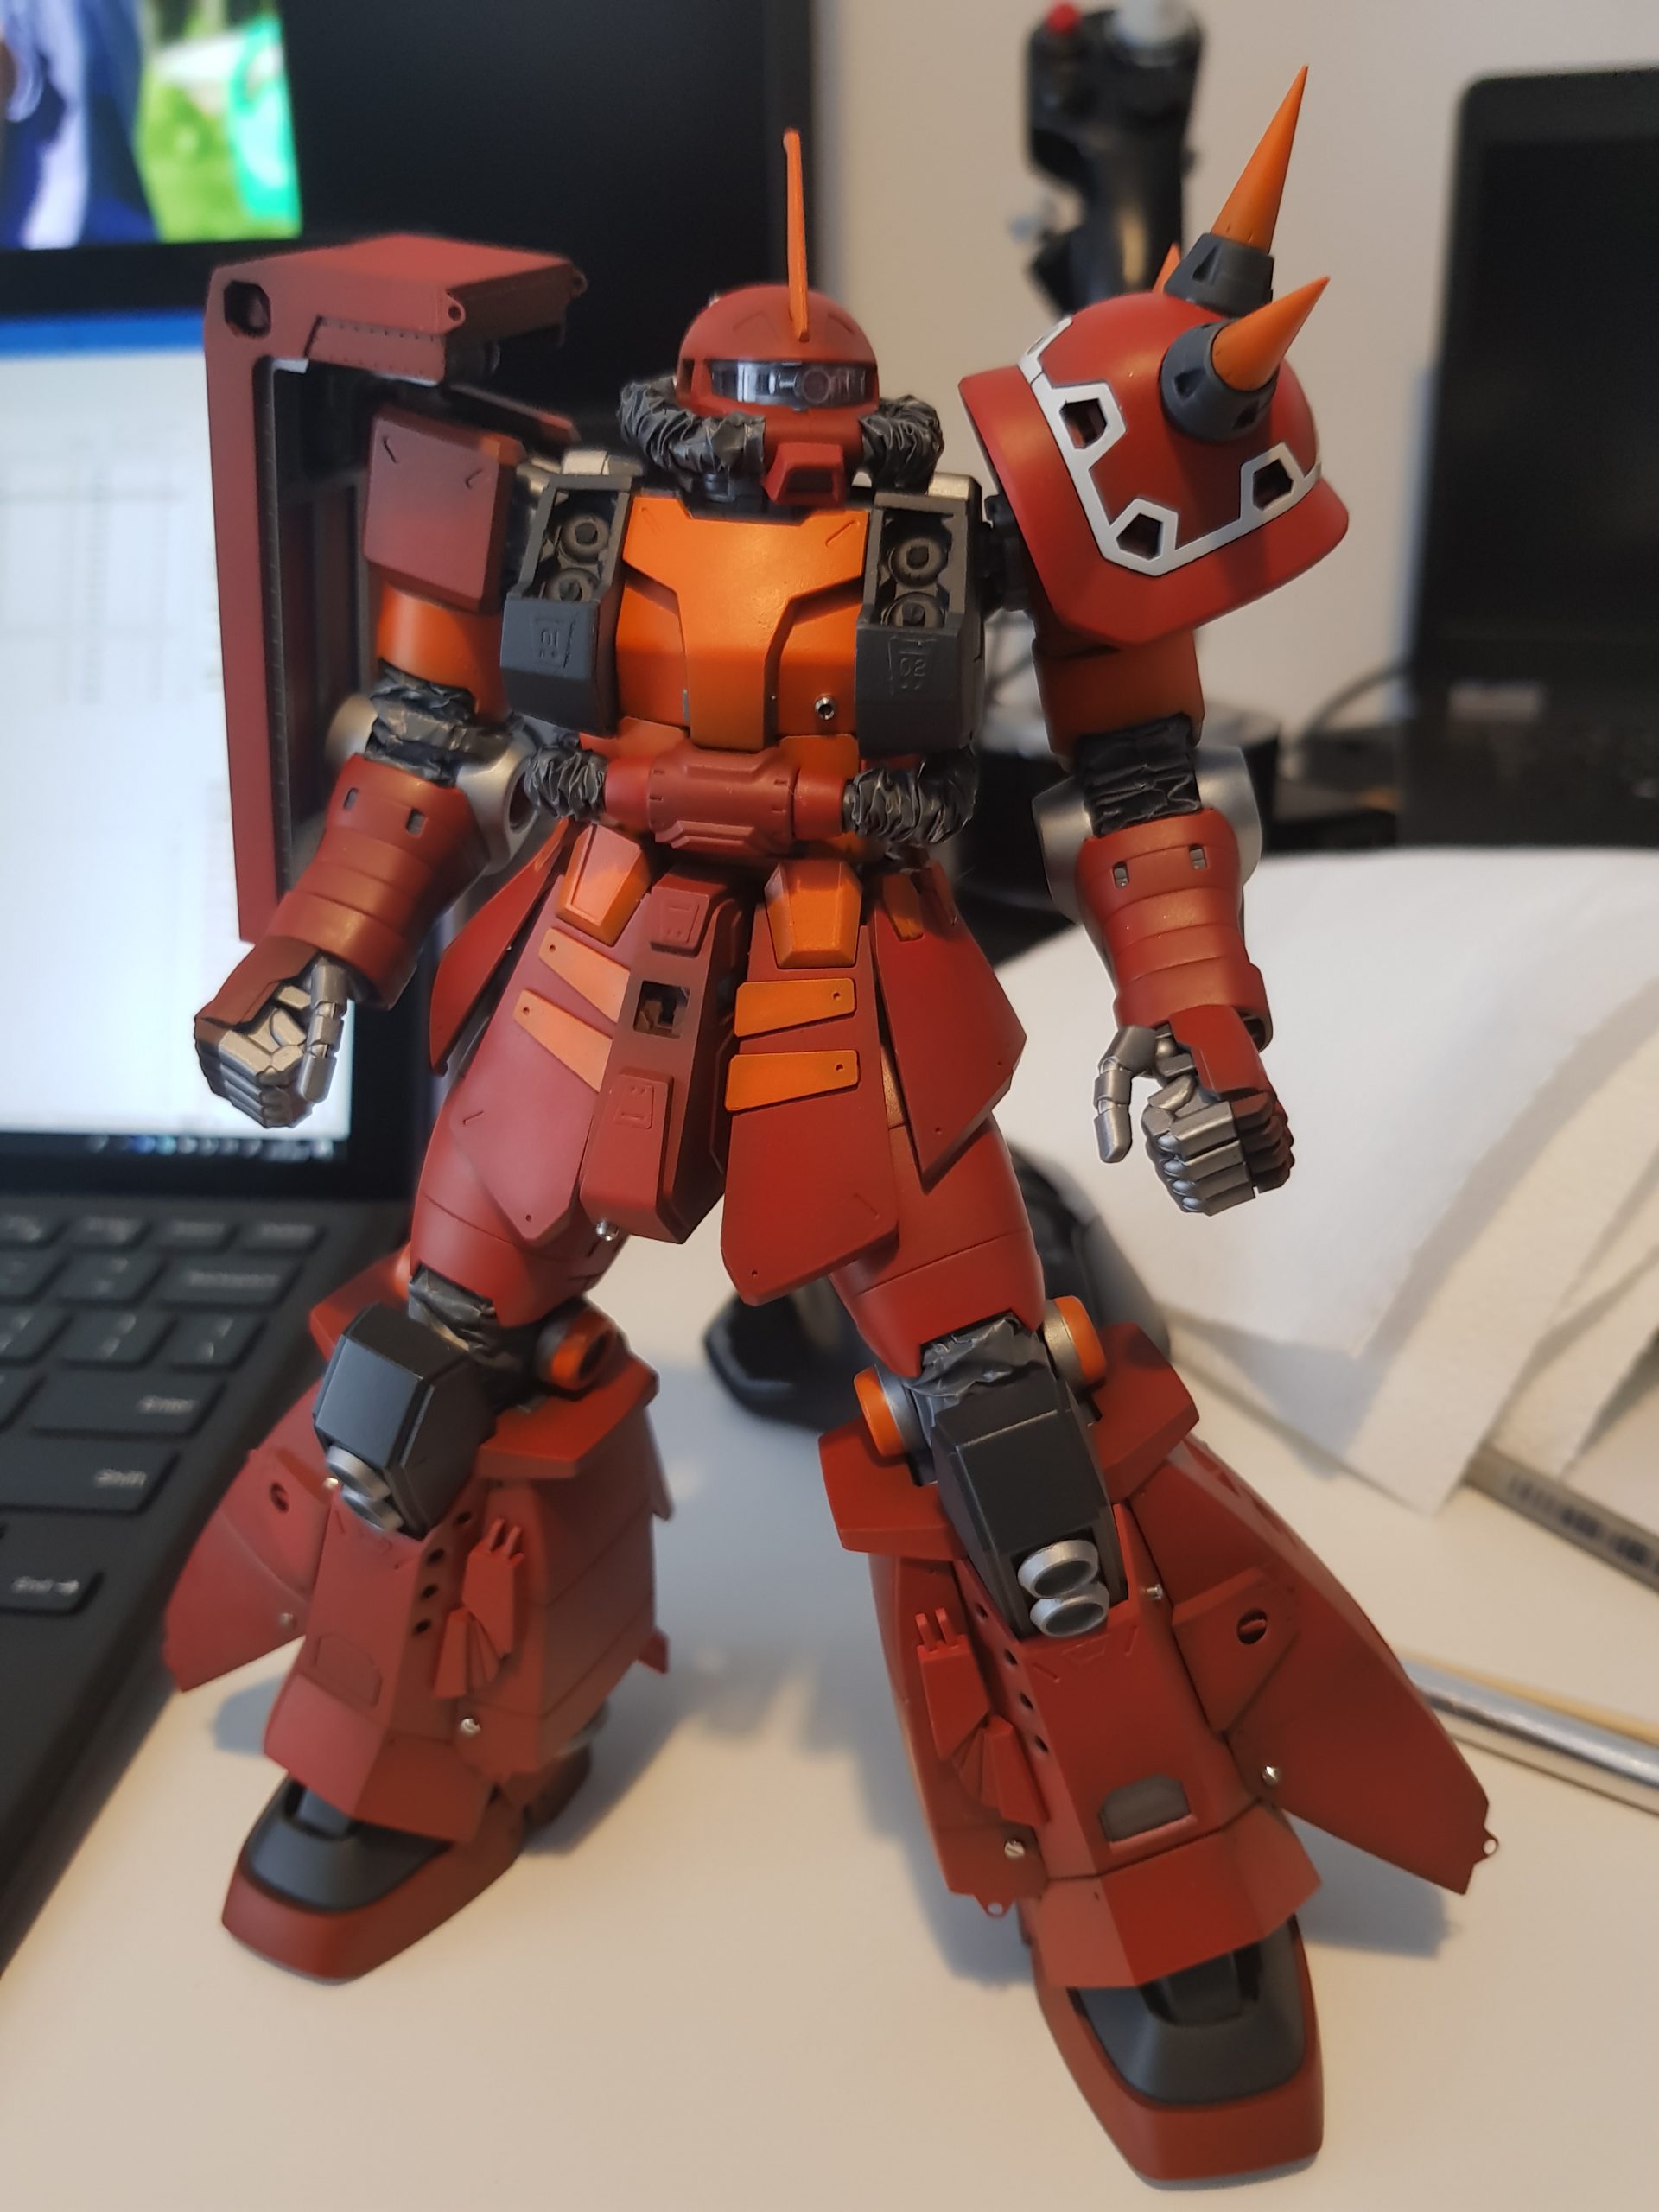
Vallejo Mecha again 🙂 Red with a bit of Black – just to brake the color. I love subtle shading…
Again, Vallejo Mecha will be my paints for PsychoZaku. Zaku stripped down – I will not disassemble inner frame, I…
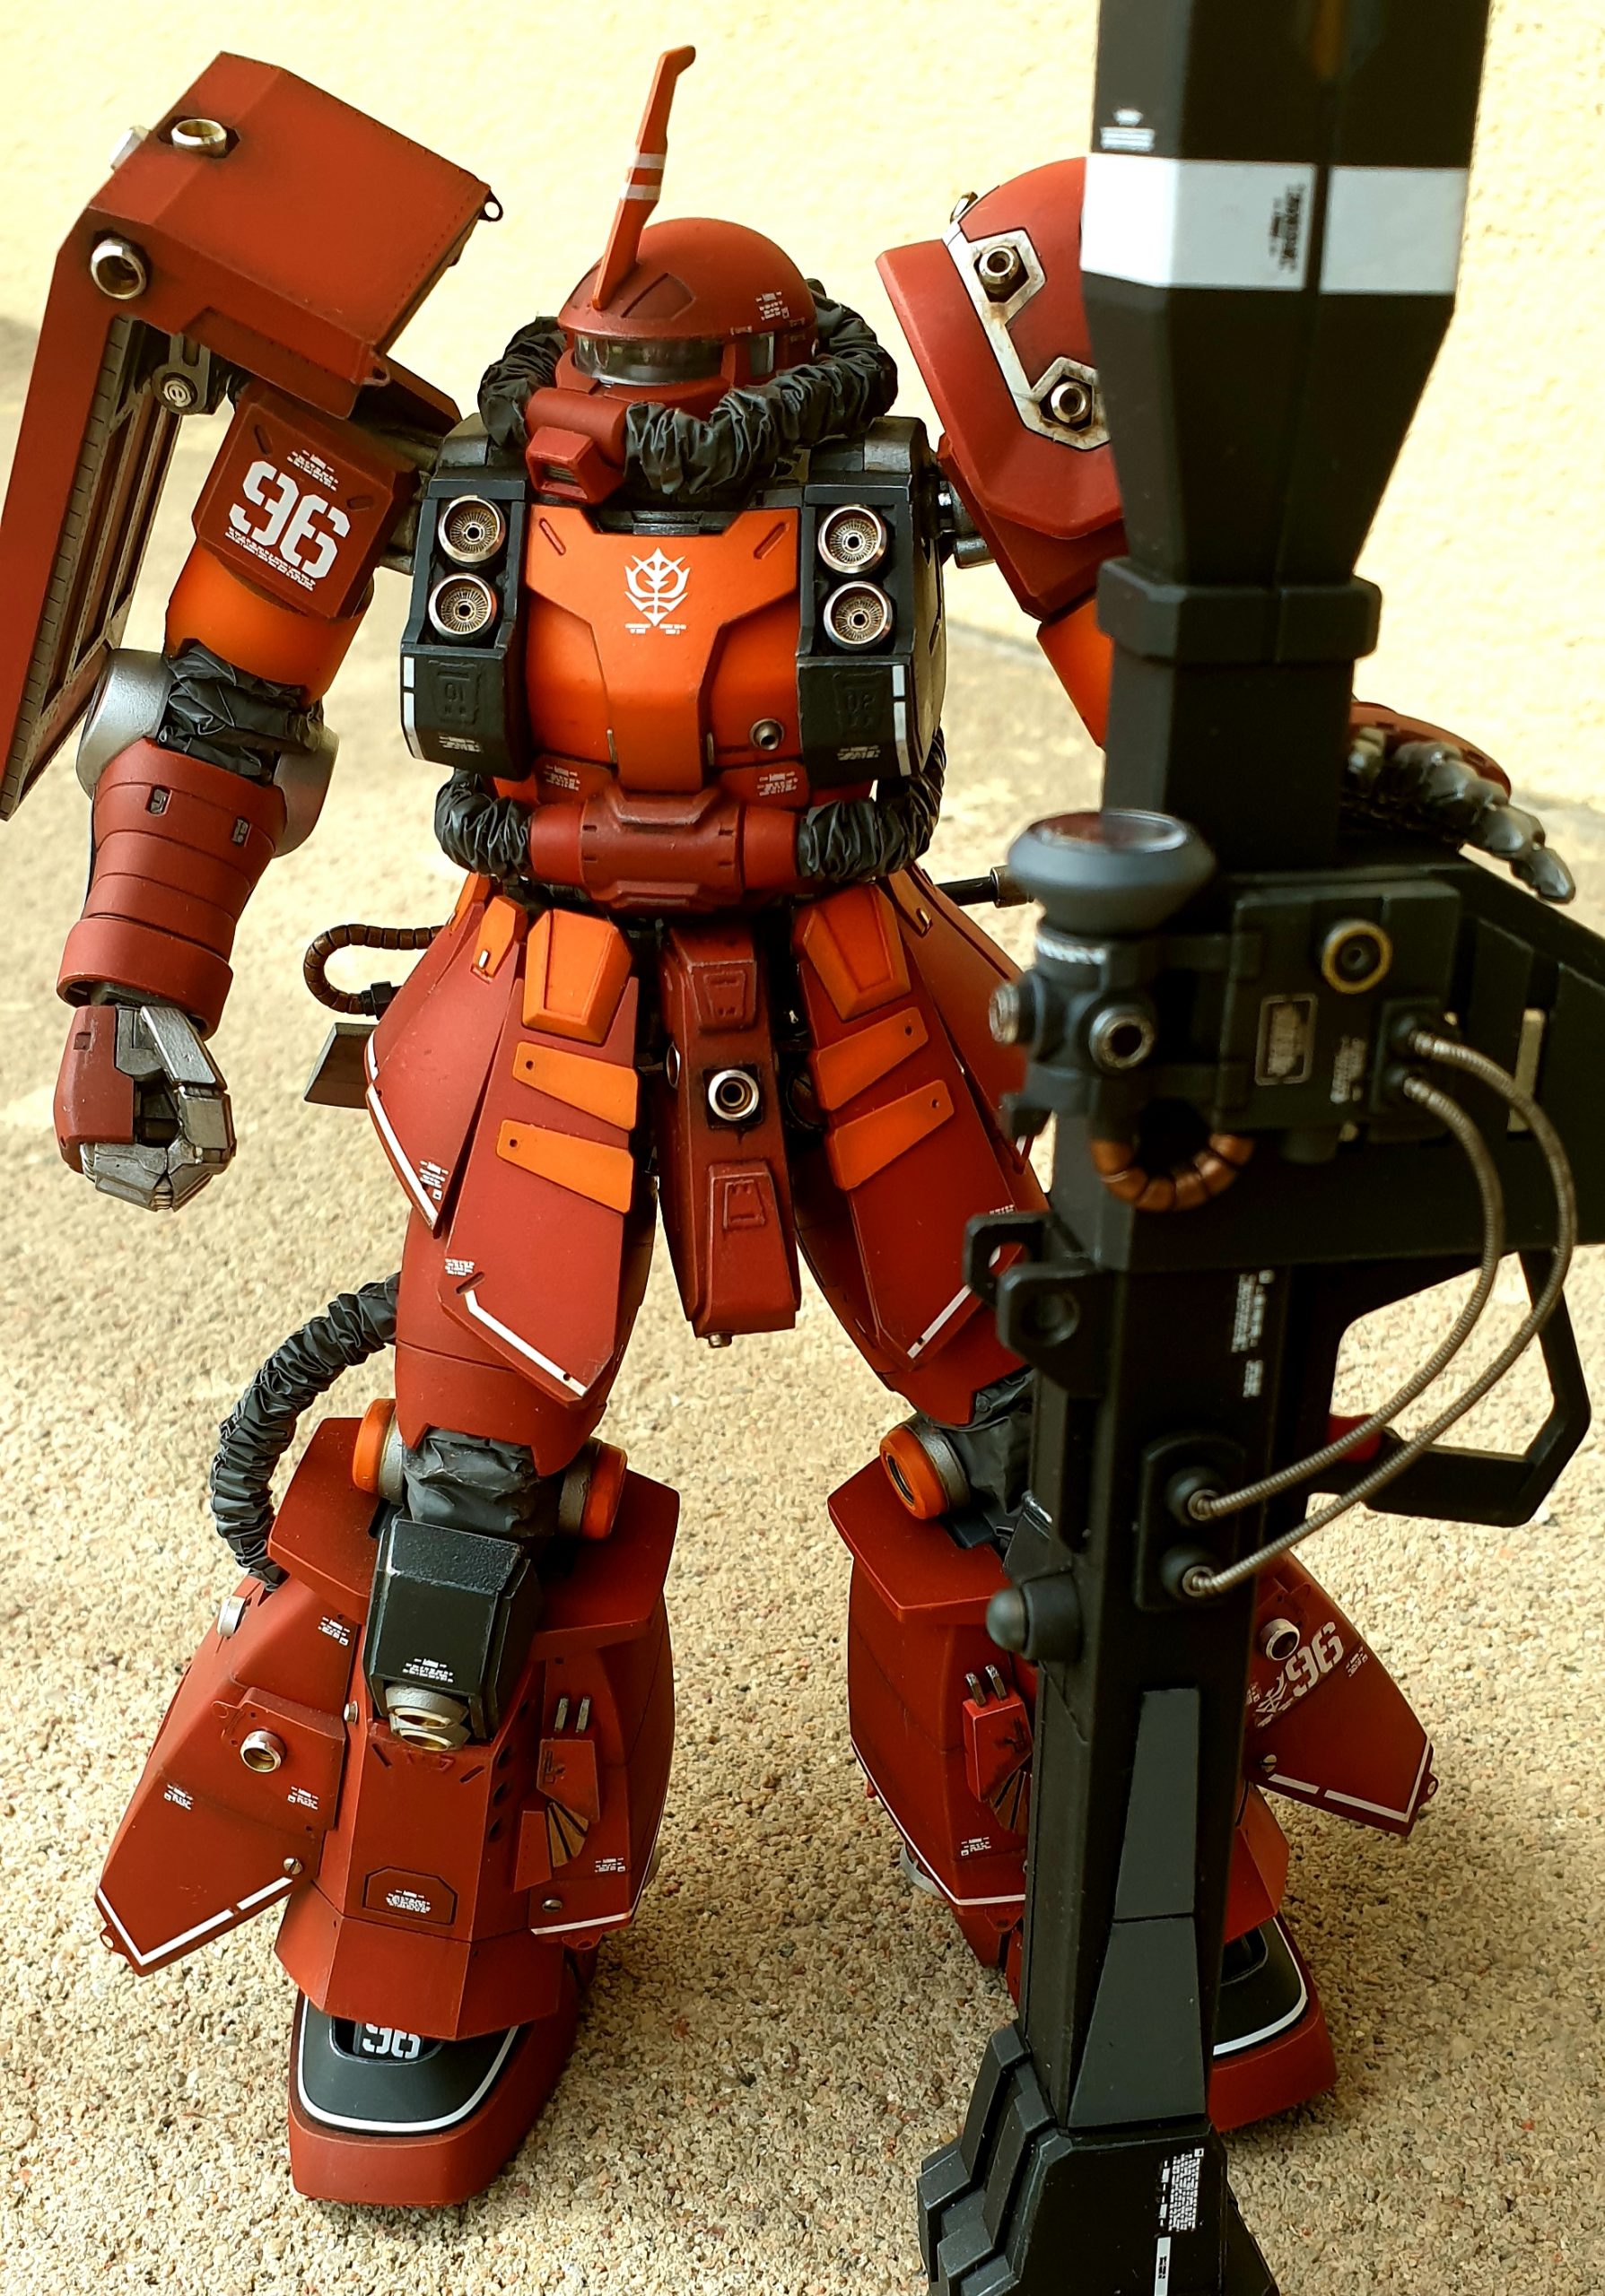
Wooohooo!!! Finally I have it – oob build during Christmas 2018 – MS-06R Zaku II High Mobility type PSYCHO ZAKU,…

It was great journey – real return to scale modeling after years. New techniques, paining with fast drying and self-leveling…
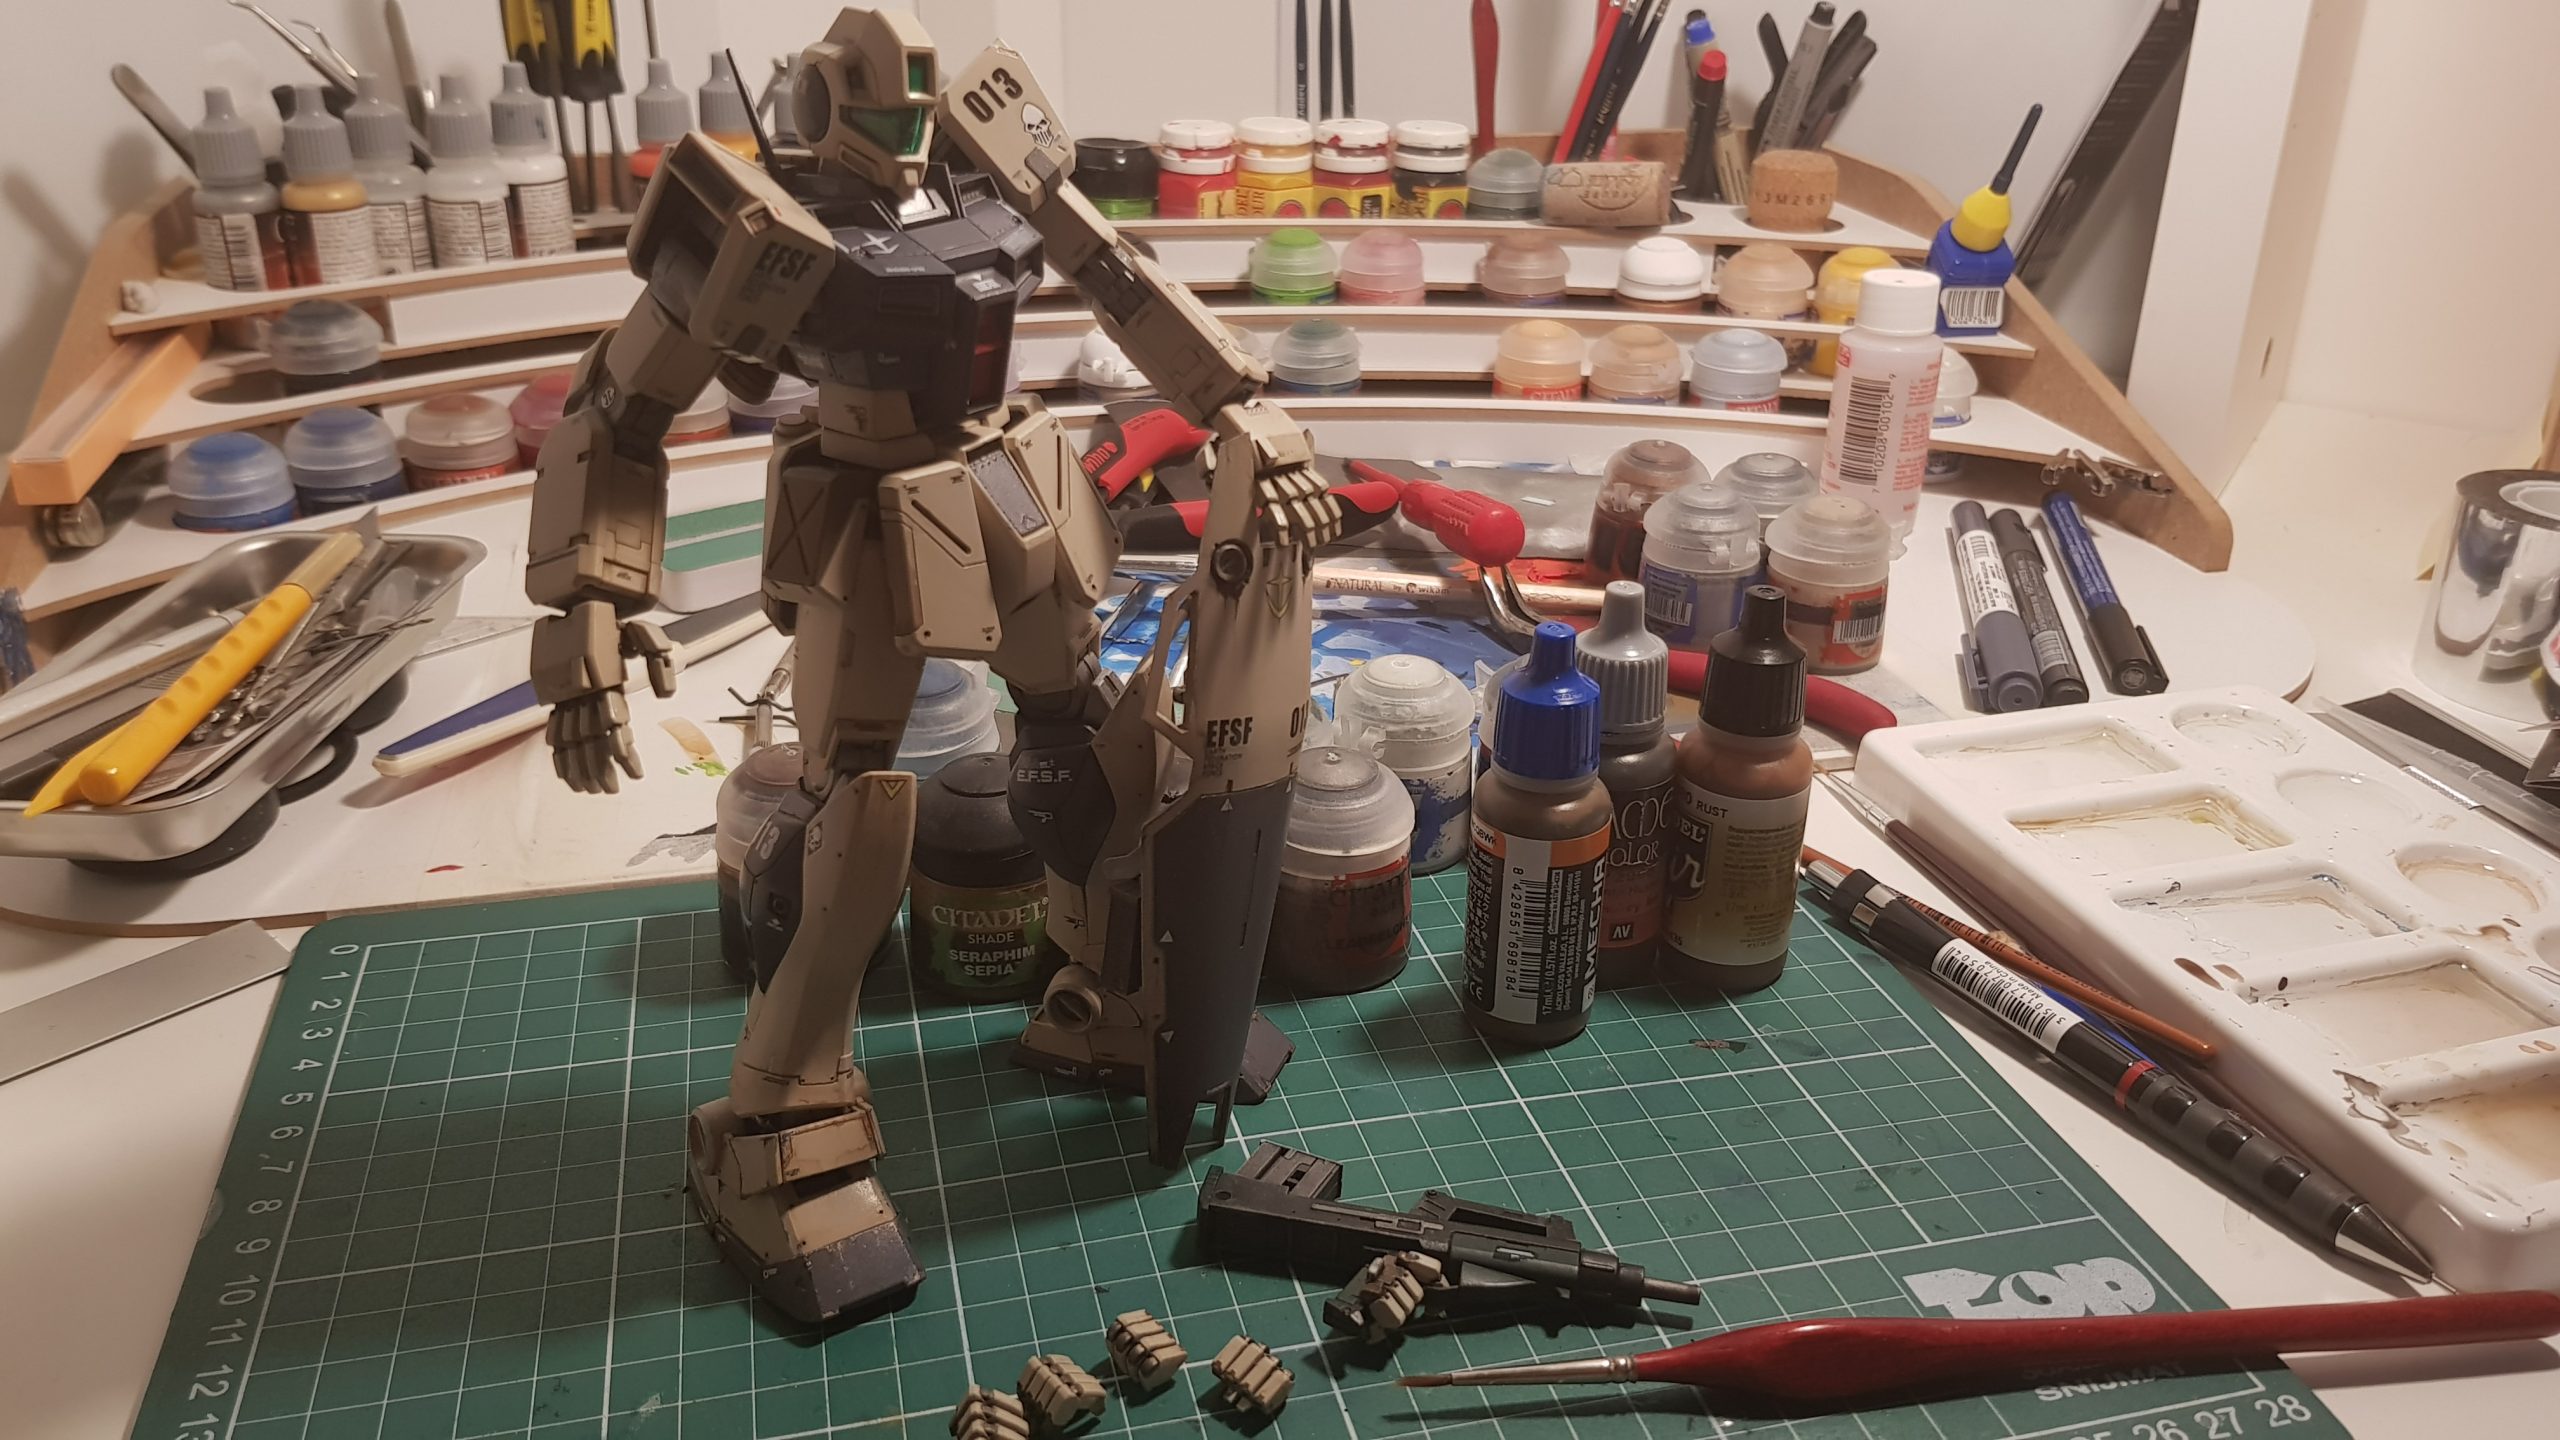
Additional details painted and Vallejo Mecha Matt applied. I decided to replace antenna – guitar string looks just fine!
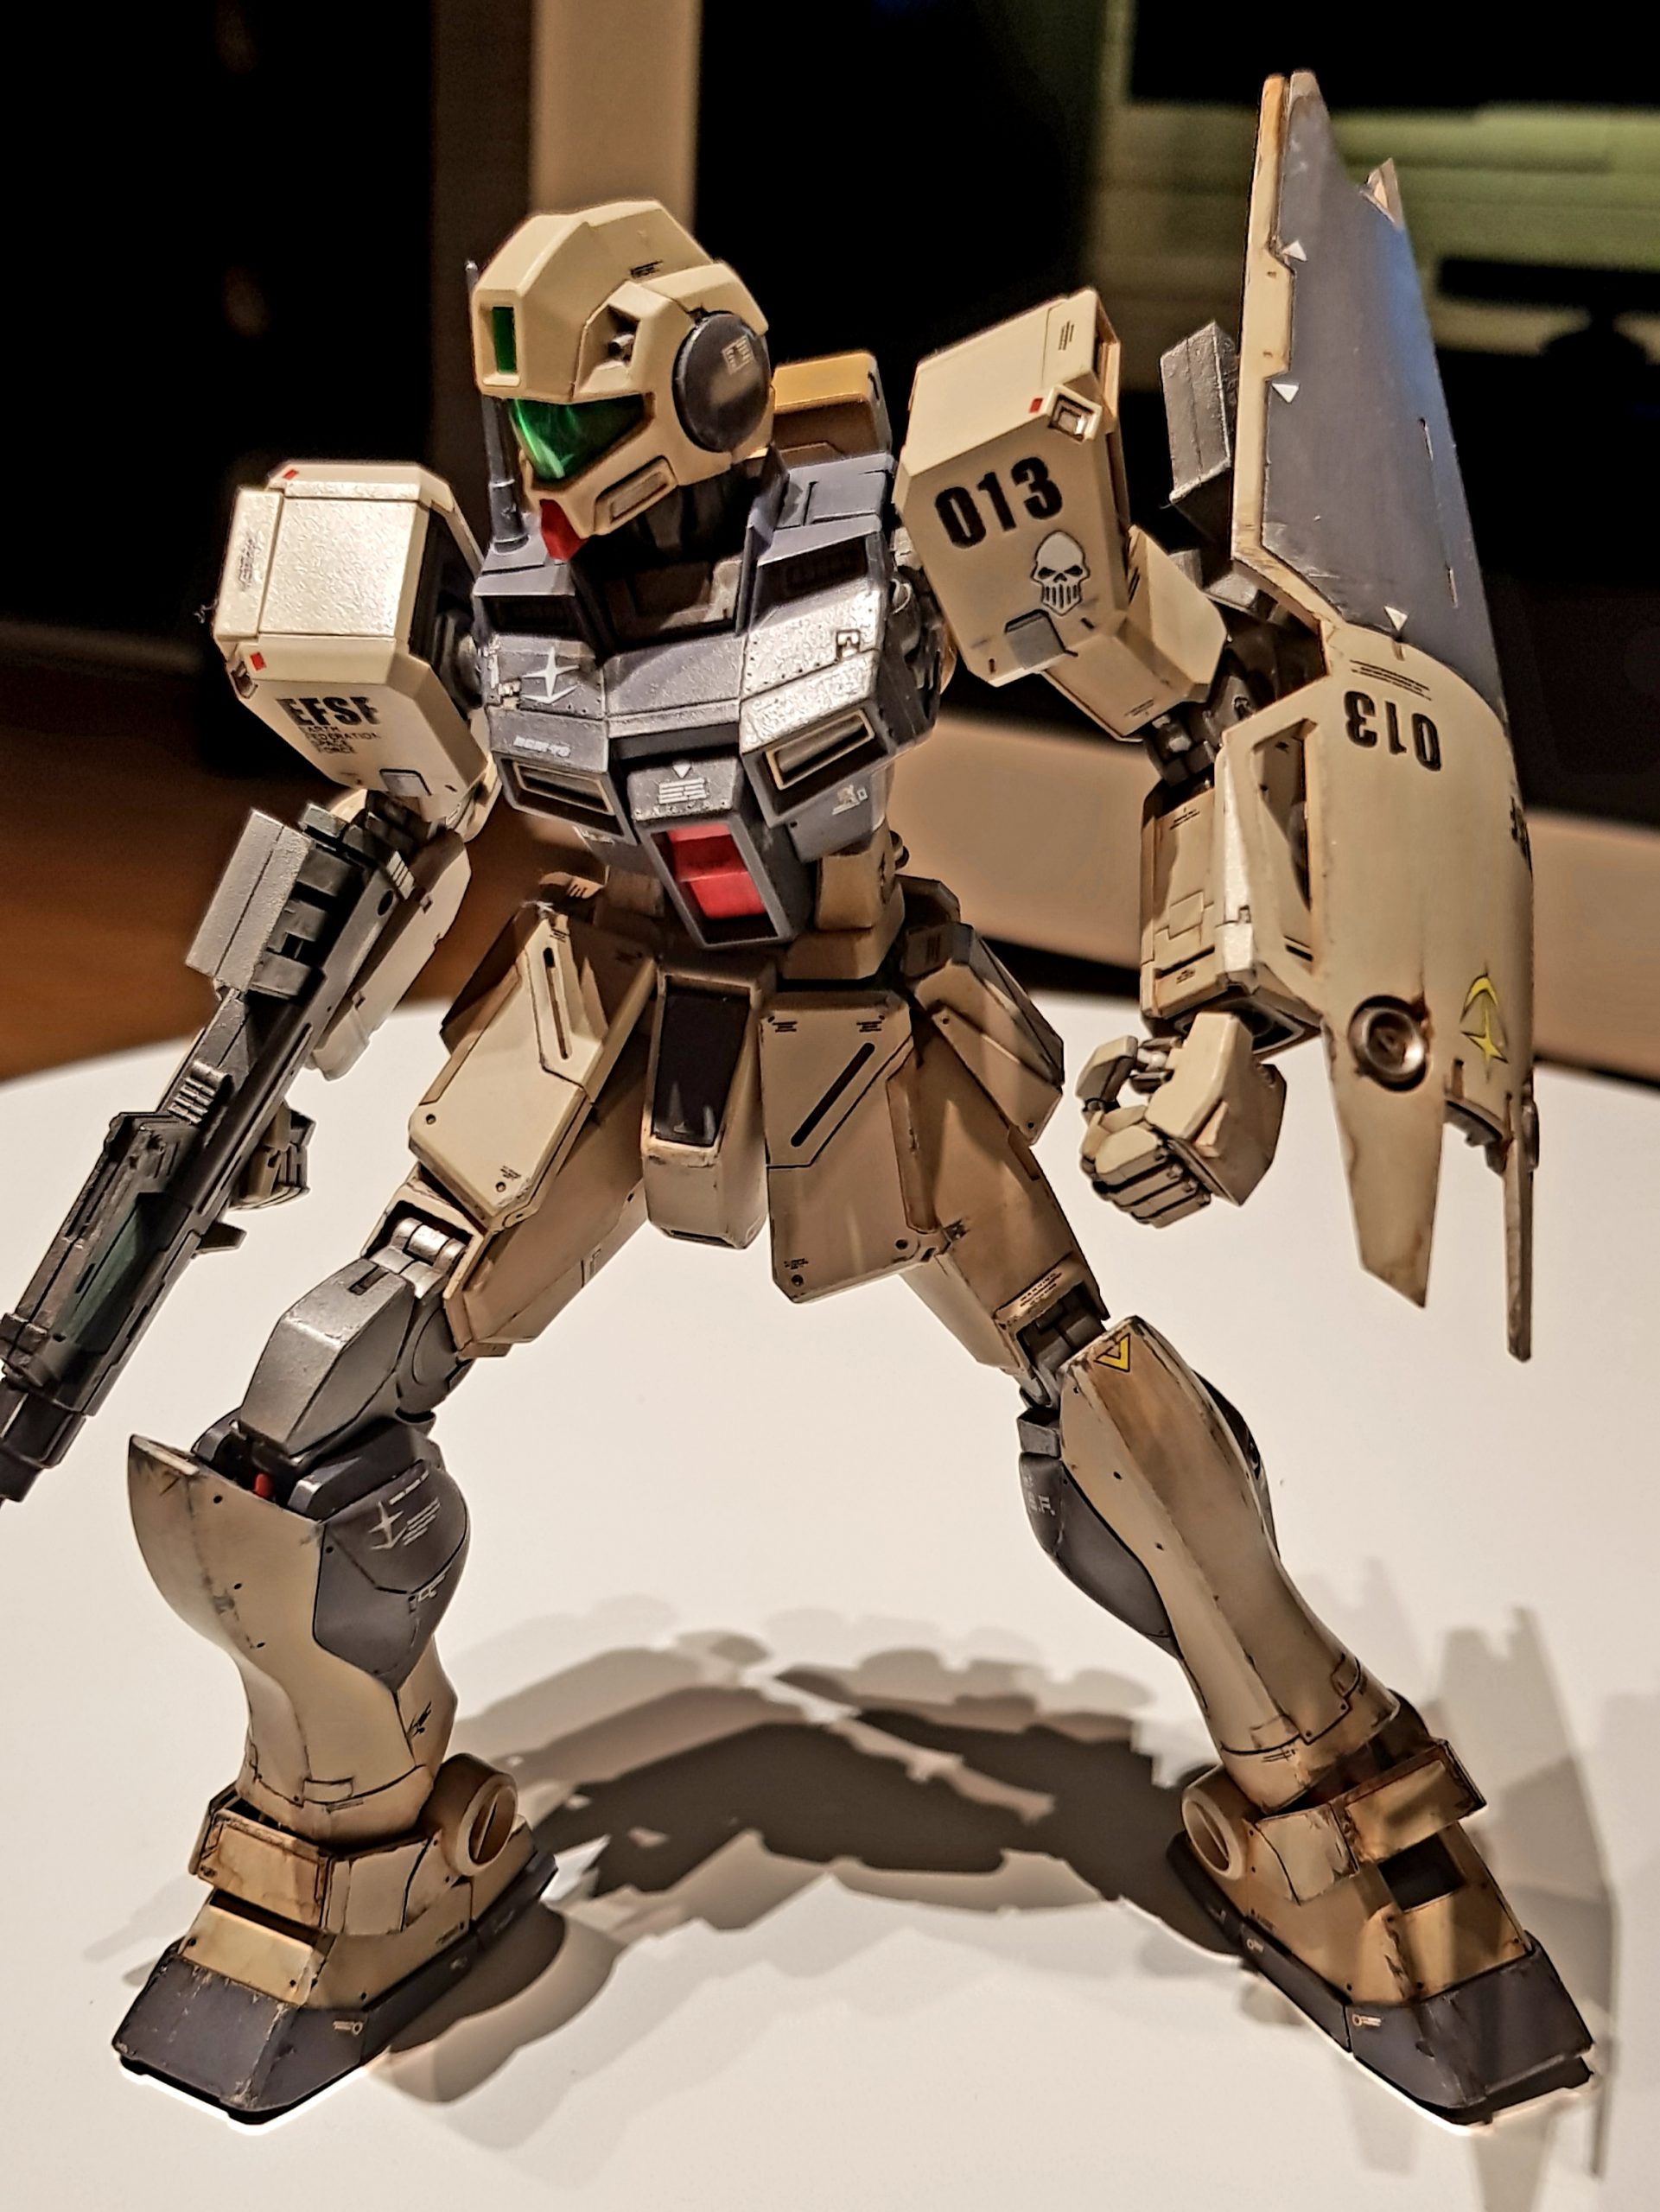
Dirt, wear, streaks, scratches and beated up metal – thats how I like my Gunpla.
I like those small details in weathering – dirt, scratches, rust (of course gundamium will not) streaks oils stains and…

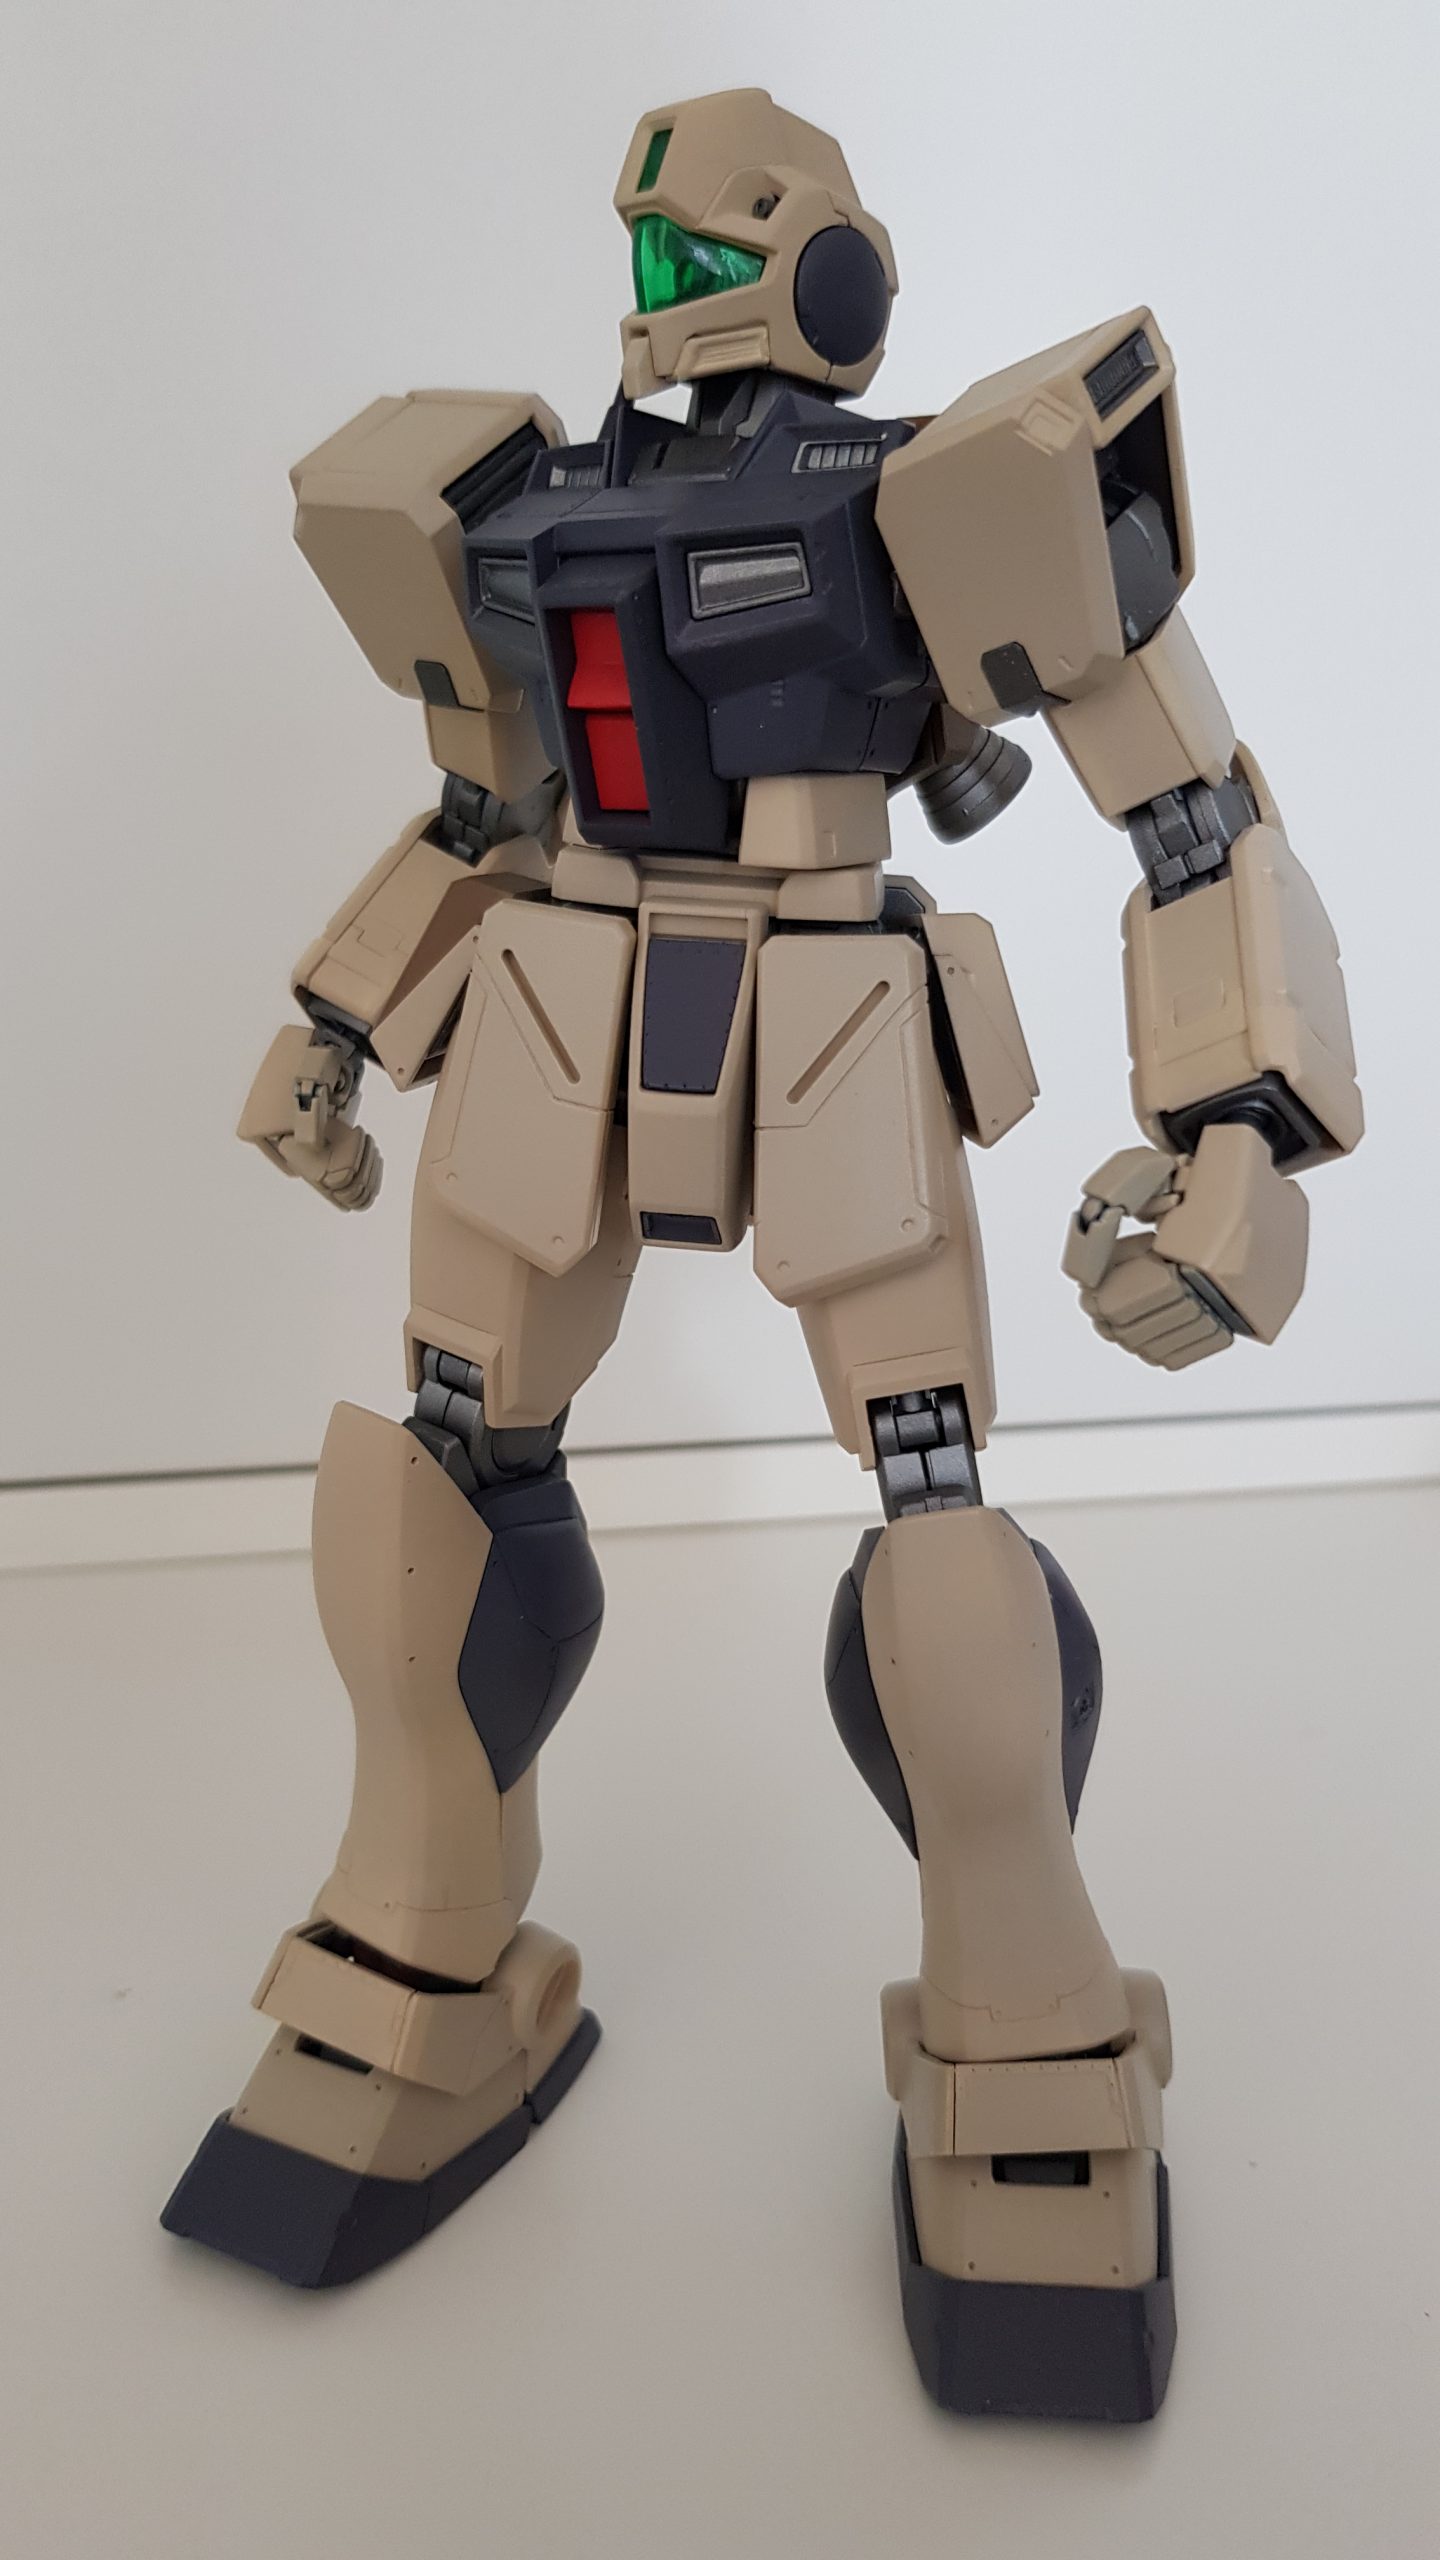
..couldn’t wait – I assembled all painted parts together – damn – it looks amazing like brand new machine out…
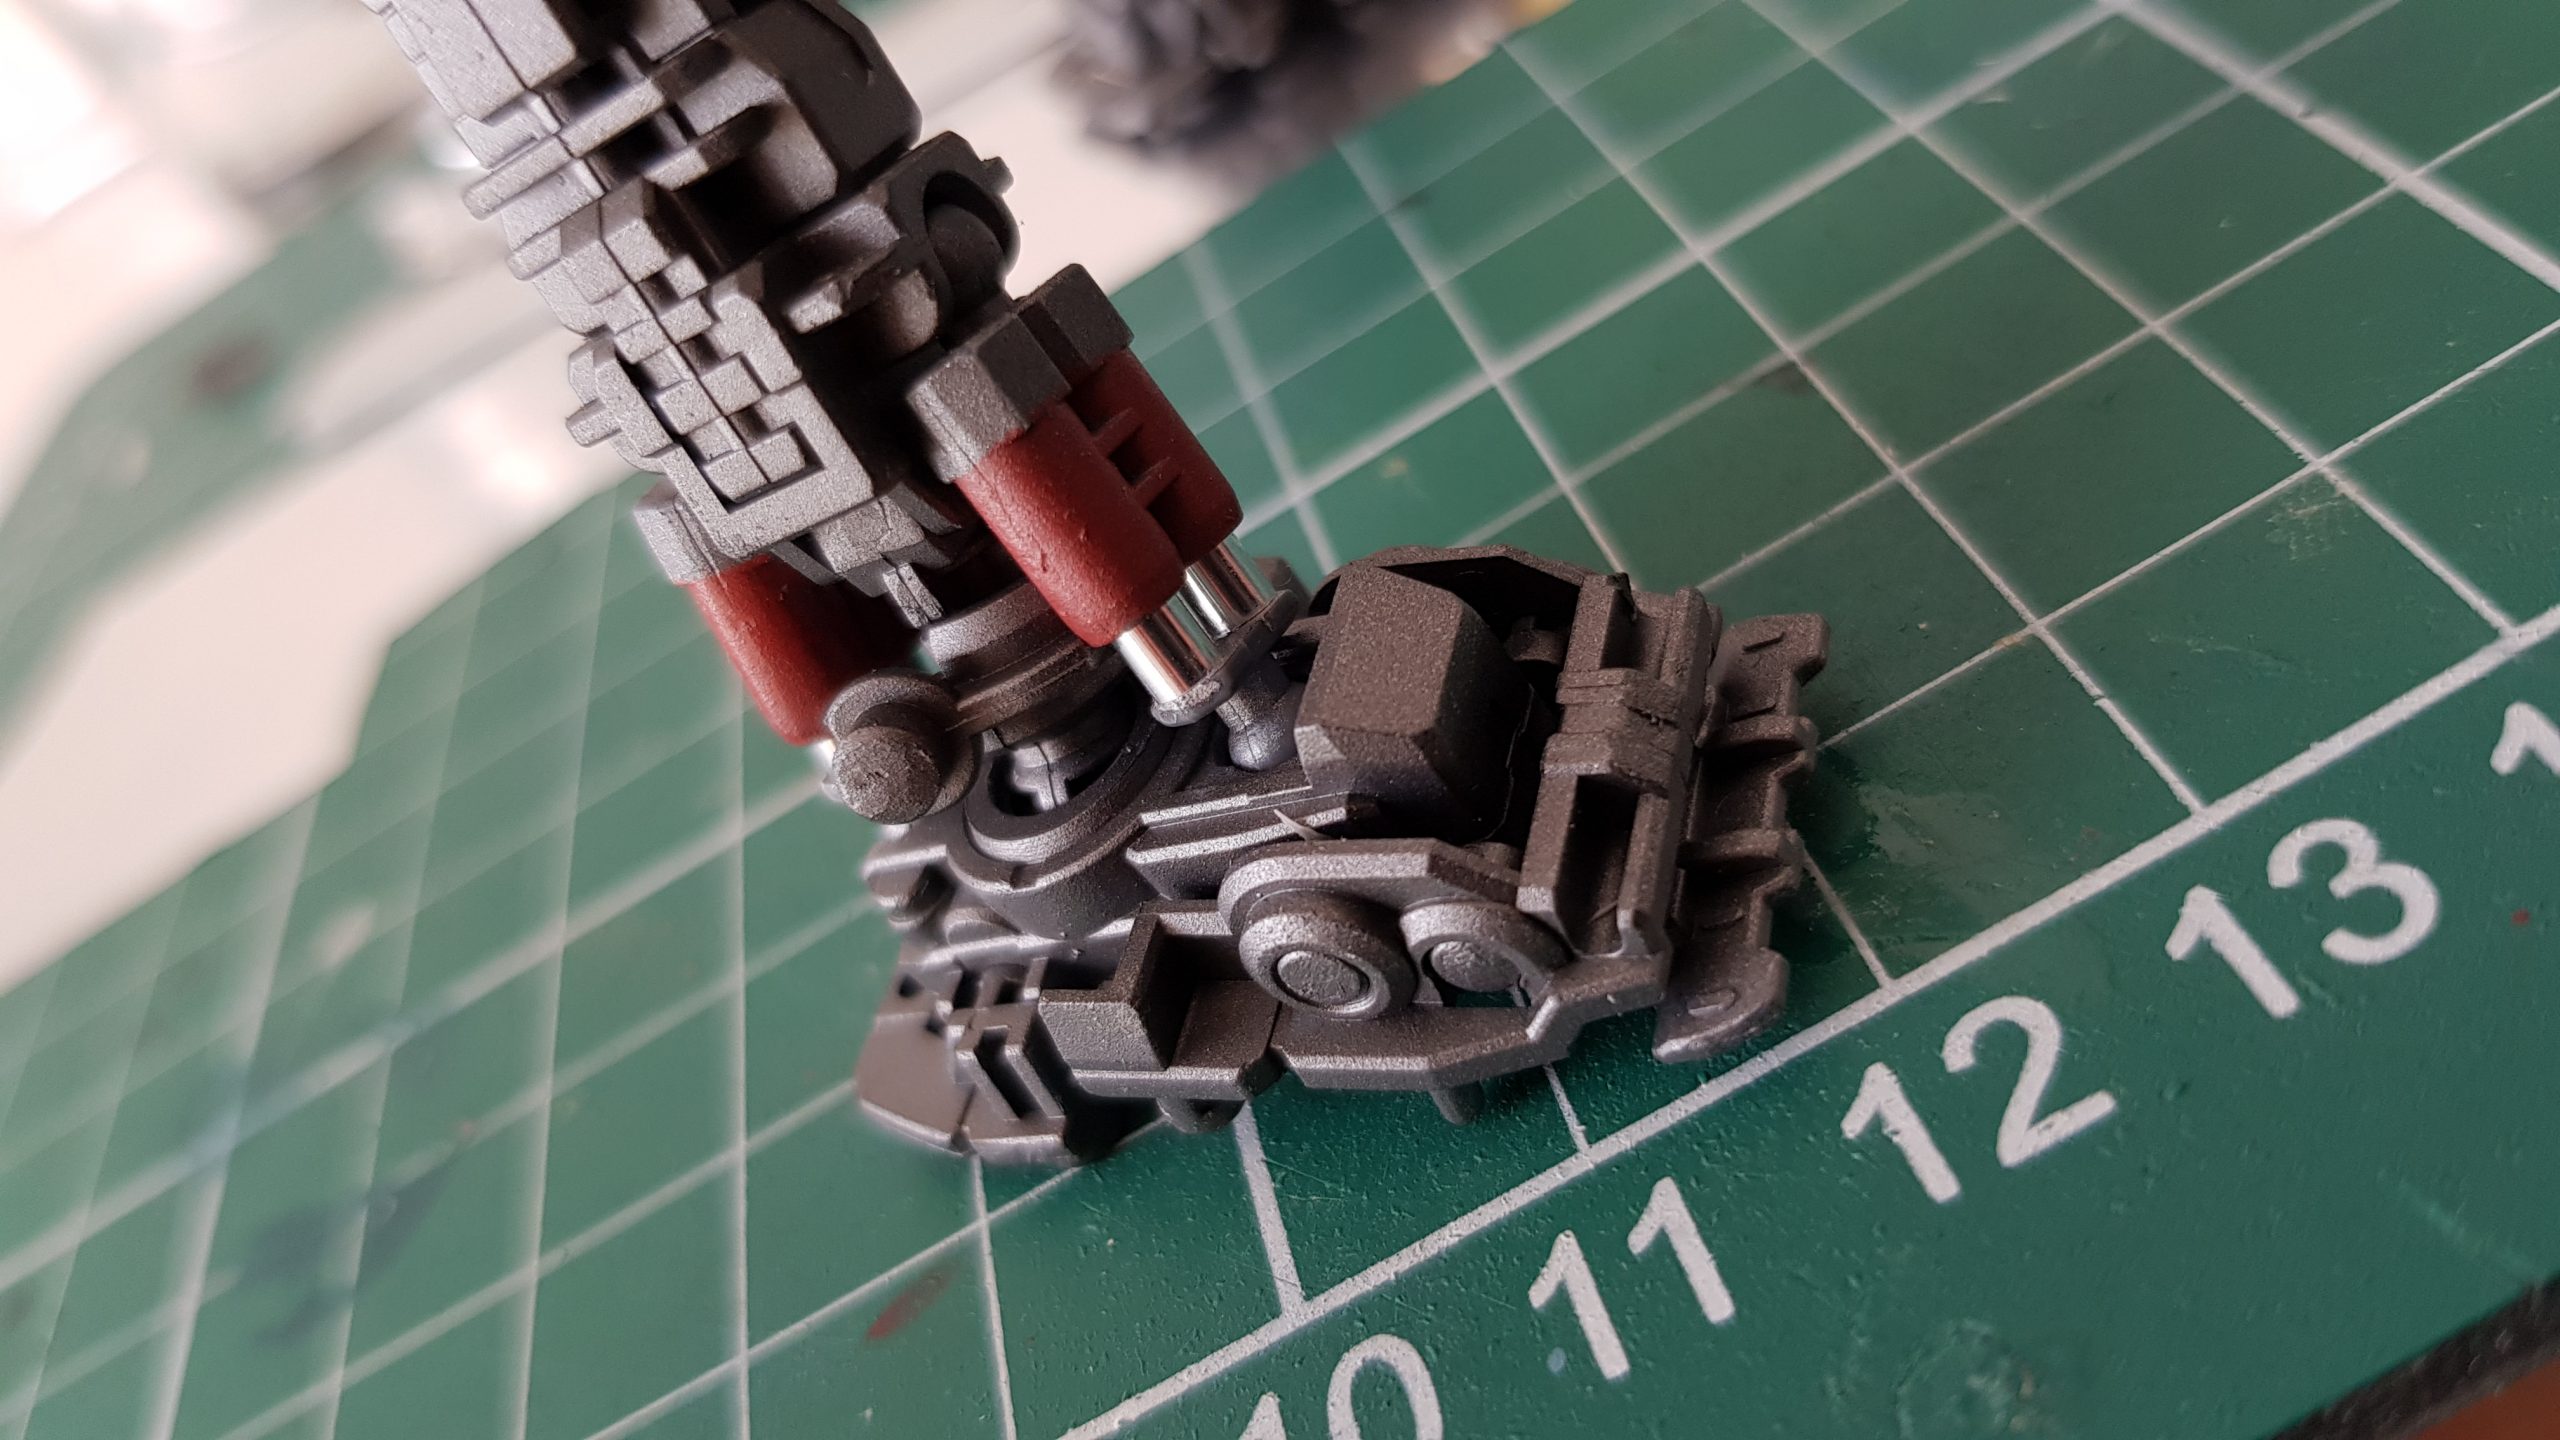
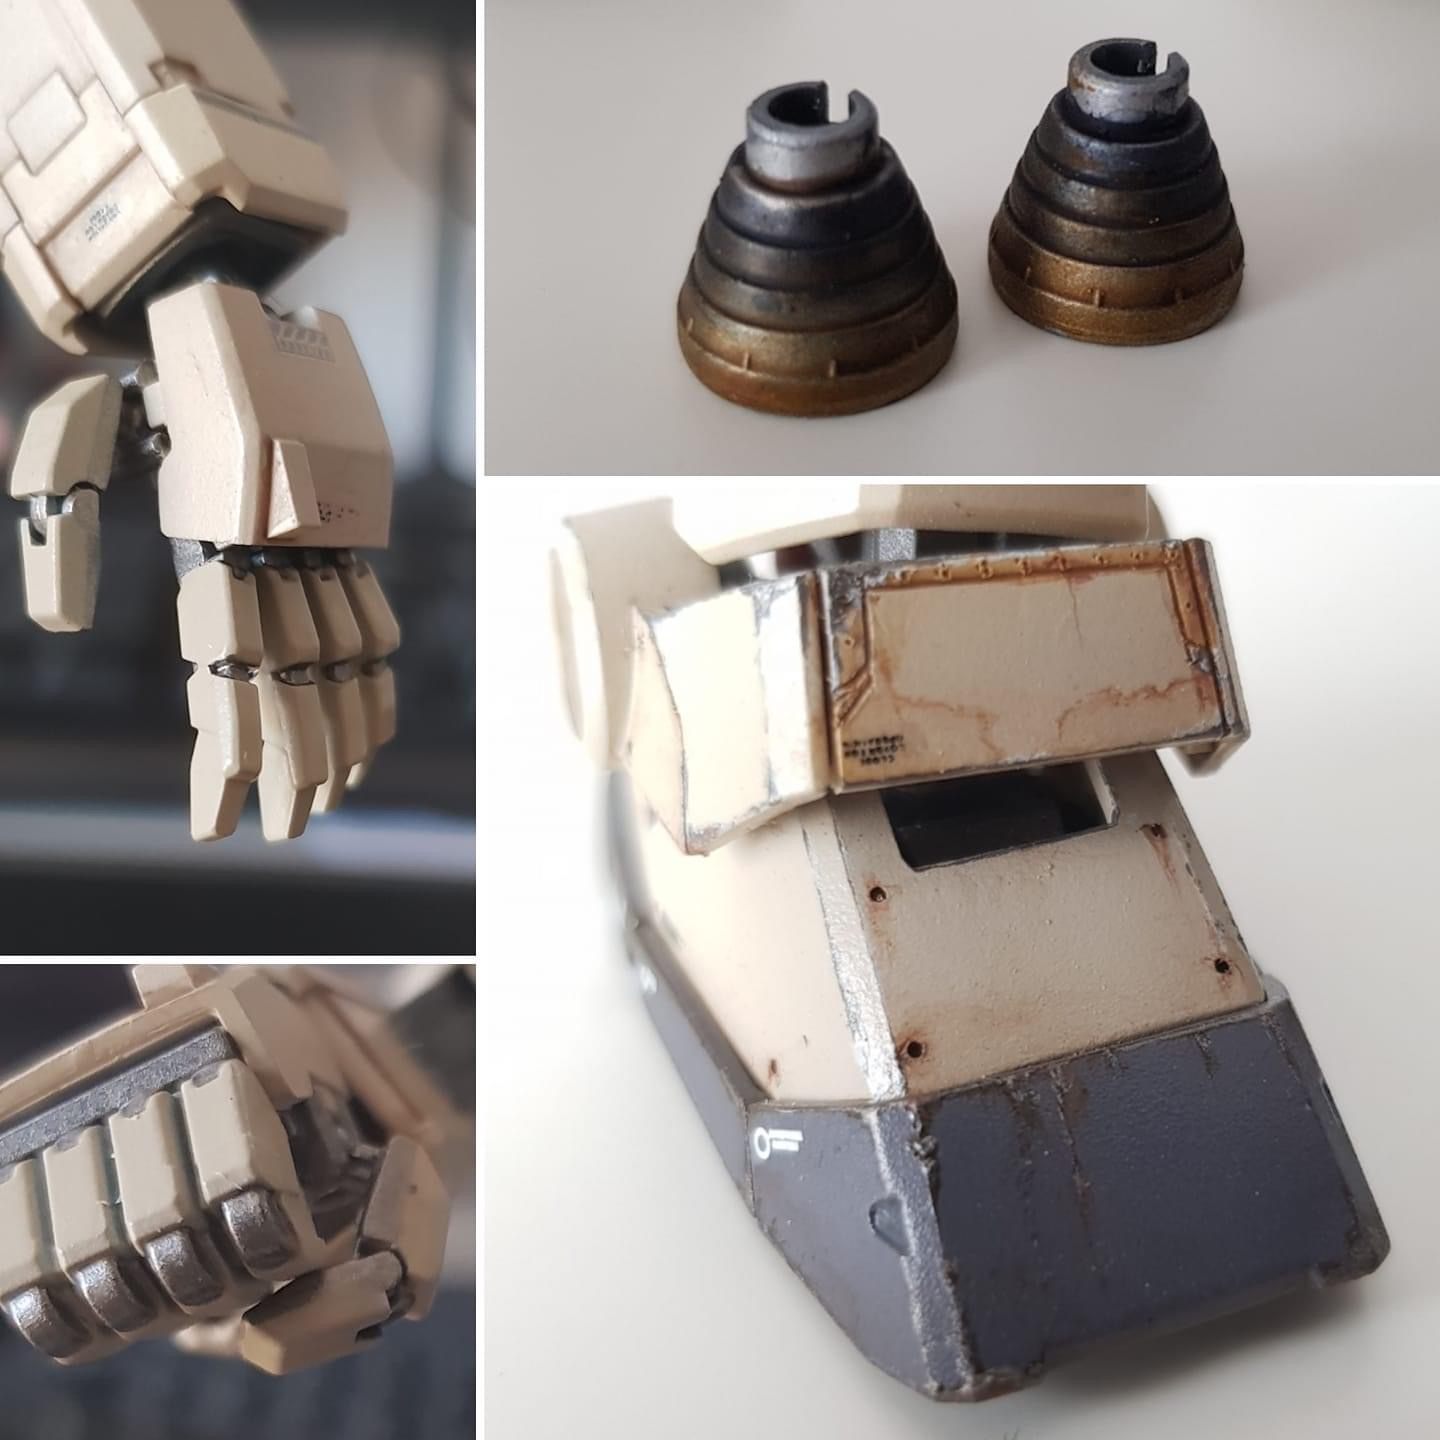
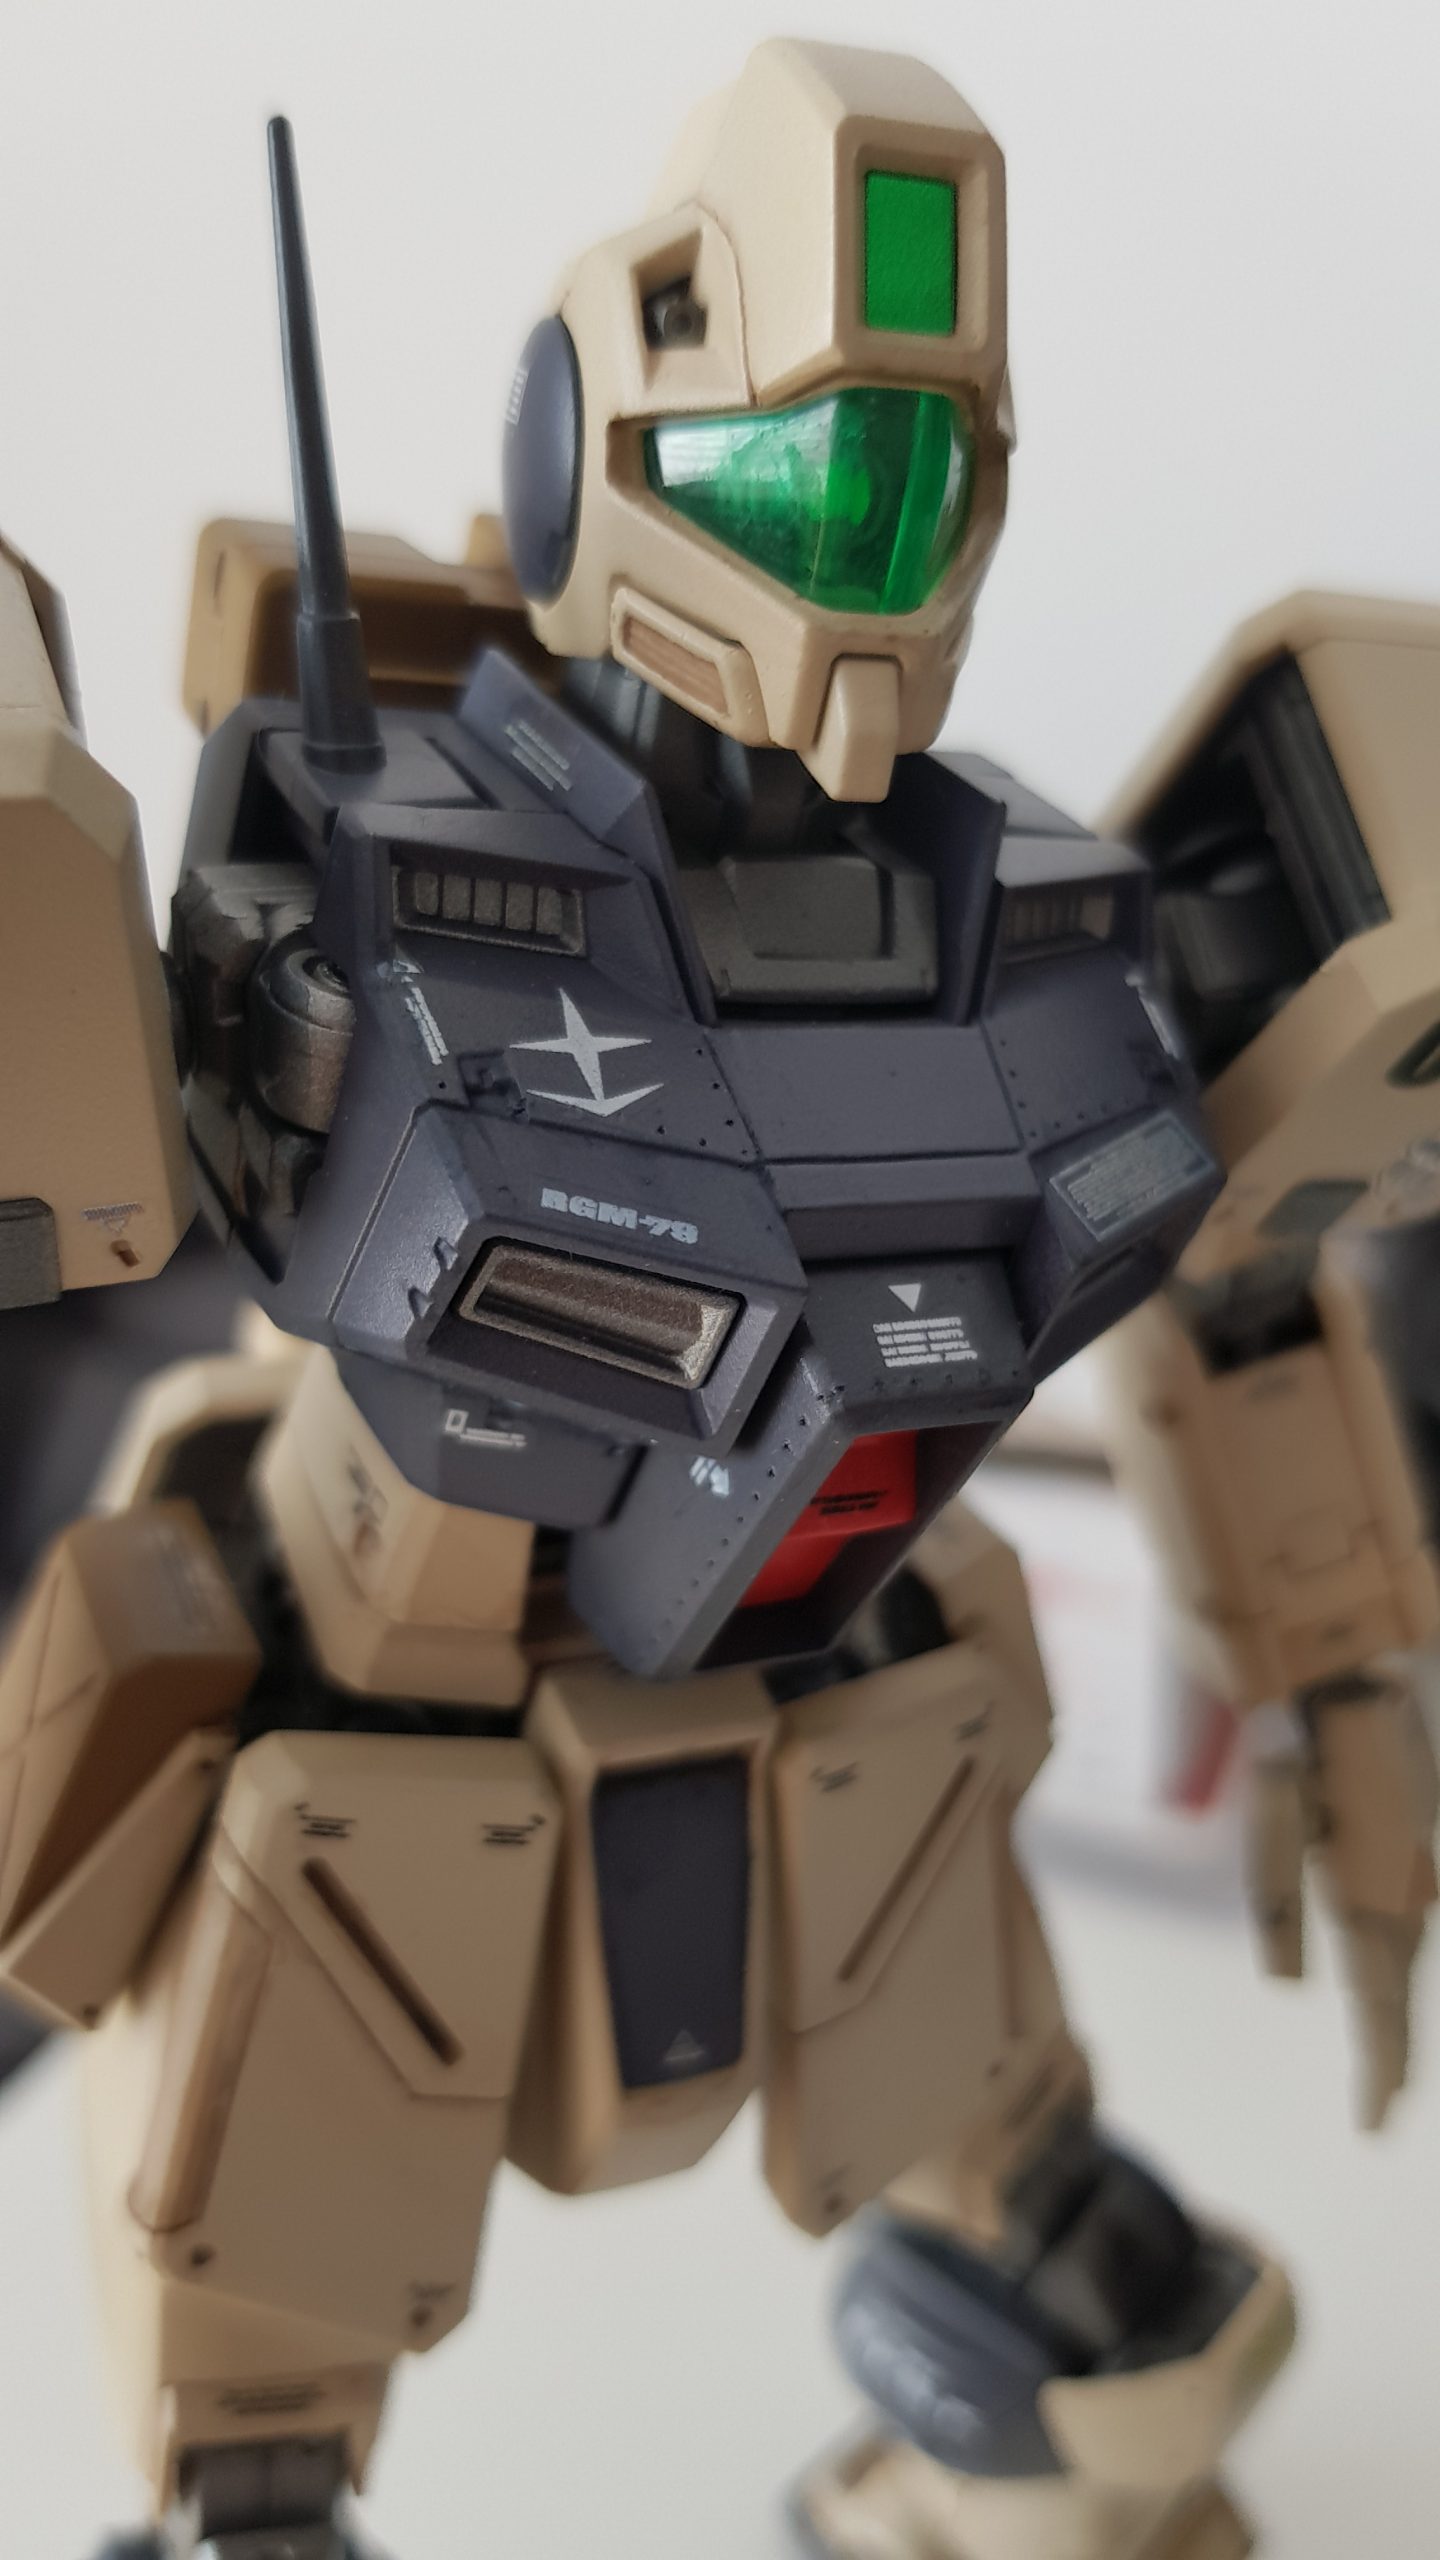
In gunpla I just love mechanical details – eg pistons!In RGM foot pistons are visible and designed as operational by…
After almost one week, primer was cured for 200% (it was ready after 24h, but I was not able to…
As it was my comeback after 10years to plastic kit models, I was trying to find quite easy and fast…

RGM79G GM Command (Colony type) – Bandai 1/100 Master Grade model – my first MG Gunpla – what a great…